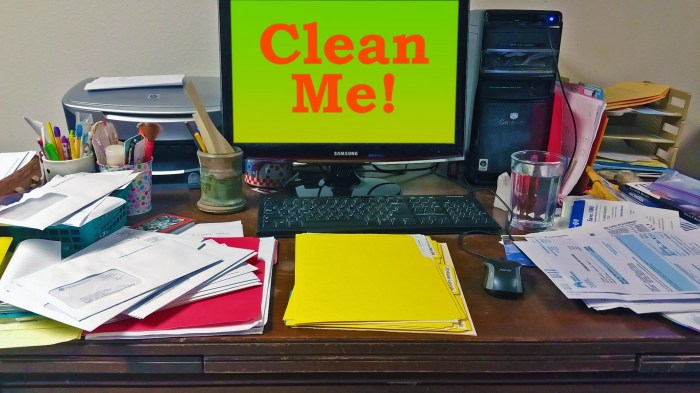
Clean an RV Hot Water Tank – a crucial task for maintaining your RV’s hot water system and longevity. A neglected hot water tank can lead to reduced performance, strange odors, and even costly repairs down the line. This guide provides a step-by-step approach to cleaning your RV’s hot water tank, from initial checks to final testing, ensuring you have a fully functional and clean hot water system for your RV adventures.
This comprehensive guide will walk you through the entire process, covering everything from identifying the need for cleaning to the final steps of reinstallation and testing. We’ll explore different types of RV hot water tanks, discuss potential problems beyond simple cleaning, and provide a detailed list of necessary supplies. Plus, we’ll delve into preventive maintenance tips to keep your tank in top shape for years to come.
Introduction to RV Hot Water Tank Cleaning
Keeping your RV hot water tank clean is crucial for maintaining its longevity and ensuring a consistent supply of hot water. A neglected tank can lead to significant problems, from reduced efficiency to costly repairs. Understanding the typical lifespan of these tanks and the importance of regular cleaning can help you proactively maintain your RV’s plumbing system. This article will explore the importance of cleaning, potential consequences of neglect, and the different types of RV hot water tanks, along with a simple check-up procedure.Regular cleaning prevents mineral buildup and sediment from clogging the tank, ensuring optimal water heating performance.
Neglecting cleaning can lead to reduced hot water flow, decreased water heating speed, and potential damage to the tank itself. Over time, mineral deposits and sediment can create a layer of scale, hindering the tank’s ability to heat water effectively and potentially causing leaks.
Importance of Maintaining an RV Hot Water Tank
Proper maintenance of your RV hot water tank is essential for its longevity. A clean tank ensures optimal performance, extending its lifespan and preventing costly repairs. Neglecting cleaning can lead to reduced hot water output, sluggish heating times, and even tank failure. The frequency of cleaning should be adjusted based on water quality and usage.
Potential Consequences of Neglecting Cleaning
Neglecting cleaning can lead to several problems. Reduced hot water flow is a common symptom of mineral buildup. The tank’s heating efficiency decreases, requiring more energy to reach desired temperatures. Over time, this buildup can damage the tank’s heating elements and even cause leaks. Without proper cleaning, the tank’s lifespan can be significantly shortened.
Typical Lifespan of an RV Hot Water Tank
The lifespan of an RV hot water tank varies, but generally ranges from 5 to 10 years. Factors like water quality, usage frequency, and the type of tank influence its longevity. Regular cleaning can significantly extend the lifespan of the tank, preventing premature failure and costly replacements. A well-maintained tank can often last 15 years or more.
Common Types of RV Hot Water Tanks
RV hot water tanks are available in various types. Storage tanks, the most common type, store heated water for use. These tanks come in various capacities to match RV size and needs. Tankless water heaters, while more expensive, offer continuous hot water supply, eliminating the need to wait for the tank to heat up. These systems often require specialized installation and maintenance.
Basic Check-up Procedure Before Cleaning
Before embarking on a cleaning procedure, it’s crucial to inspect the tank’s condition. First, shut off the water supply to the tank. Then, visually inspect the tank for any visible signs of damage, such as dents, cracks, or leaks. Check for unusual noises, like gurgling or sputtering, during operation. Note the amount of sediment or scale visible in the tank.
If you detect any issues, consult a qualified RV technician for further assessment.
Identifying Issues and Determining the Need for Cleaning
Knowing when your RV hot water tank needs a cleaning is crucial for maintaining its efficiency and longevity. Ignoring signs of trouble can lead to costly repairs down the road. This section delves into the common indicators of a dirty tank and the methods to diagnose the problem beyond a simple cleaning.A well-maintained hot water tank ensures a consistent supply of hot water.
However, several factors can impact its performance, necessitating cleaning or more extensive repairs. Identifying these issues early can save you time and money.
Common Signs of a Dirty Hot Water Tank
The first step in addressing potential hot water tank issues is recognizing the warning signs. These can range from minor annoyances to more significant problems. Common indicators include reduced hot water pressure, a noticeable decrease in water temperature, or unusual odors emanating from the tank.
- Reduced Hot Water Pressure: A common sign that your tank needs attention is a noticeable decrease in the pressure of your hot water. This could be due to mineral buildup or other debris obstructing the flow. A reduced pressure might be accompanied by a reduced temperature.
- Strange Odors: An unpleasant smell coming from your hot water tap could indicate bacterial growth or other contaminants in the tank. The odor might be subtle or quite strong, and can be a strong indicator of the need for cleaning.
- Water Temperature Fluctuation: If your hot water temperature is inconsistent or noticeably lower than usual, it could suggest a problem with the heating element or mineral buildup restricting the heating process.
- Slow Heating Times: If your hot water takes significantly longer to heat than usual, it could indicate a buildup of sediment or mineral deposits hindering the heating process. The tank may be working harder than it should be to reach the desired temperature.
Methods for Identifying the Cause
Various methods can help you pinpoint the root cause of your hot water tank issues. These methods can help you determine if the problem is easily fixable with cleaning or if more extensive repairs are required.
- Visual Inspection: A simple visual inspection of the tank’s exterior and drain valve can reveal signs of significant damage or unusual buildup. Inspecting the tank’s interior, if possible, will provide a clearer picture of the condition of the tank’s interior.
- Water Pressure Testing: Measure the water pressure at the hot water tap. Compare it to the pressure at a cold water tap. Significant differences may point towards problems with the heating element, tank, or piping.
- Smell Analysis: Pay close attention to the odor of the water. A foul smell might suggest bacterial growth or other contaminants requiring thorough cleaning.
Routine vs. Deep Cleaning
Understanding the difference between routine maintenance and deep cleaning is crucial. Routine maintenance cleaning is a preventive measure, while a deep clean is a corrective action.
- Routine Maintenance Cleaning: Regularly flushing the tank with a specialized cleaner, as suggested in the introductory sections, is essential for preventing buildup. This routine cleaning helps maintain water quality and tank efficiency.
- Deep Cleaning: A deep clean is a more comprehensive approach to address significant issues such as substantial buildup, foul odors, or reduced water pressure. This often involves a more aggressive cleaning solution and potentially more involved procedures.
Potential Causes Beyond Simple Cleaning
While cleaning often resolves minor issues, certain problems require more than just a tank flush.
- Damaged Heating Element: A malfunctioning heating element is a common cause of inconsistent water temperature. Replacing a faulty element is often necessary. Inspecting the element for visible damage or unusual resistance is a vital step.
- Internal Leaks: Internal leaks in the tank can cause water loss and reduced water pressure. This may necessitate professional repair or replacement.
- Tank Damage: Physical damage to the tank itself, such as cracks or dents, can lead to leaks or other issues. This might require professional repair or tank replacement.
Checking the Heating Element
A crucial aspect of troubleshooting hot water tank issues is inspecting the heating element. A damaged heating element can lead to poor heating performance and potential safety hazards.
- Visual Inspection: Examine the heating element for any visible damage, such as cracks, discoloration, or corrosion. Note any unusual resistance or heating behavior.
- Resistance Testing: Use a multimeter to check the resistance of the heating element. Compare the reading to the manufacturer’s specifications. An incorrect reading may indicate a faulty element. This is a task best performed by a qualified technician.
Gathering Necessary Supplies and Equipment

Getting your RV hot water tank clean is a rewarding task, but preparation is key to a successful and safe job. Having the right tools and supplies readily available will make the entire process much smoother and more efficient. This section will cover the essential items you’ll need, from cleaning solutions to protective gear, ensuring you’re well-equipped for the task.Proper preparation is crucial for a successful and safe RV hot water tank cleaning project.
Having the right tools and supplies at your disposal ensures a smooth and efficient process. This section details the necessary items, from cleaning agents to safety gear, to prepare you for the task.
Cleaning Solutions Comparison
Choosing the right cleaning solution is vital for effective and safe tank cleaning. Different solutions have varying levels of effectiveness, safety profiles, and costs. This table compares common cleaning solutions, providing insights into their pros and cons.
| Cleaning Solution | Effectiveness | Safety | Cost | Comments |
|---|---|---|---|---|
| Commercial RV Hot Water Tank Cleaner | Generally effective, often formulated for mineral deposits and scale buildup. | Follow manufacturer’s instructions carefully; some may contain harsh chemicals. | Moderate to high. | Widely available and often tailored to RV tanks. |
| Baking Soda and Vinegar Solution | Effective for mild to moderate buildup, often more environmentally friendly. | Generally safe, but requires careful handling. | Low. | A cost-effective option with potentially less harsh chemicals. |
| Phosphoric Acid Solution | Highly effective for heavy mineral buildup. | Potentially dangerous; requires proper safety precautions and ventilation. | Moderate. | Use with extreme caution due to its corrosiveness. |
Protective Gear
Safety should always be a top priority during any cleaning task. Proper protective gear will safeguard you from potential hazards and ensure a comfortable and safe cleaning experience.
- Gloves (nitrile or rubber): Protect your hands from chemicals and potential abrasions.
- Eye protection (safety glasses or goggles): Shield your eyes from splashing chemicals or debris.
- Respirator (optional, but recommended): Crucial when using harsh chemicals, especially for better air quality.
- Long sleeves and pants: Provide extra protection for your skin from chemicals and prevent accidental splashing.
Tools
The necessary tools for cleaning an RV hot water tank can range from simple items to specialized equipment. Having the right tools will ensure efficiency and effectiveness.
- Buckets (various sizes): For holding cleaning solutions and rinsing the tank.
- Scrub brush or stiff-bristled brush: For removing stubborn buildup.
- Sponges (various types): For reaching tight spaces and scrubbing.
- Hose with spray nozzle: For rinsing and cleaning the tank effectively.
- Plunger (optional): Helpful for dislodging any clogs in the drain lines.
- Drain plug and/or drain hose adapter:
Important Safety Precautions
Following safety precautions is paramount to prevent accidents during cleaning. Adherence to safety guidelines ensures a safe and smooth process.
- Always test any cleaning solution in a small, inconspicuous area first to check for any discoloration or damage to the tank.
- Work in a well-ventilated area to minimize exposure to fumes from chemicals.
- Never mix cleaning solutions unless explicitly recommended by the manufacturer.
- Follow all instructions on cleaning solution labels carefully.
- Use caution when working near water or cleaning solutions, especially if using chemicals.
Choosing the Right Cleaning Solution
Selecting the appropriate cleaning solution depends on the severity of the buildup in the tank. Consider the specific type of tank and the extent of the problem when choosing your cleaning agent.
- For mild mineral deposits, a baking soda and vinegar solution might suffice.
- For moderate to severe buildup, a commercial RV hot water tank cleaner is likely needed.
- Phosphoric acid should only be used for severe buildup and under strict safety precautions.
Preparing the RV Hot Water Tank for Cleaning
Getting your RV hot water tank clean is a crucial step in maintaining its longevity and performance. Proper preparation ensures a safe and effective cleaning process, minimizing risks and maximizing results. This section details the steps to safely disconnect the tank from the water supply and plumbing, enabling thorough cleaning without causing damage.Preparing the tank involves several steps, each critical to a successful and safe cleaning procedure.
This section details the necessary disconnections and safety precautions, ensuring a thorough and safe cleaning process.
Draining the Hot Water Tank
Properly draining the hot water tank is essential before any cleaning. This prevents water damage to the RV and ensures a clean working environment.
- Turn off the water supply to the RV’s water heater. This prevents water from flowing into the tank while you drain it.
- Locate the drain valve on the tank. This valve is typically located at the bottom of the tank and allows for complete draining.
- Open the drain valve fully. This releases the water from the tank, ensuring no water remains.
- Position a suitable container beneath the drain valve to collect the drained water. This prevents water from spilling or creating a mess.
- Allow the tank to drain completely. This ensures all water is removed, leaving the tank empty for cleaning.
Disconnecting the Water Supply Lines
Disconnecting the water supply lines is vital for preventing water leaks and ensuring a safe working environment during cleaning.
- Turn off the main water supply valve to the RV. This prevents any accidental water flow during disconnection.
- Locate the water supply lines connected to the tank. This may involve finding connections near the water heater or the tank itself.
- Carefully disconnect the water supply lines from the tank. Use appropriate tools and techniques to avoid damaging the lines or the tank.
- Ensure all connections are completely disconnected. This prevents any water from remaining in the lines and creating a problem during cleaning.
- Place a towel or rag under any potential leak points to absorb any accidental drips.
Disconnecting and Removing Associated Plumbing Components
Removing associated plumbing components allows for a more thorough cleaning.
Cleaning an RV hot water tank can be a bit of a chore, but it’s essential for a comfortable trip. While I was tackling that task this weekend, I saw the news that Soundgarden and Audioslave had silenced their social media in tribute to Chris Cornell. It was a powerful moment of respect, reminding us of the impact artists have on our lives, just like a properly functioning hot water tank makes a huge difference on a camping trip.
Hopefully, after my cleaning efforts, my RV’s hot water tank will perform as flawlessly as these bands once did. soundgarden and audioslave black out social media in honor of chris cornell. Back to the tank, though – hopefully, the cleaning will make it sing!
- Identify all plumbing components connected to the water heater. This might include supply lines, drain lines, or any other components attached.
- Carefully disconnect any associated plumbing components from the water heater. Use appropriate tools to disconnect these components without causing damage to the tank or plumbing system.
- Disconnect any electrical connections. If the water heater has an electric element, ensure to disconnect the electrical power source to prevent accidental shocks or damage.
- Label and organize disconnected components for easy reassembly after cleaning.
- Inspect each component for damage or wear to note any repairs needed after the cleaning process.
Protecting the Surrounding Area
Protecting the surrounding area during the cleaning process is crucial for preventing water damage and maintaining a safe workspace.
Cleaning an RV hot water tank can be a bit of a chore, but it’s essential for maintaining a comfortable camping experience. It’s a surprisingly satisfying task once you get into it. Speaking of satisfying, did you know that someone brilliantly recreated the Squidbillies theme song? Check out this amazing rendition by neko case neko case does the squidbillies theme song.
Regardless of the musical talent, proper hot water tank maintenance is key to a smooth RV trip, so get that tank sparkling clean!
- Cover any surfaces that could be damaged by water or cleaning solutions. This includes flooring, countertops, and other items.
- Place absorbent materials such as towels or drop cloths under potential leak points to absorb any accidental drips.
- Wear appropriate protective gear, such as gloves and eye protection, to prevent exposure to cleaning chemicals.
- Ensure good ventilation in the area to avoid inhaling cleaning fumes.
Disconnecting the Water Heater
Disconnecting the water heater safely ensures no accidental damage to the system or the RV.
- Identify the water heater’s electrical connections and shut off the power supply.
- Locate and shut off the water supply valve to the water heater.
- Carefully disconnect the water supply lines from the water heater.
- Disconnect any other connections such as drain lines or venting.
- Support the water heater while disconnecting the lines to avoid damage.
Cleaning the RV Hot Water Tank: Clean An RV Hot Water Tank
Getting rid of mineral buildup and grime in your RV’s hot water tank is crucial for maintaining its efficiency and extending its lifespan. A clean tank ensures consistent hot water delivery and prevents unpleasant odors or sediment from contaminating your water. Regular cleaning is a preventative measure that will save you money and frustration in the long run.
Cleaning the Tank Interior
A thorough cleaning of the tank interior is essential. This involves carefully removing mineral deposits, scale, and any other accumulated debris. A combination of methods often proves most effective. First, drain the tank completely to remove any remaining water.
Methods for Removing Mineral Buildup
Several methods can effectively remove mineral deposits. Using a combination of techniques will often yield the best results. A combination of physical scrubbing and chemical solutions can remove stubborn build-up.
Cleaning an RV hot water tank can seem daunting, but it’s a crucial part of RV maintenance. Properly maintaining your hot water system ensures consistent hot water for showers and other needs. Knowing how to clean an RV tank effectively is something lucinda chua somebody who likely understands given her experience in RV repair and maintenance.
Following a simple cleaning routine can prevent buildup and keep your RV hot water system running smoothly for years to come.
- Physical Scrubbing: A stiff-bristled brush, ideally one designed for cleaning plumbing, is ideal for dislodging loose deposits. Be cautious not to scratch the tank’s interior. Employ a scrubbing motion while applying gentle pressure.
- Acidic Solutions: Vinegar and citric acid solutions are common and effective for dissolving mineral deposits. A mixture of equal parts white vinegar and water is often sufficient. Alternatively, commercial tank cleaners are available. Always follow the product instructions carefully. Note: Avoid using harsh chemicals that may damage the tank’s lining.
- Baking Soda Paste: A paste made from baking soda and water can also be effective in loosening and removing mineral deposits. Apply the paste to the tank walls, let it sit for a specified time, and then scrub away the loosened buildup. Note: Baking soda is a gentler alternative to acidic solutions.
Comparing Cleaning Solutions
Different cleaning solutions vary in their effectiveness and safety.
| Cleaning Solution | Effectiveness | Safety |
|---|---|---|
| White Vinegar | Good for most mineral deposits | Generally safe, but may have a strong odor |
| Citric Acid | Excellent for stubborn deposits | Generally safe, but may be more corrosive than vinegar |
| Commercial Tank Cleaners | Highly effective, often with specific formulas | Follow product instructions carefully |
Thorough Rinsing
Thoroughly rinsing the tank after cleaning is crucial. This removes any residual cleaning solution or loosened debris, preventing potential damage to the tank or water contamination. Use plenty of clean water to flush out all traces of the cleaning agent. Leave the tank open to air dry completely.
Cleaning the Tank Exterior
Cleaning the exterior of the RV hot water tank involves a different approach. Use a mild detergent solution and a soft-bristled brush to remove any dirt or grime. Avoid harsh scrubbing that could damage the tank’s exterior finish. A hose and a garden sprayer can help to effectively remove dirt. Wipe down any remaining residue with a clean cloth.
Reinstalling and Testing the RV Hot Water Tank

Getting your RV hot water tank back online after cleaning is a crucial step. Proper reinstallation ensures the tank functions correctly and efficiently, providing reliable hot water for your travels. Careful attention to detail during this process prevents leaks, clogs, and other potential issues.
Reconnecting Water Supply Lines, Clean an RV Hot Water Tank
Correctly reconnecting the water supply lines is paramount for a functioning hot water system. Improper connections can lead to leaks, reduced water pressure, or even damage to the RV plumbing system. The process involves securing the supply lines to the tank’s inlets and ensuring they are free from kinks or obstructions. Use appropriate fittings and connectors to ensure a secure and watertight seal.
- Verify the correct orientation of the supply lines before connecting them to the tank inlets.
- Tighten the connections using the appropriate tools, but avoid over-tightening, which can damage the fittings or the tank.
- Inspect the connections for any signs of leaks or damage after tightening. A leak detector or soapy water can help with this.
- Double-check all connections to ensure a secure and watertight seal. A properly sealed system will prevent water loss and ensure consistent pressure.
Ensuring Proper Water Flow Connections
Adequate water flow is critical for efficient heating and hot water delivery. Clogs or restrictions in the supply lines can lead to slow water flow or no water at all. Thorough cleaning and inspection of all water lines before reinstallation is essential. This helps maintain consistent water pressure and ensures the hot water tank receives the necessary water volume for optimal performance.
- Inspect the water supply lines for any clogs or obstructions that could impede water flow.
- Clean any debris or buildup from the supply lines using a suitable cleaning agent and tools. This helps ensure the lines are clear for uninterrupted water flow.
- Ensure the water supply valve is fully open and allowing water to flow freely.
- Check for kinks or bends in the water supply lines, as these can restrict water flow.
Testing the Hot Water Tank
Testing the hot water tank after reinstallation is crucial to ensure it functions correctly. This involves verifying water temperature, flow rate, and the absence of leaks. A functional hot water tank ensures comfort and convenience during your RV trips.
- Turn on the water supply to the tank. Allow water to fill the tank completely.
- Turn on the water heater. Wait for the water to heat up to the desired temperature.
- Run hot water from a faucet to check the temperature and flow rate. If the temperature is too low or the flow rate is insufficient, there might be an issue with the connections or the heating element.
- Check for leaks around the connections, the tank itself, and the surrounding plumbing.
Checking Water Temperature
Consistent hot water temperature is essential for various activities in your RV. Checking the water temperature ensures that the heating system is functioning correctly. This helps maintain the desired temperature and avoids inconsistencies that can lead to discomfort or inconvenience.
- Use a thermometer to measure the temperature of the hot water coming from a faucet.
- Ensure the temperature is consistent and reaches the desired level. Most RVs are designed to provide hot water at a specific temperature.
- If the temperature is inconsistent or below the desired level, investigate the potential causes and take corrective action.
- Regular checks ensure the hot water system is operating effectively, providing consistent and reliable hot water for all your needs.
Potential Problems During Reinstallation and Solutions
| Problem | Possible Cause | Solution |
|---|---|---|
| Leakage at connections | Loose connections, damaged fittings | Tighten connections, replace damaged fittings |
| Low water pressure | Clogged supply lines, restricted flow | Clean supply lines, check for kinks |
| No hot water | Faulty heating element, tripped circuit breaker | Check heating element, ensure circuit breaker is on |
| Inconsistent water temperature | Thermostat malfunction, incorrect settings | Check thermostat, adjust settings as needed |
Prevention and Maintenance Tips
Keeping your RV hot water tank in top condition is crucial for both comfort and longevity. Proper preventative measures and regular maintenance can significantly reduce the risk of costly repairs and ensure a reliable hot water supply whenever you need it. This section details key strategies to protect your investment and maintain a hassle-free hot water experience.
Preventative Measures to Avoid Future Problems
Regular maintenance is vital for preventing future hot water tank problems. Neglecting routine checks can lead to issues ranging from minor leaks to complete tank failure. Addressing potential problems early minimizes the risk of costly repairs.
- Regular visual inspections of the tank’s exterior for any signs of leaks or damage are crucial. Look for rust, corrosion, or unusual bulges.
- Periodically check the water pressure to ensure it falls within the manufacturer’s specifications. Incorrect water pressure can lead to premature wear and tear on the tank.
- Inspect the plumbing connections for any signs of leakage or deterioration. Early detection of leaks is essential for avoiding significant water damage.
Regular Maintenance Checks
Implementing a schedule for regular maintenance checks is essential to maintain the efficiency and longevity of your hot water tank. A well-maintained tank is less prone to breakdowns and provides a more consistent supply of hot water.
- Inspect the tank’s insulation for any signs of deterioration. Insulation degradation can lead to heat loss, increasing energy consumption and potentially affecting the water temperature.
- Check the heating element for any signs of burning or damage. A faulty heating element will affect the water heating efficiency and may lead to costly repairs.
- Clean the tank’s interior annually to prevent the build-up of sediment, minerals, and other debris. This will help maintain optimal heating and prevent clogs.
Using Correct Water Pressure and Temperature Settings
Maintaining appropriate water pressure and temperature settings is essential for optimal tank performance and longevity. Improper settings can cause premature wear and tear on the tank and lead to potential safety hazards.
- Ensure the water pressure setting is within the recommended range provided by the manufacturer. Exceeding the pressure limit can lead to leaks and damage to the tank and plumbing.
- Set the water temperature to the desired level while adhering to safety guidelines. Incorrect temperature settings can affect the hot water supply and potentially cause safety hazards.
Maintaining Good Water Quality
Maintaining good water quality is paramount for the health of your RV hot water tank. Water quality issues can lead to sediment buildup, mineral deposits, and other problems that affect tank performance and longevity.
- Regularly use water treatment to reduce the concentration of minerals, preventing the buildup of scale and other sediment in the tank. This will maintain the efficiency of the heating element and prevent clogging.
- Consider installing a water filter to remove impurities that may harm the tank or affect its performance.
- Check your water supply for contaminants like chlorine or other chemicals. If present, use appropriate filters to reduce their impact on the tank.
Water Treatment Options Comparison
The table below compares various water treatment options to protect your RV hot water tank.
| Treatment Option | Description | Pros | Cons |
|---|---|---|---|
| Water Softener | Removes hard minerals like calcium and magnesium. | Reduces scale buildup, extends tank life, improves water quality. | Higher initial cost, requires regular maintenance. |
| Water Filter | Removes impurities like chlorine, sediment, and other contaminants. | Removes impurities, improves water taste, potentially extends tank life. | May not remove all hard minerals, requires replacement of filter media. |
| Water Conditioner | Adds chemicals to balance water chemistry. | Helps prevent corrosion and scale buildup. | May not be effective for all water types, may require periodic reapplication. |
Final Summary
Cleaning your RV hot water tank is a vital aspect of RV maintenance. By following this comprehensive guide, you can ensure your tank remains in excellent condition, providing reliable hot water for your trips. Remember regular maintenance, the right cleaning solutions, and proper reinstallation are key to avoiding costly repairs and maximizing your RV’s hot water system lifespan.
Enjoy worry-free hot water for your next adventure!