Tag: Video Editing

  • Put Music Onto Videos on Samsung Galaxy Your Guide

    Put Music Onto Videos on Samsung Galaxy Your Guide

    Put Music Onto Videos on Samsung Galaxy: Unlocking the potential of your Samsung device for video editing is easier than you think. This comprehensive guide explores various methods for adding music to your videos, from leveraging built-in tools to utilizing powerful third-party apps. We’ll also cover managing your music library, troubleshooting common issues, and even diving into advanced techniques for creating truly captivating videos.

    Get ready to elevate your video game!

    This guide walks you through adding music to videos on your Samsung Galaxy, covering everything from simple integration to more complex editing techniques. We’ll look at the different methods available, including built-in video editors and popular third-party apps. We’ll also discuss essential aspects like file compatibility, troubleshooting common errors, and advanced techniques.

    Introduction to Music Integration on Samsung Galaxy Devices
    Put Music Onto Videos on Samsung Galaxy

    Adding music to videos on your Samsung Galaxy device is a straightforward process, offering various methods and options tailored to different needs. Whether you’re a casual user or a video editor, understanding the available tools and potential pitfalls can significantly enhance your experience. This post explores the common approaches, file types, and potential challenges you might encounter.The process of incorporating music into videos on Samsung Galaxy devices hinges on selecting the right tools and understanding the nature of the video and audio files involved.

    Different methods exist, ranging from simple drag-and-drop functionality to more advanced editing applications.

    Methods for Adding Music to Videos

    Several methods exist for integrating music into videos on Samsung Galaxy devices. Simple methods include using built-in video editing tools within the Gallery app or utilizing third-party video editing applications available on the Google Play Store. These applications provide varying levels of control over music integration, from basic placement to advanced audio mixing.

    Video File Types Commonly Used

    Samsung Galaxy devices support various video file formats. Commonly used formats include MP4, MOV, AVI, and WebM. These formats differ in their encoding and compression techniques, which influence the quality and size of the resulting video file. The selection of the right format depends on the source of the video and the desired outcome.

    Supported File Formats and Codecs for Music Integration

    The most common audio file formats supported for integration include MP3, AAC, WAV, and FLAC. The codecs used to encode these files play a crucial role in the quality and size of the final audio track. Compatibility is essential, ensuring the chosen format is recognized by the software being used for editing.

    Common Apps or Software Used

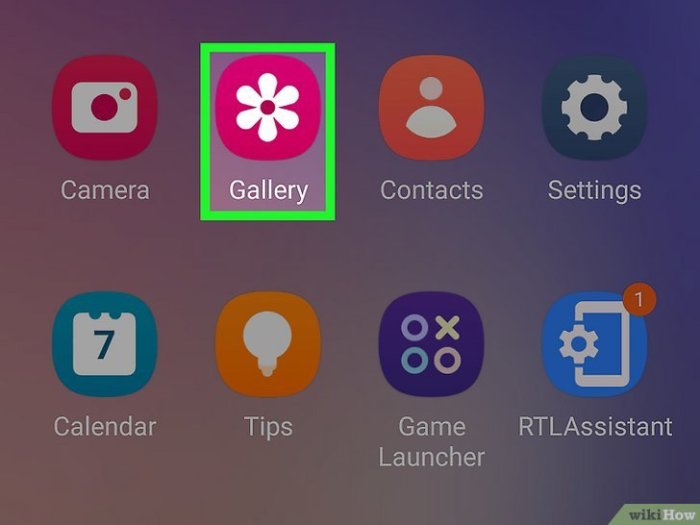
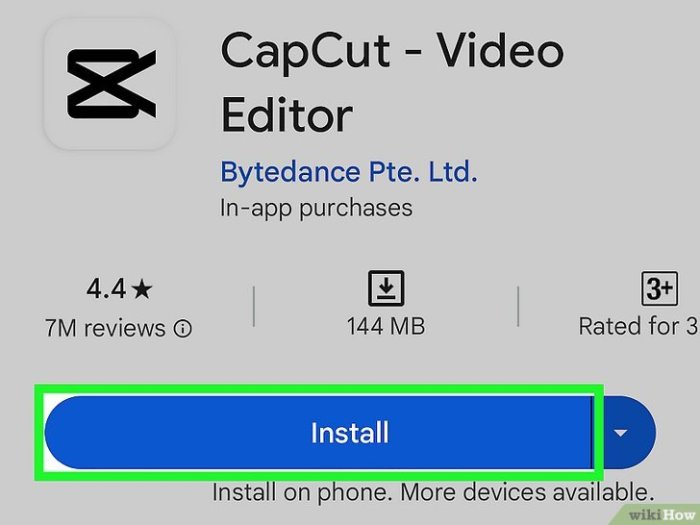
    Numerous apps and software are available for adding music to videos on Samsung Galaxy devices. The Gallery app, pre-installed on most devices, offers basic editing features, including the ability to add music. Popular third-party options include KineMaster, VN, and CapCut, which provide more extensive editing capabilities.

    Common User Issues Encountered

    Users often encounter issues during music integration, including compatibility problems between the video and audio files. Problems can arise from using unsupported formats, incorrect codec configurations, or incompatibility between the editing software and the files. In some cases, the volume level of the music might be too high or too low, requiring adjustment. Another common problem is file size issues.

    Figuring out how to put music onto videos on your Samsung Galaxy can be a breeze. While you’re fiddling with video editing apps, you might also want to check out some fresh tunes. For instance, check out this new track by RAC and Rostam, a great addition to your video soundtrack. rac and rostam team up on new track this song listen.

    Once you’ve got the perfect audio, you’re ready to make your Samsung Galaxy videos shine!

    Using Built-in Video Editing Tools

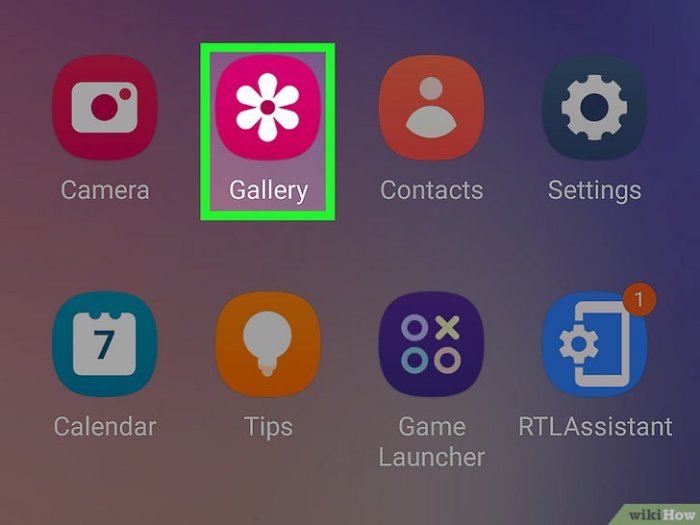
    Samsung devices often come equipped with user-friendly video editing tools. These built-in applications allow for basic enhancements, including adding music, without the need for third-party software. This makes video creation more accessible for users.These integrated tools are designed to be intuitive and require minimal learning curves. They offer a straightforward approach to adding music to your videos, allowing you to enhance the visual narrative with audio elements.

    Adding Music to Videos

    The process of adding music to videos using Samsung’s built-in editor typically involves these steps:

    Step Action Screenshot Description
    1 Open the video editing app. The user interface should display a list of videos and options for selecting and editing a video.
    2 Select the video you want to add music to. A thumbnail of the video should appear within the editing interface. The video should be clearly selected and highlighted.
    3 Locate the music option within the app. Within the editing panel, there will likely be a dedicated section or button for adding music. This could be labelled “Add Music,” “Music,” or a similar term.
    4 Select the desired music file. The app will present a file explorer or a list of saved songs from your device. The user navigates to the desired audio file and selects it. This process is identical to choosing a video or image.
    5 Adjust audio volume and placement. The editor typically provides sliders or controls to adjust the volume of the music track. The placement of the music within the video can be adjusted using trimming or cutting tools, which are visually represented on the timeline.
    6 Save the edited video. A save button will allow the user to save the video with the added music. The user can name the file and select a location to store it.

    Selecting the Desired Music File

    To select the music file, navigate through the device’s file system. This typically involves selecting the desired folder from a list of options. Look for the music file within the directory and select it.

    Adjusting Audio Volume and Placement

    Audio volume is usually adjusted using a slider control. This allows you to adjust the overall loudness of the music track. To adjust the placement of the music, you’ll often find trimming tools or a timeline interface. The music track can be placed to begin and end at specific points in the video timeline. Dragging the start and end points of the music track on the timeline allows precise control over the audio’s duration and position in the video.

    Possible Errors and Troubleshooting

    • Error: Music file not found. Ensure the music file is correctly located and accessible on your device. Check if the file name or file extension is spelled correctly. Also, ensure that the music file is not corrupted or damaged. Verify the file is located in the directory that is being searched.
    • Error: Audio volume is too low or too high. Adjust the audio volume slider until the desired level is achieved. A good approach is to listen carefully as you make adjustments.
    • Error: Music does not play or is distorted. Check the file format compatibility with the video editor. Some formats might not be supported. Try using a different music file, or converting the music file to a supported format.
    • Error: Video editor freezes or crashes. Restart the application or device. If the issue persists, check for software updates.

    Utilizing Third-Party Video Editing Apps: Put Music Onto Videos On Samsung Galaxy

    Beyond Samsung’s built-in tools, exploring third-party video editing apps unlocks a wider array of features and customization options. These apps often cater to specific needs and preferences, offering more advanced control over video and audio elements, including music integration. This approach allows for greater creative flexibility and personalized touches to your video projects.

    Figuring out how to put music onto videos on your Samsung Galaxy can be a bit tricky, but it’s surprisingly straightforward once you get the hang of it. Ever wondered about the fascinating world of simian mobile disco murmurations ? While that’s a completely different rabbit hole, the core concept of layering audio and visual elements still holds true.

    Ultimately, the process of adding music to your Samsung Galaxy videos is a satisfying digital art form.

    Popular Third-Party Video Editing Apps

    Numerous apps cater to video editing on Samsung devices. Some of the most popular and frequently used options include Adobe Premiere Rush, CapCut, VN Video Editor, and KineMaster. Each app boasts unique strengths and weaknesses, influencing its suitability for various tasks.

    Comparison of Third-Party Apps for Music Integration

    Different third-party apps offer varying levels of control over music integration. Adobe Premiere Rush, known for its professional-grade features, provides precise audio mixing and adjustment tools. CapCut, a more user-friendly option, excels in straightforward music addition and overlaying. VN Video Editor often focuses on visual effects but may still allow for basic music integration. KineMaster, with its comprehensive toolkit, stands out for advanced music mixing and editing capabilities.

    Pros and Cons of Third-Party Apps

    Using third-party apps brings advantages like advanced features and greater customization. However, these apps often come with a learning curve, requiring a dedicated time investment to master their functionalities. They might also introduce compatibility issues if not thoroughly tested for your device’s specifications. The pros outweigh the cons for many users seeking enhanced creative control.

    Importing Music Files into Third-Party Apps

    The method for importing music files varies between apps. Generally, you locate the “import” or “add media” option within the app’s interface. This often involves navigating to the music file’s location on your device’s storage. Some apps may offer direct integration with cloud storage services like Google Drive or Dropbox, allowing for quick access to your music library.

    This streamlined approach makes music import more efficient.

    Table of Third-Party Video Editing Apps and Their Music Integration Features

    App Name Key Features for Music Integration
    Adobe Premiere Rush Precise audio mixing, extensive audio effects, and seamless transitions.
    CapCut Easy-to-use interface for adding music, overlaying audio, and basic editing.
    VN Video Editor Offers basic music integration, often focusing on visual effects rather than extensive audio control.
    KineMaster Advanced audio editing, mixing, and music manipulation tools, including tempo adjustment and sound effects.

    Managing Music Libraries on Samsung Devices

    Music is a crucial part of the video editing process, and having a well-organized music library on your Samsung Galaxy device is essential for seamless integration. This section delves into the practical aspects of managing your music files, from locating them within the file system to transferring them from your computer. Efficient organization and compatibility are key for effortless video creation.Understanding how your Samsung device handles music files empowers you to efficiently integrate your preferred audio into your video projects.

    This knowledge allows for smoother workflow, preventing frustrating delays and ensuring that your video projects flow effortlessly.

    Locating Music Files on Your Samsung Device

    The file system on your Samsung Galaxy device is structured like most Android devices. Music files are typically stored in a dedicated folder within the internal storage or external SD card, depending on where the files were originally saved or transferred. Using the file explorer, you can navigate to this folder to locate your music. The exact path might vary slightly depending on your device’s operating system version.

    Organizing Your Music Library

    Efficient organization simplifies your music library, facilitating easy access to the desired tracks. Creating folders based on genre, artist, or mood is a common practice. For example, organizing music by artist allows you to quickly find all songs by a particular artist. Likewise, organizing by mood (e.g., “Workout Music,” “Relaxation Music”) can be useful for quickly selecting the right background music for your video projects.

    Creating subfolders within main categories provides an even more refined approach to organization.

    Transferring Music from a Computer to Your Samsung Device

    Transferring music files from your computer to your Samsung device is straightforward. A common method is using a USB cable to connect the device to your computer. Then, you can use the file explorer on your computer to locate and copy the desired music files directly to the appropriate folder on your device. Alternatively, cloud services like Google Drive or Dropbox can be used to transfer files wirelessly.

    Always confirm that the files are being copied to the correct folder, either the internal storage or the external SD card, to avoid accidentally overwriting existing files or losing them.

    Figuring out how to put music onto videos on my Samsung Galaxy has been a bit of a quest lately. It’s surprisingly tricky, but thankfully there are helpful guides online. Speaking of music, I just stumbled upon the new album cover for “Hercules and Love Affair” – the title is “XXS Shelter” – which is pretty cool! hercules and love affair title new album cover the xxs shelter Hopefully, once I master the video music process, I can start adding some tunes to my own clips.

    Finding the right music for the right video is key.

    Ensuring File Compatibility

    The compatibility of music files is critical for smooth playback and integration within video editing software. Common audio formats like MP3, WAV, and AAC are widely supported by Samsung devices and most video editing apps. Avoid using extremely rare or outdated formats, as they might not be compatible with your device or video editing software. Ensure the files are in the correct format to avoid issues during the integration process.

    For example, using an unsupported audio format can lead to errors in playback or prevent the file from being recognized by the video editing app.

    Using File Management Apps

    Third-party file management apps offer advanced features for organizing and managing your music library. These apps can offer features like sorting, filtering, and searching music files. They can also provide additional organization tools that the default file explorer lacks. These apps can improve the organization and management of your music files beyond what is offered by the standard file explorer.

    Using a file management app can be beneficial in ensuring that your files are correctly categorized and easily accessible.

    Troubleshooting Common Issues

    Adding music to your Samsung videos can sometimes hit snags. Understanding the potential problems and their solutions can significantly improve your video editing experience. This section delves into common issues, their causes, and effective troubleshooting steps.Troubleshooting music integration problems often requires a methodical approach. Identifying the root cause is crucial before implementing any fixes. This detailed guide aims to equip you with the knowledge to diagnose and resolve various audio and video synchronization problems, ensuring seamless music playback in your Samsung creations.

    File Format Incompatibility

    Different video editing tools and Samsung devices might not support all audio file formats. Incompatible formats can lead to playback errors or prevent the music from importing into your video project.

    • Check the supported audio formats for your specific Samsung device and video editing software.
    • Convert incompatible audio files to supported formats using online converters or dedicated software.
    • Examples of common formats include MP3, AAC, WAV, and M4A. Ensure your music files align with the software’s specifications.

    Storage Space Issues, Put Music Onto Videos on Samsung Galaxy

    Insufficient storage space on your Samsung device can cause errors during music integration. This problem often manifests as import failures or playback issues.

    • Free up storage space by deleting unnecessary files, apps, or media from your device.
    • Consider using cloud storage services to store large media files, enabling easy access without occupying internal device space.
    • Transfer large files to an external storage device if available, providing more space for your music library and projects.

    Audio Synchronization Problems

    Audio syncing issues occur when the audio and video tracks are not aligned correctly during playback. This can be frustrating, but solvable.

    • Double-check the audio and video file timestamps for accurate alignment.
    • Adjust the audio start time in your video editing software to match the video’s timeline precisely.
    • Verify the video editing software’s audio synchronization settings. Properly calibrated audio settings in the software will resolve these issues.
    • If the issue persists, consider re-importing the audio file or using different video editing tools.

    Music Playback Issues within Videos

    Problems with music playback within your videos can stem from various factors.

    • Check the music file’s integrity. Corrupted files can cause playback errors.
    • Verify the volume levels within the video editing software. Ensure the music volume is set appropriately and not muted.
    • Try playing the music file separately to confirm that the audio file is working correctly.
    • If the problem persists, consider reinstalling the video editing app to ensure compatibility with your Samsung device.

    Error Codes and Troubleshooting

    Specific error codes can indicate the root cause of music integration problems.

    Error Code Possible Cause Troubleshooting Steps
    E101 File format incompatibility Convert the file to a supported format.
    E202 Insufficient storage space Free up storage space or use cloud storage.
    E303 Audio sync issue Adjust audio start time or re-import the file.

    Advanced Techniques (Optional)

    Put Music Onto Videos on Samsung Galaxy

    Adding custom music and manipulating audio tracks can elevate your video editing from basic to professional. This section explores advanced techniques for those seeking to master music integration, going beyond simple playback. From creating custom audio tracks to mastering audio effects, these techniques unlock creative possibilities.

    Creating Custom Audio Tracks

    Custom audio tracks can be essential for specific video styles, such as creating original soundtracks or integrating sound effects that enhance the video’s narrative. Software like Audacity or GarageBand provide tools to record, edit, and mix audio. Recordings can be imported into video editing software for integration. This process involves careful selection of audio clips, precise timing, and effective mixing to create a cohesive soundtrack.

    Manipulating Audio Tracks Within Videos

    Manipulating audio tracks within videos allows for fine-tuning of volume, pitch, and tempo. Adjusting volume levels can emphasize specific dialogue or sound effects. Changing pitch can create unique and dramatic effects. For example, lowering the pitch of a voiceover can add a sense of mystery or authority. Adjusting the tempo can create a sense of urgency or slowness, changing the rhythm of the video.

    Creating Transitions Between Different Music Tracks

    Transitions between music tracks are crucial for maintaining a smooth and engaging viewing experience. These transitions can range from subtle fades to dramatic crossfades. Fades involve gradually reducing or increasing the volume of one track while simultaneously increasing or reducing the volume of the next. Crossfades blend the two tracks by overlapping their audio, creating a seamless transition.

    This technique is essential for managing the mood and rhythm of a video.

    Using Audio Effects for Enhancing Video Sound

    Applying audio effects enhances the overall sound quality and creates a more immersive experience for the viewer. Effects such as reverb, delay, and equalization can significantly improve the audio quality. Reverb adds a sense of spaciousness or ambiance, while delay creates a sense of depth and echo. Equalization allows you to adjust the balance of different frequencies, ensuring clarity and richness in the sound.

    For example, a dramatic scene might benefit from a heavy reverb effect, while a dialogue-heavy scene might need careful equalization to avoid muddiness.

    Mastering Advanced Music Integration Techniques: A Step-by-Step Guide

    This guide Artikels the steps to master advanced music integration techniques for your Samsung Galaxy videos.

    1. Prepare Your Audio: Choose the audio files (music, sound effects) that you want to use. Ensure they are compatible with your video editing software and have appropriate file formats.
    2. Import and Arrange: Import your audio files into your video editing software. Arrange them chronologically and strategically to align with the video’s scenes and narrative.
    3. Adjust Volumes and Fades: Use the audio editing tools to adjust volume levels and add fades between tracks. A gradual fade in or out creates smooth transitions.
    4. Apply Audio Effects: Experiment with audio effects such as reverb, delay, and equalization to enhance the overall sound quality.
    5. Refine and Test: Thoroughly review the audio integration. Listen to each scene carefully to ensure that the audio is clear, balanced, and complements the video.
    6. Export and Review: Export the video with the integrated music and audio effects. Review the finished product to ensure that the audio enhancement matches the overall quality and mood of the video.

    Specific Music Platforms/Services

    Music platforms like Spotify and YouTube Music offer convenient ways to add songs to your Samsung videos. These services provide a vast library of music, often with licensing agreements that allow for certain uses, including video editing. Understanding how to leverage these services within your Samsung video editing workflow can greatly enhance your projects.

    Popular Music Platforms

    Popular music platforms like Spotify and YouTube Music provide extensive music libraries. Users can easily search for and select songs from these services. Integration with video editing apps often allows for direct import and usage of selected music.

    Using Platforms for Video Addition

    Platforms like Spotify and YouTube Music often offer straightforward integration with video editing apps. Typically, the process involves selecting the desired music from the platform and then importing it into your video editing software. This usually involves authorizing access to your music account and selecting the specific songs you wish to use.

    Limitations and Restrictions

    Music licensing agreements are complex. Some platforms might restrict the use of music in commercial videos. Licensing terms may vary, and some tracks might not be downloadable. Always review the platform’s terms of service to understand potential limitations on the use of music from the platform. For example, using a popular song from Spotify for a commercial advertisement could violate licensing agreements, potentially leading to legal issues.

    Downloading Music for Offline Use

    Many music platforms offer download options. This allows users to save music for offline playback and editing. The specific download procedures and limitations vary by platform, so users should refer to the platform’s documentation. For example, Spotify Premium subscribers can download music for offline listening, which is extremely useful for editing videos on a device without an internet connection.

    This downloaded music can then be imported into Samsung video editing software for use in your videos.

    Using Music from Specific Platforms in Samsung Video Editing Software

    The process for importing music from platforms like Spotify or YouTube Music into Samsung video editing software often involves using the app’s import function. For instance, some apps might offer direct integration with these platforms, allowing users to select music directly from the platform’s interface. Then, the music can be placed into the timeline and adjusted as needed.

    These steps allow users to easily add music from these platforms into their Samsung video projects.

    Ultimate Conclusion

    Adding music to your Samsung Galaxy videos has never been easier. By following the detailed steps and tips in this guide, you can now effortlessly enhance your videos with the perfect soundtrack. Whether you’re a seasoned video editor or just starting out, this comprehensive resource equips you with the knowledge and tools to create stunning videos. From simple file imports to advanced audio manipulation, we’ve covered it all.

    So go ahead, experiment, and create!
  • Do a Boomerang on Snapchat Your Guide

    Do a Boomerang on Snapchat Your Guide

    Do a Boomerang on Snapchat: This guide dives deep into the world of Snapchat boomerangs, from the basics to creative applications. Learn how to craft captivating boomerang videos, explore different styles, and understand the technical aspects of recording and sharing them. Get ready to unleash your inner filmmaker and master the art of the Snapchat boomerang!

    We’ll explore everything from understanding the fundamental steps to creating a boomerang to the creative possibilities for storytelling, product showcases, and more. Discover the various types of boomerangs, customization options, and how to overcome potential technical challenges.

    Understanding the Action: Do A Boomerang On Snapchat

    Do a Boomerang on Snapchat

    Snapchat’s Boomerang feature is a fun and engaging way to capture short, looping videos. It’s a simple yet effective tool for creating dynamic visual content, perfect for sharing fleeting moments with friends and family. The feature’s ability to loop the video creates a playful and memorable effect, enhancing the impact of the shared experience.The “Do a Boomerang on Snapchat” feature essentially allows users to record a short video clip that automatically reverses and replays, creating a continuous loop.

    This unique format sets it apart from standard video recording, offering a distinctive visual experience. The result is a captivating sequence that seamlessly transitions from the beginning to the end of the recording.

    Creating a Boomerang

    This process involves a few straightforward steps, starting with initiating the recording and ending with sharing the finished product. The key is to understand the recording duration and timing. Snapchat’s Boomerang feature is designed to be intuitive and easy to use.

    1. Initiating the Recording: To start a boomerang, open the Snapchat app and tap the camera icon. The app will automatically recognize and transition to the boomerang mode. This mode often has a distinctive visual cue, like a looping animation or a dedicated button.
    2. Capturing the Moment: Hold your device steady and press the record button. Start recording the action you want to capture for your boomerang. The ideal length for a boomerang is generally between 1 and 3 seconds, but it can vary depending on the content. Ensure the subject is clearly visible within the frame.
    3. The Looping Effect: When you release the record button, Snapchat automatically reverses the recording and loops it back to the beginning, creating the distinctive boomerang effect. The app seamlessly joins the end of the recording to the beginning.
    4. Review and Edit: After the recording, you can preview the boomerang. If you’re not satisfied, you can re-record it. This allows for adjustments in framing, lighting, or content until you achieve the desired result.
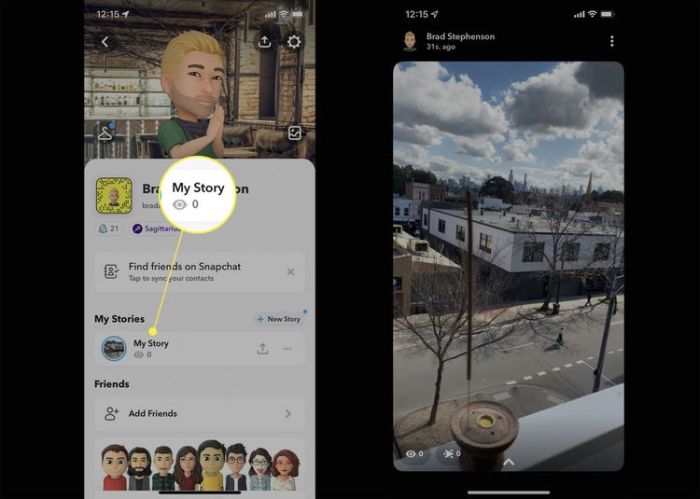
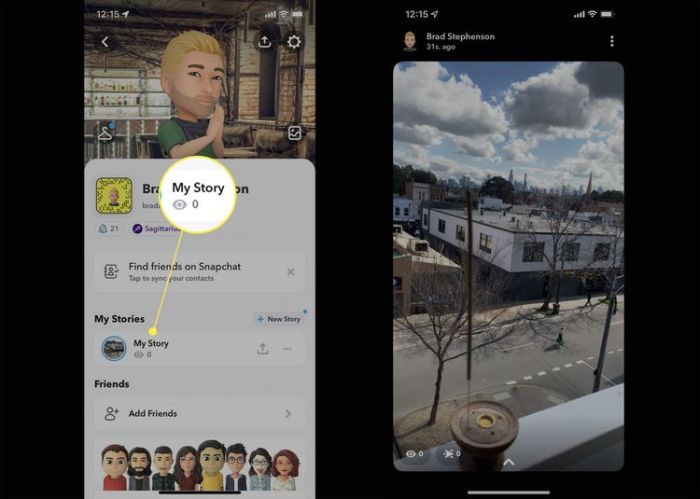
    5. Sharing the Boomerang: Once you’re happy with your boomerang, you can choose how to share it. Options include sending it directly to friends, adding it to your story, or saving it to your camera roll.

    Visual and Interactive Elements

    The visual impact of a Snapchat boomerang is significant. The looping nature of the video gives it a dynamic feel, and the rapid transition between the beginning and end of the recording creates a sense of movement and excitement. These factors enhance the visual experience for viewers.

    • Looping Action: The core visual element is the continuous loop. This creates a dynamic, playful effect. For example, a boomerang of someone throwing a ball would show the ball moving, then returning to the thrower, and repeating this action in a continuous loop.
    • Short Duration: Boomerangs are designed to be short, typically under 3 seconds. This keeps the content engaging and prevents it from becoming tedious. A longer recording would likely lose the impact of the looping feature.
    • Ease of Sharing: Snapchat’s design makes sharing boomerangs simple and seamless. The user interface is intuitive, allowing for quick sharing with friends and followers.

    Technical Aspects

    The technical aspects of a Snapchat boomerang involve recording, processing, and displaying the video. The app uses sophisticated algorithms to reverse and loop the video in real-time. The smoothness of the looping effect is a testament to the efficiency of these algorithms.

    Trying to master the art of the perfect Snapchat Boomerang? It’s all about finding the right rhythm and angles, isn’t it? Speaking of rhythm, did you know Stephen Malkmus appeared on Soldiers of Fortune’s Campus Swagger? This awesome article totally blew my mind. Now, back to the Boomerang, maybe a little bit of Malkmus’s musical swagger can help us nail that perfect loop!

    • Real-Time Processing: Snapchat’s servers process the video in real-time, ensuring the boomerang effect is visible immediately after the recording is completed. This aspect is crucial for the app’s usability.
    • Data Compression: The app compresses the video data to reduce file size, allowing for efficient storage and transmission. This aspect is important for mobile devices with limited storage capacity.
    • Displaying the Loop: The app displays the boomerang by seamlessly looping the video. This aspect is essential for the unique aesthetic of the boomerang effect.

    Different Types of Boomerangs

    Snapchat’s boomerang feature allows for a dynamic range of creative possibilities beyond just capturing a simple moment. The core function remains the same – recording a short video loop – but the options for manipulating speed, duration, and angle create a multitude of visual effects. These adjustments transform a basic recording into an artistic expression.Different boomerang settings on Snapchat offer various creative possibilities, from quick, jerky movements to smooth, extended loops.

    By understanding these settings, users can elevate their boomerang videos from mundane to mesmerizing. The key is to experiment with different options to find the perfect fit for your creative vision.

    Boomerang Speed Variations

    Understanding the impact of speed adjustments is crucial for creating compelling boomerang videos. Varying the playback speed alters the overall feel and aesthetic of the recording. Slowing down a boomerang can emphasize subtle details or create a sense of anticipation, while speeding it up can convey a sense of energy or excitement. Different speeds achieve different effects, from smooth transitions to rapid-fire action sequences.

    Snapping a Boomerang is a fun way to capture a moment, but lately I’ve been hooked on the beat of Maiya the Don Dusties’ new song. Check out the catchy rhythm and infectious lyrics in maiya the don dusties new song listen. It’s got me feeling the vibe, and I’m finding myself wanting to make some cool Boomerang videos to match the music.

    Definitely a great way to spice up my Snapchat feed.

    The choice of speed is highly dependent on the subject of the boomerang. For example, a slow-motion boomerang of a flower blooming can highlight the delicate petals unfurling, while a fast-forward boomerang of a child playing can convey the dynamism of their activity.

    Boomerang Duration Settings

    The duration of a boomerang significantly impacts its visual narrative. Shorter boomerangs are ideal for capturing fleeting moments, while longer ones can develop a more elaborate story. A brief, fast-paced boomerang can be used to highlight a quick action, such as someone catching a ball. A longer, slower boomerang could be used to showcase a more complex sequence, such as a dance routine.

    Adjusting the duration of the boomerang directly correlates to the message you want to convey. By controlling the duration, you can shape the narrative flow and visual rhythm of your content.

    Boomerang Angle and Perspective Adjustments

    Adjusting the angle of the boomerang is vital for influencing the viewer’s perception. A wider angle captures more of the environment, drawing attention to the setting. A narrower angle focuses on a specific subject, creating a sense of intimacy or intensity. Different angles produce unique visual perspectives, highlighting different aspects of a scene. This manipulation of the visual frame gives the user the ability to frame the boomerang from an overhead view, a close-up, or a wide shot.

    The user can choose the angle that best complements the subject and desired aesthetic.

    Slow-Motion and Fast-Forward Options

    Snapchat’s boomerang feature offers slow-motion and fast-forward modes. These features allow users to emphasize specific details or highlight the dynamism of a scene. Slow motion is ideal for capturing delicate movements or showcasing gradual transformations. Fast-forwarding can condense a sequence of actions into a brief, impactful clip. These modes allow for the manipulation of time to create specific visual effects and help you communicate the content in a particular way.

    Modifying Boomerang Settings on Snapchat

    Modifying boomerang settings is straightforward and usually involves tapping on the boomerang preview. From there, you can adjust the playback speed, duration, and angle. The options often appear as intuitive controls within the app. Specific controls may vary slightly depending on the Snapchat version. Experimentation with these controls allows for fine-tuning to perfectly match your vision.

    By exploring the available settings, users can unlock a range of creative possibilities and tailor the boomerang to fit their unique needs.

    Usage and Purpose

    Boomerangs on Snapchat aren’t just a fun novelty; they’re a versatile tool for communication and self-expression. Understanding how people use them reveals a lot about how they’re shaping their online presence and interacting with their social circles. They transcend the simple act of sharing a moment, becoming a dynamic form of storytelling and social engagement.From playful gestures to nuanced expressions, boomerangs allow users to convey a wide spectrum of emotions and experiences.

    This multifaceted usage makes them a powerful tool within the Snapchat ecosystem, driving engagement and fostering connections in a unique way.

    Common Use Cases

    Boomerangs are employed in a variety of contexts on Snapchat. They are not just limited to simple entertainment; their use often blends with other aspects of the platform’s functionalities, creating a rich tapestry of social interactions. The versatility of boomerangs stems from their ability to be used in numerous ways.

    • Entertainment: Capturing funny or interesting moments, whether it’s a silly dance, a quirky reaction, or a playful interaction, boomerangs are a popular choice for lighthearted entertainment. This is a common way to share joy and amusement with friends and followers.
    • Storytelling: Users can string together a series of boomerangs to create mini-stories. A day at the beach, a visit to a museum, or even a simple commute can be transformed into a visual narrative, capturing the essence of the experience.
    • Social Interaction: Sending a boomerang can be a way to participate in group conversations, express reactions to others’ posts, or simply acknowledge a friend’s activity. They function as a dynamic form of social interaction, fostering quick responses and lighthearted engagement.
    • Product Promotion: Businesses can leverage boomerangs to showcase their products or services in an engaging way. A quick, dynamic sequence can effectively highlight key features and demonstrate use cases, capturing the attention of potential customers.

    Expressing Oneself

    Boomerangs are not just about capturing moments; they are also a way to express emotions and personality. The editing features available on Snapchat enable users to tailor their boomerangs to reflect their unique style and perspectives.

    • Humor and Playfulness: Users can employ boomerangs to express humor, using exaggerated gestures, funny reactions, or silly sound effects. This is a popular method for sharing lightheartedness and joy with friends.
    • Creativity and Imagination: Users can use boomerangs to demonstrate their creativity and imagination by incorporating special effects, filters, or other visual enhancements. This is an opportunity to express individuality and creativity through visuals.
    • Social Commentary: Users can employ boomerangs to express social commentary by using the platform’s editing tools to create a visual narrative. This can be done through a sequence of images, reactions, or short videos. This usage enables users to share opinions, critiques, or perspectives on current events or trends.

    Situational Examples

    Boomerangs are highly adaptable and can be employed in various situations.

    • Sharing a reaction to a funny video: A boomerang of a surprised or amused facial expression can instantly communicate the reaction to a funny video.
    • Creating a quick summary of an event: A series of boomerangs can be used to capture highlights of a party, concert, or sporting event.
    • Demonstrating a skill or activity: A boomerang sequence can showcase a dance move, a cooking technique, or any other skill or activity.
    • Creating a visual reminder: A boomerang can be used to remind someone of a specific task, event, or appointment. The dynamic visual aspect of the boomerang is often more effective than a static image.

    Social Impact

    The use of boomerangs on Snapchat has a significant impact on social interactions and the perception of users. They encourage a culture of visual communication and quick, engaging interactions.

    • Enhanced Engagement: Boomerangs foster a culture of dynamic engagement by encouraging rapid visual responses and feedback. The quick-paced nature of the platform aligns well with the immediacy of boomerangs.
    • Improved Communication: Boomerangs facilitate communication, particularly in contexts where expressing emotion or a quick reaction is desired.
    • Visual Storytelling: Boomerangs empower users to craft their own visual stories, creating a unique method of narrative expression on the platform.

    Creative Application

    Boomerangs on Snapchat are more than just fleeting fun; they’re a powerful storytelling tool. Their short, looping nature allows for rapid-fire visual narratives, perfect for capturing moments of action, expressing emotions, or even showcasing products. This section delves into creative ways to leverage this feature for impactful and engaging content.

    Innovative Storytelling with Boomerangs

    Leveraging the looping nature of boomerangs allows for unique storytelling opportunities. A series of quick shots can condense a whole event into a captivating loop. For example, showcasing a dance routine, a cooking demonstration, or even a quick tour of a location can all be effectively communicated using a sequence of boomerangs. The brevity of the format forces the content creator to focus on impactful visuals and edits, making the final product highly engaging.

    • Showcasing a Day in the Life: Capture key moments throughout a day, from waking up to going to bed, using short, impactful boomerangs. Each boomerang could focus on a single activity, highlighting details and emotions through visual cues. This creates a cohesive narrative that’s easily digestible for viewers.
    • Creating a Quick Tutorial: Demonstrate a skill or process using a series of boomerangs. Show each step clearly and concisely, allowing viewers to easily follow along. This is particularly useful for quick tutorials on makeup application, cooking recipes, or even simple DIY projects.
    • Building Anticipation: Use a series of boomerangs to build anticipation for a larger event or reveal. Show hints and clues leading up to the climax, keeping viewers engaged and wanting more.

    Product or Service Showcase Template

    A boomerang can be a highly effective marketing tool for showcasing products or services. The looping nature and fast-paced nature of the video allows viewers to get a quick overview of the item’s features. Think of a quick tour of a new piece of clothing, the ease of use of a gadget, or the aesthetic of a product.

    Step Action
    1 Initial Shot: Briefly introduce the product or service. Use a close-up or attractive shot that captures the essence of what you’re selling.
    2 Feature Showcase: Use several boomerangs to showcase key features. Show how it works, its design, or how it’s used.
    3 Call to Action: End with a clear call to action, such as a link to a website, a social media handle, or a shop location.

    Adding Music and Effects

    Adding music and effects can significantly enhance the visual appeal and emotional impact of a boomerang. Music can create a specific mood, while filters can alter the aesthetic of the content.

    • Music Selection: Choose music that aligns with the tone and style of your content. Trending sounds or original music can add an extra layer of engagement.
    • Effect Application: Experiment with different Snapchat filters to add visual flair to your boomerangs. Consider using filters that enhance the mood or highlight specific features.
    • Transitions: Use transitions within the boomerang to add dynamism. Fade-ins, fades-outs, and cuts can help create a more engaging visual experience.

    Incorporating Trends

    Staying updated on trending sounds and filters is crucial for maximizing engagement. Utilizing popular audio tracks and filters can instantly connect your content with a broader audience. This helps in reaching new followers and maximizing your reach.

    • Trending Sounds: Use trending sounds to create a sense of relevance and immediacy in your content. This will resonate with viewers who are actively engaged with these sounds.
    • Popular Filters: Employ filters that align with current trends to add an element of visual appeal and connect with your target audience. These filters often reflect popular aesthetics or trends.

    Visual Enhancement through Editing

    Effective use of editing tools can elevate the visual appeal of your boomerangs. Editing tools can help fine-tune the shots, improve lighting, or add visual effects.

    • Speed Adjustments: Adjust the playback speed of your boomerang to create a sense of urgency or slow motion, depending on the desired effect.
    • Color Correction: Use color correction tools to enhance the overall aesthetic of your boomerangs, making the visuals more visually appealing.
    • Text Overlay: Add text overlays to your boomerangs to provide context, add captions, or highlight key information.

    Technical Aspects

    Diving deeper into the world of boomerangs on Snapchat reveals a fascinating interplay between artistry and technology. Understanding the technical specifications behind these captivating looping videos is crucial for both creators and viewers alike. This section explores the intricacies of recording, playback, quality, and troubleshooting, providing a comprehensive overview of the technical side of this popular Snapchat feature.

    Recording Specifications

    Snapchat’s boomerang feature leverages a series of frames captured at a specific rate to create the illusion of motion. The app processes these frames, effectively creating the looping effect. The precise frame rate and resolution influence the smoothness and clarity of the boomerang. While the exact specifications are proprietary, it’s safe to assume a frame rate that ensures a fluid, unbroken loop.

    This rate likely varies slightly based on the device and network conditions.

    Playback Limitations

    Sharing high-quality boomerangs on Snapchat is often challenging due to various factors, such as network instability and the app’s processing constraints. Network bandwidth limitations can cause buffering, resulting in choppy playback. Also, the app’s internal compression algorithms might reduce the visual quality to ensure smooth loading.

    Factors Affecting Quality

    Several factors contribute to the quality of a boomerang recording. Lighting conditions, device stability, and subject movement significantly impact the final product. For example, low-light conditions can lead to grainy or blurry images. Similarly, a shaky hand or rapid subject movement can cause the boomerang to appear jerky. Additionally, the background and surrounding environment can affect the overall aesthetic of the boomerang.

    The resolution of the device’s camera also plays a crucial role, impacting the sharpness and detail in the boomerang.

    Troubleshooting Common Issues

    Troubleshooting issues with boomerang creation and playback often involves examining the factors mentioned above. For instance, if the boomerang appears blurry, check for sufficient lighting. If the playback is jerky, ensure the recording is taken from a stable platform and that the subject’s movement is not excessive. In cases of buffering or slow playback, ensure a stable network connection.

    Experimenting with different recording environments and approaches can often resolve these issues.

    Optimizing for Snapchat Formats

    Snapchat offers various formats for boomerangs, each with its own recommended specifications. To optimize boomerangs for different formats, consider the aspect ratio and resolution requirements. Different Snapchat stories and filters might have specific limitations that could impact the quality and size of the boomerang. Understanding the dimensions and resolution constraints for each format will help ensure your boomerangs appear at their best.

    Learning how to do a Boomerang on Snapchat is surprisingly fun, especially when you consider the creative possibilities. It’s a great way to capture fleeting moments, but have you seen the buzz around the 73rd Golden Globes? the 73rd golden globes our predictions are all over social media, and it got me thinking – a Boomerang of the red carpet would be epic! Hopefully, that will inspire some amazing Snapchat Boomerang creations.

    Experimentation is key to finding the optimal balance between quality and compatibility.

    User Experience

    The “Do a Boomerang on Snapchat” feature, while seemingly simple, reveals nuanced user experiences. Understanding how users interact with this feature provides insights into its effectiveness and potential for improvement. This section delves into user feedback, usage patterns, and the impact of various boomerang types on engagement.

    User Feedback and Reviews

    User feedback regarding boomerangs is varied, often reflecting the subjective nature of social media experiences. Positive feedback frequently highlights the fun and creative possibilities of the feature, emphasizing the ability to capture fleeting moments and share them in a unique way. Conversely, some users report that the feature is overused or that the short duration of boomerangs can limit their impact.

    Furthermore, technical issues, such as the app’s tendency to freeze or crash while creating or viewing boomerangs, have been reported.

    Advantages and Disadvantages of Using Boomerangs

    Boomerangs on Snapchat offer several advantages. They enable a dynamic and engaging presentation of short-lived events. They are easily shareable, allowing for quick communication of experiences. However, boomerangs have limitations. Their brevity can limit the depth of information conveyed, potentially diminishing the message’s impact.

    They are also susceptible to being perceived as trivial or fleeting, potentially leading to a lack of lasting engagement. Moreover, poor execution can lead to undesirable outcomes, such as a negative user experience.

    Common Trends and Patterns in Boomerang Usage

    A common trend is the use of boomerangs to capture quick actions, like dancing, performing tricks, or expressing emotions. Another pattern involves using boomerangs in a comedic or humorous context. The usage of boomerangs also appears to be influenced by trends and current events, with some types of boomerangs becoming more popular than others at different times. Finally, boomerangs are frequently used in conjunction with other Snapchat features, like filters and lenses, creating more interactive and creative content.

    User Engagement with Different Types of Boomerangs

    User engagement varies significantly with the type of boomerang. For instance, boomerangs depicting humorous or unexpected situations often garner higher engagement than those that are simply mundane or repetitive. Boomerangs that incorporate unique visual effects or sound effects tend to be more engaging. In contrast, boomerangs that are too long or too short might not capture the viewer’s attention.

    Examples of Effective and Ineffective Boomerang Usage, Do a Boomerang on Snapchat

    An example of effective usage is a boomerang of someone successfully completing a juggling trick. The short duration of the boomerang allows for a quick and visually engaging experience, highlighting the skill and humor. An example of ineffective usage is a boomerang of someone simply walking down the street. The lack of dynamic content and the repetitive nature of the action makes it less engaging.

    Additionally, a boomerang with poor resolution or distorted video quality can negatively affect the viewing experience.

    Content Structure

    Do a Boomerang on Snapchat

    Snapchat’s boomerang feature is a powerful tool for creative expression. Understanding its parameters, common uses, customization options, and troubleshooting is key to maximizing its potential. This section dives into the structure of boomerang content on Snapchat, providing a practical guide for users.

    Boomerang Parameters

    This table Artikels the key parameters you can control when creating a Snapchat boomerang. These parameters significantly impact the final result and user experience.

    Parameter Description Example Values
    Length The duration of the boomerang loop. 3-10 seconds
    Speed The speed at which the boomerang plays back. Slow, medium, fast
    Effects Visual enhancements applied to the boomerang. Filters, overlays, or special effects
    Transitions Transitions between frames, if applicable Fade-in, fade-out, or a more dynamic transition

    Common Use Cases

    Snapchat boomerangs are versatile and can be employed in a variety of scenarios. The following table details common use cases.

    Use Case Scenario
    Capturing a moment Documenting a quick event, like a dance move or a playful action.
    Highlighting an item Showing off a cool product, a piece of art, or a gift.
    Creating a humorous effect Making a silly GIF or video loop of an amusing situation.
    Promoting an event Briefly showcasing the details of a gathering or celebration.

    Customization Options

    This table details the options and settings available for customizing a boomerang. Careful selection can significantly enhance the impact of your content.

    Customization Description Example
    Filters Pre-made visual effects to enhance the mood or theme of the boomerang. Sepia, vintage, or vibrant color filters.
    Overlays Adding graphics, text, or stickers to the boomerang. Adding a text overlay with a caption or a fun graphic.
    Speed adjustments Adjusting the playback speed of the boomerang for a unique visual effect. Slowing down or speeding up the loop.
    Audio Adding background music or sound effects to the boomerang. Adding a trending audio clip.

    Troubleshooting

    Common issues encountered while creating and playing back boomerangs are detailed below.

    Issue Possible Cause Solution
    Boomerang not playing back correctly Incorrect recording length, or issues with the device’s processing capabilities. Ensure the recording is within the acceptable length limits.
    Poor video quality Low light conditions, or unstable recording environment. Ensure proper lighting and a stable recording position.
    Boomerang is too slow or too fast Incorrect settings when creating the boomerang. Adjust the speed settings.

    Creative Techniques

    Using boomerangs creatively on Snapchat can significantly elevate your content. These examples demonstrate different approaches.

    Technique Description Example
    Storytelling Use a series of boomerangs to convey a narrative. Illustrating a funny story or a sequence of events.
    Humor Employ boomerangs to create humorous and entertaining content. Making a funny reaction boomerang.
    Product Demonstration Showcase the use of a product through a boomerang. Demonstrating how to use a product or highlight its features.

    Illustrative Examples

    Boomerangs are more than just a fun toy; they’re a powerful tool for creative expression on Snapchat. Understanding how different types of boomerangs can be used to tell stories, showcase products, or even capture a funny moment can significantly enhance your Snapchat content. The key is to think beyond the simple throw and catch.Effective use of boomerangs hinges on understanding the platform’s capabilities and utilizing them creatively.

    This section will showcase different scenarios for using boomerangs, emphasizing their versatility and impact on engagement.

    A Boomerang for a Funny Moment

    A classic boomerang application is capturing a funny moment. Imagine a friend doing a silly dance or a comical facial expression. The boomerang, moving in a continuous loop, will amplify the humor, allowing viewers to savor the moment in a playful way. A fast-paced, slightly jerky motion of the boomerang will mimic the exaggerated actions, making the moment even funnier.

    Adding a trending sound or filter will further enhance the comedic impact.

    A Boomerang to Showcase a Product or Service

    A boomerang is an excellent tool for showcasing a product or service. A smooth, steady boomerang motion can be used to highlight the key features of an item. Imagine a boomerang that shows the different angles of a new phone, or the versatility of a clothing item. If you’re promoting a food product, the boomerang could demonstrate how easy it is to prepare, showcasing the appealing visual elements.

    Consider using a filter that enhances the product’s visual appeal.

    A Boomerang to Tell a Story

    A boomerang can act as a visual narrative. For example, if you’re telling a story about a day trip to the beach, a boomerang could show you walking towards the ocean, then transitioning to you building a sandcastle. The cyclical nature of the boomerang effectively tells a story in a short, engaging format. Adding a series of related filters, such as a sun filter or a beach filter, can enhance the story’s theme.

    A Boomerang Showcasing a Visually Engaging Experience

    Capturing a visually engaging experience is another powerful use for a boomerang. Think of a vibrant sunset, or a stunning firework display. The boomerang’s looping motion can emphasize the dynamic nature of the event. The cyclical movement will draw the viewer’s attention to the beautiful colors and patterns. A filter that enhances the colors and saturation of the video can make the experience even more captivating.

    A Boomerang Using a Trending Sound or Filter

    Leveraging trending sounds or filters is an effective strategy to increase engagement. A boomerang set to a trending sound can make a simple action seem extraordinary. If you’re trying to showcase a funny dance move, using a trending sound that matches the tone will make the video more memorable. Similarly, a trending filter will add a touch of originality and increase the likelihood of your content being seen and shared.

    The combination of a trending sound and filter can create a highly engaging and memorable boomerang.

    Conclusive Thoughts

    In conclusion, mastering the art of the Snapchat boomerang opens a world of creative possibilities. This guide has provided a comprehensive overview of the feature, covering everything from the technical aspects to the social impact. Now, armed with this knowledge, you can confidently create engaging boomerangs for various purposes, from sharing funny moments to showcasing products or services. So go forth, experiment, and create some amazing boomerangs!

  • Use the Roto Brush in Adobe AE A Comprehensive Guide

    Use the Roto Brush in Adobe AE A Comprehensive Guide

    Use the Roto Brush in Adobe AE to unlock precise masking and compositing techniques. This guide delves into the ins and outs of this powerful tool, perfect for video editors seeking to refine their skills and achieve stunning results. From basic object removal to advanced compositing tasks, we’ll cover it all. Get ready to master the Roto Brush!

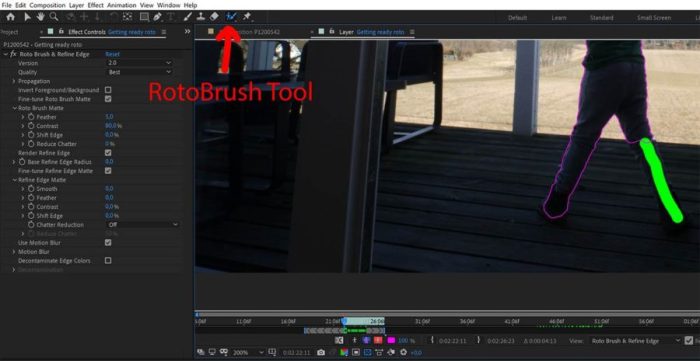
    The Roto Brush tool in Adobe After Effects allows for meticulous control over image selection, enabling users to precisely isolate and manipulate objects within a video frame. This technique is essential for tasks like compositing, masking, and object removal. Understanding its features and capabilities is crucial for any video editor seeking to elevate their projects to the next level.

    Introduction to Roto Brush Tool in Adobe After Effects

    The Roto Brush tool in Adobe After Effects is a powerful and versatile tool for precision masking and compositing. It allows for the creation of complex, accurate selections of video elements, enabling precise control over which parts of a video are included or excluded during editing. This meticulous control is invaluable for a wide range of video editing tasks, from object removal to intricate compositing effects.This tool is particularly useful for scenarios where precise selection is required, unlike simpler masking methods.

    The Roto Brush’s fine-grained control makes it an indispensable asset for professional video editors seeking high-quality results.

    Function and Applications

    The Roto Brush tool functions by allowing the user to manually trace the edges of an object or subject within a video frame. This tracing process creates a mask that isolates the object for various editing tasks. This precise masking is fundamental to many video editing techniques. The tool is employed in scenarios where high-level precision is required, such as removing unwanted objects from a shot, seamlessly compositing elements from different sources, and creating complex animation effects.

    Common Use Cases

    The Roto Brush tool has a wide array of applications, making it a crucial tool in many video editing workflows. Common use cases include:

    • Masking: The Roto Brush’s precision is essential for creating accurate masks, which are the foundation of many compositing techniques. This allows you to isolate specific elements of a video, such as a person or an object, enabling selective edits and effects.
    • Compositing: Combining elements from different sources often requires precise masking. The Roto Brush facilitates this by enabling the seamless integration of elements, such as adding a character to a different background or placing a digital effect over a real-world scene.
    • Object Removal: A significant application of the Roto Brush is removing unwanted objects or elements from a video. This process, often used in advertising and special effects, isolates the object to be removed and replaces it with another element or leaves the background untouched.
    • Motion Graphics: In creating complex motion graphics, the Roto Brush enables precise tracking of objects, allowing for smooth and accurate animation. This is crucial for maintaining realism and precision in the animation.

    Key Features of the Roto Brush Tool

    The Roto Brush tool boasts several key features, enhancing its efficiency and accuracy. These features are critical for achieving the desired results in various video editing projects.

    Feature Description Importance Example
    Precision Control The tool allows for precise tracing of object edges. Crucial for accurate masking and compositing. Removing a distracting tree from a landscape shot.
    Brush Size and Hardness Adjusting the brush size and hardness controls the precision and smoothness of the mask edges. Enables customization for diverse object shapes and sizes. Tracing a fine detail like a hair or a delicate object.
    Feathering Allows for gradual transitions between the mask and the background. Creates a smoother transition and prevents hard edges. Blending a character into a new environment without a harsh line.
    Pen Tool Integration Allows for vector-like path creation and modification for added precision. Provides an alternative method for intricate mask design. Tracing complex shapes, particularly in motion graphics.

    Mastering the Roto Brush Tool’s Interface

    The Roto Brush tool in Adobe After Effects is a powerful yet versatile tool for isolating and manipulating specific elements within a video. Understanding its interface is crucial for precise selections and efficient workflow. This section dives deep into the various panels and controls, outlining their significance and how different settings impact the final outcome.The Roto Brush interface is designed to be intuitive, allowing users to refine selections with precision.

    Different panels and controls work in harmony, providing flexibility for a wide array of projects. From basic selections to complex masking operations, mastering these controls empowers users to create impressive visual effects.

    Brush Settings

    Understanding the brush settings is essential for achieving accurate selections. These settings dictate the behavior of the brush and influence the precision of your rotoscoping. By adjusting these settings, you can create smooth, precise selections or more aggressive, rougher selections depending on the subject matter.

    Learning to use the Roto Brush in Adobe After Effects is a game-changer for precision masking. It’s a fantastic tool, especially when you’re working on complex projects, like animating a scene or fixing video glitches. While you’re mastering the technique, you might want to listen to U2’s new song, “You’re the Best Thing About Me” listen to u2s new song youre the best thing about me – it’s a great way to unwind while perfecting your masking skills.

    It really helps to have some good tunes on in the background when tackling tricky projects like these. The Roto Brush is key for a clean final product in After Effects.

    • Brush Size: This controls the diameter of the brush tip. A larger brush size covers more area in a single stroke, while a smaller size allows for more precise detail work. Larger brushes are helpful for quickly outlining large areas, while smaller brushes are critical for fine adjustments and details. For instance, when tracing the Artikel of a car, a larger brush would be suitable for initial Artikels, while a smaller brush is better for creating sharper edges around intricate details.

    • Brush Hardness: This determines the transition from the brush’s center to its edges. A hard brush creates a sharp, defined edge, while a soft brush produces a gradual transition. Hard brushes are useful for outlining crisp shapes, whereas soft brushes are suitable for smooth transitions between objects.
    • Feather: This setting controls the softness of the edges of the selection. A higher feather value creates a more gradual transition between the selected area and the surrounding background. Feathering is often employed to avoid hard edges and maintain a natural look, especially for complex shapes. For example, feathering can be used to blend the Artikel of a person’s hair with the background, creating a seamless transition.

    • Opacity: This setting dictates the transparency of the brush stroke. Lower opacity allows you to see through the selection, which is essential for subtle corrections. High opacity ensures the selection is visible and makes it easy to see the shape and edge being traced.

    Interface Panels and Controls

    The Roto Brush tool offers several panels and controls for precise selection and manipulation.

    Control Description Example Use Case Impact on the Final Result
    Roto Brush Panel This panel houses the primary controls for the brush itself, including size, hardness, feather, and opacity. Adjusting brush size and hardness for tracing an object’s Artikel. Creates a more accurate and precise selection.
    Mask Panel This panel displays the mask created by the brush strokes. It shows the selected area and allows for adjustments to the mask. Using the mask panel to refine the edges of a selection or add more detail. Provides a visual representation of the selection and enables precise adjustments.
    Opacity Adjustment This allows for fine-tuning of the selection’s transparency. Making the selection more or less visible while tracing. Enhances precision and control, allowing for more subtle corrections.
    Feathering Options This controls the softness of the selection’s edges. Blending the selection with the background for a smoother transition. Reduces harsh edges and creates a more natural appearance.

    Essential Techniques and Procedures

    Use the Roto Brush in Adobe AE

    The Roto Brush tool in Adobe After Effects empowers precise masking, enabling intricate compositing and visual effects. Mastering its techniques is crucial for achieving professional-quality results. Understanding the procedures for selecting subjects, creating masks, refining them, and feathering edges is fundamental to effective use. This section delves into these critical aspects.The Roto Brush tool, while intuitive, requires a methodical approach to achieve optimal results.

    Each step, from subject selection to mask refinement, contributes to the overall quality of the final output. This section guides you through the steps and provides crucial insights into the nuances of this powerful tool.

    Selecting a Subject, Use the Roto Brush in Adobe AE

    To begin, selecting a subject involves carefully tracing its Artikel. Begin by adjusting the brush size to suit the details of the subject. Use a soft brush edge for a smooth transition between the inside and outside of the selected area. Start with a low opacity and gradually increase it as needed to refine the selection. For complex subjects, consider using the pen tool for initial masking and then refining the mask with the Roto Brush tool.

    Creating a Precise Mask

    Creating a precise mask involves a step-by-step process. First, establish a starting point. Choose a point on the subject’s Artikel and begin tracing. Maintain a consistent stroke width and pressure to ensure accuracy. Use the brush’s feathering options to adjust the smoothness of the mask’s edges.

    Ensure the mask encompasses the entire subject, including subtle details. Continuously monitor the mask’s preview to confirm accuracy.

    Refining the Mask with Different Brush Settings

    The Roto Brush’s settings provide flexibility for refining the mask. Adjust the brush size for greater precision on fine details or wider areas. Experiment with different brush shapes, such as hard or soft edges, to accommodate various subject contours. Opacity and flow settings allow for incremental adjustments. For instance, lower opacity enables a more controlled tracing process.

    Adjusting the brush’s hardness and opacity allows for meticulous refinements.

    Learning to use the Roto Brush tool in Adobe After Effects is super helpful for precision masking. While I’m mastering this, I’m also super excited about Peter Hook’s upcoming North American tour, performing New Order classics like Movement and Power Corruption Lies here. It’s going to be a great soundtrack to my editing sessions. I’m definitely going to need to practice more with the Roto Brush to get those tricky animated elements perfect.

    Feathering the Mask Edges and Its Impact

    Feathering mask edges blurs the transition between the masked area and its surroundings. A feathered edge creates a softer transition, blending the subject with the background more seamlessly. The feathering amount dictates the smoothness of this transition. A small feather amount results in a sharper mask edge, whereas a larger feather amount results in a more gradual transition.

    The feathering option is crucial for creating natural-looking composites, avoiding harsh edges. This is especially beneficial when integrating the masked subject into a scene.

    Comparing Masking Techniques

    Technique Description Advantages Disadvantages
    Roto Brush Precisely traces the Artikel of a subject using a brush-like tool. High precision, control over details, and adaptability to various shapes. Can be time-consuming for complex subjects, requires practice for mastery.
    Pen Tool Creates vector-based paths to define the mask. Excellent for complex shapes and precise curves. Less intuitive for quick selections compared to Roto Brush.
    Magic Wand Selects pixels based on color or luminance similarities. Fast for simple shapes and uniform areas. Less precise than Roto Brush, may require multiple selections and refinements.

    Advanced Roto Brush Techniques

    Roto Brush, while powerful for basic masking, truly shines when tackling intricate shapes and complex objects. This section dives into advanced techniques, enabling you to master the tool for more demanding video editing tasks. From dealing with multiple layers and masks to harnessing the Refine Edge feature, we’ll explore strategies for precision and efficiency.The key to mastering complex masking lies in understanding how to adapt your approach to different scenarios.

    The more nuanced your understanding of the tool’s capabilities, the smoother and more efficient your masking workflow will become. This includes recognizing when specific techniques are most appropriate for various types of edges and details.

    Handling Complex Shapes and Objects

    Complex shapes often require a multi-faceted approach. Begin by breaking down the object into simpler, manageable sections. This allows you to apply different brush settings and techniques to each segment, achieving a more precise result. Iterative refinement is crucial; don’t hesitate to zoom in and adjust the mask on a granular level to perfect the edges. Understanding the shape’s underlying structure is important to guide the masking process.

    Working with Multiple Layers and Masks

    Using multiple layers and masks in conjunction with the Roto Brush is essential for intricate compositions. This strategy allows you to isolate different parts of an object, enabling precise masking and further editing on individual layers. For example, masking a person’s hair on one layer and the person’s body on another allows you to make separate adjustments to each, potentially using different brush sizes and shapes.

    Each mask can be adjusted independently to ensure accurate isolation.

    Using the Refine Edge Feature

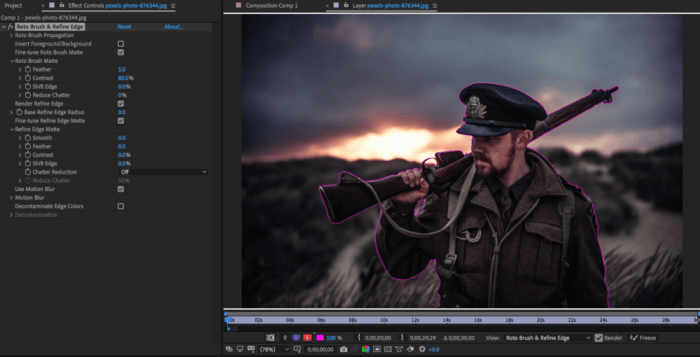
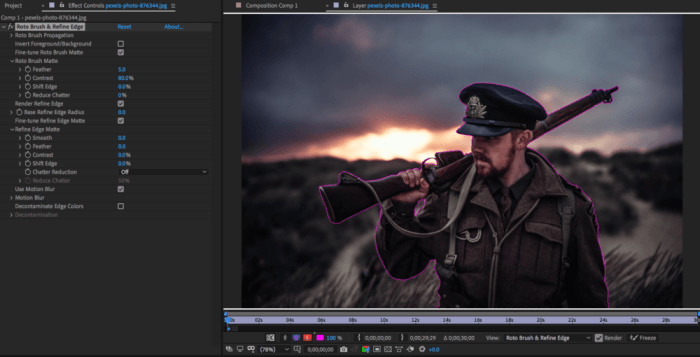
    The Refine Edge feature in the Roto Brush is a powerful tool for refining the mask’s edges. It provides a more sophisticated way to handle challenging edges, like hair or fur. By adjusting the feathering, contrast, and smoothing options within the Refine Edge panel, you can create masks with a natural and clean appearance, especially for objects with a complex or irregular edge.

    The strength of this feature is in its ability to adapt to a variety of edge types.

    Dealing with Difficult Edges and Details

    Different approaches are needed for different types of difficult edges. For example, when dealing with hair, a soft brush with a low hardness is often more suitable. This prevents harsh edges and creates a smoother transition. Conversely, a harder brush is useful for precise work on solid objects. Understanding the character of the edge is crucial for selecting the right brush size and hardness.

    Learning to use the Roto Brush tool in Adobe After Effects is super helpful, especially for intricate compositing tasks. It’s a great way to isolate and manipulate specific elements in your videos. For example, if you’re creating a music video inspired by the new song “careless untitled new song” careless untitled new song , you might want to use Roto Brush to remove a distracting background element.

    Mastering the Roto Brush is key for clean, professional-looking edits in AE.

    Experimentation is key in determining the most efficient approach.

    Comparison of Brush Settings

    Setting Description Effect on Mask Example Scenario
    Brush Size (Large) Larger brush diameter Creates wider selections, good for broad areas. Masking a large tree branch.
    Brush Size (Small) Smaller brush diameter Provides more control, precise selections. Masking intricate details on a flower.
    Brush Shape (Round) Standard brush shape Suitable for most general masking tasks. Masking a person’s face.
    Brush Shape (Custom) Allows for customized brush shape Offers more precise control for specific shapes. Masking a complex architectural feature.
    Brush Hardness (Low) Softer brush edges Creates smooth transitions, good for hair or fur. Masking a person’s hair.
    Brush Hardness (High) Sharper brush edges Provides clean, hard edges. Masking a solid object with sharp corners.

    Troubleshooting and Common Issues: Use The Roto Brush In Adobe AE

    Use the Roto Brush in Adobe AE

    Mastering the Roto Brush tool in After Effects often involves navigating unexpected challenges. Understanding common issues and their solutions is crucial for efficient and effective masking. This section dives into the troubleshooting process, providing practical methods to overcome common pitfalls and refine your masking skills.The Roto Brush tool, while powerful, can present various difficulties. Stray pixels, inconsistent masking, and hard-to-mask elements are frequent obstacles.

    This section will equip you with the knowledge and techniques to identify and resolve these issues, ultimately leading to cleaner and more accurate masks.

    Identifying and Correcting Stray Pixels

    Stray pixels, or “bleed-through” artifacts, are a common problem in Roto Brush masking. They occur when the brush unintentionally picks up pixels from adjacent areas, leading to inaccuracies in the mask. Proper brush selection and adjustment are critical in minimizing this.

    • Adjusting Brush Size and Hardness: A smaller, softer brush tip often reduces stray pixels. Experiment with different brush sizes and hardness settings to find the optimal balance between precision and coverage.
    • Refining Mask Edges: Use the Refine Edge options in the Roto Brush tool panel. These options allow you to smooth, feather, or expand the mask edges, removing unwanted stray pixels. Use the feathering option cautiously to avoid blurring the edges of the subject.
    • Using the Brush’s Eraser Tool: The eraser tool, with a smaller brush size, is ideal for removing individual stray pixels from the mask. This approach is effective for isolated issues but can be time-consuming for extensive correction.

    Cleaning Up the Mask

    Maintaining a clean and accurate mask is essential for high-quality compositing. This section provides strategies for cleaning up the mask and eliminating errors.

    • Using the Brush’s Erase Tool: This tool is crucial for removing unwanted portions of the mask. Select the appropriate brush size and hardness to avoid over-erasing and damaging the intended mask areas.
    • Mask Feathering and Expansion: Applying feathering or expansion to the mask’s edges can help clean up rough transitions. Using these tools carefully is key to achieving a smooth, professional-looking mask.
    • Using the Refine Mask Tool: The Refine Mask tool provides sophisticated options for refining mask edges, including edge smoothing and noise reduction, which helps to clean up inconsistencies.

    Addressing Inconsistent Masking

    Inconsistency in the mask can stem from various factors, including uneven lighting, complex textures, or subtle changes in the subject’s shape. Understanding the source of the problem is critical to finding an effective solution.

    • Analyze the Source of the Issue: Carefully examine the area causing the masking inconsistencies. Is it due to a sudden change in lighting, or a texture that’s difficult to isolate? Understanding the source helps you tailor the solution.
    • Experiment with Brush Settings: Try adjusting the brush’s size, hardness, and flow to better capture the details and avoid skipping parts of the subject.
    • Use Multiple Passes: Sometimes, masking a complex element requires multiple passes with the Roto Brush tool. Use separate passes for different parts of the subject for more precision and efficiency.

    Removing Unwanted Areas

    Unwanted areas in the mask can compromise the overall composition. This section presents methods for effectively removing such areas.

    • Using the Mask’s Eraser Tool: The eraser tool within the mask is a quick and effective way to remove unwanted areas.
    • Using the Brush’s Erase Tool with Precision: A precise eraser tool, with a small brush size, can target and remove unwanted areas without affecting the desired mask. This approach is crucial for detailed elements.
    • Using the Refine Edge Tool: This tool provides sophisticated options to selectively remove or refine edges, enabling better control over the mask’s shape.

    Table of Common Problems and Solutions

    Problem Description Solution Example
    Stray Pixels Unwanted pixels bleed into the mask. Adjust brush size, hardness, refine edges, use eraser tool. A hair strand extending into the background.
    Inconsistent Masking Uneven masking in the subject. Analyze the source of the issue, adjust brush settings, use multiple passes. A subject with a changing lighting pattern.
    Hard-to-Mask Elements Complex shapes or textures are difficult to isolate. Use multiple passes, adjust brush settings, utilize the Refine Mask tool. A subject with intricate details or subtle shading.

    Advanced Applications and Creative Uses

    The Roto Brush tool, while fundamental, unlocks a surprising range of creative possibilities beyond basic object extraction. Mastering its advanced applications allows for complex compositing tasks, seamless integration with other After Effects tools, and the creation of truly unique visual effects. This section dives into these expanded creative uses, providing practical examples and techniques to elevate your video projects.Understanding the Roto Brush’s power in sophisticated compositing is crucial for achieving realistic and engaging visuals.

    This goes beyond simply isolating elements; it’s about intricately manipulating and integrating them within a scene.

    Complex Compositing Tasks

    Advanced compositing tasks often involve isolating and manipulating multiple, complex elements within a scene. The Roto Brush’s precision is invaluable in this context. Instead of isolating just one object, you might use it to meticulously extract a character from a crowded background, a specific prop from a scene, or a particular light source. These detailed selections are then combined with other elements or effects, leading to more complex and believable scenes.

    For instance, imagine isolating a character’s face from a video and replacing the background with a dynamic cityscape.

    Use in Various Editing Styles

    The Roto Brush’s adaptability extends across diverse editing styles. In a documentary, it could be used to cleanly remove unwanted objects from historical footage. In a music video, the Roto Brush might help seamlessly integrate CGI elements into the live action. Its versatility in isolating subjects allows for a clean separation, whether you’re working with traditional documentary styles, experimental animation, or anything in between.

    Visual Effects and Motion Graphics

    The Roto Brush empowers sophisticated visual effects and motion graphics. For example, you can create realistic smoke or fire effects by meticulously tracing the contours of the desired effect. By isolating and manipulating these elements, the Roto Brush enables you to achieve a high level of control and realism in your motion graphics, opening doors for intricate special effects.

    Imagine creating a stylized particle system that flows around a character, meticulously tracing the particles with the Roto Brush to achieve the desired effect. This approach allows for highly customized and impressive visual results.

    Animation

    The Roto Brush is not limited to static scenes. In animation, it can be used to isolate and animate individual elements within a complex character or scene. By meticulously isolating and masking the different parts of a character, animators can create smooth and realistic movements, and precise changes in the animation of a scene. For instance, isolating a character’s hair and animating it separately allows for detailed and dynamic movement, creating a much more nuanced and engaging animation.

    Unique and Inventive Uses

    Beyond the standard uses, the Roto Brush offers surprising opportunities for unique creativity. Imagine creating a dynamic, stylized title sequence by meticulously tracing the shapes and then animating them in a way that interacts with the scene. Or, use the Roto Brush to create custom light trails, isolating specific points and applying unique effects. The possibilities are nearly limitless, limited only by your imagination and the scope of your project.

    For example, consider isolating and manipulating specific elements of a logo to create a unique animation that showcases the logo’s evolution.

    Closing Notes

    This comprehensive guide has walked you through the Roto Brush tool in Adobe After Effects, covering everything from basic functions to advanced techniques. We explored essential procedures, troubleshooting common issues, and delved into creative applications. By mastering the Roto Brush, you’ll gain a powerful new tool for precise masking, object removal, and complex compositing, enhancing your video editing skills and opening doors to more innovative projects.