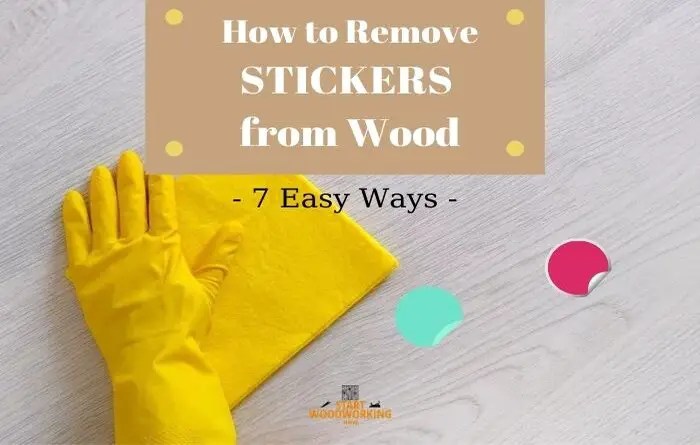
Get Stickers off Wood, a common household conundrum, is tackled in this comprehensive guide. Whether it’s stubborn adhesive labels, decals, or posters stuck to your beloved wooden furniture, this guide provides the knowledge and methods to remove them safely and effectively without damaging the wood. We’ll explore various wood types, different sticker types, and a range of removal techniques, from gentle approaches to advanced strategies for intricate designs.
From identifying the right tools to understanding safety precautions, we’ll walk you through every step of the process, ensuring a successful and damage-free removal experience. Learn how to prepare your wood surface, clean up afterward, and troubleshoot any issues that may arise along the way.
Introduction to Removing Stickers from Wood
Removing stickers from wooden surfaces is a common task, whether it’s removing old price tags from furniture, unwanted decals from doors, or remnants of promotional materials. This process can be straightforward, but a careful approach is essential to avoid damaging the wood’s finish or structure. Understanding the type of sticker, the wood’s composition, and the best removal techniques is crucial for a successful and damage-free outcome.Proper sticker removal from wood involves more than just pulling; it’s a process of identifying the right tools and techniques to prevent scratches, splinters, or permanent marks.
The choice of method will depend on the type of sticker, the material of the wood, and the overall desired outcome.
Types of Stickers
Various types of stickers can be found on wooden surfaces. These include, but are not limited to, price tags, promotional decals, decorative stickers, and even remnants of labels. Each type might require a different approach to removal to avoid damaging the wood. For example, a thick, pressure-sensitive sticker will likely need a more forceful removal method than a thin, easily removable sticker.
Wood Materials
Different types of wood have varying levels of hardness and density. Knowing the material is essential for selecting the right removal technique. Common wood types include:
- Plywood: A composite material made of thin layers of wood glued together. Its layered structure can make it more prone to damage if not handled carefully.
- Hardwood: Known for its strength and durability. However, hardwoods can still be scratched or damaged if the removal process is not handled properly.
- Medium-density fiberboard (MDF): A manufactured wood product that is less dense than hardwood but still requires a gentle approach to avoid damaging the surface.
Importance of a Proper Approach
A proper approach to sticker removal from wood is critical to preserving the wood’s integrity and aesthetic appeal. Improper methods can lead to:
- Scratches and damage to the wood’s finish:
- Splintering of the wood surface, especially on softer wood types.
- Lifting or tearing of the wood grain if the sticker is not removed gradually.
- Adhesive residue left on the wood surface, making future cleaning and maintenance difficult.
Sticker Removal Techniques
The best removal method depends on the sticker type and the wood’s material. Common techniques include:
- Using a plastic scraper: A plastic scraper can gently lift stickers without scratching the wood. This method is particularly useful for stubborn stickers or those on delicate surfaces.
- Applying heat: Heat can soften the adhesive, making it easier to remove the sticker. However, use caution and apply heat gently to prevent burning or warping the wood.
- Using a sticker removal solution: A specialized sticker removal solution can dissolve the adhesive, allowing the sticker to be peeled away easily. Follow the product instructions carefully to ensure proper application and avoid damaging the wood.
Precautions
Always test any removal method on a less visible area of the wood first to avoid unexpected damage. This is particularly important when using heat or chemical solutions.
Methods for Removing Stickers
Removing stickers from wood can be a delicate process, requiring careful consideration of both the sticker type and the wood’s surface. A hasty approach can easily damage the wood, leaving unsightly marks or even causing permanent damage. Understanding the various techniques available and choosing the appropriate method for your specific situation is crucial for achieving a successful removal without compromising the integrity of your furniture or decorative pieces.The effectiveness and safety of each method vary depending on the adhesive type of the sticker and the type of wood.
For instance, a stubborn sticker on a delicate piece of antique furniture will necessitate a gentler approach than a sticker on a sturdy plywood surface. This section will explore different techniques for removing stickers, focusing on preserving the wood’s surface while achieving complete removal.
Gentle Approaches
Prioritizing a gentle approach is often the best way to avoid damaging the wood’s surface. Starting with the least abrasive methods and progressing to more assertive techniques is recommended. Often, a simple application of patience and the correct tools will prove more effective than forceful removal. This often involves using solvents or specialized sticker removers, which are gentler than heat or scraping.
Using a Heat Gun or Hairdryer, Get Stickers off Wood
Applying heat can loosen the adhesive of some stickers, making removal easier. A heat gun or hairdryer, set to a low or medium setting, can be used to carefully heat the sticker’s adhesive. Be cautious to avoid overheating the wood, as this can cause damage. It’s recommended to use a heat gun or hairdryer at a controlled temperature, ensuring that the heat is applied evenly across the sticker’s surface.
Test in an inconspicuous area first to gauge the wood’s reaction to the heat. This method is best suited for stickers with a relatively weak adhesive, like those made with paper or plastic.
Using a Specialized Sticker Remover
Specialized sticker removers are specifically formulated to dissolve adhesive without harming the underlying surface. These products are designed to penetrate the adhesive and break it down, allowing for easy removal. Apply a small amount of the remover to the sticker, allowing it to sit for the specified time on the product label. Gently scrape away the softened sticker with a plastic scraper or a soft spatula.
Always test the remover in a hidden area first to confirm it won’t damage the wood.
Using a Scraper or Putty Knife
For stubborn stickers, a scraper or putty knife can be used to lift the sticker from the wood. However, this method requires extreme caution to avoid scratching or marring the wood. Place the scraper at a slight angle to the sticker and gently lift, working from one edge to the other. It is crucial to apply a consistent, steady force to avoid damaging the surface.
Start with a soft-edged scraper, and if necessary, use a harder one. Avoid using a metal scraper directly on the wood to minimize the risk of scratching.
Comparing Methods
| Method |
Effectiveness |
Safety |
Sticker Type |
Wood Type |
| Heat Gun/Hairdryer |
Moderate to High |
Moderate |
Paper, Plastic |
Most Wood Types |
| Sticker Remover |
High |
High |
Most Types |
Most Wood Types |
| Scraper/Putty Knife |
High |
Low |
Stubborn Stickers |
Hardwoods, Plywood |
Different methods work best with different types of stickers and wood. A specialized sticker remover is generally the safest and most effective approach for most sticker types and wood surfaces. Heat is a viable option for certain types of stickers, but care must be taken to avoid damaging the wood. For stubborn stickers on hard woods, a scraper might be necessary, but use caution and a soft scraper initially to test.
Tools and Supplies
Getting sticker residue off wood requires the right tools and supplies. Choosing the correct approach depends on the type of sticker, the wood’s surface, and the desired outcome. Careful selection and proper application of these tools will save you time, effort, and potential damage to your project.
Tools for Mechanical Removal
Mechanical methods often involve scraping or prying the sticker away. The appropriate tools for these techniques depend on the sticker’s size, the wood’s hardness, and the sticker’s adhesion.
- Utility knife: A versatile tool for cutting and scraping. A utility knife with a replaceable blade is ideal for precision cutting around edges and removing stubborn sticker parts. A standard utility knife with a dull blade will not be effective and may damage the wood surface.
- Putty knife: A flexible blade that is useful for scraping away stubborn sticker residue. Its flexible nature helps to avoid scratching the wood surface. A wide, flexible putty knife is ideal for large areas of sticker removal, while a narrower one can be used for detailed work.
- Plastic scraper: A plastic scraper is perfect for delicate surfaces or when you want to avoid scratching the wood. The smooth plastic surface prevents scratches and damage. A plastic scraper can be used on both smooth and textured surfaces.
- Razor blade/Exacto knife: For precise cutting around edges and detailed work. Choose a razor blade or Exacto knife with a sharp blade to avoid damaging the wood. These tools are useful for removing small pieces of sticker residue or getting into tight corners.
Tools for Chemical Removal
Chemical methods are often needed for stubborn stickers. Proper use of solvents is crucial to avoid damaging the wood.
- Isopropyl alcohol: A common solvent for sticker removal. It’s relatively safe and effective for many types of stickers. Isopropyl alcohol can be used on various wood types and finishes, but always test in an inconspicuous area first.
- Goo Gone: A commercially available adhesive remover specifically designed for various types of stickers. It’s effective on a range of materials and often leaves the surface clean. It’s important to follow the product instructions for best results.
- WD-40: A versatile lubricant and solvent that can be effective in softening and removing some stickers. It’s often used for stubborn adhesive, but can potentially damage certain finishes. Always test in a hidden area first.
Comparing Tool Effectiveness
| Tool Name |
Description |
Image Description |
| Utility Knife |
A versatile knife for cutting and scraping. |
A typical utility knife with a replaceable blade. |
| Putty Knife |
A flexible blade for scraping away residue. |
A wide, flexible putty knife with a smooth, flat edge. |
| Plastic Scraper |
A scraper with a smooth plastic surface for delicate surfaces. |
A plastic scraper with a flat, smooth surface. |
| Razor Blade/Exacto Knife |
For precise cutting and detailed work. |
A sharp razor blade or Exacto knife blade. |
| Isopropyl Alcohol |
A common solvent for sticker removal. |
A bottle of isopropyl alcohol (often labeled as rubbing alcohol). |
| Goo Gone |
A commercial adhesive remover. |
A container of Goo Gone adhesive remover. |
| WD-40 |
A lubricant and solvent for sticker removal. |
A spray bottle of WD-40. |
Substitutes and Considerations
Sometimes, specialized tools might not be readily available. Consider these substitutes, but be aware of potential drawbacks.
- Instead of a utility knife, a sharp knife or even a butter knife can be used, but be extra cautious not to damage the wood. A sharp butter knife may be adequate for removing smaller stickers, but for larger stickers or more stubborn residue, a utility knife is recommended.
- Instead of Goo Gone, white vinegar or a mixture of baking soda and water can be used as a less aggressive alternative for sticker removal. Vinegar may damage some wood finishes, so always test in an inconspicuous area first. Baking soda and water mixture may require more time for removal.
Specific Sticker Types and Removal Strategies
Sticker removal from wood surfaces can be a delicate process, requiring careful consideration of the sticker type and its adhesive strength. Understanding the specific nature of the adhesive is key to avoiding damage to the wood’s finish or the underlying material. Different removal methods work best for different sticker types, and knowing which to use can save time and prevent frustration.
Adhesive Labels
Adhesive labels, commonly found on furniture or containers, often have a relatively simple adhesive. A gentle approach is often sufficient. Begin by using a soft cloth or a plastic scraper to loosen the edges of the label. Applying a solvent, like rubbing alcohol or a citrus-based cleaner, can help soften the adhesive, but apply sparingly and test in an inconspicuous area first.
If the label is still resistant, consider using a specialized adhesive remover designed for labels. Work slowly and methodically, ensuring not to apply too much pressure, as this could damage the wood.
Decals
Decals, often found on decorative items, frequently have a more robust adhesive than labels. Similar to removing labels, use a soft cloth or scraper to release the edges of the decal. If this proves insufficient, carefully apply a solvent to the adhesive, but be mindful of the wood’s finish. A plastic scraper can be used to gently lift the decal away.
Removing stickers from wood can be tricky, but careful scraping and the right tools are key. Understanding energy conversions, like converting Kilojoules to Calories, can actually be helpful in certain situations. For example, if you’re trying to calculate the energy required to remove a particularly stubborn sticker, you might find Convert Kilojoules to Calories a useful tool.
Ultimately, the best way to get those stickers off your wood furniture is still with a little elbow grease and the right technique.
Some decals may require a combination of methods. Consider starting with a solvent to loosen the adhesive and follow up with a scraper to detach the decal.
Trying to get those pesky stickers off the wood? It’s a real pain, right? Luckily, there are some great techniques out there, and while I’m researching the best methods, I stumbled across some amazing news – Dead Can Dance have announced a new LP tour! dead can dance announce new lp tour Definitely a cool thing to check out.
I’m hoping some of these methods will help me get these stickers off the wood so I can properly appreciate the beauty of the wood underneath. Stay tuned for the results!
Posters
Posters, often larger and more complex than decals, require a more strategic approach. Start by carefully lifting one corner of the poster. Apply a solvent to the adhesive, being cautious to avoid spreading the solvent too widely, which can damage the wood. Using a plastic scraper or a putty knife (carefully), work along the poster’s edges to lift it off.
For stubborn adhesives, applying a heat source (such as a hairdryer, used on a low setting and with a considerable distance from the wood) can help soften the adhesive and make removal easier.
Long-Term Stickers
Stickers that have been on wood for an extended period may have their adhesive deeply embedded in the wood grain. A combination of techniques might be needed. Begin by applying a solvent, like a citrus-based cleaner or a specialized adhesive remover. Let the solvent work for a sufficient time to soften the adhesive. Then, use a plastic scraper to lift the sticker, working gradually to avoid damage to the wood.
Repeated applications of solvent and scraping might be necessary.
Intricate Wood Carvings and Designs
Removing stickers from intricate wood carvings or designs requires extreme care. Avoid using solvents or heat sources near the carvings, as these can damage the delicate design. Start by using a soft cloth or a plastic scraper to loosen the edges of the sticker. A specialized adhesive remover, if used, must be applied with the utmost care.
Work in small, controlled sections, and examine the wood frequently to ensure no damage is occurring. Use a toothpick or a similar small tool to carefully lift the sticker from the carvings. A magnifying glass may prove helpful in areas with fine details.
Different Adhesive Strengths
Different stickers have different adhesive strengths. A general guideline is to start with gentler methods for weaker adhesives. As the adhesive strength increases, gradually move to more aggressive methods. Using a solvent to soften the adhesive can be effective in most cases. For stronger adhesives, a specialized adhesive remover may be necessary.
Test the remover on a hidden area first to ensure no damage is caused to the wood’s finish. Remember, patience and meticulous work are key to successfully removing stickers of any strength without causing damage to the wood.
Safety Precautions and Considerations
Removing stickers from wood can be a rewarding task, but it’s crucial to prioritize safety. Improper techniques or the use of harsh chemicals can lead to damage to the wood surface, personal injury, or environmental harm. This section details essential safety precautions to ensure a successful and safe sticker removal process.Understanding the potential hazards and taking proactive measures is paramount.
Whether you’re using heat, solvents, or specialized tools, safety should always be your top priority. By following the Artikeld precautions, you can protect yourself, the surrounding environment, and the integrity of your wooden surfaces.
Heat Application Safety
Using heat to soften and loosen stickers requires careful consideration. Direct contact with the wood can cause scorching, warping, or discoloration. A heat gun or hair dryer should be used with caution, keeping a safe distance from the surface. The heat source should be moved frequently to prevent localized heating and damage. Always use a heat-resistant surface to protect the work area from accidental burns.
Solvent Application Safety
Solvents, while effective for some sticker types, pose significant risks. Always wear appropriate personal protective equipment (PPE), including gloves, eye protection, and a respirator. Work in a well-ventilated area to minimize exposure to fumes. Apply solvents sparingly and test them in an inconspicuous area first to ensure compatibility with the wood type. Dispose of used solvents according to local regulations.
Tool Safety
Using tools like scrapers or razor blades requires careful handling. Sharp tools can cause cuts or abrasions. Ensure proper grip and control when using these tools. Work on a stable surface to avoid accidents. Store tools properly after use to prevent injuries.
Environmental Protection
Protecting the environment is crucial. Properly dispose of any chemical waste or solvents according to local regulations. Avoid using chemicals that are harmful to the environment. If you’re using a heat gun, ensure it’s not emitting harmful fumes or causing excessive pollution.
Safety Hazard Prevention Table
| Safety Hazard |
Prevention Measure |
Example |
| Burns from heat gun |
Maintain a safe distance from the wood surface, use a heat-resistant surface, move the heat gun frequently |
Using a heat gun too close to the wood, causing a burn mark |
| Chemical burns/skin irritation |
Wear gloves, eye protection, and a respirator when using solvents, work in a well-ventilated area, test solvents on a hidden area first |
Applying a solvent without gloves, leading to skin irritation |
| Cuts from sharp tools |
Use proper grip, maintain a stable work surface, be aware of the blade’s position |
Using a scraper with improper grip, leading to a cut |
| Solvent inhalation |
Work in a well-ventilated area, use a respirator if needed |
Working with solvents in a closed area without proper ventilation, leading to inhalation of harmful fumes |
| Environmental pollution |
Proper disposal of chemicals according to local regulations, use environmentally friendly solvents if possible |
Improper disposal of solvents, leading to environmental contamination |
Wood Surface Preparation and Post-Removal Care: Get Stickers Off Wood
Sticker removal can sometimes leave behind residue or damage. Proper preparation of the wood surface both before and after removal is crucial for restoring its beauty and protecting it from future problems. Understanding how to clean, condition, and address any potential damage will ensure a smooth and successful outcome.
Getting stickers off wood can be a real pain, especially if they’re stubborn. I was completely engrossed in trying to remove some tricky ones the other day, and honestly, it got me thinking about the Pearson family attending Jack’s funeral on This Is Us. the pearson family attend jacks funeral on this is us was such a powerful scene, highlighting the emotional weight of loss.
Anyway, back to the stickers – I eventually found a great method for getting them off without damaging the wood, so I’ll share that in a future post!
Surface Preparation Before Sticker Removal
Thorough preparation of the wood surface before sticker removal minimizes the risk of damage during the process. This often involves assessing the wood’s existing condition. For example, if the wood has a protective coating like varnish or polyurethane, it’s crucial to understand how it interacts with the sticker adhesive and the removal methods. Knowing the finish type is essential for selecting the right removal technique.
Using inappropriate methods can compromise the wood’s integrity, leading to scratches or other imperfections.
Cleaning and Conditioning the Wood
After removing the sticker, cleaning and conditioning the wood is essential for restoring its appearance and protecting it. This involves meticulously removing any residual adhesive and ensuring the surface is clean and free of contaminants. Different wood types may require varying cleaning solutions. For instance, softwoods may tolerate harsher solutions than hardwoods. Carefully selecting cleaning agents and using gentle scrubbing techniques is vital.
Applying a wood conditioner or sealant is a crucial step after cleaning, as it fills in minor imperfections and protects the wood from moisture and further damage.
Addressing Damage Caused by Removal
Sticker removal can sometimes lead to damage. This can include scratches, gouges, or adhesive residue. Addressing these issues effectively is crucial for restoring the wood’s original condition. If scratches are shallow, using wood filler can effectively mask the damage. Deep scratches or gouges might require sanding and refinishing.
For stubborn adhesive residue, employing specialized adhesive removers is necessary. The choice of repair method depends on the severity of the damage.
Wood Finish Compatibility with Removal Methods
| Wood Finish |
Suitable Removal Methods |
Potential Issues |
Mitigation Strategies |
| Varnish |
Chemical strippers (with caution), heat, or specialized sticker removers |
Strippers can damage the finish if not used correctly. Heat can cause warping or discoloration. |
Apply strippers in small areas, monitor the process closely, use low heat if necessary. Sanding and refinishing might be required if significant damage occurs. |
| Polyurethane |
Chemical strippers (with caution), specialized sticker removers, heat (with caution). |
Similar to varnish, improper use of strippers or heat can damage the finish. |
Test the stripper in an inconspicuous area first. Use low heat and monitor closely. Consider sanding and refinishing if significant damage occurs. |
| Oil-based stain |
Mechanical methods (scrapers, solvents), specialized sticker removers |
Solvents can damage the wood if used incorrectly. |
Test the solvent on a small, hidden area first. Use caution and ventilation when working with solvents. |
| Water-based stain |
Mechanical methods (scrapers), specialized sticker removers, water-based cleaners |
Water-based stains are generally more resilient to sticker removal methods. |
Water-based cleaners and scrapers are usually sufficient. |
| Natural finish (no added finish) |
Mechanical methods, specialized sticker removers, gentle cleaning agents. |
The wood itself might be susceptible to damage. |
Use extreme caution and minimize force when using scrapers. Employ very gentle cleaning agents. |
The table above provides a general guideline. Always test any method in an inconspicuous area before applying it to the entire surface to avoid potential damage.
Troubleshooting Common Issues
Sticker removal can sometimes be tricky, and unexpected problems can arise. Understanding potential pitfalls and their solutions is crucial for a successful and damage-free outcome. This section details common issues encountered during sticker removal from wood and provides effective solutions.Often, the success of sticker removal hinges on careful preparation and the correct application of methods. Recognizing the specific type of sticker and the wood’s characteristics are key to avoiding damage and achieving a pristine finish.
By addressing potential problems proactively, you can ensure a smooth and efficient removal process.
Identifying Sticker Types
Different sticker types react differently to removal methods. Understanding the sticker’s composition (e.g., adhesive type, material) is essential to selecting the right approach. For instance, a vinyl sticker may require a different technique than a paper sticker. Carefully inspecting the sticker before attempting removal helps in choosing the most effective strategy.
Dealing with Stubborn Adhesive
Some adhesives are notoriously difficult to remove. This often requires a multi-step approach. For example, applying a solvent-based adhesive remover (like Goo Gone or similar) directly to the adhesive, allowing it to soften and loosen the bond, is a common solution. Following this, scraping or using a specialized tool to lift the sticker can be necessary.
Protecting the Wood Surface
It’s important to protect the underlying wood during removal. Using protective coverings (like plastic sheeting or tape) can prevent scratching or marring. Careful handling of tools and the application of pressure are crucial to avoid damaging the wood grain. This step is critical for maintaining the wood’s original beauty.
Troubleshooting Table
| Potential Issue |
Cause |
Remedy |
| Sticker residue remains |
Inadequate adhesive removal or improper scraping |
Apply a suitable adhesive remover, allow it to sit for a few minutes, and gently scrape or use a specialized tool to lift the sticker. |
| Wood surface damage (scratches, gouges) |
Using too much pressure when scraping, improper tool selection, or inadequate surface protection |
Reduce pressure, use a different tool (e.g., a soft-edged plastic scraper), or apply a protective covering to the wood before removal. |
| Sticker tears or breaks during removal |
Incorrect removal method for the sticker type or excessive force applied |
Employ a gentler removal method, such as using a heat gun (for heat-activated adhesives) or a specialized sticker removal tool. Apply pressure gradually and strategically. |
| Solvent damage to the wood |
Improper solvent application or prolonged contact with the wood |
Use solvents sparingly and only on the adhesive. Avoid prolonged contact. If solvent does come into contact with the wood, immediately rinse the area with water and allow to dry completely. Consider using a solvent-resistant sealant after removal. |
Advanced Techniques and Examples
Tackling stubborn stickers and tricky wood types requires a bit more finesse. This section dives into advanced methods for removing even the most resilient adhesive residue, catering to different wood types and surface complexities. We’ll explore specialized tools and techniques for curved, irregular, and delicate areas, along with a detailed example of removing a challenging sticker from a wooden chair.
Specialized Tools for Complex Removal
Specialized tools can significantly simplify the removal process for stubborn or complex sticker situations. A variety of tools beyond the basic scraper and putty knife are essential. These tools enhance efficiency and minimize damage to the wood surface.
- Heat Gun or Hair Dryer: Applying controlled heat can soften the adhesive, making it easier to lift or scrape off. Be cautious not to overheat the wood, which can cause warping or discoloration, especially with delicate woods like pine or maple. Always use a low heat setting and monitor the wood closely.
- Rotary Tool with a Detail Attachment: This tool can be incredibly effective for removing stubborn residue from tight spaces, crevices, and corners, especially when a scraper or putty knife can’t reach. The variable speed and precision of a rotary tool are beneficial for such applications. Ensure the attachment is appropriate for the wood type to avoid scratching.
- Plastic Spatula or Serrated Knife: These tools can be used to gently pry stickers loose from intricate surfaces without damaging the wood. The flexibility and precision of a plastic spatula can help lift and peel sticker material away from tight spaces without causing damage.
Removing Stickers from Curved or Irregular Surfaces
Curved or irregular surfaces pose unique challenges. Direct scraping or prying can be difficult and may damage the surface. These methods provide a safe approach for such cases.
- Use of a Soft, Non-Abrasive Material: Apply a soft cloth or cotton swab to the curved area, saturated with the adhesive remover. This avoids unnecessary pressure and potential scratches on the surface. This method allows for careful and controlled application of the remover, especially on the curves.
- Gentle Lifting and Peeling: Work in small sections, using a soft tool like a plastic spatula or a soft cloth to gently lift the sticker, working along the curve. This technique is crucial to avoid scratching or damaging the wood surface. Be patient and methodical to prevent tearing the sticker material.
- Precise Application of Adhesive Remover: Carefully apply adhesive remover only to the sticker, avoiding contact with the surrounding wood. This method focuses on targeting the adhesive without compromising the integrity of the wood itself.
Removing a Complex Sticker from a Wooden Chair Armrest: A Detailed Example
Consider a large, stubborn sticker stuck to a curved wooden chair armrest. The sticker is difficult to remove by hand and has a strong adhesive.
- Preparation: Apply a suitable adhesive remover, such as Goo Gone or a citrus-based solvent, to the sticker. Allow the remover to soak into the adhesive for a few minutes. Monitor the wood carefully for any signs of damage from the remover.
- Controlled Heat: Use a low heat setting from a heat gun or hair dryer, keeping the distance to the surface adequate to prevent damage to the wood. Avoid direct contact. This method gently softens the adhesive and loosens it from the wood surface.
- Gentle Removal: Using a soft plastic spatula, gently lift and peel away the sticker in small sections. Work along the curve, applying pressure only where needed to avoid damage. If necessary, reapply remover to stubborn areas.
- Final Steps: After the sticker is removed, wipe the armrest with a clean, damp cloth to remove any residue. Allow the wood to dry completely before applying any protective finish.
Last Word
Removing stickers from wood can seem daunting, but this guide has armed you with the knowledge and techniques to tackle any sticker situation. We’ve covered everything from initial assessments to advanced procedures, emphasizing safety and preservation of your wooden surfaces. By following these steps, you can confidently remove stickers and restore your wood to its pristine condition, ready for its next adventure.