Measure the Length x Width x Height of Shipping Boxes is crucial for efficient and accurate shipping. Understanding dimensions ensures packages arrive safely and on time, minimizing errors and costs. This guide will delve into everything from defining dimensions and measuring techniques to the importance of accurate measurements and calculating volume, providing a complete toolkit for any shipping professional or enthusiast.
We’ll explore various box shapes, from rectangular to irregular, and discuss essential tools and techniques. Learn how to measure accurately, avoid common pitfalls, and document your measurements effectively. We’ll also examine the impact of inaccurate measurements on shipping costs, efficiency, and safety. This detailed approach will empower you to master the art of precise shipping box measurement.
Defining Dimensions
Shipping boxes come in all shapes and sizes, but knowing their dimensions is crucial for efficient and accurate shipping. Properly measured dimensions ensure the box fits the designated space, preventing damage during transit and ensuring smooth handling by carriers. Precise measurements are critical for calculating volume, weight, and shipping costs, leading to better planning and potentially saving money.Understanding the precise dimensions of a shipping box is essential.
This involves accurately measuring its length, width, and height. These measurements are not arbitrary; they dictate the space the box occupies and its capacity. Knowing these dimensions is crucial for several reasons, from optimizing storage to calculating shipping costs.
Length, Width, and Height Measurements
Length, width, and height are fundamental measurements for shipping boxes. Length is the longest dimension, typically measured from the front to the back. Width is the dimension measured from side to side, and height is the vertical dimension, usually measured from the bottom to the top. Accurate measurements are vital for ensuring compatibility with shipping containers, vehicles, and other handling equipment.
Importance of Precise Measurements
Precise measurements are critical for efficient and accurate shipping. Incorrect measurements can lead to delays, damage, or additional charges. For instance, a slightly oversized box might not fit into a designated compartment on a truck, necessitating repackaging or additional handling, leading to delays. Inaccurate dimensions can also result in miscalculations of volume, which in turn directly affects shipping costs.
Precise measurements minimize these issues and ensure smooth, cost-effective shipping.
Units of Measurement
Various units of measurement are used for box dimensions, such as inches, centimeters, and feet. Choosing the appropriate unit depends on the context and the specific requirements of the shipping process. The most common units are inches and centimeters.
Table of Measurement Conversion, Measure the Length x Width x Height of Shipping Boxes
| Unit | Abbreviation | Conversion to inches |
|---|---|---|
| Inches | in | 1 |
| Centimeters | cm | 0.3937 |
| Feet | ft | 12 |
The table above provides a concise comparison of common units and their conversion factors to inches. This conversion is useful for ensuring compatibility between different measurement systems and calculating dimensions in various units. For example, if a box has dimensions of 12 inches by 8 inches by 6 inches, it can also be expressed as 30.48 cm by 20.32 cm by 15.24 cm.
These equivalent measurements remain consistent with the original dimensions.
Measuring Techniques
Knowing the precise dimensions of shipping boxes is critical for efficient packing, accurate shipping costs, and preventing damage during transit. Proper measurement ensures that boxes fit their contents snugly, avoiding unnecessary space and potential issues. This section details various methods for accurate box measurement, focusing on tools and techniques for diverse box shapes and sizes.Accurate measurement is paramount in the shipping industry.
Inaccurate dimensions can lead to miscalculations in shipping costs, potentially impacting profitability. Precise measurements minimize the risk of damage during transit, safeguarding both the contents and the reputation of the shipping company.
Ruler Measurement
Precise measurements using a ruler are essential for determining box dimensions. A standard ruler, typically made of plastic or metal, is a fundamental tool for accurate measurements, particularly for smaller boxes or situations where greater precision is required.Using a ruler effectively involves placing it directly against the edge of the box, ensuring the ruler is perpendicular to the box’s surface.
Reading the measurement from the ruler scale requires careful alignment with the edge of the box. For instance, if measuring the width of a small box, align the ruler precisely along the width and read the corresponding value. This ensures that the measurement accurately reflects the true dimension of the box’s width. Measurements should be recorded with meticulous attention to detail.
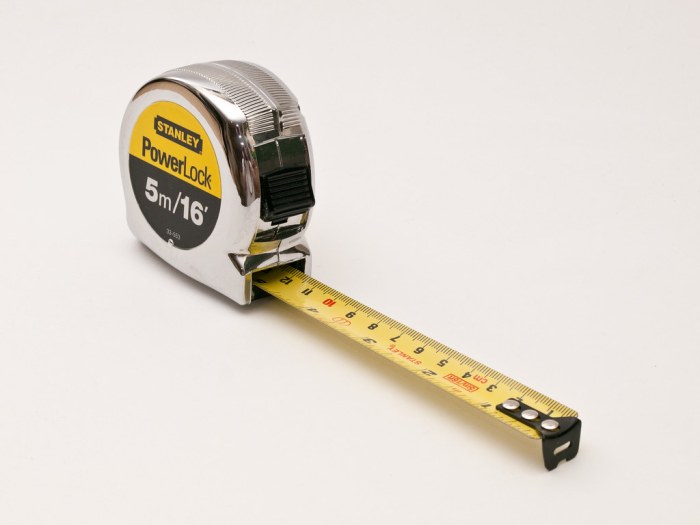
Tape Measure Measurement
A tape measure provides an alternative for measuring larger boxes. A flexible tape measure is a valuable tool for determining box dimensions, particularly when measuring longer or irregularly shaped boxes.Using a tape measure involves stretching the tape along the length of the box, ensuring the tape remains taut and perpendicular to the box’s surface. For curved surfaces, it’s crucial to ensure the tape is pressed firmly against the surface.
Carefully read the measurement indicated on the tape, noting the value precisely. For instance, when measuring the length of a large cardboard box, carefully align the tape measure to the box’s length, making sure the tape measure is firmly in contact with the box’s surface. Record the measurement precisely.
Other Measuring Tools
Other specialized tools like calipers or digital measuring devices may be used, particularly in situations requiring high precision. These tools are particularly useful for intricate shapes or complex dimensions. Using calipers involves precisely placing the measuring jaws on the opposing edges of the box. The measurement is displayed on the digital device, offering a precise reading.
Common Mistakes to Avoid
Avoiding errors in measurement is crucial for accurate results. Improper use of measuring tools can lead to discrepancies. One common mistake is not ensuring the ruler or tape measure is perpendicular to the box’s surface, leading to inaccurate measurements.Another frequent error is not reading the measurement accurately, either due to parallax error or insufficient attention to detail. Using different tools to measure the same box in different ways can result in discrepancies in the measurement.
It’s vital to maintain consistency in measurement techniques to obtain accurate results.
- Ensure the measuring tool is perpendicular to the box’s surface.
- Read the measurement from the ruler or tape measure accurately.
- Use the same technique consistently for repeated measurements of the same box.
- Take multiple measurements to identify and correct potential errors.
Measuring Different Box Shapes
Measuring boxes with various shapes requires specific techniques. Different box shapes, such as rectangular, cylindrical, or irregular shapes, necessitate different measuring approaches. Understanding these approaches ensures accurate dimensions for all types of shipping boxes.For rectangular boxes, measure the length, width, and height along the respective edges. For cylindrical boxes, measure the diameter and height. For irregular shapes, use multiple measurements along various edges to accurately capture the dimensions.
Importance of Accurate Measurements
Getting the dimensions of your shipping boxes right is crucial for smooth and efficient operations. Inaccurate measurements can lead to a cascade of problems, impacting everything from shipping costs to package safety and even customer satisfaction. This section dives into the significant consequences of inaccurate measurements in the shipping process.Accurate measurements are paramount in ensuring a seamless shipping experience.
They directly influence the cost, efficiency, safety, and security of packages throughout their journey. Ignoring this aspect can result in substantial financial losses and potential reputational damage for businesses.
Consequences of Inaccurate Measurements in Shipping
Inaccurate measurements can trigger a chain reaction of issues, affecting various aspects of the shipping process. Incorrect dimensions often lead to miscalculations in shipping costs, impacting profitability. This can be especially problematic for businesses with high volume shipments, where even small discrepancies can accumulate into considerable losses.
Impact on Shipping Costs and Efficiency
Incorrect dimensions result in inaccurate shipping rates. If the dimensions are underestimated, the shipping carrier might charge less than the actual volume of the package. However, if the dimensions are overestimated, the shipping carrier might charge more than necessary. Either way, this leads to unexpected and potentially unfavorable outcomes. This also impacts the efficiency of the shipping process.
The wrong dimensions can lead to misallocation of resources, delays in processing, and logistical inefficiencies.
Impact on Package Safety and Security
Package safety and security are paramount during transit. Inaccurate measurements can compromise the structural integrity of the packaging. If the box is too small, the contents might shift or get damaged during transit. If the box is too large, the contents may not be adequately secured, resulting in damage or even loss. This can lead to claims and compensation disputes with the carrier.
Examples of Scenarios Where Incorrect Measurements Lead to Problems
- A company underestimates the dimensions of a fragile electronic device, leading to damage during transit. This results in costly repairs or replacements, along with potential customer dissatisfaction.
- A retailer overestimates the dimensions of a shipment, resulting in higher shipping costs than anticipated. This could significantly impact the retailer’s profit margin.
- A manufacturer sends a product in a box that is too small for its contents, leading to damage. This can cause product defects, delays in production, and negatively impact customer satisfaction. The package might even get rejected by the carrier due to exceeding size or weight limits.
- A shipping carrier mistakenly classifies a package based on incorrect dimensions, potentially leading to misrouting or incorrect handling procedures. This can result in delays and potentially lost packages.
Measuring Different Box Types
Shipping boxes come in various shapes and sizes, from simple rectangular boxes to intricate custom-designed ones with cutouts and unique features. Accurately measuring these diverse box types is crucial for proper inventory management, efficient packing, and ensuring accurate shipping costs. This section delves into the specifics of measuring different box types, highlighting the challenges and solutions.
Measuring Rectangular Boxes
Rectangular boxes are the most common type. Measuring these boxes is straightforward. Use a ruler or measuring tape to precisely determine the length, width, and height of the box. Ensure the measurements are taken at the widest and longest points of the box’s sides. Take multiple measurements to ensure accuracy and minimize errors.
For example, measure the length along the top and bottom edges, and the width along the sides, to confirm the dimensions.
Measuring Irregular Boxes
Irregularly shaped boxes pose a greater challenge due to their non-standard geometry. Directly applying standard ruler methods is not effective for determining dimensions of complex shapes. Several techniques can be used to measure these boxes.
Measuring Boxes with Cutouts and Complex Features
Boxes with cutouts or complex features require careful consideration. Measure the external dimensions of the box, taking into account the furthest points from the box’s edges. To determine the internal dimensions, consider the space within the cutout or feature and account for any limitations it imposes on the items to be placed inside. For example, a box with a triangular cutout at one end requires measuring the external length, width, and height of the entire box, and separately determining the internal dimensions, taking into account the cutout.
Measuring Custom Boxes
Custom boxes often have unique shapes and dimensions. For precise measurements, use a combination of techniques. A combination of digital calipers, measuring tapes, and a digital camera may be necessary. Use a digital caliper for precise measurements of interior dimensions, and use a measuring tape to measure the external dimensions. If the box is too large for a measuring tape, use multiple measurements.
Employing a camera and image editing software can be helpful in creating a detailed model for a custom-designed box to accurately measure the box’s complex dimensions.
Challenges in Measuring Irregularly Shaped Boxes
Measuring irregularly shaped boxes presents several challenges. The lack of standard dimensions makes it difficult to obtain accurate measurements. Finding the widest and longest points on irregular shapes requires meticulous attention to detail. There may be multiple points on a box that could be considered the “widest” or “longest.” Ensuring consistent and reliable measurements becomes increasingly important as the shape deviates from the standard rectangular format.
Employing several measurement points can help ensure consistency.
Overcoming Difficulties in Measuring Non-Standard Boxes
To overcome the difficulties in measuring non-standard boxes, employ several techniques. First, carefully examine the box’s features to understand the limitations of standard measuring tools. Use a combination of methods for complex shapes, like employing digital calipers for precise measurements and measuring tapes for external dimensions. Consider using specialized measuring equipment, such as 3D scanners, if the box’s shape is very irregular.
For example, a custom-designed box with multiple curves and cutouts can be accurately measured using a 3D scanner to create a digital model for determining its dimensions.
Documentation and Record Keeping

Keeping meticulous records of shipping box dimensions is crucial for optimizing your logistics and maintaining efficiency. Accurate measurements are the bedrock of proper inventory management, cost control, and ultimately, customer satisfaction. Knowing the exact size of your shipping containers allows for precise packing, efficient space utilization, and accurate shipping calculations. A robust system for documenting these measurements saves time and resources in the long run.Accurate record keeping isn’t just about avoiding mistakes; it’s about proactive problem-solving.
Identifying patterns in dimensions, for example, can highlight opportunities to improve packing efficiency or reduce material waste. A well-maintained database can also help anticipate future shipping needs, enabling you to plan ahead and optimize your supply chain.
Shipping Box Dimension Recording Template
A well-structured template is essential for standardizing data collection and ensuring consistency. This ensures that the recorded information is readily usable and helps maintain a standardized approach to measuring and documenting shipping box dimensions.
| Date | Box ID | Length (cm) | Width (cm) | Height (cm) | Volume (cm³) | Material | Notes |
|---|---|---|---|---|---|---|---|
| 2024-10-27 | SBX-001 | 30 | 20 | 15 | 9000 | Cardboard | Fragile items |
| 2024-10-27 | SBX-002 | 40 | 30 | 25 | 30000 | Cardboard | Heavy items |
This template allows for easy tracking of various attributes. A unique box ID helps in quickly identifying and retrieving specific dimensions. Including the volume calculation streamlines the process, and notes provide space for adding additional context (e.g., fragile contents, special handling requirements). The “Material” column is crucial for inventory control and for ensuring the right packaging is used.
Database Management for Future Reference
Maintaining a database of shipping box measurements is crucial for future reference. This ensures that the data is readily available and can be used for various purposes, from optimizing packing processes to calculating shipping costs accurately. A well-organized database enables quick retrieval of specific information, allowing for efficient and accurate calculations.A database can be implemented using spreadsheet software (like Excel or Google Sheets) or dedicated database management systems.
Spreadsheet software is often a simpler solution for smaller businesses, while dedicated systems are more robust for larger volumes of data. The structure of the database should mirror the template, ensuring consistent data entry and retrieval.
Checklist for Accurate Recording
A checklist helps to ensure that all necessary steps are followed when recording shipping box dimensions. This approach is vital for maintaining consistency in the recording process. The checklist should cover all critical aspects of the process.
- Verify Box ID: Ensure a unique and consistent ID is assigned to each box. This aids in traceability.
- Precise Measurement: Use accurate measuring tools, ensuring precise measurements are recorded. This will avoid any calculation errors or discrepancies.
- Record All Dimensions: All three dimensions (length, width, height) should be recorded.
- Calculate Volume: Calculate the volume of the box using the formula Length x Width x Height.
- Add Notes: Use the notes column to record any specific information, such as fragile items, special handling requirements, or material type.
- Review and Validate: Double-check the accuracy of the recorded data before saving it. This prevents any inaccuracies from propagating through the system.
Tools and Equipment
Choosing the right tools for measuring shipping box dimensions is crucial for accuracy and efficiency. Incorrect measurements can lead to costly errors in inventory management, packaging, and shipping costs. Selecting appropriate tools ensures that your measurements are precise and reliable, minimizing potential issues during the entire shipping process.
Essential Tools and Equipment
Accurate measurement is paramount for efficient packaging and shipping operations. Having the right tools allows for consistent and reliable dimensions, which are fundamental for inventory management, order fulfillment, and preventing costly errors. A well-equipped toolkit ensures your business maintains a smooth and efficient operation.
- Rulers: Rulers, particularly those made of metal or hard plastic, are ideal for precise measurements of straight lines. Their rigid construction minimizes flex or distortion when measuring. Commonly available in various lengths and scales, rulers are inexpensive and reliable for straightforward measurements. A variety of units, such as inches and centimeters, can be found on a single ruler, making it convenient for international shipping.
- Tape Measures: Tape measures, often metal or fabric-based, offer a practical way to measure longer lengths or curved surfaces. The flexible nature of tape measures allows for adaptability to irregular shapes and dimensions. The ease of use and portability make them an essential tool for quick on-site measurements. However, the flexibility can lead to inaccuracies if not used carefully.
The quality of the tape itself can affect accuracy; more expensive tapes are often less prone to stretching or bending.
- Digital Calipers: Digital calipers are precise measuring tools for internal and external dimensions. Their digital display provides instant readings, eliminating the need for manual conversions or estimations. They are particularly useful for measuring the depth, width, and height of irregularly shaped boxes. Their accuracy and repeatability are beneficial for high-volume operations, ensuring consistent measurements across different batches.
- Micrometers: Micrometers are highly precise measuring tools, especially useful for measuring very small distances. They are commonly used in industrial settings for extremely precise measurements, where a fraction of a millimeter matters. The need for micrometers depends on the level of precision required. While offering unparalleled accuracy, they are typically more expensive and require more training to operate effectively.
Advantages and Disadvantages of Measuring Tools
The choice of measuring tool significantly impacts the accuracy and efficiency of the measurement process. Different tools cater to various needs and levels of precision. Understanding the advantages and disadvantages of each tool is critical for selecting the most appropriate option for your specific needs.
Figuring out the length, width, and height of shipping boxes is crucial for accurate packing and shipping costs. While I’m currently wrestling with these dimensions, I’ve been enjoying the new Avalanches track, “Frankie Sinatra,” featuring MF Doom and Danny Brown. It’s a total banger, reminding me why I need to get back to measuring those boxes for optimal efficiency.
the avalanches return with new song frankie sinatra featuring mf doom and danny brown listen Hopefully, I’ll have the measurements finalized soon. Perfecting these calculations will save me time and potentially money in the long run.
- Rulers: Advantages include low cost and high accuracy for straight lines. Disadvantages include limited measuring range and difficulty for curved or irregular shapes.
- Tape Measures: Advantages include portability and versatility for various shapes and sizes. Disadvantages include potential inaccuracies due to stretching or bending and less accuracy compared to digital tools.
- Digital Calipers: Advantages include high accuracy, instant readings, and suitability for internal and external dimensions. Disadvantages include a higher cost compared to rulers or tape measures and potential for damage if not handled carefully.
- Micrometers: Advantages include the highest accuracy for very small measurements. Disadvantages include a high cost, need for specialized training, and limited use cases compared to other tools.
Accuracy and Precision of Measuring Tools
The accuracy and precision of measuring tools directly impact the quality of your measurements. Accuracy refers to how close a measurement is to the true value, while precision refers to the consistency and repeatability of measurements. Using tools with appropriate accuracy and precision is critical for reliable results.
Figuring out the length, width, and height of shipping boxes is crucial for accurate packing and efficient shipping. It’s a surprisingly complex process, especially when you consider the intricate details of something like puce mary night is a trap ii , which often involves calculating these dimensions in unique and unexpected ways. Ultimately, precise measurements are key for avoiding shipping mishaps and ensuring everything arrives safely at its destination.
Comparison of Measuring Tools
This table compares the accuracy and cost of various measuring tools:
| Tool | Accuracy | Cost |
|---|---|---|
| Ruler | High | Low |
| Tape Measure | Medium | Medium |
| Digital Calipers | High | Medium-High |
Special Considerations
Packing dimensions are crucial for shipping, but often overlooked is the impact of the packaging material itself. Understanding how different materials affect measurements is vital for accurate quoting and efficient logistics. This section delves into the nuances of measuring boxes with varying thicknesses and fragility considerations.
Impact of Packaging Material Thickness
The thickness of the packaging material directly influences the overall dimensions of a shipping box. Ignoring this can lead to discrepancies in calculations and potential issues during shipping. This is particularly important when dealing with custom boxes or when comparing different packaging options.
Figuring out the length, width, and height of shipping boxes is crucial for accurate packing and shipping, especially when dealing with fragile items. It’s all about precision, and knowing those dimensions is key for avoiding damage. While I’m pondering these important details, I can’t help but be excited about Bruce Springsteen’s new album release bruce springsteen unveils new album.
It’s going to be a great listen, no doubt, but for now, I need to get back to measuring these boxes and ensuring everything fits perfectly.
- Different materials exhibit varying thicknesses. Cardboard, for instance, can vary significantly in thickness depending on the grade and construction. Similarly, corrugated cardboard comes in various flute styles, each with its own impact on the final dimensions.
- Corrugated boxes often have a significant thickness variation. A single-wall corrugated box will have a smaller thickness than a double-wall or triple-wall version. This difference is crucial when determining the actual dimensions of the box.
- Packaging materials with different densities, such as foam or plastic, will have noticeable effects on the box dimensions. A rigid plastic box will measure differently than a flexible plastic box.
Measuring Boxes with Varying Materials
Accurate measurement of boxes with different materials requires a systematic approach. Here’s how to account for the material thickness:
- Identify the material type. Knowing the type of cardboard, plastic, or other material used is the first step in accounting for its thickness.
- Determine the material’s thickness. Use a caliper or a micrometer to measure the thickness of the material directly. Record the measurements for each layer if applicable.
- Measure the outer dimensions of the box. Using a tape measure or a digital caliper, measure the length, width, and height of the box from the outside. Record these measurements accurately.
- Account for the material thickness. Add the material thickness to the outer dimensions to arrive at the net interior dimensions. For example, if the cardboard is 0.5 cm thick, and the outside length is 25 cm, the inner length is 24.5 cm. This will be critical in determining volume for shipping purposes and for ensuring that the contents fit properly within the box.
Fragile Contents and Special Handling
When shipping items with fragile contents, extra considerations are necessary to ensure their safety during transit.
- Boxes designed for fragile items often have special cushioning or protective layers. When measuring, be sure to include the thickness of these materials. This is critical for proper fitment within the box and the overall protection of the contents.
- Proper cushioning materials are essential for preventing damage. Different cushioning materials will have varying thicknesses, influencing the final dimensions of the box.
- Use appropriate padding. Proper cushioning and padding materials, like bubble wrap, packing peanuts, or foam sheets, are essential for preventing damage to fragile items. Ensure to include the padding thickness in your measurements to avoid underestimating the final dimensions.
- Consider the potential for damage during handling and transport. Fragile items are more prone to damage during transit. Therefore, extra care should be taken during measurement to ensure the box and cushioning material are adequate for protection.
Calculating Volume
Knowing the volume of a shipping box is crucial for efficient packaging and cost estimation. It helps determine the amount of space a package occupies, enabling better use of transport capacity and preventing over-packing or under-utilization. This is particularly important for businesses handling large volumes of shipments, where accurate calculations can significantly impact logistical efficiency and profitability.
Calculating Volume of a Rectangular Prism
The volume of a rectangular prism, which is the shape of most shipping boxes, is calculated by multiplying its length, width, and height. This simple formula allows for quick and precise volume determination, enabling better planning and resource management.
Formula for Calculating Volume
Volume = Length × Width × Height
This fundamental formula is universally applicable to all rectangular prisms. Understanding and applying this formula correctly ensures accurate volume estimations for any shipping box.
Examples of Calculating Volume
| Box Dimensions (cm) | Volume (cm³) |
|---|---|
| Length: 20, Width: 15, Height: 10 | 3000 |
| Length: 30, Width: 25, Height: 20 | 15000 |
| Length: 40, Width: 20, Height: 15 | 12000 |
These examples demonstrate the direct relationship between dimensions and volume. Accurate measurements are paramount to obtaining precise volume calculations.
Step-by-Step Calculation Guide
- Identify the length, width, and height of the shipping box. These measurements should be obtained with precision using appropriate tools, ensuring accurate data input for calculation.
- Use a calculator or spreadsheet program. Enter the values of length, width, and height into the calculator or spreadsheet.
- Multiply the length by the width, then multiply the result by the height. This calculation yields the volume in the appropriate cubic units (e.g., cubic centimeters, cubic inches). Consistency in units is crucial for accurate results.
- Record the calculated volume. This value should be documented for future reference and tracking purposes.
Using these steps, one can effectively determine the volume of a shipping box, providing essential data for logistics and cost optimization. By understanding the steps, any individual can confidently calculate the volume of various shipping box types.
Troubleshooting

Accurately measuring shipping box dimensions is crucial for efficient logistics and preventing costly errors. Understanding potential problems and their solutions is essential for maintaining precision in your measurements. This section details common issues and effective strategies to resolve them, ensuring accurate data for shipping calculations and inventory management.
Common Measurement Errors
Accurate measurements are fundamental to successful shipping operations. Several factors can lead to inaccurate readings, affecting the efficiency and cost-effectiveness of the process. Understanding these potential errors and how to avoid them is vital for maintaining precision.
- Incorrect Placement of the Measuring Tool: Improper positioning of the ruler or tape measure can lead to inaccurate readings. For instance, if a ruler isn’t placed perpendicular to the edge of the box, the measurement will be incorrect. Ensuring the measuring tool is correctly aligned with the box’s edge is critical for obtaining precise measurements.
- Parallax Error: This occurs when the measuring device isn’t held directly in line with the box’s edge. Viewing the measurement from an angle can introduce an error in the reading. Maintaining a direct line of sight with the measuring tool and the box’s edge is essential to minimize this error.
- Box Irregularities: Boxes aren’t always perfectly uniform. Uneven surfaces, bumps, or corners can make precise measurements difficult. Carefully inspecting the box for these irregularities and using a consistent method for measuring across different points can help minimize the effect of these irregularities.
- Inaccurate Measuring Tools: A worn or damaged ruler or tape measure can yield inaccurate readings. Regularly inspecting and calibrating measuring tools is essential to ensure their accuracy. Using a high-quality, calibrated measuring tool will significantly improve measurement precision.
Resolving Measurement Discrepancies
Discrepancies in measurements can arise from various sources. Developing effective strategies for resolving these discrepancies is essential to maintain accuracy and avoid errors in shipping calculations.
- Multiple Measurements: To ensure accuracy, take multiple measurements of each dimension from different points on the box. Averaging these measurements can provide a more accurate representation of the box’s dimensions. This method helps mitigate errors from irregularities in the box’s surface or corners.
- Using Multiple Measuring Tools: Employing different measuring tools, such as a ruler and a tape measure, can offer a cross-verification method. Comparing readings from multiple tools can identify inconsistencies and confirm the accuracy of the measurements.
- Checking for Calibration: Verify the accuracy of your measuring tools. Use a known standard, such as a calibrated ruler, to ensure the tool is functioning correctly. A calibration process can identify and correct any inaccuracies in the measuring tools.
- Visual Inspection: Carefully inspect the box for any imperfections that might affect the measurement. Addressing these imperfections before taking measurements can improve accuracy.
Using Tools for Accurate Assessments
Choosing the right tools and understanding how to use them effectively is vital for achieving precise measurements. Utilizing proper techniques with the available tools ensures the accuracy of the measurements.
- Digital Calipers: These tools offer highly precise measurements, particularly useful for irregular shapes or tight spaces. The digital display eliminates the need for manual estimations and provides an accurate representation of the dimensions.
- Laser Measuring Tools: Laser measuring tools are equipped with advanced technologies, providing accurate readings without the need for direct contact. The laser beam’s precision helps eliminate errors associated with parallax and improper placement.
- Vernier Calipers: These tools are precise and offer a high level of accuracy. The Vernier scale on these calipers allows for fractions of a millimeter or a fraction of an inch, improving the precision of the measurement.
Last Recap: Measure The Length X Width X Height Of Shipping Boxes
In conclusion, accurately measuring shipping boxes is paramount to smooth operations and successful deliveries. This guide has provided a comprehensive overview of the entire process, from defining dimensions to calculating volume, emphasizing the importance of precision and documentation. By mastering these techniques, you can streamline your shipping procedures, reduce errors, and ultimately, ensure that your packages reach their destinations safely and efficiently.