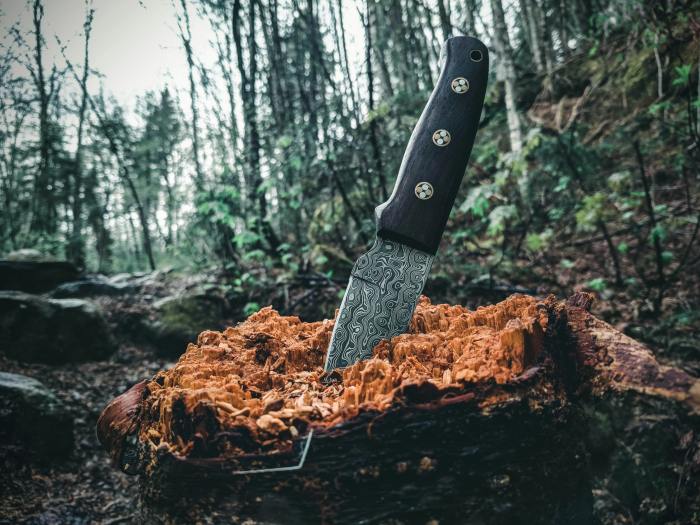
Create Fire With a Magnifying Glass: Uncover the fascinating science and history behind starting a fire with this simple tool. From understanding the fundamental physics of focusing sunlight to mastering the crucial safety precautions, this guide delves into every aspect of fire creation using a magnifying glass. We’ll explore different types of magnifying glasses, suitable materials, and essential techniques, ensuring you have the knowledge to ignite a fire safely and effectively.
This comprehensive guide will walk you through the entire process, from gathering the necessary materials to safely handling flammable substances. You’ll learn about different tinder types, ignition points, and ideal conditions for success, all presented in an easy-to-follow format. We’ll also examine the environmental impact and discuss sustainable practices, along with alternatives to magnifying glass fire starting.
Introduction to Fire Starting with a Magnifying Glass
A magnifying glass, a simple yet powerful tool, can be used to start a fire by concentrating sunlight. This method relies on the principle of focusing light rays to a single point, generating intense heat sufficient to ignite tinder. It’s a fascinating demonstration of how concentrated energy can overcome the relatively low temperatures of ambient sunlight.The ability to harness sunlight for fire-starting dates back to antiquity, highlighting its enduring relevance in survival and practical applications.
Focusing a magnifying glass to create fire is a cool science trick, but have you heard how well neko case does the Squidbillies theme song? neko case does the squidbillies theme song is surprisingly catchy, and honestly, it made me think of how much concentrated sunlight you need for the fire trick to work. It’s all about harnessing that focused energy, just like a great cover.
Back to the fire, though – it’s amazing how nature’s power can be so easily manipulated with a bit of skill!
Understanding the scientific principles behind this technique is crucial for safe and effective use. It’s important to remember that safety precautions are paramount when handling this method, especially in the presence of flammable materials.
Fundamental Scientific Principles
Focusing sunlight to generate heat is based on the laws of optics. A magnifying glass, essentially a convex lens, bends incoming light rays to converge at a specific point called the focal point. The closer the object is to the lens, the smaller the focal length becomes, and the greater the intensity of the concentrated light. The intensity of the heat generated at the focal point is directly proportional to the concentration of light.
This concentrated heat is the critical factor for igniting flammable materials.
The focal length of a magnifying glass is the distance between the lens and the point where parallel light rays converge.
Historical Context
Throughout history, magnifying glasses have played a crucial role in fire starting, particularly in environments where other methods were unavailable or less efficient. Early civilizations likely utilized natural lenses, such as polished stones or clear crystals, for this purpose. The development of glass-making techniques further refined this practice, leading to more efficient and controlled fire starting.
Safety Precautions, Create Fire With a Magnifying Glass
When using a magnifying glass to start a fire, stringent safety measures are paramount. Never aim the magnifying glass at anything other than the tinder. Ensure that the area is clear of any flammable materials or potential obstructions. Always supervise the process to prevent unintended fires. Work in an open area with minimal wind, and never leave the magnifying glass unattended while focusing sunlight on a flammable material.
Types of Magnifying Glasses
Different magnifying glasses are designed for various purposes. Their focal length, the distance at which parallel light rays converge, significantly influences their effectiveness in focusing sunlight. The table below Artikels different types of magnifying glasses, their focal lengths, and suggested uses.
| Magnifying Glass Type | Focal Length (cm) | Suggested Use | Notes |
|---|---|---|---|
| Handheld Pocket Magnifier | 5-10 | Starting small fires, detailed observation | Compact and portable, ideal for beginners. |
| Reading Magnifier | 10-20 | Detailed examination of small objects, starting medium fires | Generally larger than pocket magnifiers, allowing for more focused light. |
| Astronomy Magnifier | 20-40 | Starting larger fires, observing celestial objects | Often larger and heavier, ideal for more intense sunlight concentration. |
| Large-Area Magnifier | 40+ | Starting large fires, solar experiments | Can produce significant heat, use with caution and appropriate safety measures. |
Necessary Materials and Tools
Harnessing the power of the sun to ignite a fire requires a delicate balance of materials and careful preparation. This meticulous process, while seemingly simple, relies on understanding the specific properties of each component to ensure a successful outcome. The right combination of tinder, kindling, and fuel, along with the proper sunlight conditions, is crucial for a controlled and sustainable fire.The journey from sunlight to flame begins with a precise selection of materials.
Each element plays a unique role, contributing to the overall efficiency and safety of the fire-starting process. The key lies in understanding the characteristics of each material and how they interact with each other and the environment.
Essential Materials
A successful fire needs three fundamental components: tinder, kindling, and fuel. Tinder is the highly flammable material that ignites first, kindling is progressively larger material that sustains the flame, and fuel is the primary source of heat and combustion that sustains the fire. The appropriate choice of these materials is essential for maintaining a stable fire.
Flammable Materials
Selecting the right flammable materials is critical for a successful fire. Dry materials are key. Moisture significantly reduces a material’s flammability. For example, damp leaves will not catch fire as easily as dry ones. This is due to the water content hindering the chemical reaction required for combustion.
Ideally, the materials should be free from moisture and easily ignited.
Tinder and Kindling Types
Choosing the correct tinder and kindling is crucial for initiating and sustaining a fire. Different types have varying ignition points and characteristics, influencing the ease of ignition. These materials should be readily available and easily accessible.
- Tinder: This highly flammable material, such as cotton balls, dryer lint, birch bark, or char cloth, catches fire quickly. The smaller the tinder, the faster it will ignite, leading to a quicker start for the fire. The material’s ability to readily absorb heat and ignite is a critical factor in successful fire starting.
- Kindling: The next stage involves progressively larger pieces of wood. These materials, such as small twigs and branches, sustain the flame and gradually transfer heat to larger pieces of fuel. The size and dryness of the kindling play a vital role in the longevity of the fire. Gradually increasing the size of the kindling helps to keep the fire going, and maintain a steady burning process.
Ideal Fire Conditions
Optimal conditions for a successful fire include ample sunlight, a wind-free environment, and dry materials. The intensity and duration of sunlight directly affect the fire’s ignition and sustainability. Strong winds can easily extinguish the fire. The absence of wind is essential for preventing the fire from spreading uncontrollably.
Tinder Comparison Table
| Tinder Type | Ignition Point (°C) | Advantages | Disadvantages |
|---|---|---|---|
| Cotton Balls | ~200 | Readily available, easy to ignite | Can be easily extinguished if not properly managed |
| Dryer Lint | ~220 | Abundant in most homes, low cost | Can be less reliable than other tinder types |
| Birch Bark | ~250 | Naturally occurring, relatively easy to find in the right conditions | Requires careful selection for dryness |
| Char Cloth | ~280 | Durable, reusable, ignites quickly | Can be more expensive than other options |
Methods and Procedures
Mastering the art of fire starting with a magnifying glass requires precision and practice. Understanding the fundamental principles of focusing sunlight and manipulating the tinder are crucial for success. This section details the precise techniques and procedures necessary to achieve a controlled and efficient fire.
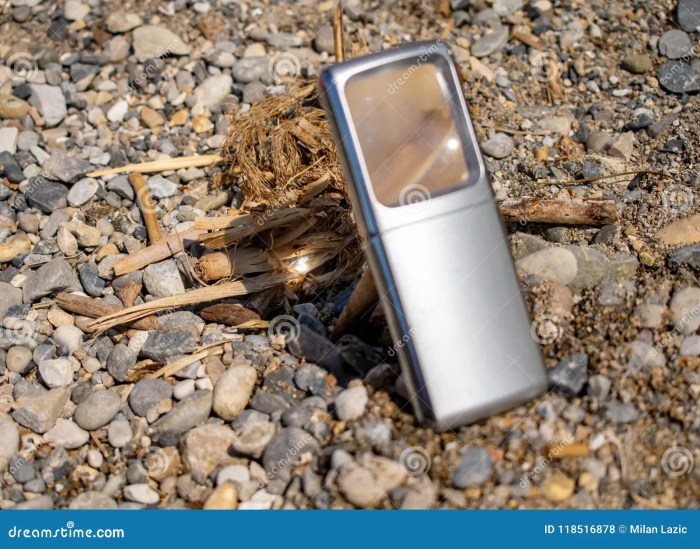
Focusing Sunlight with a Magnifying Glass
Proper focusing is paramount. The magnifying glass should be held at a consistent distance from the tinder, positioned to concentrate the sun’s rays into a small, intense beam. The ideal position is slightly adjustable, depending on the angle of the sun and the specific magnifying glass used. Experimentation is key to finding the optimal focal point.
Step-by-Step Fire Starting Procedure
Creating a fire with a magnifying glass involves a methodical approach. The following steps Artikel the procedure, ensuring a successful outcome.
- Gather Dry Tinder: Begin by collecting readily ignitable materials like dry grass, cotton balls, or shredded paper. These materials must be exceptionally dry to ignite quickly and efficiently. Moisture significantly hinders the process.
- Prepare the Surface: Choose a clear, level surface free of debris. This allows for consistent sunlight and a stable platform for the tinder.
- Position the Magnifying Glass: Hold the magnifying glass at the appropriate distance from the tinder. Adjust the angle to maximize sunlight concentration. The ideal focal point is a small, intensely hot spot on the tinder.
- Focus the Rays: Slowly adjust the position of the magnifying glass until a small, intense spot forms on the tinder. The spot should appear extremely concentrated and bright. This is the key to igniting the tinder.
- Maintain Consistent Focus: Once the focal point is achieved, maintain a consistent position. Slight movements can significantly reduce the intensity of the beam and hinder the ignition process.
- Apply Gentle Pressure (Optional): For some materials, gently pressing the magnifying glass against the tinder can enhance the heat concentration.
- Observe and Ignite: Continuously observe the tinder. When the tinder begins to smolder, gently blow on it to help it catch. This will help it ignite more rapidly.
- Maintain the Fire: Once the tinder ignites, carefully add kindling and fuel to support the growing flames. Gradually increase the size of the fuel as the fire becomes established.
Adjusting Magnifying Glass and Tinder Position
The position of both the magnifying glass and the tinder plays a critical role in successful fire starting. Precise adjustments are necessary to maintain focus and optimize heat concentration.
- Magnifying Glass Position: Adjusting the distance and angle of the magnifying glass is essential for maintaining the focal point on the tinder. Slight changes in position can significantly impact the intensity of the focused light.
- Tinder Position: Ensure the tinder is positioned directly beneath the focused light. The position should be stable and free from obstructions to maximize the heat concentration.
Procedural Flow Chart
The following chart visually represents the steps involved in creating a fire using a magnifying glass.
| Step | Action |
|---|---|
| 1 | Gather dry tinder |
| 2 | Prepare a clear surface |
| 3 | Position magnifying glass |
| 4 | Focus sunlight on tinder |
| 5 | Maintain focus and observe |
| 6 | Ignite tinder |
| 7 | Add kindling and fuel |
Safety Considerations and Precautions: Create Fire With A Magnifying Glass

Starting a fire with a magnifying glass, while a fascinating demonstration of physics, requires meticulous attention to safety. Improper handling can lead to serious injury or property damage. Understanding the potential risks and adhering to safety protocols is crucial for a successful and safe experience.
Potential Hazards of Using a Magnifying Glass
The concentrated sunlight focused by a magnifying glass can quickly ignite flammable materials. This intense heat can cause burns, both to the user and to surrounding objects. Miscalculations in the positioning of the magnifying glass or the choice of materials can result in unexpected and uncontrolled fires. The rapid escalation of a fire started with a magnifying glass can lead to significant damage if not properly contained.
Importance of Supervision
Young children, in particular, require constant supervision when using a magnifying glass to start a fire. Their lack of experience with the potential dangers of concentrated sunlight and flammable materials can result in accidents. Adults should ensure proper handling techniques are followed, maintain a safe distance, and intervene promptly if necessary. Children should be taught the importance of caution and respect for fire.
Safe Handling of Flammable Materials
Before initiating the fire-starting process, carefully select materials that are appropriate for the task. Avoid using highly flammable materials that can quickly escalate the fire. Ensure the chosen materials are dry and well-ventilated. Consider the surrounding environment and potential wind conditions. Always have a designated area for the fire and keep it clear of any obstacles.
Importance of a Fire Extinguisher
Having a fire extinguisher readily available is crucial for mitigating potential hazards. A small fire can quickly escalate if not addressed promptly. A fire extinguisher allows for quick and effective intervention, preventing the fire from spreading and causing damage. The type of extinguisher used should be appropriate for the materials being used and the potential type of fire.
Emergency Procedures
A proactive approach to safety is paramount when dealing with fire. Always have a clear escape route and be aware of the surrounding environment. A well-defined plan for potential emergencies can significantly reduce the risk of accidents and injuries. Know how to use the fire extinguisher properly and where emergency contacts are located.
Table of Safety Considerations
| Potential Hazards | Preventive Measures | Emergency Procedures | Specific Examples |
|---|---|---|---|
| Burns from concentrated sunlight | Use a magnifying glass with appropriate safety features, maintain a safe distance, and use protective eyewear. | Immediately cool the affected area with cool water, seek medical attention if necessary. | Directly focusing sunlight on skin can cause severe burns. |
| Uncontrolled fire | Use appropriate, dry, and non-flammable materials. Maintain a clear area around the fire. Have a designated fire pit or area. | Immediately activate the fire alarm and/or notify emergency services. Contain the fire using a fire extinguisher, if safe to do so. | Improperly chosen materials or positioning of the magnifying glass can cause a fire to spread. |
| Risk to children | Constant supervision is required for children. Ensure they understand the potential dangers. Provide proper instruction and demonstrate safe handling procedures. | Follow emergency procedures for the age group, and immediately seek medical attention if necessary. | Children lack the experience and understanding of the risks associated with concentrated sunlight. |
| Damage to property | Select materials that will not ignite easily. Ensure the area is clear of flammable objects. Keep a safe distance from surrounding structures. | Notify emergency services immediately, and follow their instructions. | A fast-spreading fire can destroy homes or other structures. |
Environmental Impact and Sustainability
Harnessing the power of the sun to create fire offers a captivating glimpse into nature’s ingenuity. However, the environmental impact of any fire-starting method, including those using magnifying glasses, warrants careful consideration. Responsible practices are crucial to minimizing harm and promoting sustainability. This section delves into the environmental footprint of fire starting, examines sustainable methods, and highlights the importance of responsible fire management.Environmental Impact of Fire StartingFire, whether intentionally kindled or resulting from uncontrolled wildfires, has significant environmental consequences.
Uncontrolled burning releases greenhouse gases, including carbon dioxide, into the atmosphere, contributing to climate change. The impact extends to air and water quality, potentially affecting ecosystems and human health. Sustainable practices mitigate these impacts.
Sustainable Fire Starting Practices
Sustainable fire starting practices prioritize minimizing environmental harm. These practices encompass several key areas.
- Choosing the Right Location:
- Considering Weather Conditions:
- Using Natural Materials:
- Extinguishing the Fire Thoroughly:
Selecting a location with minimal vegetation or dry brush significantly reduces the risk of uncontrolled spread. Avoid areas near dry leaves, grasses, and overhanging branches. This proactive approach can prevent potential wildfires.
Wind conditions and humidity levels significantly impact fire spread. Conducting fire activities during calm weather or low humidity minimizes the risk of escalating into an uncontrollable blaze.
Using natural materials like twigs and leaves for kindling reduces the reliance on manufactured fuels, minimizing waste and preserving natural resources. This mindful approach respects the natural cycle.
Ensuring the complete extinguishing of the fire, using water or sand, prevents embers from reigniting dry vegetation and potentially starting a wildfire. Thorough extinguishing is essential to avoid the recurrence of accidental fires.
Impact of Wildfires
Wildfires, often ignited by human carelessness or natural phenomena, inflict substantial environmental damage. They decimate forests, releasing pollutants into the atmosphere, and impacting water quality. The loss of habitats and biodiversity is another devastating consequence.
Prevention of Wildfires
Wildfires can be prevented by adhering to local regulations and practicing responsible fire management. Avoiding the use of fire in high-risk areas during dry periods is crucial.
Ever tried creating fire with a magnifying glass? It’s a surprisingly simple, yet powerful demonstration of focusing energy. The sheer intensity of concentrating sunlight, though, is a reminder of the destructive power of focused force, which can be seen in the complexities of the world. Like that concentrated sunlight, the 50th anniversary collectors edition of “War the World is a Ghetto” war the world is a ghetto 50th anniversary collectors edition brings to light the enduring realities of conflict and social disparity.
Ultimately, mastering the small-scale power of focusing light, as with creating fire with a magnifying glass, is a lesson in harnessing energy responsibly.
Importance of Respecting Local Fire Regulations
Local fire regulations are established to mitigate wildfire risks. These regulations specify permissible times and locations for outdoor fires, as well as appropriate safety measures. Adhering to these regulations protects the community and environment.
Carbon Footprint Analysis of Fire Starting Methods
Various fire-starting methods yield different carbon footprints. Using a magnifying glass, for instance, is a low-emission method when compared to methods that rely on fossil fuels. This analysis considers the energy required for each method, as well as the emissions associated with the materials used.
- Magnifying Glass Method: This method relies on solar energy, thereby producing minimal emissions. The carbon footprint is negligible compared to other methods.
- Matches/Lighter Method: This method involves the combustion of materials like wood or gas, resulting in the release of greenhouse gases. The carbon footprint is significantly higher than that of the magnifying glass method.
- Chemical Fire Starters: The manufacturing and disposal of chemical fire starters have a carbon footprint. Their use, although convenient, has a greater environmental impact than the magnifying glass method.
Variations and Alternatives
Starting a fire with a magnifying glass is a fascinating and sometimes necessary skill. However, it’s crucial to understand that this method isn’t always the most practical or reliable option. This section explores various methods and considerations, highlighting both the advantages and disadvantages of using a magnifying glass compared to other, more conventional techniques.
Different Magnifying Glass Types
Magnifying glasses vary significantly in their focal length and magnifying power. A shorter focal length results in a stronger magnification, but also a smaller area of focused sunlight. Conversely, a longer focal length produces a larger concentrated area but less intense heat. The type of glass used can also influence the efficiency of focusing sunlight. Understanding these differences is key to selecting the right magnifying glass for a particular task.
For example, a larger magnifying glass might be more effective for starting a fire in very dry conditions, while a smaller, more powerful one could be crucial in a more challenging environment.
Alternative Fire Starting Methods
Beyond magnifying glass techniques, numerous reliable alternatives exist for initiating fires. Flint and steel, for instance, create sparks by striking a piece of flint against a steel object. This method requires a little more dexterity and skill, but it’s a valuable backup in various conditions. Matches, another readily available and reliable option, utilize the combustion of a flammable material to ignite tinder.
Their simplicity and ease of use make them a popular choice in many situations.
Environmental Considerations and Variations in Techniques
The effectiveness of any fire-starting method depends heavily on the prevailing environmental conditions. Wind, humidity, and the type of tinder available all play a significant role. For example, in extremely dry conditions, a smaller, more powerful magnifying glass may be more effective than a larger one, as the smaller lens can focus the sunlight more intensely. Conversely, in humid conditions, a larger magnifying glass may be necessary to provide enough concentrated heat.
The quality of tinder also matters greatly; dry, easily ignitable materials are essential for success.
Comparison Table of Fire Starting Methods
| Method | Suitability in Dry Conditions | Suitability in Humid Conditions | Ease of Use |
|---|---|---|---|
| Magnifying Glass | Good, especially with a strong lens | Poor, requires significant sunlight and optimal conditions | Moderate, requires skill and practice |
| Flint and Steel | Good, provides sparks in various conditions | Good, sparks are effective in most conditions | Moderate, requires skill and practice |
| Matches | Excellent, reliable and easy to use | Excellent, reliable and easy to use | Excellent, simple and accessible |
Illustrative Examples and Case Studies
Learning to start a fire with a magnifying glass isn’t just about theory; it’s about practical application. Successful attempts often depend on environmental conditions and the user’s skill. This section presents illustrative examples, highlighting factors impacting success and showcasing adaptive strategies in challenging scenarios.
Successful Fire Starting in Sunny Conditions
A clear, sunny day with minimal wind presents ideal conditions for fire starting with a magnifying glass. Practice makes perfect; the more you experiment with focusing sunlight, the better you’ll understand the nuances of the process. Successful ignition relies on several factors, including the type of tinder used, the intensity of sunlight, and the positioning of the magnifying glass.
The key to success is consistently adjusting the magnifying glass’s position to maintain the concentrated beam of sunlight on the tinder. Optimal positioning results in a steady, intense heat source that quickly ignites the tinder.
Creating fire with a magnifying glass is surprisingly tricky, especially when the sun isn’t cooperating. It’s a bit like dealing with tricky situations, like when Marta is having trouble navigating a difficult situation. Check out marta tricky when its going wrong for some helpful advice. Ultimately, though, patience and a bit of practice are key to success with the magnifying glass method.
Factors Influencing Success or Failure
Several factors influence the success or failure of fire starting with a magnifying glass. Cloud cover, wind, and the type of material used as tinder can significantly impact the process. Understanding these factors is crucial for adapting to different conditions.
- Cloud Cover: Partial or complete cloud cover significantly reduces the intensity of sunlight, making fire starting more challenging. A dense cloud cover may render fire starting with a magnifying glass impossible.
- Wind: Wind can disperse the concentrated beam of sunlight, preventing the tinder from reaching the necessary temperature for ignition. Strong winds are often a major impediment.
- Tinder Type: The type of tinder significantly affects ignition. Dry, easily flammable materials like dry leaves, paper, or cotton balls are ideal. Damp tinder is less effective and requires a more intense heat source.
Adapting to Unexpected Challenges
Imagine a scenario where you’re attempting to start a fire on a partly cloudy day with a moderate breeze. This example demonstrates how a skilled user adapts to these conditions.
On a partly cloudy day with a moderate breeze, a user should position the magnifying glass carefully to maximize the amount of sunlight reaching the tinder, while also considering the wind’s effect. Slight adjustments to the magnifying glass’s angle will help maintain the focused beam despite the wind.
- Assess the conditions: Notice the amount of sunlight and wind speed. Identify a sheltered spot to minimize the wind’s impact.
- Select suitable tinder: Prioritize dry materials. Consider using a thicker piece of tinder or adding more layers for increased heat retention.
- Adjust the magnifying glass’s position: Position the magnifying glass to maximize the amount of sunlight focused on the tinder, compensating for the cloud cover and wind.
- Monitor the tinder closely: Observe the tinder’s response to the focused sunlight. Adjust the magnifying glass’s position as needed to maintain a steady heat source.
- Be prepared for setbacks: Be prepared for repeated attempts if the conditions are less than ideal. Stay patient and persistent.
Detailed Step-by-Step Process
This detailed process Artikels the steps involved in fire starting with a magnifying glass, emphasizing key aspects for success.
- Gather necessary materials: Ensure you have a magnifying glass, tinder (e.g., dry leaves, paper, cotton balls), kindling (e.g., small twigs), and fuel (e.g., larger branches). Ensure the materials are dry.
- Find a suitable location: Select a location with minimal wind and ample sunlight. A sheltered spot is preferred in windy conditions.
- Prepare the tinder: Arrange the tinder in a small pile or nest. Make sure it is completely dry.
- Position the magnifying glass: Carefully position the magnifying glass to concentrate sunlight onto the tinder. Adjust the position to maintain a steady beam.
- Focus the light: Adjust the magnifying glass to ensure the sunlight is concentrated on the tinder. Maintain this focus to increase the temperature of the tinder.
- Observe and adapt: Continuously monitor the tinder’s response to the focused sunlight. Adjust the magnifying glass’s position if necessary to maintain the heat source.
- Add kindling: Once the tinder ignites, gradually add kindling to the fire.
- Add fuel: Continue adding fuel as the fire grows.
Further Research and Development
 | 12 Methods ...")
Igniting fire with a magnifying glass, while seemingly simple, holds surprising potential for further exploration. From refining the technology behind the magnifying glass itself to exploring new applications, the field offers exciting avenues for innovation. This section delves into potential research directions and advancements, including improved techniques and alternative uses.
Potential Avenues for Future Research
The pursuit of more efficient and reliable fire starting methods using magnifying glasses can benefit from several research areas. Understanding the optimal lens shape, material, and surface treatment for maximum light concentration is crucial. Furthermore, investigating the impact of environmental factors, such as atmospheric conditions and cloud cover, on light transmission and focusing efficiency is vital.
Advancements in Magnifying Glass Technology
Current magnifying glass designs often compromise between portability, light concentration, and cost. Future advancements could explore materials like high-refractive index glass or polymers to enhance light focusing ability without increasing weight or cost. Additionally, incorporating specialized coatings on the lens surfaces to minimize reflection losses and maximize light transmission could significantly improve the performance of magnifying glasses. For example, a lens with a special anti-reflective coating could dramatically improve its efficiency in low-light conditions.
Potential Uses of Magnifying Glasses in Different Fields
Magnifying glasses, beyond their traditional role in fire starting, show promise in various fields. In microscopy, high-powered magnifying glasses could provide a low-cost alternative to expensive microscopes for basic biological or material analysis. In solar energy collection, advancements in magnifying glass technology could lead to more efficient solar concentrators, potentially revolutionizing renewable energy production. Furthermore, they might find applications in industrial settings for tasks requiring focused light.
Related Resources for Further Exploration
The realm of fire starting with magnifying glasses draws inspiration from diverse scientific fields. Books on optics, physics, and materials science offer insights into the principles governing light concentration and lens design. Additionally, scientific journals and research papers focused on solar energy collection, optics, and materials science provide valuable information.
Potential Improvements or Innovations in Techniques
Refining techniques for using magnifying glasses to ignite materials can yield improvements. Investigating the relationship between fuel type, moisture content, and the intensity of focused sunlight is key. For instance, developing strategies for effectively igniting different types of tinder, including composite tinder mixtures, could increase the success rate in various conditions. Further, research into optimal focal point positioning and adjustments in response to changing environmental conditions could increase efficiency.
Closing Notes
In conclusion, creating fire with a magnifying glass is a captivating blend of science, history, and practical skill. This guide has explored the entire process, from initial setup to successful ignition. Remember to prioritize safety and environmental responsibility throughout the process. By understanding the principles and procedures, you can harness the power of sunlight to ignite a fire responsibly.
Whether you’re a seasoned outdoorsman or a curious beginner, this guide will equip you with the knowledge and confidence to start a fire safely and effectively.