Tag: Minecraft Building

  • Build a Horse Stable in Minecraft Your Ultimate Guide

    Build a Horse Stable in Minecraft Your Ultimate Guide

    Build a Horse Stable in Minecraft! This comprehensive guide walks you through crafting the perfect equine haven. From detailed design considerations to crafting resources and maximizing functionality, we’ll cover everything you need to create a stable that’s both beautiful and practical. Get ready to house your equine companions in style!

    Imagine a magnificent stable, meticulously crafted, nestled within your Minecraft world. This guide provides detailed plans, from basic layouts to elaborate designs. We’ll explore various materials, architectural styles, and features to create a stable that truly stands out.

    Design Considerations: Build A Horse Stable In Minecraft

    Crafting a magnificent horse stable in Minecraft transcends mere functionality; it’s an opportunity to showcase architectural prowess and artistic flair. Careful planning is key to creating a stable that is both visually appealing and practical, seamlessly integrating with your existing world or village. This section delves into various design considerations, offering a multitude of options to inspire your equine-themed construction project.Thorough planning, including consideration of space requirements, material choices, and aesthetic preferences, will ensure a stable that serves both the practical needs of your horses and enhances the overall beauty of your Minecraft world.

    Addressing these factors ensures that your creation stands out from the typical Minecraft structures, becoming a distinctive feature.

    Stable Layouts

    Different stable layouts cater to various needs and preferences. The shape and size directly impact the number of horses accommodated and the available storage space. Rectangular structures are simple and efficient, while more complex shapes, like L-shaped or U-shaped layouts, can maximize space utilization. Consider the number of horses you intend to keep and the amount of storage needed when choosing a layout.

    Circular or hexagonal stables, though more intricate, can add a unique visual appeal.

    Stable Sizes and Shapes

    A small stable, perhaps 3×3 blocks, might suffice for a single horse, including basic storage. A medium-sized stable, 5×5 blocks or larger, is ideal for multiple horses and greater storage. For larger stables, 7×7 or more, you can incorporate multiple stalls, a tack room, and a feeding area. The shape of the stable can also impact its aesthetic.

    A long, narrow stable might look more like a barn, while a square or rectangular one feels more contained and cozy.

    Architectural Styles

    The architectural style can be adapted to fit your Minecraft world’s theme. A rustic, wooden stable would be ideal for a woodland environment. A more modern, stone or brick structure could fit into a futuristic or urban setting. Even incorporating elements of medieval castles or ancient ruins can create a unique and captivating stable. Consider the surrounding terrain and the overall aesthetic you are aiming for.

    Materials and Blocks

    Material choices significantly impact both the practicality and aesthetic of your stable. Wood, while aesthetically pleasing, is susceptible to damage. Stone and brick offer durability and a more substantial look. Using different coloured materials for different sections, like using light grey stone for the walls and a darker grey stone for the roof, can provide visual appeal and contrast.

    You can also consider more advanced materials like glass or obsidian for windows and special features, providing both practicality and visual appeal.

    • Wood: Provides a rustic look, but is prone to damage. Suitable for smaller stables or those in wooded areas.
    • Stone: Offers durability and a classic aesthetic. Excellent for larger stables or those needing greater longevity.
    • Brick: Provides a sturdy and visually appealing structure.

      Ideal for stables in towns or villages.

    • Glass: Offers a modern and spacious feel. Use for windows or other transparent features.
    • Obsidian: Provides a sleek and dark aesthetic. Excellent for adding a touch of sophistication.

    Integrating the Stable

    Integrating a stable into an existing Minecraft world or village can enhance the immersion and realism. Place it near a farm or a horse breeding area to reflect its purpose. Consider placing it near a village for community engagement, or integrate it into a larger farm complex for a more extensive design. You can even incorporate it into a larger castle or fortress for an even more grand structure.

    Strategically positioning the stable will significantly enhance its impact on your Minecraft world.

    Decorative Elements

    Personalizing your stable is essential to make it truly unique. Add decorative elements like banners, paintings, or crafted signs to personalize the space. Consider using flowers, vines, or torches to enhance the visual appeal. Using different coloured wool or stained glass panes for windows can significantly enhance the aesthetic. The choice of decorative elements will reflect your personal style and the atmosphere you wish to create within the stable.

    Building a horse stable in Minecraft can be surprisingly satisfying, especially when you’ve got the right resources. But sometimes, the most intricate projects require a little extra care, like washing a human hair weave. Learning how to properly care for your weave is key to maintaining its health and beauty, just as building a stable requires thoughtful planning.

    You can find helpful tips on how to wash a human hair weave Wash a Human Hair Weave to ensure it lasts a long time. After all that, it’s back to Minecraft, and the joy of a well-built stable for your equine friends!

    • Banners: A simple yet effective way to add color and personality.
    • Paintings: Showcase your artistic skills or reflect the theme of your stable.
    • Signs: Display important information or add personal touches.
    • Flowers/Vines: Enhance the natural aesthetic and create a sense of life.
    • Torches: Provide lighting and add visual interest.

    • Wool/Stained Glass: Offer varied colors to enhance the visual appeal of windows.

    Crafting and Resources
    Build a Horse Stable in Minecraft

    Building a sturdy horse stable in Minecraft requires careful planning and efficient resource management. Understanding the necessary materials and their acquisition methods is crucial for a successful project. This section delves into the crafting recipes, resource types, and optimal strategies for gathering materials, providing a comprehensive guide for any aspiring stable builder.

    Crafting Recipes for the Stable

    Minecraft stables are constructed using various blocks. Understanding the required crafting recipes for each block is essential for efficient building. These recipes dictate the specific materials and quantities needed to create each component. The crafting table is the central hub for these processes.

    Required Resources, Build a Horse Stable in Minecraft

    The construction of a stable demands a range of materials. These include different types of wood, stone, and specialized blocks. Choosing the right materials significantly impacts the overall aesthetic and structural integrity of the stable.

    • Wood: Various wood types, such as oak, spruce, birch, jungle, acacia, and dark oak, are used for basic construction elements. Each wood type provides different aesthetic options for the stable’s exterior. Different wood types may require different quantities for the same structural component.
    • Stone: Stone blocks, such as cobblestone, and various stone variants, are vital for foundational structures and certain decorative elements. Stone’s durability contributes to the stable’s longevity.
    • Special Blocks: Items like chests, doors, and pressure plates are integral for functionality. These enhance the usability and practicality of the stable, allowing for storage and controlling access.

    Resource Quantities for Varying Stable Sizes

    The amount of resources required directly correlates with the size and complexity of the stable. A small stable will necessitate fewer resources than a large, elaborate structure.

    Building a horse stable in Minecraft can be a rewarding project, but sometimes you encounter a bit of a snag. Like when you need to get a water pump working properly. Learning how to effectively “Prime a Water Pump” Prime a Water Pump is crucial for a functional stable, ensuring a constant water supply for your equine friends.

    A properly working water pump is essential for a successful horse stable build, after all!

    Stable Size Wood Stone Chests Doors
    Small 20-30 logs 10-15 cobblestone 1-2 chests 2-3 doors
    Medium 40-50 logs 20-30 cobblestone 2-3 chests 4-5 doors
    Large 60-80 logs 30-40 cobblestone 3-4 chests 6-8 doors

    Efficient Resource Gathering

    Efficient resource gathering is key to minimizing the time spent on the construction process. Exploring different biomes and utilizing tools effectively are crucial steps. Specific biomes, like forests, offer abundant wood resources. Likewise, mountainous areas often contain significant stone deposits. Employing tools like axes and picks significantly accelerates the gathering process.

    Alternative Resource Acquisition Methods

    Sometimes, certain resources may be scarce in the immediate area. Alternative methods exist to acquire necessary resources, ensuring that construction doesn’t stall. Trading with other players or utilizing crafting recipes to transform existing resources into the desired materials are useful methods.

    Functionality and Features

    Crafting a functional horse stable in Minecraft goes beyond just aesthetics; it’s about creating a safe and efficient environment for your equine companions. This section delves into the practical aspects of designing a stable that seamlessly integrates with your Minecraft world, from housing multiple horses to implementing advanced features. A well-designed stable allows for easy management and enhances the overall experience of horse ownership within the game.A robust stable design should prioritize both the immediate needs of the horses and the long-term potential for expansion and customization.

    Careful planning for storage, feeding, and management will result in a stable that effectively accommodates your growing equine population. This includes not only the stalls but also areas for grooming, potential breeding, and blacksmithing, should you choose to incorporate these elements.

    Horse Stalls and Management

    A well-organized stable requires individual stalls for each horse. These should be spacious enough for the horse to move freely, but also secure enough to prevent escape. The stalls should include a comfortable bedding area, allowing for rest and preventing injuries. Multiple stalls can be arranged in a linear fashion or in a more complex layout, depending on the size of the stable.

    Consider using fences or walls to create clear boundaries between stalls.

    Feeding Troughs and Automated Systems

    Feeding troughs are crucial for maintaining the health of your horses. They should be large enough to accommodate the daily feed requirements of each horse. For convenience and efficiency, consider integrating automated feeding systems. This could involve hoppers, dispensers, or custom-built mechanisms that deliver food to the troughs automatically, ensuring your horses are always well-fed. A simple automated system can dramatically reduce the time spent on manual feeding, freeing you up for other tasks.

    Storage and Organization

    A well-organized stable requires dedicated storage areas for hay, grain, tack, and other essential supplies. Consider using chests, hoppers, and custom-built storage structures to maximize space and ensure everything is easily accessible. Clear labeling and a logical layout will help you quickly locate items when needed. This ensures a seamless and efficient operation. For example, a designated area for saddles and harnesses can prevent clutter and reduce the risk of misplacing equipment.

    Security Measures

    Adding security measures is an important aspect of a well-designed stable. Consider using fences, reinforced walls, or even traps to prevent unwanted intruders from entering the stable. These security measures are vital for the safety of your horses and to maintain a safe and secure environment.

    Blacksmith Shop and Breeding Area

    Expanding on the core functionality, integrating a blacksmith shop can provide services for repairing horse tack and equipment. This could involve a simple anvil, crafting table, and necessary resources. A dedicated breeding area can enhance the stable’s functionality, enabling horse breeding and the management of foals. This area can be designed with separate enclosures and resources to facilitate the breeding process.

    Building a horse stable in Minecraft is surprisingly satisfying, especially when you consider the meticulous planning involved. You need to gather resources, design the layout, and even account for the aesthetics! It’s a bit like creating a digital equine haven, and then, listening to some tunes to get you in the mood, check out this track about a bear by skrillexp oo bear would you ever skrillexp oo bear would you ever.

    The music will undoubtedly fuel your creativity as you finalize the stable’s design and furnishings, and hopefully, your digital horses will appreciate the effort!

    A well-equipped blacksmith shop and breeding area contribute to the overall value and practicality of the stable.

    Easy Access and Management

    The layout of the stable should prioritize easy access and management. Paths should be wide enough for easy movement, allowing for quick and efficient checks on each horse. Clear signage and designated areas for specific tasks will improve efficiency. The goal is to create a stable where managing your horses is simple and straightforward. A well-thought-out design ensures your horses’ comfort and your ease of management.

    Visual Representation

    Building a Minecraft horse stable isn’t just about function; it’s about crafting a visually appealing structure that reflects the desired aesthetic. From humble beginnings to elaborate designs, the visual representation of the stable can significantly enhance the overall experience. This section explores various design approaches, from simple and rustic to intricate and modern, and how these choices impact both the appearance and practicality of the stable.Different architectural styles offer unique visual appeals and can be adapted to various Minecraft landscapes.

    Understanding these styles allows players to create stables that match their personal preferences and the environment they’re building in. By considering both aesthetics and functionality, the stable can become a centerpiece of the Minecraft world.

    Different Visual Representations

    Various designs cater to different aesthetics and functional needs. Simple stables, often consisting of a single, enclosed area, are ideal for basic housing. More complex designs can incorporate multiple stalls, hay storage, and even decorative elements. These variations offer a range of visual choices, allowing players to craft a stable that perfectly suits their needs and creativity.

    • Simple Stables: These are basic rectangular or square structures, often with a single entrance. They’re straightforward to build and ideal for smaller horse populations or as part of a larger farm complex. Visual appeal is kept minimal, prioritizing function.
    • Complex Stables: These can incorporate multiple stalls, separated by partitions. Additional features like hay storage areas, tack rooms, and even decorative elements like intricate roofs or balconies, increase the visual appeal and functionality.
    • Medieval Stables: These designs typically feature a steeply pitched roof, stone or wood walls, and a large, imposing entrance. This style evokes a sense of antiquity and grandeur, creating a visual statement. Think of a fortified barn or stable from historical illustrations.
    • Rustic Stables: These stables utilize natural materials like wood and stone, often with exposed beams and natural textures. They offer a warm, inviting feel and blend well with wooded or countryside settings. Imagine a charming log cabin-style structure.
    • Modern Stables: These utilize clean lines, modern materials like glass and metal, and minimalist designs. They present a sleek, contemporary aesthetic, well-suited for a more futuristic or technologically advanced Minecraft world.

    Architectural Styles

    Different architectural styles influence the visual representation of the stable, offering unique characteristics and aesthetics. Each style evokes a distinct mood and atmosphere, enabling players to personalize their stable to fit their vision.

    • Medieval: Characterized by thick walls, high roofs, and imposing features, medieval stables often evoke a sense of strength and protection. Imagine a large stone structure with crenellations, or battlements, on the roof. The overall impression is one of robust and sturdy construction.
    • Rustic: Rustic stables often employ natural materials like wood and stone, with an emphasis on natural textures. Exposed beams and natural wood siding contribute to a warm and welcoming atmosphere. The design is often inspired by traditional farmhouses.
    • Modern: Modern stables emphasize clean lines, smooth surfaces, and the use of advanced materials. Glass walls and metal roofs are frequently used to create a sleek and futuristic aesthetic. The overall impression is one of sophistication and innovation.

    Design Comparison Table

    This table Artikels the key strengths and weaknesses of various stable designs, considering both aesthetics and functionality.

    Design Style Materials Used Functionality Image Description
    Simple Wood, logs Basic horse housing, easily expandable A rectangular structure with a simple roof and a single entrance. Walls are made of wood planks.
    Medieval Stone, cobblestone, wood Sturdy and imposing, potentially multiple stalls A large, rectangular structure with a high, steeply pitched roof made of wooden planks. Walls are constructed of stone or cobblestone blocks.
    Rustic Wood, logs, stone, planks Warm and inviting, blends well with nature A structure with exposed wooden beams, natural stone accents, and a slightly sloped roof made of wooden planks.
    Modern Glass, metal, smooth stone Sleek and sophisticated, potentially advanced features A structure with a minimalist design using glass panels, metal roofing, and smooth stone walls. Features minimal ornamentation.

    Lighting and Decoration

    Proper lighting and decoration significantly enhance the visual appeal of the stable. Lighting should illuminate the interior without being overly harsh, while decorations add personality and character.

    • Lighting Options: Torches, lanterns, and even glowstone can be used to create warm, inviting light. Strategically placed torches can highlight key areas, while lanterns create a more diffused glow. Glowstone provides a bright, even light, perfect for illuminating larger spaces. Consider using a mix of these for varied effects.
    • Decoration Ideas: Hay bales, saddles, horse figurines, and banners can add character and personality. Placing these elements thoughtfully creates a cohesive and appealing design. Consider adding small details like well-placed buckets or tools for a rustic or medieval feel. Using items like stained glass can add a modern or medieval feel.

    Integration and Expansion
    Build a Horse Stable in Minecraft

    Building a Minecraft horse stable is a rewarding project, but its value truly shines when integrated into a larger world. This section explores different methods of seamlessly incorporating the stable into an existing Minecraft environment, allowing for expansion and modification to suit evolving gameplay. From simple additions to significant upgrades, the stable can adapt to the player’s changing needs and preferences.The key to a successful integration lies in careful planning.

    Consider the surrounding environment and the stable’s intended role within the world. Will it be a central hub for a village, a secluded retreat for a player’s personal herd, or something in between? These considerations will guide the design decisions for both initial construction and future expansions.

    Integrating into Existing Worlds

    The stable’s integration should be natural and aesthetically pleasing. Avoid jarring contrasts between the stable and the surrounding landscape. Consider the existing structures and vegetation when placing the stable. For example, if the area has a dense forest, place the stable near the edge of the forest, with trees incorporated into the design. If the location is open, you could surround it with fields or create a small, enclosed pasture.

    Mimicking the existing terrain ensures a more harmonious integration into the world.

    Expanding the Stable

    Expanding the stable should be a thoughtful process, maintaining the original aesthetic. A simple addition might be a separate tack room, equipped with crafting tables for saddles and harnesses. An upgraded stable could include a grooming area with a wash station for cleaning horses. A more elaborate expansion might incorporate a small arena for training or racing horses.

    Expansion plans should always be designed to enhance the stable’s functionality without detracting from its initial appeal.

    Accommodating Growing Horse Populations

    A well-planned stable design can accommodate a growing horse population. Consider incorporating multiple stalls, each with its own feeding trough and space for grooming. A significant expansion could include a separate paddock area for exercising and grazing. Adding multiple stable doors or larger entryways can improve the flow of horses through the stable. This will allow for efficient management of the growing horse herd.

    Adding Rooms and Features

    The stable’s aesthetic should be maintained during room additions. A hayloft can be added to store hay and other supplies, while a blacksmith’s forge could be integrated for creating custom horse equipment. A small office or a storage room for additional supplies could improve functionality. The design should be seamless, blending new elements into the existing stable structure without compromising the initial vision.

    Visual Representation and Integration with Surroundings

    The surrounding environment should complement the stable’s design. Incorporate trees, bushes, and other decorative elements that harmonize with the overall theme. For example, if the stable is located in a mountainous region, consider incorporating rock formations and waterfalls. If it’s a village stable, integrate structures that are typical for the region, such as houses or shops. The surrounding environment should enhance the stable’s appeal and make it a natural part of the Minecraft world.

    Ultimate Conclusion

    Building a horse stable in Minecraft is more than just a project; it’s a journey of creativity and resourcefulness. This guide has equipped you with the knowledge and inspiration to design and build a stable that reflects your style and gameplay. From simple designs to elaborate expansions, you’re empowered to create the ultimate equine sanctuary in your Minecraft world.
  • Build a Chair in Minecraft A Complete Guide

    Build a Chair in Minecraft A Complete Guide

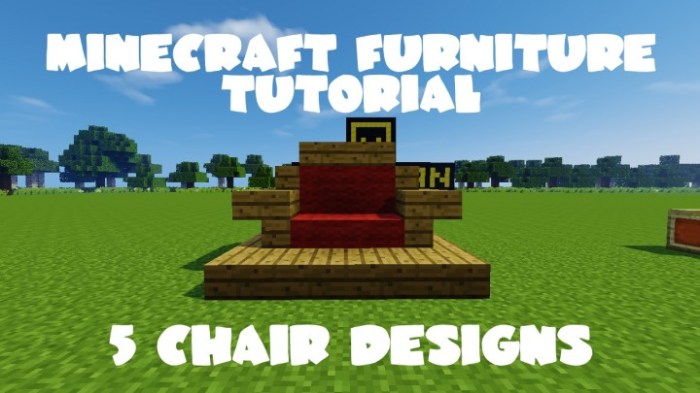
    Build a Chair in Minecraft, a surprisingly complex project! This comprehensive guide delves into every aspect of crafting and placing chairs in the Minecraft world. From basic designs to intricate masterpieces, we’ll cover everything you need to know to create functional and visually appealing seating for your Minecraft adventures.

    Imagine crafting a cozy armchair in your Minecraft home, or a sleek, modern design for a shop you’re building. This guide walks you through the process, providing detailed crafting recipes, design variations, and even troubleshooting tips for any issues you might encounter.

    Introduction to Minecraft Chair Building

    Minecraft, a sandbox game renowned for its creative possibilities, allows players to craft an impressive array of objects, including chairs. While not a crucial element for gameplay, crafting chairs offers a fulfilling creative outlet, demonstrating player ingenuity and attention to detail. This exploration delves into the diverse world of Minecraft chair building, encompassing materials, construction steps, and design variations.Minecraft’s chair building capabilities are remarkably versatile.

    Players can craft chairs from a range of materials, each with unique aesthetic qualities. The process, though straightforward, allows for personalized designs, reflecting the player’s creativity. The potential for unique and intricate chair designs is substantial, opening up a realm of decorative and functional furniture possibilities within the game.

    Materials for Chair Construction

    Various materials can be used for chair construction in Minecraft. Wood, a readily available resource, is often a starting point for basic designs. Crafting tables and furnaces are essential to turn raw materials into usable components. More elaborate chairs might involve stone, iron, or even more exotic materials like diamonds or netherite. Each material offers a distinct aesthetic.

    Crafting Steps for a Basic Chair

    The general steps for crafting a basic chair in Minecraft involve gathering materials, creating the chair’s components, and assembling them. First, the appropriate wood or other materials are collected. These materials are then processed through crafting tables to create the chair’s essential parts like legs, seats, and backs. Finally, the components are assembled according to the chosen design.

    Chair Design Variations

    Minecraft chair designs range from simple to complex and decorative. A simple chair might use basic wood planks for all components. More complex chairs can incorporate intricate designs using different types of wood, or even incorporate other materials for a unique look. Decorative chairs might involve the use of dyes or other decorative blocks to enhance their visual appeal.

    Creating a Basic Chair Design

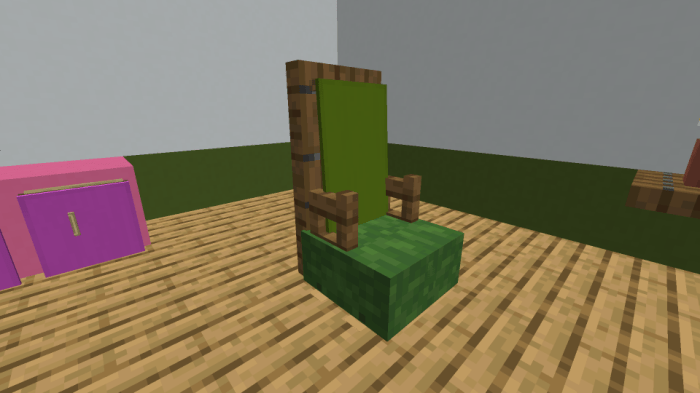
    To build a basic chair, start with a simple design using planks from a chosen type of wood. The legs are usually four sturdy wooden planks arranged in a square shape. A plank is placed on top of the legs for the seat. A plank or two can be added to create a backrest, depending on the desired chair design.

    For example, a simple wooden chair can be crafted by using four wooden planks for the legs, one plank for the seat, and one plank for the back. The choice of wood affects the chair’s visual appeal. A simple chair design can be made quickly and easily.

    Detailed Crafting Recipes

    Crafting chairs in Minecraft goes beyond simply gathering materials. Understanding the different crafting recipes unlocks a wide array of styles, each with varying durability and aesthetic appeal. This section delves into the specifics of creating chairs, offering detailed crafting recipes for various designs.

    Crafting Recipes for Chair Styles

    Different chair styles require specific materials and crafting steps. A well-organized table outlining these recipes allows for easy comparison and efficient crafting. The table below presents several common chair designs and their associated crafting requirements.

    Chair Style Materials Quantities Crafting Steps
    Simple Wooden Chair Wooden Planks 6 Place 6 wooden planks in a 2×3 crafting grid.
    Wooden Chair with Backrest Wooden Planks, Wooden Slabs 8 Planks, 4 Slabs Combine 4 wooden planks and 4 wooden slabs in a 2×2 crafting grid.
    Stone Chair Stone Bricks 6 Place 6 stone bricks in a 2×3 crafting grid.
    Stone Chair with Backrest Stone Bricks, Stone Slabs 8 Bricks, 4 Slabs Combine 4 stone bricks and 4 stone slabs in a 2×2 crafting grid.
    Iron Chair Iron Ingots 6 Place 6 iron ingots in a 2×3 crafting grid.
    Iron Chair with Backrest Iron Ingots, Iron Slabs 8 Ingots, 4 Slabs Combine 4 iron ingots and 4 iron slabs in a 2×2 crafting grid.

    Common Chair Designs and Recipes

    This section lists common chair designs, alongside their associated crafting recipes, emphasizing their variations in terms of materials, durability, and aesthetic impact.

    • Simple Wooden Chair: This chair, crafted from wooden planks, is a foundational design. Its simplicity makes it a quick and easy build, perfect for beginners. Its durability is modest, susceptible to damage from environmental factors and player actions. The aesthetic is plain, but can be customized with different colors or textures.
    • Wooden Chair with Backrest: Adding a backrest enhances both durability and aesthetic appeal. This design, utilizing wooden planks and slabs, provides a more comfortable and substantial chair compared to the basic wooden chair. The increased durability comes at the cost of more materials and a slightly more complex build.
    • Stone Chair: Stone chairs offer a more durable option than wooden chairs, ideal for areas prone to player damage or environmental hazards. The stone materials provide a sturdy foundation, making it resilient against various factors. The design lacks the intricate details found in other chair styles, resulting in a simpler aesthetic.
    • Stone Chair with Backrest: This design offers a balance of durability and aesthetic appeal. The stone backrest increases the chair’s resistance to damage while maintaining a basic design, making it a practical choice for a variety of situations.
    • Iron Chair: Iron chairs represent a substantial step up in durability compared to wooden and stone counterparts. The use of iron ingots makes them resistant to damage and weathering, making them suitable for long-term use or high-traffic areas. The aesthetic is plain, and not as intricate as other styles.
    • Iron Chair with Backrest: The iron chair with a backrest, incorporating iron ingots and slabs, offers superior durability and comfort. This design makes it a good choice for demanding situations, balancing sturdiness with a slightly more complex build. The iron material creates a sturdy and strong chair.

    Tools and Resources for Efficient Chair Construction

    Efficient chair construction requires a well-equipped inventory and a strategic approach. Gathering the necessary materials and using appropriate tools significantly speeds up the chair-building process. An axe for wood, pickaxe for stone and iron, and furnace for smelting are essential for efficient crafting. A crafting table is needed for all designs. This approach streamlines the process, reducing wasted time and effort.

    Chair Design Variations and Enhancements: Build A Chair In Minecraft

    Build a Chair in Minecraft

    Crafting a chair in Minecraft transcends mere functionality; it’s an opportunity to express creativity and personalize your virtual abode. Beyond the basic stool or simple chair, a wealth of design possibilities awaits, opening doors to unique styles and aesthetics. From rustic charm to futuristic flair, the options are virtually limitless. This section dives into the exciting world of chair design variations, exploring methods for customization and enhancement.Beyond the fundamental chair blueprint, numerous avenues for personalization and creative expression exist.

    Adding intricate details or adjusting the overall structure allows for unique chair designs tailored to specific needs or preferences. This detailed exploration provides the tools to transform a simple chair into a masterpiece, reflecting your Minecraft world’s personality.

    Chair Design Table

    Understanding the building blocks is crucial for crafting distinctive chairs. This table Artikels different chair designs, encompassing variations in style, materials, and complexity.

    Design Name Materials Description
    Simple Wooden Chair Wooden planks A basic, straightforward chair ideal for starting out.
    Rustic Wooden Chair Wooden planks, logs, vines A chair incorporating natural elements, perfect for a woodland or cabin aesthetic.
    Modern Metal Chair Iron bars, gold ingots A sleek and contemporary design featuring metallic elements, great for a futuristic or industrial environment.
    Enchanted Chair Various enchanted materials, including diamonds, emeralds A luxurious and elaborate chair with added enchantment effects for a royal or magical touch. This design showcases advanced crafting techniques.
    Decorated Wooden Chair Wooden planks, dyed wool, stained glass panes A basic wooden chair enhanced with decorative elements, such as colourful wool and stained glass panes.

    Customization Methods

    Decorating and customizing a chair in Minecraft involves several approaches. The most effective method is to combine materials and structures to achieve the desired look.

    • Dyeing: Dyeing wool or other fabric-like materials allows for a wide spectrum of color choices, adding vibrant pops to the chair’s appearance. The color can complement or contrast with the chair’s primary material, enhancing its aesthetic appeal.
    • Stained Glass: Stained glass panes provide a unique decorative touch. These panes can be used to add intricate patterns or colors to the chair, creating a visually appealing and sophisticated look. The combination of stained glass and wood is particularly effective.
    • Additional Structures: Incorporating structures like vines, leaves, or even small decorative blocks adds depth and dimension to the chair. This creates an organic feel or evokes specific themes.
    • Enchantment Effects: Applying enchantments to the chair itself or the materials used in its construction can enhance the chair’s appearance and functionality, giving it special properties. This adds an element of magic and sophistication.

    Unique and Creative Chair Designs, Build a Chair in Minecraft

    Crafting truly unique chair designs requires thinking outside the box. Examples include incorporating intricate carvings into the wood, creating chair backs with intricate patterns, or using a variety of materials in an unexpected combination.

    • The “Spiderweb Chair”: A chair made from cobwebs, decorated with glowing spider eyes, would fit perfectly in a spooky or gothic-themed area. The eerie effect is further enhanced by the use of cobwebs and their eerie glow.
    • The “Starry Night Chair”: A chair with a design inspired by Vincent van Gogh’s “The Starry Night,” featuring a dark wooden base and a backrest with a sky of stars made of glowstone and lapis lazuli. This design embodies artistic expression within the game.
    • The “Rainbow Chair”: This chair incorporates a vibrant range of dyed wool, strategically placed to create a captivating rainbow effect. The combination of bright colours provides a cheerful and inviting atmosphere.

    Modifying Chair Designs

    Adapting chair designs to specific needs involves considering the desired functionality and aesthetic. Adjusting the height, width, or shape of the chair can be achieved by altering the structure. For instance, a taller chair can be crafted for use in a higher-level building, while a wider chair can accommodate multiple people.

    • Height Modification: Adjust the number of chair legs or the overall height of the chair’s structure to fit the environment. A taller chair is suitable for a multi-story building, while a lower chair fits a ground-level setting.
    • Armrest Addition: Adding armrests to a chair provides support and comfort, transforming a basic design into a more functional one. This feature is essential for a more ergonomic chair.
    • Backrest Customization: A chair with a backrest can provide greater support and comfort. The backrest can be customized with various materials or designs.

    Adding Intricate Details

    Intricate details elevate a chair’s design beyond basic functionality, creating a more aesthetically pleasing and visually appealing piece. This can involve detailed carvings, patterns, or the strategic use of smaller decorative items.

    • Carvings: Carving patterns or designs into the chair’s wood provides a touch of artistry and sophistication. This method involves using tools to create intricate patterns.
    • Pattern Layouts: Laying out patterns or designs using materials like stained glass, wool, or other decorative blocks creates visual appeal. The pattern should align with the chair’s overall style.
    • Combination of Materials: Combining different materials to create textures and visual contrasts elevates the chair’s design. The contrast between smooth and rough textures can be particularly effective.

    Chair Placement and Integration

    Crafting a chair in Minecraft is only half the battle. Effective placement is crucial for maximizing its aesthetic and functional value within your world. Proper integration with existing structures creates a cohesive and believable environment, transforming a simple chair into a focal point or a subtle element of your design. This section explores the art of placing and integrating your meticulously crafted chairs into the diverse landscapes of Minecraft.Effective chair placement transcends mere functionality; it’s about enhancing the overall ambiance and narrative of your Minecraft world.

    Careful consideration of location, surrounding structures, and the desired aesthetic impact will elevate your builds from ordinary to extraordinary. A well-placed chair can subtly hint at the inhabitants’ personality, the purpose of the structure, or even the time of day.

    Building a chair in Minecraft can be surprisingly satisfying, but sometimes you just need a break from pixelated furniture and delve into something a bit… more conceptual. Like checking out the incredible collaboration between Lil B, Doom, and GZA on their Marvel comic book covers, lil b doom gza get marvel comic book covers. Once you’ve absorbed the artistic vision of those covers, you’ll probably be inspired to go back to building that chair in Minecraft with a fresh perspective.

    Methods for Chair Placement

    Various methods exist for placing chairs in Minecraft, ranging from straightforward placement to more intricate techniques that integrate them seamlessly with the environment. Understanding these methods will provide you with the flexibility to tailor your chair placement to your specific design goals. Consider the surrounding structures, the texture and color of the blocks, and the lighting conditions to achieve the desired visual impact.

    • Direct Placement: This is the most straightforward approach. Simply place the chair on a flat surface, such as a floor or a table. This method is ideal for quick and easy integration into existing structures. Ensure the chair aligns with the surrounding architecture for a consistent aesthetic.
    • Elevated Placement: Placing the chair on raised platforms, such as small stone or wooden structures, or even on stacked blocks, creates a sense of height and visual interest. This is a useful technique for highlighting a chair in a large space or for emphasizing a particular area.
    • Integration with Furniture: Integrating chairs with existing furniture, such as tables or desks, enhances the functionality and visual appeal of the surrounding area. This technique is ideal for creating a sense of a lived-in space, like a home or a shop.

    Selecting Appropriate Locations

    Choosing the right location for your chair is critical to its visual impact. The surroundings significantly influence the overall impression. Consider factors such as the surrounding environment, the size and scale of the area, and the intended function of the chair. Analyzing these factors will allow you to make informed decisions about chair placement.

    • Space and Scale: Consider the size of the room or area where you want to place the chair. A small chair in a large room might get lost, while a large chair in a small room could overwhelm the space. Balance the scale of the chair with the surrounding environment for a visually harmonious outcome.
    • Surrounding Environment: The environment surrounding the chair greatly influences its aesthetic impact. A chair placed in a lush forest will have a different feel than a chair placed in a desert or a snowy biome. Harmonize the chair with the surrounding natural or man-made elements.
    • Lighting Conditions: Natural and artificial light sources can dramatically alter the appearance of a chair. Place the chair strategically to maximize the use of available light, creating a brighter and more inviting atmosphere. A well-lit chair can draw attention and create a focal point.

    Aesthetic Impact of Different Chair Placements

    Different chair placements can evoke diverse aesthetic moods. Careful consideration of the style and context of the placement can dramatically alter the perceived atmosphere. The placement can convey different moods, whether casual, formal, or whimsical.

    • Formal Settings: Chairs placed in formal settings, such as houses or grand halls, should be aligned with the overall architectural design. This approach creates a sense of order and formality.
    • Casual Settings: Chairs in casual settings, like a cozy living room or a campfire area, can be placed more freely, reflecting a sense of relaxed comfort. They might be scattered or grouped together, creating a sense of spontaneity.
    • Functional Integration: For functional areas, such as a shop or a work area, the chair placement should prioritize accessibility and ease of use. Chairs should be positioned for efficient work or interaction, while maintaining a visually pleasing arrangement.

    Creating Functional and Visually Appealing Chair Arrangements

    Crafting a functional and visually appealing arrangement requires a combination of planning and execution. Careful planning will prevent awkward placement and will ensure the desired aesthetic. Balance and symmetry are crucial for creating a visually appealing environment.

    • Symmetry and Balance: Symmetrical arrangements create a sense of order and formality. Use symmetry as a guide when placing chairs, ensuring they are balanced and aligned in relation to the surrounding structures.
    • Focal Points: Strategically place chairs to create focal points within the structure. These focal points can draw attention and enhance the overall visual appeal.
    • Flow and Movement: Create a sense of flow and movement within the arrangement. The placement of chairs can guide the viewer’s eye and create a dynamic visual experience.

    Integrating Chairs into Structures

    Integrating chairs into various structures, such as houses, shops, or forts, is an essential aspect of Minecraft world-building. Understanding the principles of integration ensures a seamless and visually appealing environment. The integration of chairs should enhance the overall structure and not detract from it.

    • Houses: Incorporate chairs into living areas, dining rooms, and other spaces to create a sense of lived-in comfort and functionality. Choose chair styles that match the overall design aesthetic of the house.
    • Shops: Use chairs to create seating areas in shops to accommodate customers or visitors. Consider the style of chair that best fits the shop’s ambiance and target audience. Placement of chairs can influence customer flow and comfort.
    • Forts: Chairs can be used to add a touch of practicality and comfort to a fort, creating a sense of a fortified home base. Consider the strategic placement of chairs in relation to defense points and key areas within the fort.

    Troubleshooting and Common Problems

    Building a chair in Minecraft, while seemingly straightforward, can present unexpected challenges. Understanding potential issues and their solutions is crucial for successful chair construction. This section delves into common problems and provides practical troubleshooting methods.Careful attention to detail, coupled with a systematic approach, will minimize construction hurdles and ensure a satisfying chair-building experience. The following sections will detail common problems, provide solutions, and offer answers to frequently asked questions to help you navigate any difficulties.

    Identifying Common Construction Issues

    Incorrect block placement, particularly in the chair’s support structure, is a frequent source of instability. Missing or misplaced blocks can lead to a chair that collapses under even minimal weight. Misaligned support beams or incorrectly placed legs can result in an uneven chair, making it difficult to use or aesthetically displeasing. Furthermore, issues with block selection or inappropriate material choices can impact the chair’s durability and overall appearance.

    Troubleshooting Methods

    Troubleshooting chair-building problems involves a systematic approach. First, visually inspect the chair for any obvious misalignments or missing blocks. If necessary, carefully dismantle the chair section by section to identify the problematic area. Then, re-evaluate the design, ensuring accurate placement of blocks based on the intended design. Using a schematic or a visual reference is invaluable in resolving discrepancies.

    If a design is proving too complex, a simpler design approach may be a better option.

    Frequently Asked Questions (FAQs)

    • Q: My chair collapses easily. What’s wrong?

      A: A common cause of chair collapse is inadequate support. Ensure that the legs are firmly anchored and that the support structure is robust enough to withstand the chair’s intended weight. Check for misaligned blocks, especially in the base or supporting beams. Using stronger materials, like oak or jungle wood, might be a better solution for a chair that is meant to support weight.

    • Q: How can I prevent my chair from wobbling?

      A: Wobbling chairs often stem from uneven leg placement. Ensure that each leg is placed firmly on a stable foundation and that the support beams are precisely aligned. Using a level tool or a straight edge can assist in ensuring even leg placement and prevent wobbling. This is important for both aesthetics and function.

    • Q: My chair looks different than the design I envisioned. How can I fix it?

      A: Review the design blueprints or visual references to confirm the correct block placement and alignment. Carefully compare the construction process with the design to identify and rectify any discrepancies. A well-planned layout is essential to achieve the desired chair design.

    Addressing Conflicts with Existing Structures

    Integrating a chair into an existing Minecraft environment requires careful planning. Consider the chair’s size and shape in relation to surrounding structures to avoid collisions or obstructions. Strategically place the chair to maintain both aesthetic appeal and functionality within the environment. Pre-planning and visual assessment of the space are crucial in preventing issues.

    • Potential conflicts: Narrow walkways, overhanging structures, or nearby walls might cause placement issues. Always carefully examine the surrounding environment before placing a chair.
    • Solutions: Adjust the chair’s design or location to avoid obstructions. Use alternative materials or designs to reduce the chair’s size or profile to better fit the space. Consider the surrounding structures and plan accordingly.

    Advanced Techniques and Strategies

    Beyond the basics of chair construction, mastering advanced techniques unlocks a world of possibilities in Minecraft chair design. These strategies allow for intricate designs, efficient material usage, and even strategic advantages in gameplay. By understanding these methods, players can create truly unique and functional chairs that complement their Minecraft world.Advanced chair construction requires a deeper understanding of the game’s mechanics and a willingness to experiment with various materials and tools.

    This section dives into techniques for creating complex designs, maximizing efficiency, and optimizing chair placement for strategic benefit.

    Building a chair in Minecraft can be surprisingly satisfying, but sometimes you just need a break from pixelated furniture-making. For a dose of real-world entertainment, check out the Mountain Goats’ hilarious performance on watch the mountain goats perform get famous on colbert. Then, once you’ve had your fill of musical mayhem, you can always return to crafting those perfect Minecraft chairs.

    Complex Chair Designs

    Crafting intricate chairs requires meticulous planning and an understanding of Minecraft’s building blocks. A well-structured approach involves dividing the chair into smaller, manageable components. For example, a complex chair with curved backs or intricate legs might be easier to build by constructing the backrest first, then the seat, and finally the legs. This approach minimizes errors and allows for adjustments as needed.

    Building a chair in Minecraft can be surprisingly satisfying, but sometimes I need a little creative escape. Like, I’ve been completely captivated by this amazing Phoebe Bridgers cover of Conor Oberst’s “Mamah Borthwick” – a sketch, check out the video here. Back to Minecraft, though, I’m determined to craft the most elaborate, comfortable chair in the game.

    I think a bamboo chair would be the perfect blend of style and practicality.

    Advanced designs can include multiple materials to create visual interest and functionality, like combining wood with stone for a more substantial or fortified chair.

    Advanced Tools and Techniques

    Beyond basic tools like pickaxes and shovels, specialized tools like shears, buckets, and even dispensers can dramatically improve chair construction efficiency. Shears can precisely trim bushes or flowers for unique decorations, while buckets are crucial for collecting materials like water or lava. Dispensers can be programmed to automatically place blocks, drastically reducing construction time, particularly for repetitive tasks like crafting a large number of identical chairs.

    Material Optimization

    Different materials offer unique benefits in chair design. Wood, for instance, is a common and versatile material. Using planks of different types can provide variations in colour and aesthetics. Stone or metal can be incorporated to create sturdier, more durable chairs. For example, a chair made with reinforced stone or iron can withstand more damage in combat situations.

    Combining materials in innovative ways can create visually striking and functional chairs, adding a personal touch to a player’s Minecraft world.

    Maximizing Efficiency

    Creating chairs efficiently involves understanding material requirements and utilizing the right tools. Players should develop strategies to collect resources effectively. Utilizing chests and inventory management can prevent losing materials and keep the crafting process flowing smoothly. For complex chair designs, creating a detailed blueprint can help visualize the construction process and reduce errors.

    Strategic Placement

    Optimizing chair placement involves considering the chair’s intended purpose. In combat situations, strategically placing chairs can offer defensive advantages, providing cover or a vantage point for attacking enemies. This can be achieved by positioning the chair near resources or in areas that are important for player control. In crafting areas, positioning chairs near crafting tables or furnaces can improve workflow and reduce the need for constant movement.

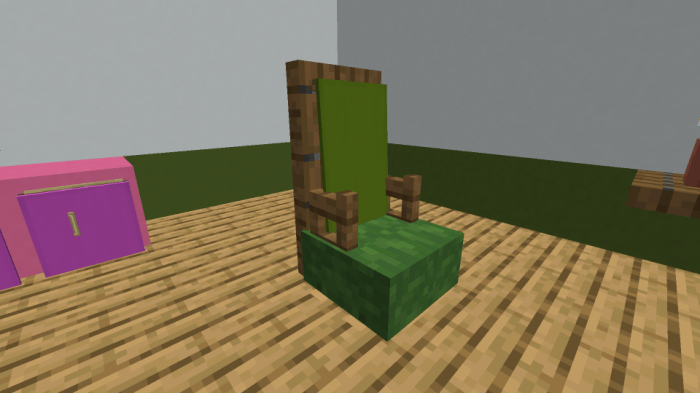
    Visual Representation of Chair Designs

    Build a Chair in Minecraft

    Crafting a chair in Minecraft isn’t just about functionality; it’s about aesthetics. This section dives into a visual exploration of various chair designs, showcasing their unique appeal and potential for integration into your Minecraft world. Different designs cater to different playstyles and creative visions.

    Chair Design Variations

    A wide array of chair designs can be achieved using various materials and crafting techniques. The visual appeal of a chair often hinges on the materials used and the specific design elements. This table provides a glimpse into the diversity of chair designs achievable within Minecraft.

    Chair Name Image Description Brief Description
    Simple Wooden Chair A basic wooden chair, constructed from planks of wood. The seat and backrest are simple, rectangular shapes, meeting at a right angle. The legs are also simple, straight wooden posts. This is the most basic chair design, easily constructed using common materials.
    Elegant Wooden Chair Similar to the simple wooden chair, but with a slightly more refined design. The seat and back are slightly curved, and the legs are carved with simple decorative grooves. Adds a touch of elegance to the basic design with subtle carvings and curves.
    Stone Throne A sturdy chair constructed entirely of stone blocks. The seat and back are carved with intricate patterns, giving a regal appearance. The legs are thick, stone pillars. This design emphasizes strength and regal aesthetics.
    Iron-Framed Chair A chair with an iron frame. The seat and back are crafted from wood planks, but the frame is made from iron bars, giving a strong and durable appearance. Combines the strength of iron with the warmth of wood, creating a durable and visually interesting design.
    Cozy Woven Chair A chair constructed from woven plant materials. The seat and back are made of intertwined vines and other plant-like materials. The legs are either thin wooden poles or are simply anchored into the ground. Ideal for a rustic or natural-themed environment, providing a unique and inviting visual.
    Modern Chair A sleek chair design, constructed from polished stone or obsidian. The seat and back are smooth and have a minimalist aesthetic. The legs are smooth, pillar-like shapes. A modern and stylish design, perfect for a minimalist or modern-themed environment.
    Giant Chair A chair constructed using large, thick wooden beams and planks. The chair is proportionally oversized, giving a comical or unique visual impact. Suitable for comedic effect, large-scale environments, or a bold statement.

    Enhancements and Considerations

    Beyond the fundamental designs, numerous enhancements can elevate the aesthetic appeal of Minecraft chairs. Consider incorporating custom dyes, unique textures, and intricate patterns to make your chair truly stand out. The use of specialized crafting tables can allow for intricate patterns and textures that would be difficult to achieve with basic tools. Adding these details significantly improves the overall visual appeal of the chair.

    Final Thoughts

    Crafting a chair in Minecraft is more than just a simple task; it’s an opportunity to unleash your creativity and build functional and visually appealing structures. Whether you’re aiming for a simple stool or an elaborate throne, this guide has you covered. Now get out there and start building!