Knit an Infinity Scarf: Dive into the world of cozy, versatile scarves with this comprehensive guide. Learn everything from the basics of infinity scarf design to advanced techniques for intricate patterns and unique color combinations. This guide provides detailed information on all aspects of knitting this stylish accessory, ensuring you’re ready to create your perfect infinity scarf.
We’ll explore different yarn types, essential tools, and crucial measurements to ensure your project is a success. From beginner-friendly patterns to designs that challenge even the most experienced knitters, this guide covers a wide spectrum of possibilities. Get ready to craft a stunning infinity scarf that will turn heads!
Introduction to Infinity Scarves
An infinity scarf is a versatile and stylish accessory, characterized by its continuous loop design. Unlike traditional scarves that have distinct ends, an infinity scarf forms a continuous, flowing piece, offering a unique aesthetic and often more practical warmth. The circular design lends itself to a variety of textures and patterns, making it a popular choice for both casual and formal wear.The design of an infinity scarf allows for a variety of construction techniques, making it a versatile accessory.
Different methods produce different visual effects and levels of warmth.
Types of Infinity Scarves
Infinity scarves are available in a wide range of materials, each with its own unique qualities. Knitted and crocheted infinity scarves offer a soft, cozy feel, often featuring intricate patterns and textures. Woven infinity scarves, on the other hand, provide a more structured and often more substantial feel, with a variety of patterns and colors. These variations allow for a diverse array of styles and personal preferences.
Key Characteristics of Infinity Scarves
Infinity scarves are distinguished from other scarf types by their continuous loop construction. This continuous loop design is a key element that differentiates them from other scarf styles. This distinctive shape often results in a more streamlined and elegant appearance. The construction method, whether knit, crochet, or woven, contributes to the overall aesthetic and feel of the scarf.
Knitting an infinity scarf is a surprisingly relaxing project. The repetitive stitches and flowing design really help you zone out, almost like a meditative state. It’s a great way to unwind and let your mind wander, especially if you’re listening to some chill music or even some songs from yo la tengo here to fall. This particular album, yo la tengo here to fall , has a soothing vibe that complements the rhythmic motions of knitting.
Ultimately, a beautiful infinity scarf is a rewarding finish to the whole process.
Comparison to Other Scarf Types
The following table Artikels key differences between infinity scarves and other common scarf types, highlighting the distinctive construction and style elements of infinity scarves.
| Scarf Type | Construction | Style | Key Difference |
|---|---|---|---|
| Infinity Scarf | Knitted, crocheted, or woven in a continuous loop | Streamlined, versatile, often elegant | Continuous loop construction, no distinct ends |
| Traditional Scarf | Knitted, woven, or other materials in a straight or slightly curved shape | Versatile, can be formal or casual | Distinct ends, typically not continuous |
| Stole | Typically woven or knitted in a rectangular or slightly draped shape | Formal, elegant, often heavier | Usually longer and wider than a traditional scarf |
| Bandana | Usually woven or printed cotton, in a square shape | Casual, practical, often used for headwear | Distinct shape, primarily for practical use or headwear |
Knitting Techniques for Infinity Scarves
Crafting an infinity scarf involves more than just basic knitting. Understanding the specific techniques for casting on, joining ends, and working with multiple colours is key to creating a beautiful and wearable piece. These techniques, combined with careful stitch selection, ensure a seamless and satisfying project.Mastering these techniques allows you to confidently tackle more intricate designs and achieve professional-quality results, even if you’re a beginner knitter.
Each step contributes to the overall look and feel of the scarf, from the initial cast-on to the final join.
Common Knitting Stitches
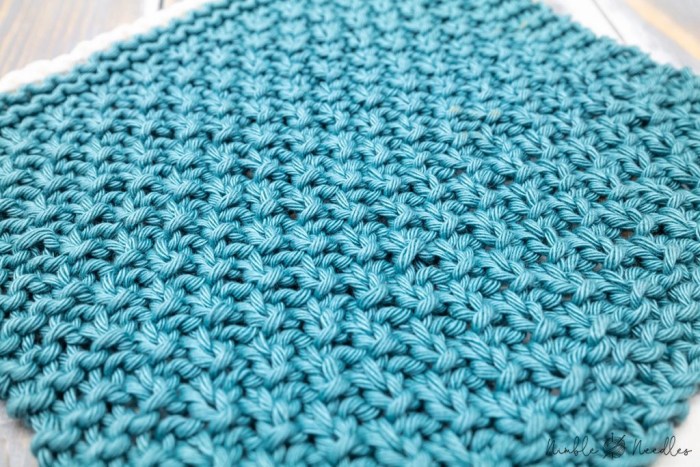
The most common stitches for infinity scarves are garter stitch, stockinette stitch, and seed stitch. Garter stitch creates a smooth, ribbed texture, while stockinette stitch offers a classic, simple look. Seed stitch, with its alternating knit and purl stitches, creates a more textured, intricate pattern. The choice of stitch directly impacts the overall appearance of the scarf.
Casting On and Off
Casting on and off techniques are essential for creating a smooth and even edge on the infinity scarf. A proper cast-on prevents the beginning of the scarf from unraveling, while a proper cast-off secures the end and provides a neat finish. The chosen cast-on and cast-off methods should complement the selected stitch pattern.
Joining the Ends
Joining the ends of an infinity scarf is a crucial step in the process. Various methods exist, each offering distinct advantages and disadvantages. The chosen method should align with the project’s overall aesthetic and desired outcome.
Methods of Joining Ends
| Method | Description | Pros | Cons |
|---|---|---|---|
| Slip Stitch Join | Slip stitches are used to seamlessly connect the two ends. | Easy to execute, creates a clean join. | Can look slightly less secure than other methods. |
| Knitted Join | A few rows of knit stitches are used to secure the ends. | Strong and secure join. | Can add bulk to the join, more complex than slip stitch. |
| Seamless Join | Specialized techniques like the “invisible join” or “seamless method” are used. | Creates a nearly invisible join, very professional. | More complex, requires more experience with advanced knitting techniques. |
| Weaving in the Ends | Ends are woven in using a needle. | Simple to do. | Not suitable for a clean join, can be visible, not ideal for a seamless look. |
Common Mistakes
Common mistakes include uneven tension, incorrect stitch selection, and improper joining. Uneven tension can lead to a distorted pattern or an overall uneven look. Choosing an inappropriate stitch can compromise the scarf’s aesthetics and overall feel. Incorrect joining methods can lead to a weak point in the scarf, or make it appear less professional. Careful attention to detail in each step is crucial for a successful outcome.
Working with Multiple Colours
Working with multiple colours in an infinity scarf can create visually appealing patterns and designs. A common approach involves alternating colours in a set pattern or using colour changes to create a gradient effect. The color changes should be strategically planned and seamlessly integrated into the design, to enhance the overall visual appeal. A colour chart can help to visualize and coordinate the color changes.
Patterns and Designs for Infinity Scarves
Infinity scarves, with their versatile design and endless possibilities, offer a unique canvas for knitters to express their creativity. Beyond the basic construction, the world of infinity scarf patterns opens up a vast realm of textures, colors, and visual effects. This exploration delves into a variety of patterns, catering to both novice and experienced knitters, ensuring there’s a design to spark your next knitting project.The beauty of infinity scarves lies in their ability to adapt to a wide range of designs.
From simple stripes to intricate lace patterns, the possibilities are truly endless. This section will provide a comprehensive look at different pattern types, textures, and techniques, enabling you to choose a project that perfectly suits your skill level and aesthetic preferences.
Beginner-Friendly Infinity Scarf Patterns
A great starting point for infinity scarves is selecting patterns designed for beginners. These patterns typically feature simple stitch combinations and straightforward color schemes, allowing you to focus on the fundamental techniques of knitting without being overwhelmed by complex instructions.
- Simple Ribbed Infinity Scarf: This pattern utilizes the classic rib stitch, creating a textured and cozy scarf. The repetitive nature of the rib stitch is easy to master and results in a visually appealing, versatile scarf.
- Garter Stitch Infinity Scarf: The garter stitch, a simple knit stitch, is ideal for beginners. The uniform texture is easy to follow and provides a straightforward yet elegant look.
- Seed Stitch Infinity Scarf: This pattern creates a visually interesting and textured infinity scarf. The seed stitch, formed by alternating knit and purl stitches, is straightforward to execute and results in a lovely, comfortable finish.
Infinity Scarf Patterns with Lace and Cables
Lace and cables add intricate details and visual interest to infinity scarves. These patterns often require a bit more practice but are incredibly rewarding to create.
- Lace Infinity Scarf: Lace patterns often use variations of openwork stitches to create delicate and ethereal designs. A common lace pattern for an infinity scarf is the “Eyelet” stitch, featuring open spaces that allow light to pass through, creating a lovely and airy look.
- Cable Infinity Scarf: Cable patterns add a textured dimension to the scarf. Using cables like the “Seed Cable” or “Moss Stitch Cable” provides an interesting contrast to the main fabric of the infinity scarf. Be sure to carefully follow the charts to avoid twisting or distorting the pattern.
Colorwork Infinity Scarf Patterns
Colorwork patterns incorporate the use of multiple colors to create intricate designs. These patterns offer a way to personalize the infinity scarf and create unique visual effects.
- Striped Infinity Scarf: Simple stripes can be easily incorporated into infinity scarf patterns, using different colors to create visual interest. The colors can be solid or variegated, depending on the desired effect.
- Intarsia Infinity Scarf: Intarsia involves knitting different colors into the fabric without changing colors. This technique allows for more intricate colorwork patterns. An intarsia infinity scarf can feature intricate images, repeating designs, or even a custom design.
Infinity Scarf Patterns for Advanced Knitters
Advanced knitters can explore more complex patterns that incorporate intricate stitch combinations, colorwork, and complex cable patterns.
- Complex Lace Infinity Scarf: Advanced lace patterns incorporate more complex stitch combinations, such as intricate patterns and varying textures.
- Intricate Cable Infinity Scarf: Advanced cable patterns use a variety of cable stitches and intricate combinations to create a more textured and three-dimensional look.
Yarn and Materials for Infinity Scarves
Choosing the right yarn is crucial for creating an infinity scarf that not only looks beautiful but also feels wonderful to wear. The yarn’s characteristics significantly impact the drape, texture, and warmth of the finished piece. Selecting the correct weight, gauge, and type of yarn is essential for achieving the desired look and ensuring a comfortable experience.Understanding the properties of various yarns allows you to tailor your project to your specific needs and preferences.
Different yarns react differently to knitting techniques, influencing the final outcome. By considering factors like warmth, drape, and texture, you can select a yarn that aligns perfectly with your vision for the infinity scarf.
Yarn Types and Suitability
Yarn type plays a critical role in the overall feel and appearance of an infinity scarf. Different fibers react differently to knitting techniques and environmental factors. Wool, for example, provides warmth and texture, while cotton offers a softer drape. Understanding the properties of various yarn types allows you to select the perfect yarn for your project.
- Wool: Known for its warmth and softness, wool yarns are a popular choice for infinity scarves, particularly during colder months. They often have a luxurious feel and a distinctive texture. However, wool can sometimes be prone to shrinkage, so it’s important to follow care instructions carefully.
- Acrylic: Acrylic yarns are a synthetic alternative to wool. They are generally affordable, easy to care for, and hold their shape well. Acrylic scarves are often a good choice for those seeking a durable and low-maintenance option.
- Cotton: Cotton yarns offer a lightweight and breathable option. Perfect for warmer weather, cotton infinity scarves provide a soft and airy drape. Cotton scarves are generally more delicate than wool or acrylic and may require special care.
- Cashmere: Cashmere is a luxurious fiber known for its exquisite softness and warmth. Cashmere yarns create a remarkably soft and luxurious infinity scarf. However, cashmere can be more expensive than other options.
- Alpaca: Alpaca yarn offers a balance of warmth and softness. It’s a natural fiber that’s known for its lightweight feel and luxurious drape. Alpaca scarves are generally warmer than cotton but less warm than wool.
Yarn Weight and Gauge
Yarn weight and gauge are critical factors in achieving the desired size and drape for your infinity scarf. A heavier yarn weight will result in a thicker, warmer scarf, while a lighter yarn weight will produce a thinner, more delicate scarf. Gauge refers to the number of stitches and rows per inch. Matching your chosen yarn weight to the desired gauge ensures the finished scarf will be the correct size and texture.
- Yarn Weight: Yarn weight is categorized into different groups (e.g., super bulky, bulky, worsted, fingering). Each weight corresponds to a specific thickness and stitch density. A heavier yarn will create a thicker, warmer scarf, while a lighter yarn will create a thinner, more delicate scarf.
- Gauge: Gauge is the number of stitches and rows per inch. The gauge of the yarn influences the size and drape of the finished scarf. A tighter gauge results in a denser, potentially less drapey scarf. A looser gauge leads to a more flowing and drapey scarf. Consistent gauge is crucial for creating a well-proportioned infinity scarf.
Pros and Cons of Different Yarn Types, Knit an Infinity Scarf
Consider the specific properties of each yarn type when choosing for your infinity scarf. Warmth, drape, and texture are all important factors to weigh. Different yarns excel in different aspects.
| Yarn Type | Warmth | Drape | Texture | Pros | Cons |
|---|---|---|---|---|---|
| Wool | High | Moderate | Robust | Excellent warmth, natural texture | Can shrink, potentially itchy for some |
| Acrylic | Moderate | Good | Smooth | Affordable, easy care, holds shape well | Can feel less luxurious than natural fibers |
| Cotton | Low | Excellent | Soft | Breathable, soft drape | Less warm, may require more care |
| Cashmere | High | Excellent | Luxurious | Exceptional softness, warmth | Expensive, delicate |
| Alpaca | Moderate | Good | Soft | Balance of warmth and softness | May be slightly more expensive than acrylic |
Determining Yarn Quantity
Accurately calculating the yarn needed for your project is crucial to avoid running out of yarn midway. A yarn gauge swatch is essential for determining the precise amount of yarn required. This swatch allows you to determine the yardage needed to knit a sample section of the infinity scarf, which can be used to extrapolate the total amount of yarn required for the entire scarf.
This prevents costly mistakes.
Measure the yarn needed by knitting a swatch that replicates the pattern and yarn used in the infinity scarf.
Tools and Equipment for Infinity Scarf Knitting

Beyond the yarn and pattern, a well-equipped knitter enjoys a smoother, more satisfying infinity scarf-making experience. The right tools make all the difference, whether you’re creating a simple infinity scarf or a complex design with intricate patterns. Choosing the right tools ensures accuracy, comfort, and ultimately, a beautiful finished product.Essential tools streamline the knitting process, enhancing precision and comfort.
Having the correct tools for specific designs allows you to achieve the desired effect and create unique and intricate infinity scarves. Different designs demand different tools, so knowing which ones to use is crucial. This section explores the essential and specialized tools required for knitting infinity scarves, from basic to advanced techniques.
Essential Knitting Tools
Understanding the basics is fundamental to any knitting project. Essential tools like needles, stitch holders, and measuring tools are critical for precision and efficiency.
- Knitting Needles: The most fundamental tool, knitting needles come in various sizes (US sizes or metric equivalents) corresponding to the yarn weight and desired stitch density. Different needle types (circular, straight, or double-pointed) cater to specific projects, like shaping and joining pieces. Circular needles are especially beneficial for creating seamless infinity scarves.
- Stitch Holders: These are crucial for managing stitches when working on multiple sections of the infinity scarf or when switching to different colors. They prevent stitches from dropping and ensure neat work. A stitch holder is indispensable for keeping track of stitches while you work on other parts of the infinity scarf, especially during color changes.
- Measuring Tape: Precise measurement is critical for creating a well-proportioned infinity scarf. A tape measure allows you to accurately gauge the desired length and width, helping you create a scarf that fits perfectly.
- Yarn Scissors: Sharp yarn scissors are vital for cutting yarn cleanly and efficiently, reducing fraying and maintaining a neat appearance. Yarn scissors are necessary for cutting yarn cleanly and preventing unraveling.
Tools for Intricate Infinity Scarf Designs
Crafting intricate infinity scarf patterns often requires specialized tools beyond the basics. These tools enhance control and allow for more complex designs.
- Cable Needles: These needles are used for creating cable patterns. They hold stitches temporarily to create the characteristic cable structures. For intricate patterns, cable needles are essential for maintaining stitch definition and achieving the desired effect. They help maintain the integrity of cable stitches while knitting.
- Stitch Markers: These are used to mark specific points in the pattern, like beginning and end of rows or sections, to maintain consistency. They are also crucial for managing increases or decreases and keep track of repeating patterns. They help in keeping track of increases or decreases and repeating patterns.
- Darning Needles: These are used for weaving in ends, repairing mistakes, and adding decorative elements. Their fine points allow for precise work, and they are essential for tidying up loose ends and making repairs in infinity scarves.
Tools for Specific Infinity Scarf Types
Some infinity scarf designs benefit from specialized tools.
- Blocking Mats and Pins: Blocking is a crucial step for many infinity scarves, particularly those with intricate patterns or those using bulky yarns. These tools help maintain the shape and size of the infinity scarf.
- Specialized Needles for Shaping: Certain infinity scarves require specific needle shapes to create the desired form, such as shaping the ends for a unique design. These specialized needles help achieve the desired shaping, whether it’s a point, a curve, or a particular taper.
Tool Summary Table
| Tool | Purpose | Importance |
|---|---|---|
| Knitting Needles | Holding and manipulating stitches | Essential for creating the fabric of the scarf |
| Stitch Holders | Temporarily holding stitches | Crucial for managing sections and color changes |
| Measuring Tape | Accurate measurement | Ensures proper fit and proportions |
| Yarn Scissors | Cutting yarn cleanly | Maintains neatness and prevents fraying |
| Cable Needles | Creating cable patterns | Necessary for intricate designs |
| Stitch Markers | Marking specific points | Keeps track of pattern repeats and increases/decreases |
| Darning Needles | Weaving in ends, repairs | Essential for neat finishing and repairs |
| Blocking Mats and Pins | Maintaining shape after blocking | Crucial for precise shaping and form |
| Specialized Needles for Shaping | Creating specific shapes | Essential for specific design elements |
Measurements and Sizing for Infinity Scarves: Knit An Infinity Scarf
Getting the perfect infinity scarf involves more than just choosing a pretty pattern. Accurate measurements are crucial for a well-fitting, comfortable, and aesthetically pleasing piece. Understanding how to calculate the right yarn and stitch length, and how to adjust patterns for different sizes and necklines, are key skills for any knitter.
Importance of Accurate Measurements
Precise measurements ensure the scarf drapes correctly around the neck, falls to the desired length, and complements the wearer’s physique. A scarf that is too long or too short can look awkward or detract from the overall style. Careful measurements also help avoid wasted yarn and frustration from having to redo a project.
Calculating Yarn and Stitch Length
To determine the necessary yarn and stitch length for your desired infinity scarf size, you need to consider several factors. First, know the desired width and length of the scarf. Second, the stitch pattern you choose significantly impacts the final dimensions. A tighter stitch pattern will result in a smaller scarf than a looser one. Finally, the type of yarn used will influence the finished size.
A heavier yarn will create a larger scarf than a lighter one.
The formula for calculating the required yarn length typically involves multiplying the scarf width by the number of stitches per inch, then by the length in inches.
For example, if you want a 20-inch wide scarf, and your stitch pattern creates 5 stitches per inch, and you want it 60 inches long, you would multiply 20 x 5 x 60 to determine the amount of yarn needed. This will vary based on the yarn weight. The amount of yarn needed should always be checked against the yarn ball band information, as well.
Sample Measurements for Different Infinity Scarf Sizes
| Scarf Size (approx.) | Width (inches) | Length (inches) |
|---|---|---|
| Small | 18 | 50 |
| Medium | 20 | 60 |
| Large | 22 | 70 |
| Extra Large | 24 | 80 |
These are approximate measurements and can vary depending on the chosen stitch pattern and yarn weight.
Adjusting Patterns for Different Sizes and Necklines
Patterns often provide a standard size. However, your unique needs may call for modifications. Adjusting patterns for different sizes and necklines is a crucial skill. Many patterns offer guidance on scaling dimensions or provide instructions for altering stitch counts or row lengths. Understanding the relationship between stitches and rows in the pattern is essential.
Knitting an infinity scarf is surprisingly relaxing. It’s a great way to unwind after a long day, and the rhythmic clicking of the needles can be quite meditative. Recently, I’ve been inspired by the new version of “Morning Elvis” by Florence and the Machine, featuring Ethel Cain, which you can check out here: ethel cain joins florence and the machine on new version of morning elvis listen.
The soaring vocals definitely give me some serious motivation to keep my knitting project going. Hopefully, this new inspiration will help me finish my infinity scarf soon!
A good knitter will be familiar with the gauge (stitches per inch) to ensure accurate sizing.
Adjusting Patterns for Different Sizes
Adjusting a pattern for a different size involves calculating the new stitch and row counts based on the desired width and length. This often involves using the pattern’s gauge to determine how many stitches and rows are required for the new dimensions. You can either adjust the pattern’s instructions to match the new stitch count or add or remove stitches to maintain the pattern’s design.
This step is essential for achieving a properly sized scarf. For instance, if the original pattern calls for 100 stitches and 150 rows, and you want a larger scarf, you would add more stitches and rows.
Choosing the Correct Needle Size
The needle size you select directly impacts the gauge of your knitting. Using the incorrect needle size will result in a scarf that is too tight or too loose. The correct needle size is essential for achieving the desired drape and visual appeal. The pattern should specify the recommended needle size. Using the wrong needle size can lead to distorted patterns and uneven textures.
Sticking to the pattern’s recommendations is crucial for an accurate and aesthetically pleasing result.
Troubleshooting Infinity Scarf Projects
Knitting an infinity scarf can be a rewarding experience, but sometimes challenges arise. Understanding common knitting problems and their solutions is crucial for completing your project successfully and preventing frustration. This section will guide you through troubleshooting common issues, from dropped stitches to joining problems, and offer strategies for correcting mistakes and preventing them in the future.
Common Knitting Problems and Solutions
Troubleshooting knitting projects is an essential skill for any knitter. Recognizing and addressing issues promptly can save time and frustration. This section provides a comprehensive guide to common knitting problems encountered while making infinity scarves, offering clear solutions and preventive measures.
- Dropped Stitches: Dropped stitches are a common occurrence in knitting, especially when working on a complex pattern or with a finer yarn. To remedy this, carefully evaluate the area where the stitch dropped. Gently lift the dropped stitch using a needle, ensuring it’s re-inserted into the correct position. If the stitch is too far gone, try picking up the dropped stitch from the next row.
If the stitch is not easily recovered, consider starting again from the affected section. Ensure proper tension and gauge throughout the project to prevent further drops.
- Uneven Tension: Variations in tension can lead to an uneven infinity scarf, impacting its appearance and overall look. Maintaining consistent tension throughout the project is crucial. Check your tension regularly. Adjust your knitting pressure and needle grip to ensure a consistent stitch formation. You can also experiment with different yarn weights and needle sizes to find a combination that works for you.
If the tension remains inconsistent, review your pattern instructions to confirm that you’re following them accurately.
- Joining Issues: Joining the ends of an infinity scarf requires precision. A mismatched or uneven join can ruin the appearance of the finished project. Carefully match the edges of the two ends before weaving in the ends. Use a tapestry needle to weave in the ends of the yarn securely. Ensure the ends are completely concealed and not protruding from the scarf.
Practice your joining techniques on smaller projects before tackling a larger infinity scarf.
- Mistakes during the Knitting Process: Making mistakes is inevitable in knitting. Don’t be discouraged; they are part of the learning process. If you realize a mistake, don’t panic. Evaluate the mistake and determine the best course of action. If the mistake is minor, you can often correct it within the same row.
If the mistake is more significant, consider whether it’s easier to frog (unravel) a section or start a new row. For errors in a large project, consider carefully if it’s worth correcting the mistake or starting over.
Methods for Correcting Errors
Correcting errors in knitting is a crucial skill. Understanding the techniques for fixing mistakes can save you time and frustration. This section provides detailed instructions for addressing errors effectively.
- Fixing Dropped Stitches: To correct dropped stitches, carefully use a needle to lift the dropped stitch. Ensure the stitch is re-inserted into the correct position. Alternatively, consider picking up the dropped stitch from the next row. If the dropped stitch is too far gone, consider re-knitting the affected section. Maintain consistent tension throughout the project to avoid further drops.
Knitting an infinity scarf is a surprisingly satisfying project. It’s a great way to unwind and create something cozy for the cooler months. Plus, the vibrant colours and intricate patterns in the movie, miles morales into the spiderverse , remind me of the beautiful textures you can achieve with yarn. It’s definitely a craft that sparks creativity and keeps my hands busy, like Miles Morales’s spider-powers! The final product is a stylish accessory that’s perfect for layering.
- Adjusting Uneven Tension: To adjust uneven tension, regularly check your tension. Adjust your knitting pressure and needle grip to ensure a consistent stitch formation. Adjusting the yarn weight or needle size may also be necessary. If the problem persists, review your pattern instructions to confirm you’re following them correctly.
- Correcting Joining Issues: To correct joining issues, carefully match the edges of the two ends before weaving in the ends. Use a tapestry needle to securely weave in the ends, concealing them completely. If the join is significantly off, you may need to carefully unravel the section and re-join it correctly.
- Preventing Mistakes in the Future: To prevent future mistakes, practice consistent tension and gauge. Pay close attention to your pattern instructions, and review them before starting the project. Take your time and carefully knit each row. Avoid rushing the process. Consider using a stitch counter or a stitch marker to maintain track of your progress.
Table of Common Knitting Problems and Solutions
| Problem | Solution |
|---|---|
| Dropped Stitches | Carefully lift and reinsert the dropped stitch, or pick up the dropped stitch from the next row. |
| Uneven Tension | Adjust knitting pressure and needle grip. Adjust yarn weight or needle size. |
| Joining Issues | Carefully match edges and weave in ends securely. Consider re-joining if the join is significantly off. |
| Mistakes during Knitting | Evaluate the mistake and determine the best course of action (frog a section or start a new row). |
Project Inspiration and Ideas

Unleashing your creativity is key to crafting an infinity scarf that truly reflects your unique style. From classic elegance to bold statements, the possibilities are endless. This section explores a multitude of inspiration sources, techniques for incorporating embellishments, and creative ideas for designing your perfect infinity scarf.The joy of knitting an infinity scarf lies not just in the process, but also in the final product.
Careful consideration of inspiration, embellishments, and design choices can elevate a simple scarf into a truly personalized piece.
Inspiration Sources for Infinity Scarf Designs
Inspiration for infinity scarf designs can be drawn from various sources. Nature’s beauty, with its intricate patterns and color palettes, provides endless inspiration. Consider the swirling patterns of leaves, the vibrant hues of flowers, or the calming tones of a forest scene. Fashion trends can also spark ideas; examine current runway collections and magazine features for unique colour combinations, textures, and designs.
Artistic movements like Art Deco or Impressionism can provide visual cues for patterns and colour schemes.
Incorporating Embellishments into Infinity Scarves
Embellishments add a touch of personality and visual interest to infinity scarves. Beads, buttons, and embroidery can be incorporated into the knitting process to create unique designs. Beads can be woven into the fabric, strung along the edges, or clustered in specific patterns. Buttons can be sewn onto the scarf, arranged in rows, or used as decorative accents.
Embroidery, with its versatility, can be used to add intricate designs, lettering, or symbols. The choice of embellishments and their placement will depend entirely on your desired aesthetic.
Creative Design Ideas for Infinity Scarves
Colour combinations, patterns, and textures can dramatically affect the look and feel of an infinity scarf. A monochromatic palette can create a sense of serenity, while contrasting colours can produce a vibrant and dynamic design. Geometric patterns can lend a modern edge, while floral or paisley patterns offer a touch of elegance. Consider textures such as cables, lace, or garter stitch to add depth and visual interest.
Personal Style and Preference in Infinity Scarf Design
Personal style and preferences play a crucial role in designing an infinity scarf. A scarf that reflects your individual tastes will be more enjoyable to wear and more meaningful to own. Consider your wardrobe, your preferred colours, and the overall aesthetic you strive for. If you prefer a minimalist style, a simple solid-coloured scarf with subtle embellishments might be ideal.
If you are drawn to bold statements, an infinity scarf with intricate patterns and vibrant colours will be a better fit. The goal is to create a piece that you will cherish and wear with confidence.
Techniques for Creating Personalized Infinity Scarves
Techniques for creating personalized infinity scarves can involve incorporating unique elements into the knitting process. For example, a personalized message or a meaningful symbol can be knitted into the design. Consider using different yarn weights or colours to create a gradient effect, or varying stitch patterns to produce a visually appealing transition between sections. Experimenting with different techniques and materials will help you achieve a scarf that is uniquely yours.
Closure
In conclusion, creating a beautiful infinity scarf is a rewarding experience that combines artistry, skill, and creativity. This guide provided a comprehensive overview of the entire process, from selecting the perfect yarn to troubleshooting common knitting issues. Armed with the knowledge and techniques presented, you’re now well-equipped to embark on your own infinity scarf knitting journey. Whether you’re a seasoned knitter or just starting out, we encourage you to explore the vast world of infinity scarf designs and create something truly special.