Tag: iPhone

  • Reset Network Settings on iPhone A Comprehensive Guide

    Reset Network Settings on iPhone A Comprehensive Guide

    Reset Network Settings on iPhone is a crucial troubleshooting step for various connectivity issues. This guide delves into the process, from understanding different reset types to preparing your iPhone and handling post-reset actions. We’ll cover everything from common Wi-Fi and cellular problems to advanced scenarios and security considerations, ensuring a smooth and secure reset experience.

    Whether you’re facing slow internet speeds, lost connections, or Bluetooth pairing woes, this guide will walk you through the process of resetting your iPhone’s network settings, and offer valuable tips to ensure a successful outcome. We’ll examine the various types of network resets available, and explain the impact of each on your connected accounts and devices. Understanding these nuances is key to making informed decisions when tackling network issues.

    Understanding the Reset Network Settings Process

    Resetting network settings on your iPhone can be a useful troubleshooting step for various connectivity issues. This process essentially erases your iPhone’s saved network configurations, forcing it to reconnect to Wi-Fi and cellular networks. It’s important to understand the different types of resets and their implications before proceeding.

    Step-by-Step Reset Procedure

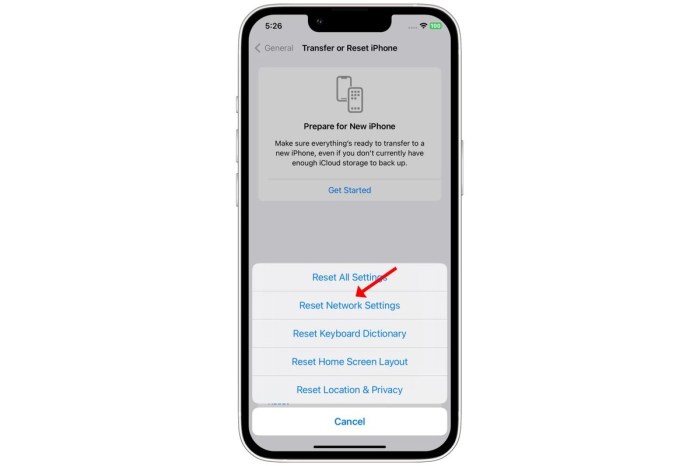
    To reset your iPhone’s network settings, follow these steps:

    • Open the Settings app on your iPhone.
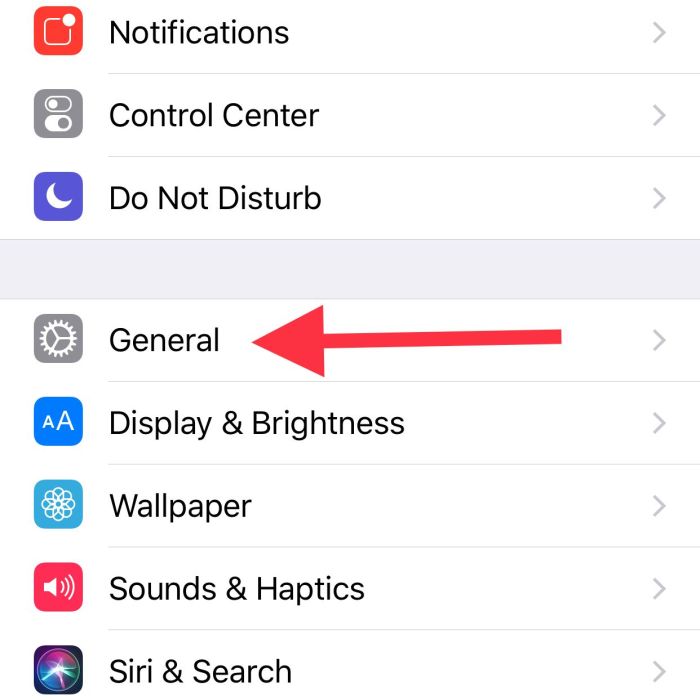
    • Tap on “General.”
    • Scroll down and tap on “Transfer or Reset iPhone.”
    • Tap on “Reset.”
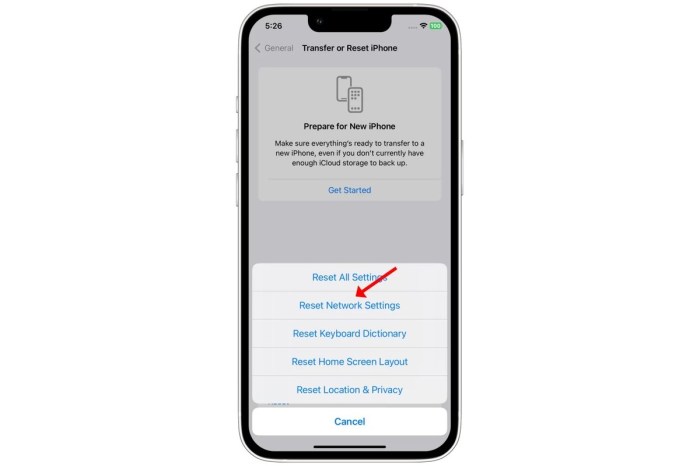
    • Tap on “Reset Network Settings.”
    • Enter your passcode if prompted.
    • Confirm the reset by tapping “Reset Network Settings” again.

    Your iPhone will now disconnect from all Wi-Fi networks and cellular data connections. The process typically takes a few minutes.

    Types of Network Resets

    Resetting network settings on an iPhone offers different options. A full reset affects all network configurations, while targeted resets only impact specific aspects.

    • Full Network Reset: This option removes all saved Wi-Fi networks, cellular data settings, VPN configurations, and Bluetooth pairings. This is a comprehensive approach to restoring default network settings.
    • Targeted Resets (e.g., Wi-Fi or Cellular): These selective resets offer more granular control. For instance, a Wi-Fi reset clears saved Wi-Fi networks, allowing you to reconnect to them from scratch. Similarly, a cellular reset restores your cellular data settings to default.

    Impact on Connected Accounts and Devices

    Resetting network settings typically does not affect your connected accounts, such as iCloud, or apps. However, some third-party apps might require re-authentication or re-pairing with your device after the reset. Also, any saved Bluetooth pairings will be removed, and you’ll need to re-pair those devices.

    Comparison of Full vs. Targeted Resets

    The table below highlights the key differences between a full network reset and targeted resets.

    Reset Type Impact on Wi-Fi Impact on Cellular Data Impact on Other Settings
    Full Reset Removes all saved Wi-Fi networks; you must reconnect. Resets cellular data settings; you must reconfigure. Removes VPN configurations, Bluetooth pairings, and other network-related settings.
    Targeted (Wi-Fi) Removes saved Wi-Fi networks; you must reconnect. No impact on cellular data. No impact on other network-related settings.
    Targeted (Cellular) No impact on Wi-Fi. Resets cellular data settings; you must reconfigure. No impact on other network-related settings.

    Troubleshooting Network Issues

    Resetting your iPhone’s network settings can be a powerful tool for resolving various connectivity problems. However, it’s crucial to understand when a reset is the right solution and what other potential causes might be at play. Knowing these factors can save you time and frustration.This section dives deeper into common network problems a reset might address, and importantly, when a reset won’t be the answer.

    Sometimes, a frustratingly slow iPhone connection needs a good reset. A quick Network Settings reset can often fix those connection hiccups. If you’re looking for something a bit more upbeat to listen to while you wait for the reset to complete, you might enjoy the new song from Kipp Stone Tata, check it out here: kipp stone tata new song listen.

    It’s a great way to pass the time while your phone sorts itself out. Just remember to back up your important data before performing any iPhone resets.

    We’ll also explore potential underlying issues and how to diagnose them effectively. Understanding the various diagnostic methods is vital for finding the root cause of your network problems.

    Common Network Problems Resolved by a Reset

    A network reset can often resolve issues arising from corrupted network settings. This includes problems with Wi-Fi connectivity, cellular data issues, VPN configuration errors, and incorrect proxy settings. In many cases, a simple reset can restore a stable connection, eliminating the need for more complex troubleshooting.

    Network Problems a Reset Might Not Fix

    While a reset can be effective for configuration errors, it won’t address hardware problems. Examples include a faulty SIM card, a damaged antenna, or issues with the cellular tower’s signal. Software glitches unrelated to network settings, such as corrupted app data or system glitches, also won’t be resolved by resetting network settings. Moreover, problems originating outside the iPhone, like internet service provider outages, will remain unresolved.

    Potential Causes of Network Issues Beyond Faulty Configuration

    Network issues can stem from various factors beyond incorrect settings. A weak or inconsistent Wi-Fi signal from the router, for example, can lead to intermittent connectivity problems. Similarly, interference from other electronic devices operating on the same frequency can affect the strength of your wireless connection. A crowded Wi-Fi network can also result in slower speeds and connection dropouts.

    In cellular data scenarios, network congestion or a poor cellular signal reception area could be contributing factors.

    Methods for Diagnosing Network Problems

    Different methods offer varying levels of insight into network issues. Checking for Wi-Fi or cellular signal strength using the iPhone’s built-in settings is a quick preliminary step. More detailed diagnostics might involve using a network analysis tool or consulting your internet service provider (ISP) for troubleshooting advice, especially if the problem is consistent. Using a Wi-Fi analyzer app can pinpoint issues with your router’s signal or identify interference from other devices.

    If you suspect a cellular issue, checking signal bars and contacting your carrier for any service disruptions is recommended.

    Importance of Backing Up Data Before a Reset

    Backing up your data is crucial before performing any reset. A network reset will not delete your personal data, but it can affect app configurations and settings. This includes saved Wi-Fi passwords, VPN connections, and other network-related data. Ensure your data is safely stored in iCloud or a local backup. This precaution prevents any potential loss of important information.

    Steps to Take if the Reset Fails

    If the reset fails to resolve the network issue, it indicates a problem that extends beyond the network configuration. First, review your internet service provider’s status page to check for any outages or maintenance. Consider contacting your carrier or your router’s manufacturer for support if the issue persists. If the issue is localized, consulting an IT professional might be necessary.

    Preparing for the Reset

    A network reset on your iPhone can be a powerful troubleshooting tool, but it’s crucial to prepare thoroughly. This involves understanding what the reset will do, backing up critical data, and ensuring you have a plan to restore your settings afterward. A well-planned reset minimizes potential disruptions and maximizes the chances of a smooth transition.The reset process essentially erases your network settings, requiring you to reconnect to Wi-Fi and cellular networks.

    This often resolves connectivity issues, but a crucial aspect is proactively preparing for this change. Careful planning ensures you don’t lose important information or face unexpected challenges.

    Essential Checks Before Initiating a Reset

    Before diving into the reset process, it’s wise to perform some preliminary checks. This helps ensure the reset is the appropriate solution and that you’ve taken necessary precautions. These checks should be performed methodically, and each step verified before proceeding.

    • Verify all essential network connections are functioning correctly. This includes checking Wi-Fi, cellular data, and Bluetooth, to make sure everything is running as expected.
    • Ensure all your desired apps are running as expected. This helps you to avoid surprises during the reset.

    Verifying Network Connections

    A thorough check of your current network connections is vital. This step helps determine if the reset is truly necessary or if a different approach might resolve the problem.

    • Test Wi-Fi connectivity by trying to access websites and other online resources.
    • Verify cellular data access by checking data usage, or by making and receiving calls. This will help you determine the current status of your cellular network connection.
    • Confirm Bluetooth is working correctly by attempting to connect Bluetooth devices, such as headphones or car audio systems.

    Disconnecting from Wi-Fi and Cellular Data

    Disconnecting from Wi-Fi and cellular data is critical before performing the reset. This prevents unexpected data loss or conflicts during the reset process.

    • Turn off Wi-Fi by navigating to Settings > Wi-Fi and toggling the switch to the “Off” position.
    • Turn off cellular data by navigating to Settings > Cellular and toggling the switch to the “Off” position.

    Backing Up Important Data

    Backing up your data before resetting network settings is essential to avoid data loss. A robust backup strategy safeguards crucial information.

    • Back up your contacts, photos, videos, and other important data to iCloud, a computer, or an external storage device. This ensures you don’t lose your vital information.

    Securing Accounts and Data

    Protecting your accounts and data is a crucial part of the preparation process. A structured approach helps ensure that your personal information is secure.

    Account Security Steps
    iCloud Review and update your iCloud password.
    App Stores Ensure your app store passwords are secure and up-to-date.
    Email Confirm email passwords are secure and up-to-date.
    Other Important Accounts Review and update passwords for all other essential accounts.

    Post-Reset Actions

    Resetting your iPhone’s network settings is a powerful troubleshooting tool, but it’s crucial to understand the steps required to reconnect and reconfigure your devices afterward. This section will guide you through the process of reconnecting to Wi-Fi, cellular networks, Bluetooth devices, and VPN connections, along with potential issues and their solutions.

    Resetting network settings on your iPhone can sometimes be a lifesaver for frustrating connection issues. But sometimes, a deeper dive into system memory management is needed. For instance, clearing the RAM on your iPad or iPhone, as detailed in this helpful guide Clear the RAM on an iPad or iPhone , can resolve similar performance hiccups. Ultimately, resetting network settings on your iPhone can often be a simple and effective solution, resolving those stubborn connectivity problems.

    Reconnecting to Wi-Fi and Cellular Networks

    After the reset, your iPhone will need to scan for available Wi-Fi and cellular networks. This process typically involves selecting your preferred network from the list of available options and entering the password if required. For cellular networks, your iPhone will automatically connect to your carrier’s network, assuming proper service is available in your area.

    Re-entering Network Settings

    The re-entry of network settings involves re-inputting the necessary details for your Wi-Fi and cellular connections. This typically includes entering the network name (SSID) and password for your Wi-Fi network. For cellular, the iPhone will automatically configure itself based on your carrier’s network settings. Ensure you have the correct network credentials to avoid connection issues.

    Re-Pairing Bluetooth Devices

    The process of re-pairing Bluetooth devices after a network reset involves a similar procedure to initial pairing. This often requires selecting the device from a list of available Bluetooth devices on your iPhone and then entering the pairing code if needed. If the device doesn’t appear in the list, check if the device is turned on and within Bluetooth range.

    Resetting network settings on your iPhone can sometimes be a lifesaver, especially if you’re having connectivity issues. It’s a surprisingly simple process, but sometimes it can feel a bit like a digital detox. You might even find yourself thinking about other digital tools, like adding swatches in Photoshop. Add Swatches in Photoshop is a great way to streamline your design workflow, but don’t forget that a simple network reset can often resolve those annoying connection problems, too.

    So, if you’re still struggling with your iPhone’s Wi-Fi, give it a try!

    Re-configuring VPN Connections

    Re-configuring VPN connections involves re-entering the VPN server address, username, and password. The specific procedure depends on the type of VPN service you’re using. Refer to the VPN provider’s documentation for detailed instructions. Remember to choose the correct VPN protocol for optimal security and performance.

    Common Post-Reset Issues and Resolutions, Reset Network Settings on iPhone

    After a network reset, some common issues may arise. One such issue is the inability to connect to a Wi-Fi network. This could be due to an incorrect password or a network name change. Another potential problem is difficulty re-pairing Bluetooth devices. This can be resolved by ensuring both devices are turned on and within range.

    If you face difficulties re-configuring VPN connections, double-check your VPN provider’s instructions and ensure the correct credentials are entered.

    Advanced Scenarios

    Resetting network settings on your iPhone can be a powerful troubleshooting tool, but it’s crucial to understand its implications, especially in complex situations. This section dives into advanced scenarios where a reset might be necessary and how to navigate potential complications. From specific problem types to the impact on connected devices and locked iPhones, we’ll cover it all.A network reset isn’t a magic bullet.

    It’s a significant step, and understanding the potential consequences—particularly in cases involving sensitive data or multiple devices—is paramount. This section aims to equip you with the knowledge to make informed decisions.

    Specific Problems Requiring a Reset

    Network resets are not a one-size-fits-all solution. They are most effective when other troubleshooting steps have failed. Problems like persistent Wi-Fi connection issues, intermittent cellular connectivity, or strange network behavior that resists other fixes are prime candidates for a network reset. In such situations, a reset can help isolate the problem to the network configuration itself.

    Impact on Connected Devices

    A network reset on your iPhone affects other devices on the network. This is because the reset essentially removes and re-establishes the iPhone’s network configuration. If you’re part of a home network with multiple devices, expect temporary disruptions in connectivity. For example, smart home devices might lose their connection or require manual re-pairing. This is temporary, as the devices will reconnect after the iPhone reconfigures its network settings.

    In some cases, devices may require you to re-enter network credentials.

    Recovering Lost Network Settings

    Unfortunately, there’s no foolproof way to recover lost network settings after a reset. The reset action discards the previous configuration, so it’s essential to take precautions. This is why careful preparation, as discussed in previous sections, is so important. If you’ve backed up your network settings or meticulously documented them before the reset, this process will be much smoother.

    However, without prior records, restoring your network configuration becomes challenging.

    Restoring Previous Network Configurations

    Various approaches exist for restoring previous network configurations, each with its own level of complexity. If you have a backup of your network settings, restoring from the backup is the easiest and most reliable method. However, if you haven’t backed up your network settings, manual re-entry of the network details is the only option. This involves meticulously remembering and re-entering all network details, including Wi-Fi passwords and cellular APNs.

    The method of choice depends entirely on the availability of prior backups and meticulous record-keeping.

    Impact on a Locked iPhone

    Resetting network settings on a locked iPhone can present unique challenges. If the iPhone is locked and you don’t have the passcode, you won’t be able to access the settings necessary to initiate the reset. This means that you’ll be unable to re-configure the network settings until the iPhone is unlocked. Therefore, the process of resetting the network configuration on a locked iPhone is effectively impossible.

    Security Considerations

    Resetting your iPhone’s network settings can be a useful troubleshooting step, but it’s crucial to understand the potential security implications. This process essentially wipes the slate clean on network configurations, which, while beneficial for resolving issues, can also expose your device to vulnerabilities if not handled carefully. Knowing the potential risks and how to mitigate them is essential to maintaining a secure connection.Network resets often involve removing security protocols and configurations that were previously in place to protect your device and personal information.

    This can leave your device susceptible to various security threats if proper precautions are not taken. Understanding the specifics of these risks and implementing appropriate safeguards will ensure that your iPhone remains secure even after a reset.

    Potential Security Risks

    Network resets can inadvertently compromise your device’s security by removing critical security measures. These measures, such as Wi-Fi passwords, VPN configurations, and even two-factor authentication settings, are often erased during the reset process. This can lead to unauthorized access to your network and sensitive data.

    Examples of Potential Risks

    • Compromised Wi-Fi Network: If you rely on a secured Wi-Fi network for banking or sensitive online transactions, resetting your network settings will remove the saved Wi-Fi credentials. This means you’ll need to re-enter the password, potentially exposing the network to unauthorized access during this process if security measures aren’t in place to prevent it. This is especially true for public Wi-Fi networks, where security is often compromised.

    • Exposure to Malware: If your device has existing malware or spyware, resetting network settings might not remove the malware entirely. The malware could potentially exploit vulnerabilities during the reset to further infiltrate the device or obtain access to your sensitive data.
    • Loss of VPN Connection: If you use a VPN for enhanced security and privacy while using public Wi-Fi, resetting your network settings will disconnect you from your VPN. This means you’ll lose the added layer of security provided by the VPN until you reconnect.

    Mitigation Strategies

    Taking proactive steps to safeguard your device during and after a network reset is crucial. It’s essential to prioritize security to prevent potential risks.

    • Backup Data: Before initiating a network reset, back up all important data on your device. This ensures that you don’t lose any critical information during the reset process. Consider using iCloud or iTunes for comprehensive backups.
    • Secure Wi-Fi Network: If you use a secured Wi-Fi network, ensure that the password is strong and difficult to guess. Avoid using easily guessable passwords, like birthdays or names. Employ a strong password management tool.
    • Two-Factor Authentication: Enable two-factor authentication whenever possible for all accounts and applications that support it. This adds an extra layer of security beyond just a password.
    • Verify Network Security: After resetting network settings, carefully review and reconfigure all your network connections. Ensure you have strong passwords and utilize appropriate security protocols.

    Impact on Security Protocols

    Network resets can affect various security protocols in different ways.

    • Wi-Fi Security: Resetting settings might remove saved Wi-Fi passwords, requiring re-entry and potentially exposing the network to vulnerabilities. It’s critical to secure your Wi-Fi connection again using strong, unique passwords.
    • VPN Configurations: Resetting network settings will disconnect you from any active VPN connections. Reconnect to the VPN after the reset to restore the enhanced security.
    • Cellular Data Security: While cellular data security isn’t directly affected by a network reset in the same way as Wi-Fi, it’s still essential to maintain secure data usage habits. Avoid using public Wi-Fi for sensitive transactions if possible.

    Summary Table

    Potential Security Risks Mitigation Strategies
    Compromised Wi-Fi Network Use strong, unique passwords; secure the Wi-Fi network; use VPN when necessary.
    Exposure to Malware Regularly scan your device for malware; back up data before reset.
    Loss of VPN Connection Reconnect to the VPN after the reset.
    Exposure to unauthorized access Ensure strong passwords, use secure networks, and enable two-factor authentication where available.

    iPhone Models and Variations: Reset Network Settings On IPhone
    Reset Network Settings on iPhone

    Resetting network settings on your iPhone can be a straightforward process, but the specific steps might vary slightly across different models and iOS versions. Understanding these nuances is crucial to ensure a smooth and successful reset, avoiding potential complications.Different iPhone models might have slightly varying hardware configurations, which could affect network performance. This means the way your iPhone interacts with cellular towers, Wi-Fi networks, and Bluetooth devices can subtly differ from one model to another.

    These minor variations can influence how a network reset affects the device’s operation.

    Comparison of Network Reset Procedures Across iPhone Models

    Different iPhone models, even within the same generation, might have slightly different hardware configurations. This can lead to subtle differences in the way the reset process affects the device’s operation. For instance, older models with limited RAM might experience slightly longer reset times. Newer models with more powerful processors might handle the reset procedure more quickly. While these differences are usually insignificant for the average user, technical experts might find them noteworthy.

    Variations in the Reset Process Based on iOS Versions

    The iOS version installed on your iPhone can significantly impact the network reset process. Newer iOS versions often incorporate optimizations that improve the efficiency of the reset procedure. Older iOS versions might have different user interfaces or steps, which could require slightly different approaches during the reset process. Consider that older iOS versions might not have the advanced features of newer versions, making the process slightly less streamlined.

    Specific Considerations for Older iPhone Models

    Older iPhone models might have limitations in terms of processing power and memory. This can lead to longer reset times and potential instability during the procedure. When performing a network reset on an older model, it’s advisable to have a stable power source available. Consider the potential for the device to become unresponsive or exhibit unusual behavior during the reset.

    Be prepared for slightly longer reset durations on older devices.

    Unique Challenges Associated with Specific iPhone Models

    Certain iPhone models, due to their hardware limitations or design characteristics, might encounter unique challenges during a network reset. These challenges could involve compatibility issues with specific Wi-Fi standards or cellular network technologies. For instance, a model with a less sophisticated Wi-Fi chip might experience difficulties connecting to newer Wi-Fi standards, which could be a unique challenge during the reset.

    Table Summarizing iOS Version Compatibility with Network Reset Methods

    This table provides a general overview of the compatibility of different iOS versions with various network reset methods. Note that this table is not exhaustive and specific scenarios might require further investigation.

    iOS Version Compatibility with Network Reset Methods Specific Considerations
    iOS 15 and above Generally compatible with all standard network reset methods. Potentially optimized reset procedures for enhanced speed and stability.
    iOS 14 Compatible with all standard network reset methods. Minor differences in user interface compared to newer versions.
    iOS 13 and below Generally compatible with standard network reset methods. Potential for longer reset times due to processing limitations.

    Final Conclusion

    Reset Network Settings on iPhone

    In conclusion, resetting your iPhone’s network settings can be a powerful tool for resolving connectivity problems. By following this comprehensive guide, you’ll gain a clear understanding of the process, from preparation to post-reset actions. Remember to back up your data, carefully consider the different reset types, and address any potential security concerns. This detailed guide empowers you to confidently tackle network issues and keep your iPhone connected and secure.
  • Hulu App No Sound iPhone Troubleshooting Guide

    Hulu App No Sound iPhone Troubleshooting Guide

    Hulu App No Sound iPhone is a frustrating problem, but don’t worry! This comprehensive guide delves into the various potential causes and provides actionable solutions to get your Hulu streaming back on track. We’ll explore everything from simple troubleshooting steps to examining app conflicts and even checking your device’s hardware.

    From software glitches to network hiccups, we’ll cover a wide range of possibilities. This guide aims to equip you with the knowledge and tools to pinpoint the root cause and restore your Hulu viewing experience. Let’s dive in!

    Troubleshooting iPhone Audio Issues with Hulu

    Hulu, a popular streaming service, can sometimes experience audio problems on iPhones. This often results in frustrating silences or distorted sound while attempting to enjoy your favorite shows and movies. This guide provides a comprehensive approach to diagnosing and resolving these issues, covering potential software, app, network, and even hardware-related causes.This comprehensive guide will walk you through various troubleshooting steps, from basic checks to more advanced techniques, ensuring a smooth and sound Hulu experience on your iPhone.

    Identifying the root cause is key to a swift resolution. Common error messages and symptoms will be explored, along with explanations of potential underlying problems.

    Common Symptoms of No Sound on Hulu

    Users often report experiencing a complete lack of sound, or intermittent audio issues, when using the Hulu app on their iPhone. Symptoms can include no sound at all during playback, muted audio, distorted sound, or audio that abruptly cuts in and out. These issues can be frustrating, disrupting the viewing experience and leading to considerable inconvenience.

    Potential Causes of No Sound Issues

    Several factors can contribute to audio problems with the Hulu app on iPhones. These include software glitches within the Hulu app itself, conflicts with other apps on your device, network connectivity problems, or even potential hardware issues.

    Troubleshooting Steps

    A systematic approach is crucial to resolving iPhone audio issues. Here are some troubleshooting steps, ranging from simple checks to more complex solutions:

    • Check iPhone Volume and Mute Settings: Ensure the volume on your iPhone is turned up and that the device’s mute switch is not activated. This is often the first and simplest troubleshooting step.
    • Restart the Hulu App: Sometimes, a simple app restart can resolve minor glitches. Close the Hulu app and reopen it to see if the sound returns.
    • Restart your iPhone: A full device restart can often resolve a variety of software-related problems. This may be necessary if the sound issue persists after restarting the Hulu app.
    • Check Network Connection: Poor or unstable network connections can lead to audio issues. Ensure your iPhone has a stable Wi-Fi or cellular connection. Try using Wi-Fi if you are using cellular data.
    • Update Hulu App and iOS: Outdated apps or operating systems can cause compatibility problems. Ensure the Hulu app and your iOS are up to date to prevent potential audio issues.
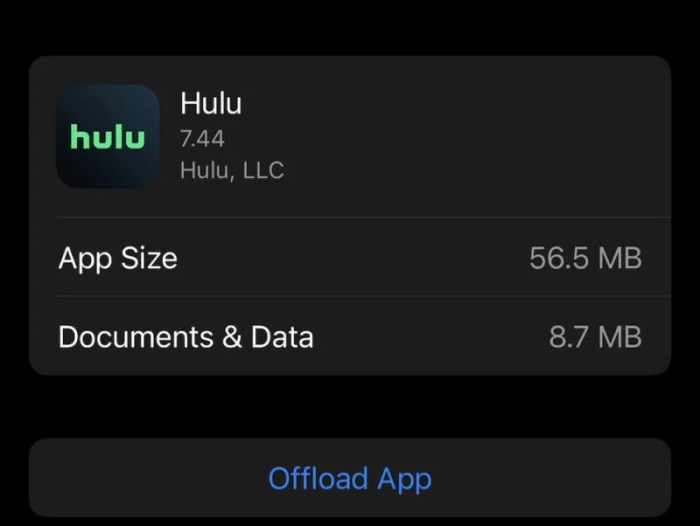
    • Clear Hulu App Cache and Data: Accumulated cache data from the Hulu app can sometimes cause problems. Clearing the app’s cache and data may resolve audio issues.
    • Check for App Conflicts: Sometimes, another app on your iPhone might be interfering with the Hulu app’s audio functionality. Try temporarily disabling other apps to see if the sound issue resolves.
    • Contact Hulu Support: If all other troubleshooting steps fail, contact Hulu support for further assistance. They may have specific troubleshooting steps or be able to identify any broader service issues.

    Troubleshooting Effectiveness Comparison

    The table below provides a comparison of different troubleshooting steps and their typical effectiveness:

    Step Description Expected Outcome Success Rate
    Check iPhone Volume & Mute Ensure volume is up and mute is off Sound restored if muted High
    Restart Hulu App Close and reopen the Hulu app Sound restored if minor glitch Medium
    Restart iPhone Completely restart the device Resolve various software issues High
    Check Network Connection Ensure stable Wi-Fi or cellular data Sound restored if network is stable Medium-High
    Update Apps Update Hulu app and iOS Resolve compatibility issues Medium
    Clear App Cache/Data Clear Hulu app cache and data Resolve cache-related problems Medium
    Check for App Conflicts Temporarily disable other apps Sound restored if other apps are interfering Low-Medium
    Contact Hulu Support Seek assistance from Hulu support Specific troubleshooting steps or service issues identification High (if other steps fail)

    Hulu App-Specific Sound Problems

    The Hulu app, while generally reliable, can sometimes experience audio issues on iPhones. These problems can stem from various factors unique to the app’s operation and its interaction with other software on your device. Understanding these specific issues can help you pinpoint the cause and find a solution.App updates, version incompatibility, and conflicts with other installed applications can all contribute to audio problems.

    My iPhone’s Hulu app is acting up again – no sound! This is seriously frustrating, especially when trying to watch a new show. I’ve tried the usual troubleshooting steps, but nothing seems to work. Maybe I should try making a dinosaur tail like the ones in the tutorial on Make a Dinosaur Tail instead. At least that would be a fun craft project! Hopefully, a restart will fix the Hulu sound issue though, because I need my shows!

    This article will explore these potential issues, offering troubleshooting steps to help isolate the problem.

    Common Hulu App Sound Problems

    The Hulu app, like any software, can encounter specific audio problems. These issues often stem from the app’s interaction with the iPhone’s operating system and other installed applications. Some common problems include:

    • Incompatibility with iOS versions: A newly released Hulu app version might not be fully compatible with an older iOS version. This can lead to audio playback issues. For example, a new version of the app might require a specific iOS version to function properly. If you are using an older iOS version, you may experience sound problems with newer Hulu app versions.

      An incompatibility between the Hulu app and the iOS version can also affect audio output.

    • Conflicts with other apps: Certain apps might interfere with the Hulu app’s audio output. For instance, if another app is using the audio hardware or changing audio settings, the Hulu app might not be able to play sound correctly. This is particularly true for apps that use background audio, such as music players or podcasts.
    • Corrupted app data: Occasionally, the Hulu app’s internal data can become corrupted, which may manifest as sound problems. This is less common but could still affect audio output. A forced restart or reinstalling the app can often solve this problem. This issue could affect other apps and may require a complete system restart.

    App Updates and Version Incompatibility

    Hulu regularly releases app updates to enhance functionality and fix bugs. However, these updates sometimes introduce unforeseen issues. Version incompatibility between the Hulu app and your iOS version or other installed apps can lead to audio problems. For example, a newer version of the Hulu app might have different audio encoding requirements than your iOS version, causing issues.

    My iPhone’s Hulu app is acting up again – no sound! It’s so frustrating, especially when I’m trying to catch up on my favorite shows. Luckily, I’ve been looking forward to seeing Phoenix on their North American tour, and tickets are selling fast, so I’m hoping to have some great music to distract me from the Hulu sound issues.

    phoenix line up north american tour is shaping up to be a fantastic show, but until then, I’m going to try a few troubleshooting steps to get my Hulu sound working again. Hopefully, it won’t be too much longer before I can binge-watch without the frustrating silence.

    Conflicts with Other Installed Apps

    The iPhone’s multitasking capabilities can lead to conflicts between apps. If another app on your device is competing for audio resources or interfering with the Hulu app’s audio settings, sound problems can occur. Examples include background audio players, media streaming apps, or apps using a lot of CPU processing power.

    Troubleshooting: Isolating the Problem

    Temporarily disabling or uninstalling other apps can help isolate the cause of the sound problem. This method is crucial for diagnosing conflicts.

    • Disable or uninstall other apps: Temporarily disable or uninstall apps that are potentially conflicting with Hulu, like background music players or other streaming services. Restart your iPhone after making these changes. This helps to determine if the issue is indeed caused by a conflict with another app.

    Hulu App Version Sound Stability

    This table compares different Hulu app versions and their reported sound output stability. Note that this is based on user reports and not definitive data.

    App Version Description Sound Issues Reported
    1.23.4 Initial release Some users reported sound crackling
    1.23.5 Minor bug fixes Sound issues resolved for most users
    1.23.6 Added support for Dolby Atmos Few users reported sound distortion with Dolby Atmos

    Network Connectivity and Sound

    A strong and stable internet connection is crucial for a smooth Hulu streaming experience, particularly when it comes to audio. Poor network performance can lead to frustrating issues like buffering, audio dropouts, and choppy sound, severely impacting the viewing enjoyment. Understanding the relationship between network connectivity and Hulu audio is essential for troubleshooting these problems.Poor internet connectivity significantly impacts the Hulu app’s ability to deliver a seamless audio experience.

    Insufficient bandwidth can cause audio to stutter, skip, or cut out entirely. Moreover, the quality of the audio stream directly correlates with the reliability of the internet connection.

    Impact of Different Network Types

    Different network types—Wi-Fi and cellular data—present unique challenges for Hulu audio streaming. Wi-Fi networks, generally, provide a more stable and reliable connection, resulting in consistent audio playback. However, interference from other devices or distance from the router can affect signal strength, leading to interruptions. Cellular data, while convenient for mobile viewing, is often less stable due to variable signal strength.

    This can result in audio buffering, especially in areas with weak cell service. The audio quality may also be lower due to the limitations of mobile data bandwidth.

    Network Latency and Buffering

    Network latency, the time it takes for data to travel between your device and Hulu’s servers, directly impacts the smoothness of the audio stream. High latency can lead to noticeable delays in audio playback, making the experience jarring and frustrating. Buffering, the process of downloading data to prepare for playback, is crucial for a smooth experience. Long buffering times can lead to significant pauses in the audio, further hindering the enjoyment of the streaming.

    For example, a user in a remote area with a spotty cellular connection may experience frequent buffering, leading to poor sound quality and a choppy viewing experience.

    Checking Network Connection Strength and Stability

    To determine the strength and stability of your network connection, utilize the built-in tools on your iPhone. Check your Wi-Fi signal strength indicator in the Wi-Fi settings. A strong signal generally means better audio quality. If using cellular data, assess the signal strength indicator within the cellular data settings. Stronger signals usually correlate to fewer audio issues.

    Furthermore, consider using a network speed test application to assess download and upload speeds. This can give a clearer picture of the bandwidth available and the potential for streaming issues.

    Network Conditions and Hulu Audio Impact

    Network Condition Description Impact on Sound
    Strong Wi-Fi Consistent signal strength, minimal interference. Clear, uninterrupted audio playback.
    Weak Wi-Fi Intermittent signal strength, potential interference from other devices. Potential for audio dropouts, buffering, and choppy playback.
    Strong Cellular Data Consistent signal strength in an area with good cellular coverage. Generally stable audio playback, though potentially lower quality than Wi-Fi in some cases.
    Weak Cellular Data Intermittent signal strength, especially in areas with poor cellular coverage. High probability of audio buffering, dropouts, and low-quality audio playback.
    High Network Latency Significant delay in data transmission between device and server. Audio playback delays, choppy playback, and potential for a poor viewing experience.

    iPhone System Settings and Sound: Hulu App No Sound IPhone

    Your iPhone’s sound settings play a crucial role in ensuring smooth audio playback for Hulu, or any other app. Understanding these settings can help diagnose and resolve sound issues. Incorrect configurations can lead to problems, so a careful review is often beneficial.Properly adjusting volume levels and output settings on both your iPhone and within the Hulu app is vital for a consistent audio experience.

    Many issues stem from mismatched volume levels or conflicting settings, impacting how the app interacts with your device’s audio system. Furthermore, understanding how your iPhone handles sound, especially with features like Do Not Disturb, can prevent unexpected audio interruptions.

    iPhone Volume Levels

    Adjusting volume levels within the Hulu app and on your iPhone separately can impact the final audio output. If the volume is too low in either location, the audio will be muted or barely audible. Conversely, setting volumes too high can lead to distortion. Matching the levels across both platforms provides the optimal audio experience.

    Do Not Disturb and Other Sound Modes

    The iPhone’s Do Not Disturb mode silences all incoming calls and notifications, often affecting the audio output of apps like Hulu. Other sound modes, like Airplane Mode or specific custom modes, can also impact the audio. It’s important to ensure that these settings aren’t unintentionally silencing or affecting the sound of Hulu.

    Headphones and External Speakers

    Using headphones or external speakers can change the audio output. If connected to headphones, the audio will primarily play through them. Conversely, external speakers will deliver sound from the device to these speakers. Understanding which output device is selected is crucial for diagnosing audio issues. If sound isn’t coming through headphones despite being selected, the headphones might be faulty, or a software issue could be present.

    Output Settings and Hulu Audio

    Correctly configured output settings are essential for Hulu audio. This includes selecting the appropriate audio output device (headphones, speakers) and verifying that the volume levels are appropriately balanced across both the app and the iPhone. It’s important to ensure the selected output is functioning properly.

    Table of iPhone Sound Settings and Hulu Audio, Hulu App No Sound iPhone

    Setting Description Effect on Hulu Sound
    iPhone Volume Overall volume control for the device. Adjusting this affects the overall volume of Hulu audio.
    Hulu App Volume Volume control specific to the Hulu app. Adjusting this controls the volume of Hulu audio only.
    Do Not Disturb Silences notifications and calls. May mute Hulu audio if the setting is active.
    Headphone/Speaker Selection Chooses the output device. Audio will play through the selected device.
    Ringtone/Notification Sounds Control settings for ringtone and notifications. May not directly affect Hulu audio, but other sound settings could indirectly influence it.

    Device Hardware Issues

    Troubleshooting sound problems in the Hulu app can sometimes involve looking beyond the software. Physical hardware issues with your iPhone, headphones, or external audio devices can lead to unexpected sound problems. Understanding these potential causes can help you pinpoint the source of the issue and get your Hulu streaming back on track.Often, subtle hardware issues can mimic software problems.

    A loose connection, a failing component, or a damaged part can manifest as sound issues within the Hulu app, just like a software glitch. This is why a systematic approach to troubleshooting is essential.

    Potential iPhone Hardware Problems

    Various internal components within the iPhone can impact sound quality. Problems with the speaker system, audio chip, or even the headphone jack can lead to distorted sound, muted audio, or complete silence when using the Hulu app, or any other audio-related app.

    Headphone/External Audio Device Issues

    Faulty headphones, damaged cables, or mismatched connections with external audio devices can lead to sound issues when streaming Hulu. A poor connection, a damaged connector, or a defect in the headphones themselves can prevent audio from playing properly. Similarly, using headphones or external speakers that aren’t compatible with your iPhone model can also lead to audio problems.

    Examples of Hardware Issues Causing Sound Problems

    A common example is a loose connection within the headphone jack. This can cause intermittent sound cuts or distorted audio when streaming Hulu, or even any audio-related app. Another scenario is a failing speaker system, where a particular speaker might stop working altogether. This could lead to a noticeable decrease in audio volume or complete silence on one side of the speakers, again when using the Hulu app.

    Having trouble with sound on your Hulu app on your iPhone? It’s a common issue, and while I haven’t found a definitive fix yet, some folks swear by checking for updates and restarting the app. Interestingly, a similar troubleshooting spirit applies to the musical talents of musicians like the bassist for the band Rip Fear, derf scratch.

    Hopefully, a similar approach to solving the sound problem will resolve itself. I’m still on the hunt for a foolproof method though.

    A damaged audio chip can cause a range of problems from muted sound to distorted audio. Even a tiny crack or damage to the iPhone’s speaker grill can reduce the volume or distort sound.

    Comparison of iPhone Models and Reported Sound Quality

    iPhone Model Description Reported Sound Issues
    iPhone 14 Pro Max High-end model with advanced features. Generally reported with high sound quality and few sound-related issues in the Hulu app. Some users report minor audio distortions in specific audio tracks, which may be due to software limitations or user configuration.
    iPhone 13 Mini Compact, entry-level model. Generally reported with comparable sound quality to the iPhone 13 Pro Max. However, some users have reported slightly lower volume compared to the high-end models, though not significantly impacting the Hulu experience.
    iPhone 11 Mid-range model with a smaller display. Reports vary on sound quality when using the Hulu app. Some users report a slightly less powerful speaker output compared to newer models. However, the sound quality is usually sufficient for the Hulu app.
    Older iPhone Models Preceding iPhone generations. Users have reported varied sound quality. Some report problems with low volume or distortion in the Hulu app, while others do not report any issues. The reported sound quality is sometimes dependent on the specific model and the age of the device.

    Troubleshooting Steps and Procedures

    Hulu App No Sound iPhone

    Sometimes, even the best streaming apps can experience audio issues. This section Artikels systematic troubleshooting procedures to help you resolve sound problems with the Hulu app on your iPhone. Following these steps in order can often pinpoint the source of the problem and restore your audio experience.

    Restarting the Hulu App

    This simple step can resolve temporary glitches within the app. A fresh start often clears up minor conflicts or cached data that might be interfering with audio playback.

    1. Open the Hulu app on your iPhone.
    2. Tap and hold the Hulu app icon on your home screen.
    3. Tap “Delete App” when prompted.
    4. Go to the App Store and search for “Hulu”.
    5. Download the Hulu app again.
    6. Open the Hulu app and try playing content.

    Restarting the iPhone

    A complete restart of your iPhone can refresh the system’s resources and resolve issues that may be impacting the Hulu app’s audio functionality.

    1. Press and hold the power button on your iPhone.
    2. Slide the “Power off” slider to the right.
    3. Wait for the iPhone to completely shut down.
    4. Press and hold the power button again until the Apple logo appears.
    5. Set up your iPhone as needed if prompted.
    6. Open the Hulu app and try playing content.

    Resetting Network Settings

    Sometimes, network configuration issues can lead to audio problems in streaming apps. Resetting network settings can resolve conflicts and ensure a stable connection.

    1. Open the “Settings” app on your iPhone.
    2. Tap “General”.
    3. Tap “Transfer or Reset iPhone”.
    4. Tap “Reset”.
    5. Tap “Reset Network Settings”.
    6. Enter your passcode if prompted.
    7. Allow the iPhone to restart and reconnect to your network.
    8. Open the Hulu app and try playing content.

    Last Point

    Hulu App No Sound iPhone

    So, your Hulu app isn’t playing sound on your iPhone? Hopefully, this guide has provided the insights and troubleshooting steps you need to get your streaming back on track. Whether it’s a software issue, a network problem, or something more involved, we’ve covered a multitude of potential causes. If you’ve tried these tips and the issue persists, don’t hesitate to reach out to Hulu support for further assistance.

    Happy streaming!

  • Add Favorites to Your iPhone A Comprehensive Guide

    Add Favorites to Your iPhone A Comprehensive Guide

    Add Favorites to Your iPhone sets the stage for a detailed exploration of organizing your iPhone. From contacts and apps to websites and photos, learning how to add and manage favorites can significantly enhance your iPhone experience. This guide covers everything from basic methods to advanced customization, troubleshooting common issues, and leveraging the power of your iPhone’s built-in features for a more efficient workflow.

    Understanding how to effectively add favorites on your iPhone can streamline your daily tasks and make your device more personalized. This comprehensive guide will walk you through various methods, including long-presses, dedicated buttons, and menu options, to help you effortlessly organize the elements you use most frequently.

    Understanding iPhone Favorites

    The iPhone’s “Favorites” feature is a powerful tool for streamlining your interactions with various content types. It allows you to quickly access frequently used contacts, apps, websites, and even photos, saving you valuable time and effort. This feature is especially useful for organizing your digital life and making it more efficient.The “Favorites” feature on an iPhone is a personalized collection of frequently accessed items.

    It allows users to quickly find and interact with content they use regularly, be it contacts, apps, websites, or photos. This curated collection can greatly enhance your daily digital workflow, promoting a smoother and more intuitive user experience.

    Ever wanted to quickly access your favorite Halloween recipes or spooky decorations? Adding favorites to your iPhone is a super helpful trick, especially when planning a big bash like Throw a Halloween Party. You can easily bookmark those awesome websites and social media posts that you want to re-visit, making your iPhone a handy resource. This simple feature saves you time and effort, just like organizing your Halloween party preparations.

    Definition of iPhone Favorites

    Favorites on an iPhone are a curated list of frequently accessed items. This personalized list streamlines user interactions by providing direct access to important contacts, applications, websites, and photos. This feature caters to the user’s specific needs and preferences, allowing for a tailored experience.

    Types of Items in iPhone Favorites, Add Favorites to Your iPhone

    The “Favorites” section can include various types of content, tailored to individual needs. This allows for diverse organization and easy retrieval. Here’s a breakdown of the common types:

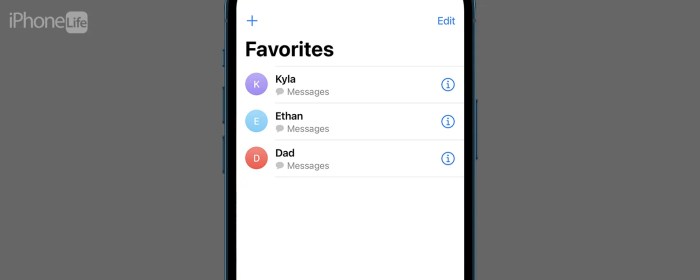
    • Contacts: Frequently contacted individuals are easily accessible, allowing for rapid communication.
    • Apps: Essential applications are quickly launched, enhancing productivity and efficiency.
    • Websites: Frequently visited websites are readily available, saving time and effort in navigating the web.
    • Photos: Important photos are easily retrievable, preserving memories and crucial visual information.

    User Applications of iPhone Favorites

    Users leverage the “Favorites” feature in numerous ways. The personalized nature of the feature allows for a tailored user experience. For example, business professionals might add frequently contacted clients, while students might add their favorite study resources.

    • Communication: Quickly access contacts for calls or messages, optimizing communication.
    • Productivity: Quickly access essential applications, enhancing productivity and efficiency.
    • Information Retrieval: Access frequently visited websites for quick information lookup.
    • Memory Preservation: Quickly locate important photos, preserving cherished memories.

    Importance of Organizing Content with Favorites

    Organizing content with favorites on an iPhone provides significant benefits. A curated selection of frequently accessed items leads to a streamlined workflow.

    • Enhanced Efficiency: Direct access to essential items reduces search time and effort.
    • Improved Workflow: Streamlined access to important information enhances overall efficiency.
    • Personalized Experience: The curated list caters to individual preferences and needs.

    Advantages of a Dedicated Favorites Section

    A dedicated favorites section on the iPhone offers several advantages. This feature provides a centralized location for frequently used items.

    • Time Savings: Quickly access essential items, eliminating the need for extensive searches.
    • Reduced Cognitive Load: The dedicated space streamlines information retrieval, reducing mental effort.
    • Improved User Experience: A curated list of favorites enhances the overall experience, making the iPhone more intuitive and user-friendly.

    How iPhone Favorites Enhance User Experience

    The “Favorites” feature significantly enhances user experience. This feature provides a personalized space for frequent items.

    • Intuitive Navigation: The curated list simplifies access to essential information, enhancing user interaction.
    • Personalized Interface: The personalized list adapts to user preferences and behavior.
    • Increased Efficiency: Direct access to frequent items streamlines the workflow and saves time.

    Comparison Across iPhone Models

    The “Favorites” feature is generally consistent across various iPhone models. The fundamental functionality remains largely unchanged, but subtle differences may exist in implementation. These differences can include the placement of the feature in the interface.

    Simple User Flow Diagram for Adding Favorites

    [A simple, text-based diagram of the user flow, like a numbered list, would be placed here. For example:

    • Open the desired app (e.g., Contacts).
    • Select the contact to add to favorites.
    • Tap the “Add to Favorites” button.
    • The contact is now added to the Favorites list.]

    Methods for Adding Favorites

    Adding favorites on your iPhone allows quick access to frequently used contacts, apps, and websites. This streamlined approach saves time and effort by placing essential resources at your fingertips. Understanding the various methods for adding items to your favorites ensures optimal use of these features.Efficient management of your iPhone’s favorites is crucial for enhanced productivity and personalized organization.

    Different methods cater to various preferences and contexts, offering flexibility in how you save your favorite items.

    Different Methods for Adding Favorites

    Several methods exist for adding items to your iPhone favorites, each with its own set of steps. Choosing the appropriate method depends on the type of item you want to add and the interface you’re using.

    Method Description Example App/Feature
    Long Press Hold down on the item for a brief period. A contact in the Contacts app. Contacts App
    Dedicated Button Specific buttons in certain apps allow direct addition to favorites. An app in the App Library. App Library
    Menu Options Some items offer a dedicated “Add to Favorites” option in a context menu. A website in Safari. Safari, specific apps.

    Adding Contacts to Favorites

    To add a contact to favorites, use the long-press method. Long-press the contact’s name in the Contacts app. A context menu will appear, and you should see an option to add the contact to favorites. Select this option to save the contact.

    Adding Apps to Favorites

    The App Library provides a dedicated “Add to Favorites” button for apps. Locate the desired app in the App Library. Tap the app icon and a dedicated “Add to Favorites” button will appear.

    Adding Websites to Favorites

    Adding websites to your favorites involves using Safari’s menu options. Open the website in Safari. Tap the “Share” button (it typically looks like a square with an upward-pointing arrow). From the share sheet, select “Add to Home Screen.” A confirmation prompt will appear, and selecting “Add” will save the website to your home screen.

    Adding Photos to Favorites

    To add a photo to favorites, follow these steps:

    1. Open the Photos app.
    2. Locate the photo you want to add.
    3. Tap and hold the photo to bring up the context menu.
    4. Select “Add to Favorites.”

    Features and Functionality

    Add Favorites to Your iPhone

    iPhone favorites offer a powerful way to quickly access frequently used apps, contacts, websites, and other items. This feature streamlines workflow and saves time by providing direct access to essential resources. Understanding how favorites are displayed, managed, and accessed is crucial for maximizing their benefits.Display and Management of FavoritesFavorites are displayed in a manner that’s intuitive and easy to navigate.

    Ever wanted to quickly access your favorite apps on your iPhone? Adding favorites is a simple way to streamline your phone use. Speaking of streamlining, did you know you can make delicious cake pops without sticks? Check out this fantastic tutorial on Make Cake Pops Without Sticks for a fun and creative twist. It’s a great way to get creative with your baking, and afterwards, you can easily add those new favorite recipes to your iPhone’s bookmarks or favorites list!

    The specific layout and visual presentation of favorites vary depending on the type of item. For example, app favorites are often shown as icons in a grid-like format on the home screen. Contacts and websites, on the other hand, might appear as entries in a list or within a contact app. The display format is tailored to facilitate quick identification and selection.

    The management of favorites involves adding, removing, and organizing items into folders or subfolders to categorize and improve overall accessibility.Accessing FavoritesAccessing favorites is a straightforward process. Users can tap on the favorite item directly from the displayed location, or use a dedicated favorites section or menu to quickly reach the desired item. For instance, tapping on a favorite app icon on the home screen immediately launches the app.

    Speaking of organizing your digital life, adding favorites to your iPhone is a game-changer. It’s super helpful for quickly finding your go-to apps, music, and contacts. While you’re diving into that, have you heard about Radiohead reissuing Kid A and Amnesiac with a new album of unreleased tracks? You have to listen to them if you say the word, check out the details here.

    Once you’ve sorted through all that amazing new music, remember to use that handy favorite feature to keep your most-used apps easily accessible on your iPhone!

    Similarly, selecting a contact from the favorites list opens the contact information.Organizing and Removing FavoritesFavorites are organized and managed through folders and subfolders, which allow for categorization. Users can create folders to group related items together. Items within a folder are typically displayed in a list or grid format, allowing users to locate items quickly. To remove a favorite, users can either individually delete it from the specific location or delete the entire folder.Search FunctionalitySearch functionality is often integrated into the favorites system.

    This allows users to locate specific items by typing a or phrase related to the item. The search function searches within the context of the favorites, making it easier to find specific contacts, apps, or websites.Use of Folders and SubfoldersFolders and subfolders offer a structured way to organize favorites. For instance, users can create a folder for work contacts, another for family contacts, and further subdivide the work folder by department.

    This hierarchical organization makes it easy to locate and access the desired contact. Creating folders also makes it easier to find specific favorites and manage them in a more organized manner.Limitations of the Favorites SystemOne limitation of the favorites system is the storage capacity. The number of favorites a user can add is potentially limited, depending on the iPhone model and storage capacity.

    Another limitation is the type of items that can be added to the favorites. For example, a user might not be able to add a specific note or document to their favorites list.Accessibility Features for Adding FavoritesThe accessibility features of adding favorites are often integrated with the device’s general accessibility settings. These settings may include options to enlarge the display or customize the navigation for easier access to favorite items.

    Users with visual or motor impairments may find these features helpful in managing and accessing their favorites.

    Troubleshooting and Common Issues: Add Favorites To Your IPhone

    Add Favorites to Your iPhone

    Adding items to your iPhone’s favorites can sometimes run into hiccups. This section dives into common problems users encounter and provides practical solutions. Understanding these issues can save you time and frustration when trying to organize your digital life.Troubleshooting favorite items on your iPhone requires a methodical approach. Identifying the specific problem is crucial before attempting a solution.

    This section will cover common problems, potential conflicts with other settings or apps, and methods to resolve issues related to specific apps or features. We’ll also explore how to reset your favorites list as a last resort.

    Items Missing from Favorites List

    Sometimes, items you’ve meticulously added to your favorites simply vanish. This can be frustrating, especially if those items were important to your workflow or organization. Several factors can contribute to this issue.

    • Incorrect data entry: Double-check that you’ve entered the correct information, such as the precise website address or app name, when adding the item to your favorites. Typos or slight variations can prevent the item from being recognized. For example, if you’re trying to add a website, ensure the URL is correctly typed.
    • App or system glitches: Occasionally, bugs or temporary system glitches can disrupt the favorite-saving process. Restarting your iPhone or updating the app responsible for adding the item can often resolve these temporary issues.
    • Data corruption: In rare cases, corrupted data in the operating system or a specific app can prevent items from appearing in the favorites list. A full reset of the favorites list might be required.

    Conflicts with Other Settings or Apps

    Certain settings or apps might inadvertently interfere with your favorites list. Understanding these potential conflicts can prevent future problems.

    • Background app refresh: Some apps may not save favorites correctly if their background refresh settings are interfering with the system’s ability to store the data. Disabling unnecessary background app refresh can resolve this issue.
    • Incompatible apps: Some third-party apps might not fully integrate with the iOS favorites system, leading to issues with saving or retrieving items. Check the app’s documentation or contact the developer for potential solutions.
    • Data synchronization issues: If you use iCloud or other syncing services, ensure your settings are configured correctly to prevent conflicts with your favorite items.

    Resolving Issues with Specific Apps or Features

    Specific apps might have their own unique ways of handling favorites. This section will provide solutions to problems with particular apps.

    • Web browser favorites: If a website isn’t appearing in your browser’s favorites, ensure you’ve added the item using the correct method within the browser’s settings. Clearing browser cache and cookies can sometimes resolve the issue. Ensure the website is accessible from the internet.
    • Email accounts: If you can’t find an email in your favorites, review your email client’s settings for favorite management. Some email clients may have specific requirements for adding or organizing favorites.

    Resetting the Favorites List

    As a last resort, you can reset the favorites list. This action will remove all items from your favorites.

    • Important Considerations: Resetting your favorites list will permanently delete all items. Make sure you have backed up your favorites or have copies of important items before proceeding.
    • Process: The process for resetting the favorites list varies slightly depending on the app or feature. Refer to the app’s documentation or your iPhone’s settings for the specific steps.

    Advanced Usage and Customization

    Taking your iPhone favorites beyond the basics opens up a world of possibilities for enhanced organization and efficiency. Beyond simply adding items, you can now strategically group, sort, and share your favorites, transforming them into powerful tools for specific tasks. This section dives into the advanced techniques for maximizing your favorite items.Customizing your favorites isn’t just about aesthetics; it’s about streamlining your workflow.

    By implementing custom categories, sorting methods, and sharing strategies, you can elevate your iPhone experience to meet your unique needs. This advanced approach is particularly beneficial for users who frequently interact with specific sets of information or locations.

    Sharing Favorites

    Sharing favorites extends their usefulness beyond individual devices. This feature allows you to easily distribute curated collections to others. For instance, you can share a list of favorite restaurants with a friend or family member, or a set of frequently visited locations with a travel companion. This feature is particularly useful for collaboration and information sharing.

    Importing/Exporting Favorites

    The ability to import and export favorites provides flexibility for managing your data across different devices or platforms. If you’ve meticulously crafted a collection of favorite contacts or websites on one iPhone, you can easily transfer that collection to another device or even a computer. This is valuable for maintaining consistency and continuity in your favorite data.

    Customizing Organization

    Creating custom categories allows you to tailor your favorites to your specific needs. Imagine creating a category for “Work Contacts” that houses your business associates, or “Favorite Recipes” to store culinary inspirations. This focused approach allows you to easily locate and access the specific information you need.

    Custom Categories for Favorites

    You can create custom categories to group related items. For example, if you frequently visit specific locations, you can create a category like “Travel Destinations” to store information about hotels, restaurants, and attractions in that area. This tailored approach ensures that your favorites are neatly organized, accessible, and relevant to your needs.

    Using Favorites for Specific Tasks

    Beyond general organization, you can use favorites for specific tasks. For instance, a frequent traveler might use favorites to store frequently visited locations, flight information, and hotel bookings. This ensures quick access to essential travel details. By associating favorites with a task, you can make it easier to manage your activities and stay organized.

    Customization Options for Favorites

    The table below illustrates various customization options available for organizing your favorites.

    Option Description Example
    Custom Folders Create folders for grouping related favorites Work Contacts, Family Members, Shopping Locations
    Sorting Organize favorites by date added, last accessed, or alphabetically Sort by last accessed for frequently visited locations, or alphabetically for contacts
    Sharing Share curated collections of favorites with others Share a list of favorite restaurants with a friend
    Importing/Exporting Transfer favorites between devices or platforms Transfer a list of favorite websites from one iPhone to another

    Summary

    In conclusion, mastering the art of adding favorites on your iPhone empowers you to curate a personalized digital ecosystem. By understanding the various methods, features, and troubleshooting steps, you can unlock a more streamlined and intuitive iPhone experience. This guide provides a robust foundation for optimizing your iPhone, ensuring you can quickly access the information and applications that matter most to you.

  • Adding to FaceTime Calls on iPhone/iPad

    Adding to FaceTime Calls on iPhone/iPad

    Add Someone to a FaceTime Call on iPhone or iPad. Making group FaceTime calls is easier than ever! This guide breaks down the different ways to invite friends and family to your existing calls, from using contact lists to phone numbers and email addresses. We’ll also tackle common troubleshooting issues and offer some advanced techniques for adding multiple people, all while highlighting FaceTime’s security features.

    Whether you’re trying to include a colleague in a work meeting or catching up with distant relatives, this guide will help you navigate the process of adding participants to your FaceTime calls with ease. Learn the ins and outs of the FaceTime interface and discover how it compares to other video calling platforms.

    Introduction to FaceTime Call Invitations

    FaceTime, Apple’s video calling service, is a popular way to connect with friends and family. It’s intuitive and readily available on iPhones and iPads, offering a seamless communication experience. This guide delves into the various methods for initiating calls and adding participants to an existing FaceTime session.Understanding the process of inviting someone to a FaceTime call is crucial for maximizing its utility.

    This knowledge streamlines the interaction and ensures a smooth experience for everyone involved.

    Initiating FaceTime Calls

    FaceTime calls can be initiated in several ways, catering to different situations and preferences. A user can start a call directly from the FaceTime app or by tapping a contact’s icon from the Phone app. Alternatively, a call can be initiated from a Messages conversation, which facilitates seamless integration with existing communication channels.

    Methods for Initiating a FaceTime Call

    • Directly from the FaceTime app: This involves opening the FaceTime app and selecting a contact from the list of saved contacts.
    • From the Phone app: Selecting a contact from the Phone app’s contact list allows initiation of a FaceTime call without navigating to the FaceTime app.
    • From a Messages conversation: This method allows initiating a FaceTime call directly from a conversation in the Messages app.

    Adding Participants to an Existing FaceTime Call

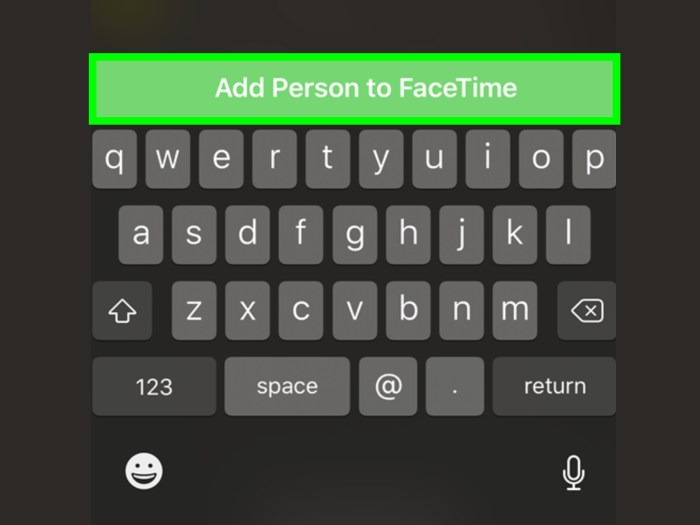
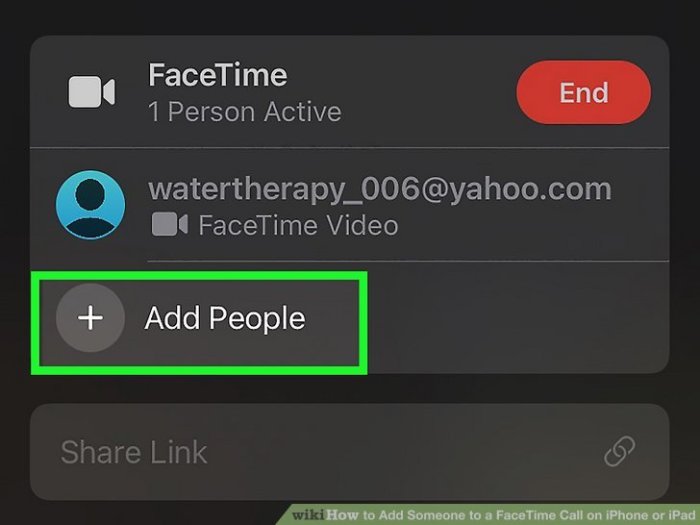
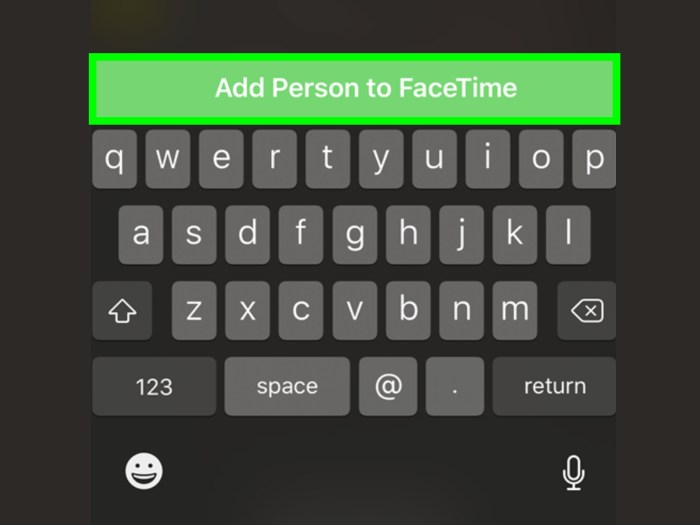
    Adding someone to an ongoing FaceTime call is a straightforward process. This feature is especially useful for group conversations or when you need to include more people in a discussion. The process involves the use of the ‘Add Person’ or similar options in the FaceTime interface.

    Typical Interface Elements for Inviting Participants

    The FaceTime interface typically presents a menu or button for adding participants during a call. This interface element often appears as a button or a menu option that’s readily accessible within the active call. The design is user-friendly, minimizing steps and maximizing efficiency.

    • Add Person/Add Participants Button: This button or icon is usually located prominently within the FaceTime interface, making it easy to identify and access.
    • Contact List: A list of contacts is presented, allowing you to select the person you want to add to the call.
    • Call Invitation Confirmation: The interface usually confirms that the invitation has been sent to the selected contact, which provides reassurance and clarity for the user.

    Methods for Adding Participants

    Adding participants to a FaceTime call can be a quick and easy way to include more people in a conversation. This process is straightforward and adaptable to various scenarios, from connecting with friends to collaborating with colleagues. Knowing the different methods and their nuances can help you choose the most efficient approach for your specific needs.This guide will detail the steps for adding someone via contact list, phone number, or email address, highlighting the advantages and disadvantages of each method.

    Understanding these options will allow you to select the most suitable approach for your FaceTime call.

    Adding Participants via Contact List

    Adding someone from your contact list is often the fastest and easiest method. This method leverages the existing contact information you’ve already stored on your device. You’re essentially leveraging the established relationship.

    • Locate the contact you wish to add in the FaceTime call invitation. This often involves searching through your contact list.
    • Select the contact and tap the ‘Add’ or ‘Invite’ button. The specific button may vary slightly depending on your iPhone or iPad model and operating system version.
    • Confirm the invitation on the recipient’s end. This confirmation usually involves a notification or prompt on the recipient’s device.

    Adding Participants Using Their Phone Number

    Adding someone by their phone number is particularly useful when you don’t have the person’s contact information saved on your device. This is an excellent option for connecting with someone you’ve recently met.

    Figuring out how to add someone to a FaceTime call on your iPhone or iPad is a breeze. Just like jamming out to the latest Maiya the Don Dusties track, maiya the don dusties new song listen , it’s a simple process. Once you’ve got the hang of it, adding folks to your FaceTime sessions becomes a snap.

    It’s a surprisingly straightforward process, perfect for those spontaneous virtual chats.

    • Open the FaceTime app and initiate a new call.
    • Tap the “+” symbol (or similar button) to add a participant.
    • Select the option to enter a phone number.
    • Enter the recipient’s phone number and tap “Add.”
    • If the recipient’s phone is registered with FaceTime, they’ll receive an invitation to join the call. The recipient must then accept the call.

    Adding Participants Using Their Email Address

    Adding a participant using their email address is a more indirect method. This is a helpful option when you have a recipient’s email address, but not their phone number or contact information.

    • Open the FaceTime app and initiate a new call.
    • Tap the “+” symbol (or similar button) to add a participant.
    • Select the option to enter an email address.
    • Enter the recipient’s email address and tap “Add.”
    • The recipient will receive an invitation to join the call via email.
    • The recipient must then accept the call from the email invitation.

    Comparison of Methods

    This table compares the pros and cons of each method for adding participants to a FaceTime call.

    Method Pros Cons
    Contact List Easy, fast, and convenient. Leverages existing contacts. Requires the recipient to be in your contacts.
    Phone Number Direct addition, no need for a contact. May not work if the recipient doesn’t have FaceTime or if their phone isn’t registered with FaceTime.
    Email Flexible, useful if you have the recipient’s email but not their phone number. Less direct than other methods. Requires the recipient to accept the invitation.

    Troubleshooting Common Issues

    Adding participants to a FaceTime call should be straightforward, but occasional hiccups can occur. Understanding the common problems and their potential solutions can save you valuable time and frustration. This section dives into troubleshooting frequently encountered issues when inviting someone to a FaceTime call on your iPhone or iPad.

    Contact Not Found

    Incorrect contact information is a primary reason for “contact not found” errors. Double-checking the contact’s name, phone number, or email address is crucial. Ensure the contact is saved in your contacts with accurate details, including the full name, correct phone number, and email address. Verify the spelling of the contact’s name. If the contact is saved in a different format, or using an email address instead of a phone number, make sure the format matches the expected input format in FaceTime.

    Call Invitation Failed

    Network connectivity issues are a common culprit for call invitation failures. A weak or unstable Wi-Fi connection or poor cellular signal can hinder the invitation process. Ensure a stable internet connection or strong cellular signal. Try restarting your device. If you are using Wi-Fi, ensure your Wi-Fi is active and connected.

    If using cellular data, ensure your data is turned on and working correctly. Try adding the contact again after a few minutes, or during a time with a stronger signal.

    Cannot Add to Call

    A primary reason for being unable to add someone to a FaceTime call is if the recipient does not have FaceTime installed or enabled. Verify if the recipient has FaceTime installed on their device. If the contact is using an older version of iOS, or if the device is not compatible with FaceTime, it might not be possible to add them.

    If they are using an older model of iPhone or iPad that doesn’t support FaceTime, adding them won’t work.

    Resolving Contact List or Phone Number Issues

    Problems with contact lists or phone numbers can sometimes prevent adding contacts to a FaceTime call. Ensure your contact list is up-to-date. Sync your contacts across all your devices, and make sure you have the correct phone numbers saved. If the contact has recently changed their phone number, update their information in your contacts app. Check for any potential issues with your device’s contact syncing process.

    A common cause is the device not having a connection to sync contacts. A common solution is to restart your device and re-establish a connection.

    Common Problems and Solutions

    Problem Possible Cause Solution
    Contact not found Incorrect contact info, contact not saved Verify contact details, ensure contact is saved correctly in your contacts
    Call invitation failed Network issues (weak Wi-Fi or cellular signal) Check internet connectivity, ensure a stable connection, or try again later
    Cannot add to call Recipient does not have FaceTime enabled Verify if recipient has FaceTime installed and enabled

    Advanced Techniques (Optional)

    Add Someone to a FaceTime Call on iPhone or iPad

    Mastering FaceTime’s advanced features empowers you to effortlessly manage calls with multiple participants and handle various scenarios. This section delves into strategies for adding numerous individuals, including those outside your contact list, and provides practical examples for different situations.

    Figuring out how to add someone to a FaceTime call on your iPhone or iPad is a breeze, but sometimes deciphering if a guy actually likes you after a first date is a bit trickier. Knowing subtle cues can be key, and if you’re wondering about those signals, check out this helpful guide on Know if He Likes You After the First Date.

    Once you’ve got the hang of both, you’ll be mastering tech and dating in no time! Just make sure you’ve got the contact details and you’re good to go for your FaceTime call.

    Adding Multiple Participants, Add Someone to a FaceTime Call on iPhone or iPad

    Efficiently adding multiple people to a FaceTime call enhances communication, allowing you to involve various stakeholders in a single session. A well-structured approach ensures a smooth transition for all participants.

    Figuring out how to add someone to a FaceTime call on your iPhone or iPad is super straightforward. Just make sure you’ve got the right contact information handy, and then you can easily add that person to the call. Speaking of connections, did you know that the xxs romy talks xxs origins love of Beyonce with savages jehnny beth listen?

    the xxs romy talks xxs origins love of beyonce with savages jehnny beth listen is a fascinating interview. After that, adding a friend or family member to your next FaceTime call is a breeze!

    Adding a Large Group

    Adding a large group to a FaceTime call requires careful planning and execution. Consider the size of the group; if it exceeds a certain number, the call might not be as effective or responsive. Facilitate communication using appropriate tools like chat or a shared document to manage discussions and information exchange. For instance, a large group of colleagues might be better served with a pre-meeting discussion or assignment of roles to facilitate a more organized exchange.

    Adding Someone Not on Your Contact List

    Adding someone who isn’t on your contact list involves using their phone number or email address. This process is straightforward but requires precision. Ensure the recipient has the FaceTime application installed to avoid any confusion or technical issues.

    Examples of Different Scenarios

    Different scenarios demand tailored approaches. For a family reunion, you’d want to add all relatives. For a work presentation, you might want to include clients or colleagues. For a casual gathering, adding friends or acquaintances is straightforward.

    • Family Reunion: Adding extended family members to a FaceTime call is common during gatherings. Ensure all participants have the app and understand the purpose of the call.
    • Work Presentation: Including clients or colleagues in a presentation requires prior coordination and clear communication to ensure the presentation flows smoothly. For example, ensure everyone has the meeting link and is prepared to join the call.
    • Casual Gathering: Adding friends or acquaintances for a social gathering is simple. Share the FaceTime call link or invite them directly, allowing them to join easily.

    Security Considerations

    FaceTime, while convenient, requires careful consideration of security measures. Unauthorized access to a FaceTime call can lead to various privacy violations, and maintaining a secure environment is paramount. Protecting personal information and verifying the identities of participants are crucial steps in ensuring a safe and trustworthy FaceTime experience.Understanding the potential risks associated with sharing personal information during a FaceTime call is essential.

    This knowledge empowers users to make informed decisions and safeguard their data effectively. By implementing the appropriate security protocols and adhering to privacy settings, users can significantly reduce the likelihood of encountering security breaches.

    Protecting Against Unauthorized Access

    Maintaining the security of FaceTime calls involves proactive measures to prevent unauthorized access. Implementing strong passwords for your Apple ID and enabling two-factor authentication are fundamental steps. Furthermore, regularly reviewing and updating your security settings within the FaceTime application itself is critical.

    Verifying Call Participant Identities

    Verifying the identity of FaceTime call participants is essential to prevent fraudulent activities. Using a combination of visual cues, prior knowledge of the participant, and, where applicable, confirming the call through a separate, established communication channel enhances security.

    Privacy Settings for FaceTime Calls

    FaceTime offers various privacy settings to control the visibility of your calls and activities. Adjusting these settings to your comfort level is crucial for maintaining privacy. Understanding the different options available within the FaceTime app settings is essential. For example, adjusting the visibility of your presence on the FaceTime app, as well as limiting the access to your call history, are significant privacy considerations.

    Risks Associated with Sharing Personal Information

    Sharing personal information during a FaceTime call, such as financial details or sensitive medical information, carries significant risks. Be mindful of the potential for eavesdropping or data breaches. Always prioritize the confidentiality and security of sensitive information when engaging in a FaceTime call. Using end-to-end encryption, where available, and adhering to the best practices for sharing personal information are essential.

    Avoid discussing sensitive information over a public Wi-Fi network.

    User Interface (UI) Exploration: Add Someone To A FaceTime Call On IPhone Or IPad

    The FaceTime interface, designed for seamless communication, features intuitive controls for adding participants to a call. Understanding these visual elements simplifies the process of inviting others to join an ongoing or scheduled conversation. This section delves into the specific buttons, menus, and steps involved in the participant addition process, offering practical examples to clarify the user experience.

    Visual Elements for Adding Participants

    The FaceTime interface employs a combination of icons, buttons, and menus to facilitate the addition of participants. Key visual elements often include a “Participants” button, a “+” icon, or a similar symbol indicating the ability to add more members to the call. These visual cues are designed to be easily recognizable and accessible.

    Participant Invitation Buttons and Menus

    The interface typically displays a “Participants” button or a similar menu option within the call window. Tapping this button or icon usually reveals a list of current participants, followed by an option to add new members. The options to invite individuals are often presented via contact lists, or by inputting phone numbers or email addresses. The interface may also offer a “Share” button, allowing the user to share the FaceTime call invitation with others via messaging apps, email, or other methods.

    Step-by-Step Guide to Invite Someone

    To invite someone to a FaceTime call, follow these steps:

    1. Initiate a FaceTime call with the desired number of participants.
    2. Locate the “Participants” button or menu within the call interface. This button’s appearance varies slightly depending on the FaceTime version; it might be a button, a tab, or an icon.
    3. Tap the “Participants” button or menu. A screen displaying the current participants will be shown.
    4. Look for the “Add Participant” option, often indicated by a “+” icon or a similar symbol. This is where you will invite new members.
    5. Select the desired method of invitation. You might be able to select contacts from your address book, enter phone numbers, or email addresses directly.
    6. Select the contact, phone number, or email address of the person you wish to invite.
    7. Confirm the invitation. The invitee will receive a notification, allowing them to join the call.

    Examples of UI Elements

    A common example is a floating “+” icon, usually positioned within the FaceTime call interface’s participant list area, indicating the addition of a new participant. Another example is a “Participants” menu, accessible via a button or icon, that lists the current participants and provides an option to add more members. Furthermore, an input field for entering a phone number or email address might be used to invite participants not in the contact list.

    Comparison with Other Platforms

    Add Someone to a FaceTime Call on iPhone or iPad

    Adding participants to a FaceTime call is a straightforward process, but how does it compare to similar features on other video calling platforms? Understanding the differences can help users choose the best platform for their needs. Different platforms employ varying methods for adding participants, reflecting the unique design philosophies and functionalities of each.While FaceTime’s intuitive interface excels in simplicity, other platforms might offer more advanced features or integration options.

    This comparison highlights the similarities and distinctions in functionality, providing a clear picture of how each platform handles the addition of participants to a video call.

    Similarities Across Platforms

    Most video calling platforms share fundamental similarities in adding participants. They typically involve an invitation process, either through a link or a direct contact method. The goal is to seamlessly bring multiple individuals into a shared video conversation. Successful addition often depends on the recipient’s availability and the platform’s real-time communication capabilities.

    Differences in Functionality

    The process of adding participants to a call varies significantly across platforms. FaceTime, for example, relies on direct contact, while other platforms may offer group creation or dynamic linking.

    Process Variations

    Platform Method of Adding Participants User Experience
    FaceTime Directly contacting participants via contacts. Intuitive and straightforward.
    Zoom Sending a meeting invitation, which may include a meeting link. Offers more control over the meeting, with options for scheduling and managing participants.
    Google Meet Sharing a meeting link or directly inviting contacts. Combines aspects of FaceTime and Zoom, offering both direct contact and a link-based approach.
    Microsoft Teams Inviting participants to a Teams meeting. Focuses on integration with other Microsoft services and productivity tools.

    The table illustrates the different approaches. FaceTime is fundamentally a direct-contact method. Other platforms, like Zoom and Google Meet, offer more flexibility, enabling the creation of meeting links that allow broader access. Microsoft Teams emphasizes the seamless integration of video calls within its broader platform. This variation reflects the distinct functionalities and integration needs of different platforms.

    Integration with Other Features

    Some platforms, like Zoom and Google Meet, integrate the addition of participants with broader meeting management tools, such as scheduling and recording. FaceTime primarily focuses on the immediate video call aspect. This difference impacts how users handle larger group calls or scheduled meetings. Different platforms offer varying levels of meeting management, emphasizing distinct features and integration strategies.

    Last Recap

    In conclusion, adding someone to a FaceTime call on your iPhone or iPad is a straightforward process. This guide has covered various methods for adding participants, from using contact lists to phone numbers or emails. We’ve also addressed common troubleshooting steps and highlighted important security considerations. So, whether you’re a seasoned FaceTime user or just starting out, this comprehensive guide should help you navigate the process smoothly and confidently.

    Enjoy connecting with your loved ones through seamless video calls!

  • Change Your TikTok Region on iPhone/iPad

    Change Your TikTok Region on iPhone/iPad

    Change Your Region in TikTok on iPhone or iPad is a crucial guide for users seeking to access different content libraries and features. This detailed walkthrough explains the process of switching regions, common pitfalls, and best practices for maintaining account safety throughout the transition. Understanding the impact on your user experience, content availability, and security measures is key.

    This comprehensive guide breaks down the steps involved, from initial setup to potential troubleshooting. We’ll explore the reasons behind needing to change your TikTok region, highlighting the significance of choosing the correct region and how it impacts your TikTok experience.

    Introduction to TikTok Region Change

    TikTok, a global platform, allows users to connect with creators and content from various countries. However, some users may find their experience limited by region-specific content availability or features. Changing your TikTok region can open up a wider range of content and potentially access specific features tailored to that region.Changing your TikTok region on an iPhone or iPad is a straightforward process, often required to access certain features or content unavailable in your current region.

    This process involves adjusting your account settings to reflect the desired location. However, there are common pitfalls to watch out for to ensure a smooth transition.

    Reasons for Changing TikTok Region

    Understanding why someone might want to change their TikTok region is crucial. Users might seek access to content unavailable in their current region, including creators, trending challenges, or unique features. They might also be interested in engaging with a community more closely aligned with their interests or location.

    Process of Changing TikTok Region on iPhone/iPad, Change Your Region in TikTok on iPhone or iPad

    The process for changing your TikTok region on an iPhone or iPad is generally straightforward. Follow these steps to ensure a smooth transition:

    • Open the TikTok app on your iPhone or iPad.
    • Tap on your profile picture in the bottom right corner.
    • Select “Settings and Privacy”.
    • Navigate to “Account”.
    • Look for the “Region” option. Tap it to choose a new region.
    • Confirm your selection and ensure the region is correct. You may need to confirm your choice by entering your details.

    Potential Issues Encountered During Region Change

    Several factors can lead to issues when changing your TikTok region. Common reasons include network connectivity problems, incorrect or outdated information provided during the process, or issues with the TikTok servers.

    • Network Connectivity: A weak or unstable internet connection can hinder the region-changing process. Ensure a reliable connection is available throughout the procedure.
    • Incorrect Information: Providing inaccurate information during the process can lead to verification issues and prevent successful region changes.
    • TikTok Server Issues: Occasionally, TikTok servers may experience downtime or malfunctions, which can affect the ability to change your region. This is an unavoidable circumstance that is beyond user control.

    Importance of Selecting the Correct Region

    Selecting the correct region on TikTok is vital for several reasons. It ensures you’re accessing the intended content, features, and community tailored to that region. Choosing the wrong region can lead to issues with accessing relevant content and interacting with the desired community.

    Steps for Changing Region on TikTok: Change Your Region In TikTok On IPhone Or IPad

    Changing your TikTok region can be useful for accessing content specific to a different country or region. This is particularly relevant for users who want to view content tailored to their local interests or engage with creators in their preferred language. This guide Artikels the steps involved in switching your TikTok region on an iPhone or iPad.

    Navigating the TikTok App

    To change your TikTok region, you need to access the app’s settings. This is usually done by tapping on the profile icon, located in the bottom right corner of the main screen. From there, a menu will appear, allowing you to navigate to the region settings.

    Figuring out how to change your region in TikTok on your iPhone or iPad can be a bit tricky, but it’s definitely doable. While you’re digging into those settings, you might also want to check out some new tunes! Bill Callahan just dropped 5 more new songs, and they’re absolutely worth a listen. bill callahan releases 5 more new songs listen Once you’ve got your region sorted, you can enjoy all the TikTok content available in your new area.

    Just remember to follow the instructions carefully, and you’ll be TikTok-ing in no time!

    Accessing Region Settings

    Once you’ve accessed the profile menu, you’ll likely see an option for “Settings” or “Account Settings”. This is where you’ll find the region change feature. If it isn’t immediately apparent, look for an option that explicitly relates to your location or account preferences.

    Changing Your Region

    This section details the procedure to change your TikTok region. Precise wording and the exact placement of options may vary slightly based on the app version. This procedure assumes a standard setup.

    1. Open the TikTok app on your iPhone or iPad.
    2. Tap on your profile icon (typically a silhouette of a person) located at the bottom right corner of the main screen.
    3. Select “Settings” or “Account Settings” from the menu.
    4. Look for an option labeled “Region,” “Location,” or similar. This is where you’ll initiate the region change.
    5. Tap on the current region listed. A list of available regions will appear.
    6. Select the desired region from the list.
    7. Confirm the region change. TikTok may prompt you to verify your identity or make other necessary changes.
    8. The app will then update your region settings. You may be required to log out and log back in for the changes to take effect. Close and reopen the app.

    Potential Issues and Solutions

    Changing your TikTok region on an iPhone or iPad, while straightforward in theory, can sometimes encounter unexpected hurdles. These issues, while not insurmountable, can be frustrating for users. This section delves into common problems, their underlying causes, and effective solutions. Understanding these potential pitfalls allows you to navigate the region-change process smoothly and avoid unnecessary complications.Many factors can affect a successful region change.

    Network connectivity, app updates, device settings, and even account history can all play a role. The following sections address potential difficulties and offer practical solutions to resolve them.

    Figuring out how to change your region on TikTok on your iPhone or iPad can be a bit tricky, but it’s totally doable! Speaking of things that are a bit tricky, did you know there’s a whole passionate fanbase dedicated to lil tecca we love you tecca? This awesome article dives deep into the fascinating world of tecca fandom.

    Once you’ve mastered TikTok’s regional settings, you’ll be able to access content from around the globe! So, get ready to explore!

    Common Error Messages

    Different error messages might indicate varying underlying issues. Identifying the specific error message you encounter is the first step toward finding a suitable resolution.

    • “Network Error” or “Connection Lost”: This often stems from unstable internet connections. Ensure a stable Wi-Fi or cellular data connection is active during the region change process. Try restarting your device or your internet router. If the issue persists, contact your internet service provider (ISP) for assistance.
    • “TikTok Server Error”: This suggests a temporary problem with TikTok’s servers. In this case, waiting a short period and retrying the process is often effective. If the error continues, try the region change at a later time.
    • “Account Restrictions”: If your account has restrictions, changing your region might be temporarily blocked. This could be due to violations of TikTok’s terms of service or previous issues with the account. Review your account activity for any potential causes. Contact TikTok support for assistance in resolving any account-related problems.
    • “Region Change Failed”: This generic error message could stem from a variety of issues. Ensure your device’s internet connection is stable, your account is up-to-date, and try restarting your device. If the problem persists, consider checking for any recent TikTok updates and trying the region change again after a while.

    Troubleshooting Steps

    Addressing potential problems requires systematic troubleshooting. This section Artikels crucial steps for diagnosing and fixing common issues.

    Figuring out how to change your region on TikTok on your iPhone or iPad can be a bit tricky, but it’s totally doable! While you’re browsing TikTok, you might also want to check out the new trailer for the upcoming TV show, “Beef House,” starring Tim and Eric. watch tim and erics first trailer for new tv show beef house Once you’ve caught that, remember to easily adjust your TikTok region settings for a more personalized experience.

    • Verify Network Connectivity: A stable internet connection is paramount. Ensure your Wi-Fi or cellular data is active and functioning correctly. Try a different network connection if possible.
    • Restart Your Device: A simple restart can often resolve temporary glitches. Force-quit the TikTok app and restart your device.
    • Check for TikTok Updates: Ensure you have the latest version of the TikTok app. Outdated versions might contain bugs that hinder the region change process.
    • Review Account Activity: Look for any suspicious or unusual activity on your TikTok account. Any violations of TikTok’s terms of service might prevent region changes.
    • Contact TikTok Support: If troubleshooting steps fail, reaching out to TikTok support is a last resort. This is especially important for account-related restrictions or persistent issues.

    Potential Account Issues During Region Change

    Account-related issues can significantly hinder the region change process.

    • Account Restrictions: Violations of TikTok’s terms of service or other issues might temporarily restrict account actions. Review your account activity and contact TikTok support for resolution.
    • Account Suspension: A suspended account will prevent region changes and other actions. Resolve any account suspension issues with TikTok support.
    • Account Inactivity: A prolonged period of inactivity might lead to restrictions on account actions. Ensure your account is active and log in regularly.

    Impact of Region Change on User Experience

    Change Your Region in TikTok on iPhone or iPad

    Changing your TikTok region can significantly alter your experience on the platform. This isn’t just about seeing different trending videos; it impacts the overall functionality, content availability, and even the features you can access. Understanding these nuances is crucial for a smoother and more enjoyable experience, regardless of your chosen region.The user experience on TikTok varies greatly depending on the region.

    Different regions have varying cultural norms, preferences, and regulations that shape the platform’s offerings. This means the content you see, the features you use, and even the language available can be drastically different based on your selected region.

    Content Availability Differences

    Understanding content availability across regions is key to adapting to a new TikTok experience. TikTok’s algorithm is tailored to each region, showing users content relevant to their specific interests and cultural context. This algorithm adjustment is vital to tailoring the platform’s offerings to each region. A user in the United States will likely see different content than a user in India, reflecting the diverse tastes and preferences of each region.

    • Specific Content Restrictions: Certain content types might be restricted in a particular region due to local regulations or community guidelines. For example, content promoting alcohol or tobacco might be restricted in some regions, while others might have different standards.
    • Trending Topics: Trending topics on TikTok often vary significantly between regions. This is a direct result of the algorithm’s tailoring. A trending dance in Japan might not be as popular in the United States, reflecting the regional differences in popularity and cultural trends.
    • Language and Accessibility: The language options and accessibility features available on TikTok can differ across regions. This is due to varying needs and preferences. For example, subtitles or closed captions might be more prevalent in some regions to cater to a wider audience.

    Feature Variations

    TikTok’s features might not be identical across all regions. Some features may be available in one region but not in another, due to regional differences in the platform’s functionality.

    • Specific Filters or Effects: TikTok might offer different filters or effects tailored to specific regions. This is related to local tastes and aesthetic preferences. A filter popular in one region might not be as popular or available in another.
    • Payment Features: In some regions, TikTok might have different payment features or monetization options than others. This reflects the varying approaches to digital payments and revenue generation across regions.
    • Live Streaming Capabilities: The functionality of live streaming on TikTok may vary based on region. This is due to regulations, local policies, and potential technical constraints.

    User Experience Comparison

    The user experience on TikTok varies across different regions due to the algorithm’s adjustments and content selection. This reflects the different cultural backgrounds, interests, and local norms of each region.

    Region Content Focus User Experience
    United States Diverse, including trending challenges, entertainment, and educational content. High engagement, wide variety of content
    India Local entertainment, including regional music, dance, and lifestyle content. Strong engagement, focus on local trends
    Japan Aesthetically pleasing content, anime, and trending challenges. High engagement, focus on aesthetic and unique content

    Examples of Content Availability Changes

    A user switching from the US region to the UK region might see a significant shift in the types of trending videos. This change is due to the differences in cultural tastes and trends between the two regions.

    Account Safety and Security During Region Change

    Changing your TikTok region can offer new content and features, but it’s crucial to prioritize account security throughout the process. A secure account is vital, not just for enjoying the platform but also for safeguarding your personal information. Neglecting security measures can expose your account to unauthorized access and data breaches.A region change, while usually straightforward, introduces a potential vulnerability if not handled cautiously.

    Taking proactive steps to secure your account before, during, and after the change can significantly reduce these risks. This involves understanding the security risks, implementing strong security measures, and monitoring your account for suspicious activity.

    Best Practices for Maintaining Account Security

    Careful attention to detail and consistent security practices are crucial during a region change. Implementing robust security measures is a proactive step towards minimizing potential risks. This includes utilizing strong passwords and enabling two-factor authentication (2FA).

    • Strong Passwords: Employ a unique and complex password for your TikTok account, ideally one that combines uppercase and lowercase letters, numbers, and symbols. Avoid using easily guessable passwords, like your birthdate or pet’s name.
    • Two-Factor Authentication (2FA): Enabling 2FA adds an extra layer of security. This requires a second verification method, such as a code sent to your phone or an authenticator app, alongside your password. This significantly reduces the risk of unauthorized access even if a password is compromised.

    Security Risks Associated with Changing TikTok Regions

    While TikTok region changes are typically safe, some potential risks exist. These risks can stem from factors like network vulnerabilities, unauthorized access attempts, and phishing scams. Understanding these risks empowers you to implement proactive security measures.

    • Compromised Networks: If you change regions while using a public or unsecured Wi-Fi network, your account information might be vulnerable to interception by malicious actors. Always prioritize using a secure, private network whenever possible.
    • Phishing Attacks: Be vigilant about suspicious emails or messages related to your TikTok account, especially after changing regions. Phishing attacks often attempt to trick you into revealing your password or other sensitive information. Never click on links or open attachments from unknown sources.
    • Data Breaches: While unlikely, the possibility of data breaches during a region change exists, though less frequent than other methods of attack. Be aware of the possibility and take necessary precautions. A strong password and 2FA will significantly reduce your vulnerability.

    Tips for Maintaining Account Security Throughout the Process

    Implementing a robust security strategy is paramount for maintaining account safety. Taking proactive steps can mitigate risks and maintain a secure account throughout the region change process.

    • Regular Account Reviews: Periodically review your account settings and activity log to identify any unusual or suspicious activity. This vigilance allows you to address any potential issues quickly.
    • Avoid Public Wi-Fi: Refrain from using public Wi-Fi networks during the region change process to prevent unauthorized access to your account information. Use a secure network, like your home Wi-Fi, for increased security.
    • Suspicious Activity: If you suspect any unusual activity on your TikTok account, immediately change your password and contact TikTok support for assistance. Quick action is key in such cases.

    Content Examples for Region Change

    Exploring TikTok’s global reach requires understanding the nuances of region-specific features. This section delves into practical examples, illustrating how regional variations impact the TikTok experience and how users can navigate potential issues during a region change.

    Regions Available on TikTok

    This table provides a snapshot of various TikTok regions, highlighting key distinctions in currency, language, and other relevant details. This information is crucial for understanding the diverse user base and the localized content that might be available.

    Region Name Currency Language(s) Other Details
    United States USD English Major content hub, significant creator base.
    India INR Hindi, English, other regional languages Vast user base, significant local content.
    Japan JPY Japanese Strong emphasis on animation and aesthetic content.
    Brazil BRL Portuguese Large user base, diverse content trends.
    Indonesia IDR Indonesian, English Massive user base, a growing hub for trending content.
    United Kingdom GBP English High engagement with global trends.

    Common Issues and Solutions During Region Change

    Navigating a region change on TikTok can present challenges. This table Artikels common issues and effective solutions, enabling users to troubleshoot potential problems.

    Problem Potential Causes Solutions
    Account login issues Incorrect region selection, network issues, server overload. Verify network connectivity, re-enter region settings, contact TikTok support.
    Content unavailability Content restricted by region, changes in content policy. Explore content from other regions, verify content policy for the new region.
    Currency issues during payments Incorrect currency settings, conflicting payment methods. Update payment method details to reflect the new region, contact payment provider.
    Language barrier Difficulties understanding TikTok interface, limited availability of translated content. Use translation tools, explore community support groups for the new region.

    Maintaining Account Security During Region Change

    Account security is paramount. Following these tips during a region change can help protect your TikTok account from potential threats.

    “Always use strong, unique passwords for your TikTok account. Avoid using the same password for other online services. Regularly update your security settings and monitor your account activity.”

    Comparing the TikTok Experience Across Regions

    The TikTok experience varies across different regions. This table compares available content, features, and other key differences.

    Region Available Content Features Other Key Differences
    United States Broad range of content, including entertainment, education, and social trends. Comprehensive features, including live streaming, duets, and challenges. High level of engagement with trending content.
    India Local content trends, entertainment, and social issues. Similar features to other regions but tailored to local trends. Strong emphasis on local languages and cultural expressions.
    Japan Aesthetically focused content, anime-inspired trends. Potential unique features for showcasing art. Content often focused on high-quality visuals and artistic expressions.

    Advanced Considerations

    Changing your TikTok region isn’t always a straightforward process. Beyond the basic steps, there are nuances and potential limitations to consider, particularly for international users and those seeking alternative approaches. These advanced considerations involve understanding specific requirements, potential pitfalls of alternative methods, and how these factors might impact your user experience and account security.This section delves into these intricacies, providing a more comprehensive understanding of the region-change process on TikTok.

    Alternative Approaches to Region Change

    There are no officially sanctioned, alternative methods to change your TikTok region. Attempting unofficial methods or third-party tools could pose significant risks to your account. TikTok’s platform is complex, and unauthorized access attempts can lead to account suspension or permanent ban.

    Specific Requirements and Limitations

    TikTok does not publicly list specific requirements for region changes. However, the platform’s terms of service and community guidelines implicitly dictate that users must comply with all applicable local laws and regulations in their new region. For example, if a user is attempting to change their region to avoid restrictions on certain content types, that content may still be restricted in their new region.

    Limitations of Alternative Methods

    Unofficial methods for changing your TikTok region are often unreliable and may violate the platform’s terms of service. Using such methods could lead to your account being suspended or permanently banned. Any potential benefit gained by bypassing official procedures is outweighed by the risk of account compromise. Moreover, these methods often lack support or guarantees, leaving users vulnerable to security issues.

    Considerations for International Users and Different Time Zones

    International users and those in different time zones should be aware of potential differences in content availability and platform functionality. TikTok’s content moderation policies and local regulations can vary significantly from region to region, influencing what types of content are allowed and how the platform operates. For instance, a user in a region with stricter content guidelines might encounter differences in their feed compared to a user in a region with more relaxed policies.

    Furthermore, potential variations in platform support and responsiveness to issues in different time zones could affect user experience.

    Conclusion

    Change Your Region in TikTok on iPhone or iPad

    Navigating TikTok’s regional settings can be straightforward with the right guidance. This guide equips you with the knowledge and steps to successfully change your TikTok region on your iPhone or iPad. Remember to prioritize account security throughout the process and understand how region changes impact your experience. By following this guide, you’ll unlock a wider range of content and features within TikTok.