Tag: iPad

  • Adding to FaceTime Calls on iPhone/iPad

    Adding to FaceTime Calls on iPhone/iPad

    Add Someone to a FaceTime Call on iPhone or iPad. Making group FaceTime calls is easier than ever! This guide breaks down the different ways to invite friends and family to your existing calls, from using contact lists to phone numbers and email addresses. We’ll also tackle common troubleshooting issues and offer some advanced techniques for adding multiple people, all while highlighting FaceTime’s security features.

    Whether you’re trying to include a colleague in a work meeting or catching up with distant relatives, this guide will help you navigate the process of adding participants to your FaceTime calls with ease. Learn the ins and outs of the FaceTime interface and discover how it compares to other video calling platforms.

    Introduction to FaceTime Call Invitations

    FaceTime, Apple’s video calling service, is a popular way to connect with friends and family. It’s intuitive and readily available on iPhones and iPads, offering a seamless communication experience. This guide delves into the various methods for initiating calls and adding participants to an existing FaceTime session.Understanding the process of inviting someone to a FaceTime call is crucial for maximizing its utility.

    This knowledge streamlines the interaction and ensures a smooth experience for everyone involved.

    Initiating FaceTime Calls

    FaceTime calls can be initiated in several ways, catering to different situations and preferences. A user can start a call directly from the FaceTime app or by tapping a contact’s icon from the Phone app. Alternatively, a call can be initiated from a Messages conversation, which facilitates seamless integration with existing communication channels.

    Methods for Initiating a FaceTime Call

    • Directly from the FaceTime app: This involves opening the FaceTime app and selecting a contact from the list of saved contacts.
    • From the Phone app: Selecting a contact from the Phone app’s contact list allows initiation of a FaceTime call without navigating to the FaceTime app.
    • From a Messages conversation: This method allows initiating a FaceTime call directly from a conversation in the Messages app.

    Adding Participants to an Existing FaceTime Call

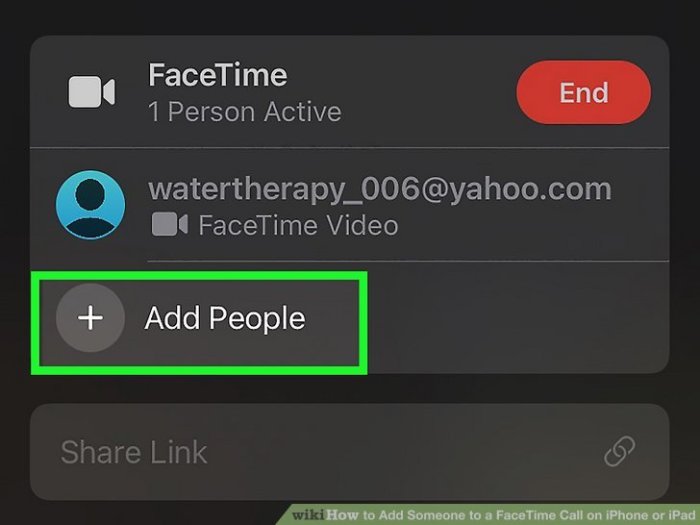
    Adding someone to an ongoing FaceTime call is a straightforward process. This feature is especially useful for group conversations or when you need to include more people in a discussion. The process involves the use of the ‘Add Person’ or similar options in the FaceTime interface.

    Typical Interface Elements for Inviting Participants

    The FaceTime interface typically presents a menu or button for adding participants during a call. This interface element often appears as a button or a menu option that’s readily accessible within the active call. The design is user-friendly, minimizing steps and maximizing efficiency.

    • Add Person/Add Participants Button: This button or icon is usually located prominently within the FaceTime interface, making it easy to identify and access.
    • Contact List: A list of contacts is presented, allowing you to select the person you want to add to the call.
    • Call Invitation Confirmation: The interface usually confirms that the invitation has been sent to the selected contact, which provides reassurance and clarity for the user.

    Methods for Adding Participants

    Adding participants to a FaceTime call can be a quick and easy way to include more people in a conversation. This process is straightforward and adaptable to various scenarios, from connecting with friends to collaborating with colleagues. Knowing the different methods and their nuances can help you choose the most efficient approach for your specific needs.This guide will detail the steps for adding someone via contact list, phone number, or email address, highlighting the advantages and disadvantages of each method.

    Understanding these options will allow you to select the most suitable approach for your FaceTime call.

    Adding Participants via Contact List

    Adding someone from your contact list is often the fastest and easiest method. This method leverages the existing contact information you’ve already stored on your device. You’re essentially leveraging the established relationship.

    • Locate the contact you wish to add in the FaceTime call invitation. This often involves searching through your contact list.
    • Select the contact and tap the ‘Add’ or ‘Invite’ button. The specific button may vary slightly depending on your iPhone or iPad model and operating system version.
    • Confirm the invitation on the recipient’s end. This confirmation usually involves a notification or prompt on the recipient’s device.

    Adding Participants Using Their Phone Number

    Adding someone by their phone number is particularly useful when you don’t have the person’s contact information saved on your device. This is an excellent option for connecting with someone you’ve recently met.

    Figuring out how to add someone to a FaceTime call on your iPhone or iPad is a breeze. Just like jamming out to the latest Maiya the Don Dusties track, maiya the don dusties new song listen , it’s a simple process. Once you’ve got the hang of it, adding folks to your FaceTime sessions becomes a snap.

    It’s a surprisingly straightforward process, perfect for those spontaneous virtual chats.

    • Open the FaceTime app and initiate a new call.
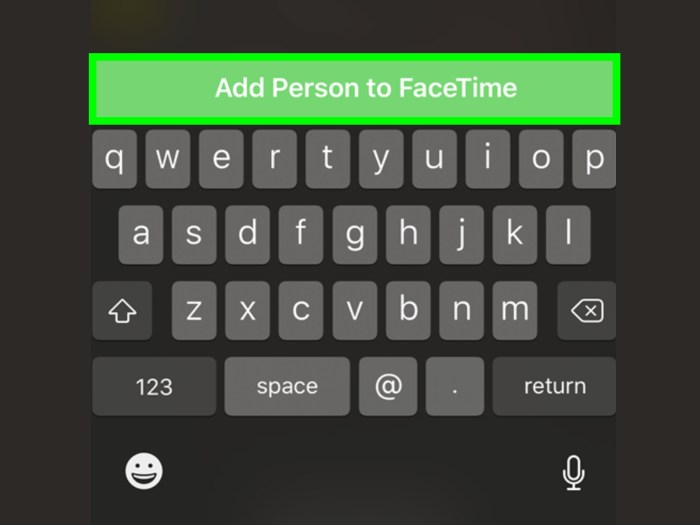
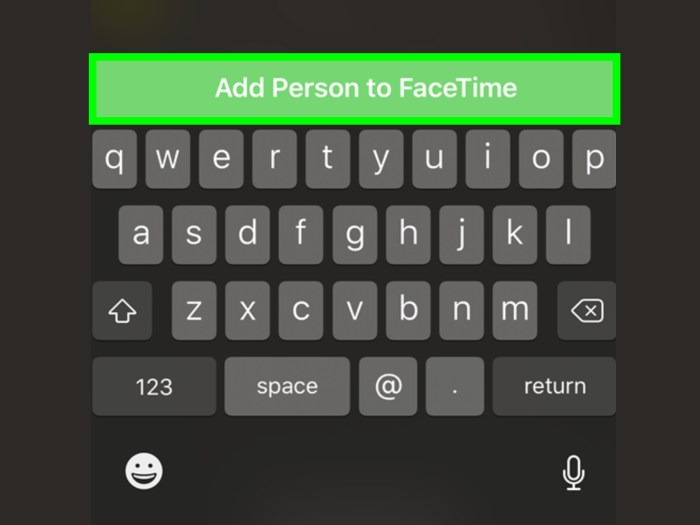
    • Tap the “+” symbol (or similar button) to add a participant.
    • Select the option to enter a phone number.
    • Enter the recipient’s phone number and tap “Add.”
    • If the recipient’s phone is registered with FaceTime, they’ll receive an invitation to join the call. The recipient must then accept the call.

    Adding Participants Using Their Email Address

    Adding a participant using their email address is a more indirect method. This is a helpful option when you have a recipient’s email address, but not their phone number or contact information.

    • Open the FaceTime app and initiate a new call.
    • Tap the “+” symbol (or similar button) to add a participant.
    • Select the option to enter an email address.
    • Enter the recipient’s email address and tap “Add.”
    • The recipient will receive an invitation to join the call via email.
    • The recipient must then accept the call from the email invitation.

    Comparison of Methods

    This table compares the pros and cons of each method for adding participants to a FaceTime call.

    Method Pros Cons
    Contact List Easy, fast, and convenient. Leverages existing contacts. Requires the recipient to be in your contacts.
    Phone Number Direct addition, no need for a contact. May not work if the recipient doesn’t have FaceTime or if their phone isn’t registered with FaceTime.
    Email Flexible, useful if you have the recipient’s email but not their phone number. Less direct than other methods. Requires the recipient to accept the invitation.

    Troubleshooting Common Issues

    Adding participants to a FaceTime call should be straightforward, but occasional hiccups can occur. Understanding the common problems and their potential solutions can save you valuable time and frustration. This section dives into troubleshooting frequently encountered issues when inviting someone to a FaceTime call on your iPhone or iPad.

    Contact Not Found

    Incorrect contact information is a primary reason for “contact not found” errors. Double-checking the contact’s name, phone number, or email address is crucial. Ensure the contact is saved in your contacts with accurate details, including the full name, correct phone number, and email address. Verify the spelling of the contact’s name. If the contact is saved in a different format, or using an email address instead of a phone number, make sure the format matches the expected input format in FaceTime.

    Call Invitation Failed

    Network connectivity issues are a common culprit for call invitation failures. A weak or unstable Wi-Fi connection or poor cellular signal can hinder the invitation process. Ensure a stable internet connection or strong cellular signal. Try restarting your device. If you are using Wi-Fi, ensure your Wi-Fi is active and connected.

    If using cellular data, ensure your data is turned on and working correctly. Try adding the contact again after a few minutes, or during a time with a stronger signal.

    Cannot Add to Call

    A primary reason for being unable to add someone to a FaceTime call is if the recipient does not have FaceTime installed or enabled. Verify if the recipient has FaceTime installed on their device. If the contact is using an older version of iOS, or if the device is not compatible with FaceTime, it might not be possible to add them.

    If they are using an older model of iPhone or iPad that doesn’t support FaceTime, adding them won’t work.

    Resolving Contact List or Phone Number Issues

    Problems with contact lists or phone numbers can sometimes prevent adding contacts to a FaceTime call. Ensure your contact list is up-to-date. Sync your contacts across all your devices, and make sure you have the correct phone numbers saved. If the contact has recently changed their phone number, update their information in your contacts app. Check for any potential issues with your device’s contact syncing process.

    A common cause is the device not having a connection to sync contacts. A common solution is to restart your device and re-establish a connection.

    Common Problems and Solutions

    Problem Possible Cause Solution
    Contact not found Incorrect contact info, contact not saved Verify contact details, ensure contact is saved correctly in your contacts
    Call invitation failed Network issues (weak Wi-Fi or cellular signal) Check internet connectivity, ensure a stable connection, or try again later
    Cannot add to call Recipient does not have FaceTime enabled Verify if recipient has FaceTime installed and enabled

    Advanced Techniques (Optional)

    Add Someone to a FaceTime Call on iPhone or iPad

    Mastering FaceTime’s advanced features empowers you to effortlessly manage calls with multiple participants and handle various scenarios. This section delves into strategies for adding numerous individuals, including those outside your contact list, and provides practical examples for different situations.

    Figuring out how to add someone to a FaceTime call on your iPhone or iPad is a breeze, but sometimes deciphering if a guy actually likes you after a first date is a bit trickier. Knowing subtle cues can be key, and if you’re wondering about those signals, check out this helpful guide on Know if He Likes You After the First Date.

    Once you’ve got the hang of both, you’ll be mastering tech and dating in no time! Just make sure you’ve got the contact details and you’re good to go for your FaceTime call.

    Adding Multiple Participants, Add Someone to a FaceTime Call on iPhone or iPad

    Efficiently adding multiple people to a FaceTime call enhances communication, allowing you to involve various stakeholders in a single session. A well-structured approach ensures a smooth transition for all participants.

    Figuring out how to add someone to a FaceTime call on your iPhone or iPad is super straightforward. Just make sure you’ve got the right contact information handy, and then you can easily add that person to the call. Speaking of connections, did you know that the xxs romy talks xxs origins love of Beyonce with savages jehnny beth listen?

    the xxs romy talks xxs origins love of beyonce with savages jehnny beth listen is a fascinating interview. After that, adding a friend or family member to your next FaceTime call is a breeze!

    Adding a Large Group

    Adding a large group to a FaceTime call requires careful planning and execution. Consider the size of the group; if it exceeds a certain number, the call might not be as effective or responsive. Facilitate communication using appropriate tools like chat or a shared document to manage discussions and information exchange. For instance, a large group of colleagues might be better served with a pre-meeting discussion or assignment of roles to facilitate a more organized exchange.

    Adding Someone Not on Your Contact List

    Adding someone who isn’t on your contact list involves using their phone number or email address. This process is straightforward but requires precision. Ensure the recipient has the FaceTime application installed to avoid any confusion or technical issues.

    Examples of Different Scenarios

    Different scenarios demand tailored approaches. For a family reunion, you’d want to add all relatives. For a work presentation, you might want to include clients or colleagues. For a casual gathering, adding friends or acquaintances is straightforward.

    • Family Reunion: Adding extended family members to a FaceTime call is common during gatherings. Ensure all participants have the app and understand the purpose of the call.
    • Work Presentation: Including clients or colleagues in a presentation requires prior coordination and clear communication to ensure the presentation flows smoothly. For example, ensure everyone has the meeting link and is prepared to join the call.
    • Casual Gathering: Adding friends or acquaintances for a social gathering is simple. Share the FaceTime call link or invite them directly, allowing them to join easily.

    Security Considerations

    FaceTime, while convenient, requires careful consideration of security measures. Unauthorized access to a FaceTime call can lead to various privacy violations, and maintaining a secure environment is paramount. Protecting personal information and verifying the identities of participants are crucial steps in ensuring a safe and trustworthy FaceTime experience.Understanding the potential risks associated with sharing personal information during a FaceTime call is essential.

    This knowledge empowers users to make informed decisions and safeguard their data effectively. By implementing the appropriate security protocols and adhering to privacy settings, users can significantly reduce the likelihood of encountering security breaches.

    Protecting Against Unauthorized Access

    Maintaining the security of FaceTime calls involves proactive measures to prevent unauthorized access. Implementing strong passwords for your Apple ID and enabling two-factor authentication are fundamental steps. Furthermore, regularly reviewing and updating your security settings within the FaceTime application itself is critical.

    Verifying Call Participant Identities

    Verifying the identity of FaceTime call participants is essential to prevent fraudulent activities. Using a combination of visual cues, prior knowledge of the participant, and, where applicable, confirming the call through a separate, established communication channel enhances security.

    Privacy Settings for FaceTime Calls

    FaceTime offers various privacy settings to control the visibility of your calls and activities. Adjusting these settings to your comfort level is crucial for maintaining privacy. Understanding the different options available within the FaceTime app settings is essential. For example, adjusting the visibility of your presence on the FaceTime app, as well as limiting the access to your call history, are significant privacy considerations.

    Risks Associated with Sharing Personal Information

    Sharing personal information during a FaceTime call, such as financial details or sensitive medical information, carries significant risks. Be mindful of the potential for eavesdropping or data breaches. Always prioritize the confidentiality and security of sensitive information when engaging in a FaceTime call. Using end-to-end encryption, where available, and adhering to the best practices for sharing personal information are essential.

    Avoid discussing sensitive information over a public Wi-Fi network.

    User Interface (UI) Exploration: Add Someone To A FaceTime Call On IPhone Or IPad

    The FaceTime interface, designed for seamless communication, features intuitive controls for adding participants to a call. Understanding these visual elements simplifies the process of inviting others to join an ongoing or scheduled conversation. This section delves into the specific buttons, menus, and steps involved in the participant addition process, offering practical examples to clarify the user experience.

    Visual Elements for Adding Participants

    The FaceTime interface employs a combination of icons, buttons, and menus to facilitate the addition of participants. Key visual elements often include a “Participants” button, a “+” icon, or a similar symbol indicating the ability to add more members to the call. These visual cues are designed to be easily recognizable and accessible.

    Participant Invitation Buttons and Menus

    The interface typically displays a “Participants” button or a similar menu option within the call window. Tapping this button or icon usually reveals a list of current participants, followed by an option to add new members. The options to invite individuals are often presented via contact lists, or by inputting phone numbers or email addresses. The interface may also offer a “Share” button, allowing the user to share the FaceTime call invitation with others via messaging apps, email, or other methods.

    Step-by-Step Guide to Invite Someone

    To invite someone to a FaceTime call, follow these steps:

    1. Initiate a FaceTime call with the desired number of participants.
    2. Locate the “Participants” button or menu within the call interface. This button’s appearance varies slightly depending on the FaceTime version; it might be a button, a tab, or an icon.
    3. Tap the “Participants” button or menu. A screen displaying the current participants will be shown.
    4. Look for the “Add Participant” option, often indicated by a “+” icon or a similar symbol. This is where you will invite new members.
    5. Select the desired method of invitation. You might be able to select contacts from your address book, enter phone numbers, or email addresses directly.
    6. Select the contact, phone number, or email address of the person you wish to invite.
    7. Confirm the invitation. The invitee will receive a notification, allowing them to join the call.

    Examples of UI Elements

    A common example is a floating “+” icon, usually positioned within the FaceTime call interface’s participant list area, indicating the addition of a new participant. Another example is a “Participants” menu, accessible via a button or icon, that lists the current participants and provides an option to add more members. Furthermore, an input field for entering a phone number or email address might be used to invite participants not in the contact list.

    Comparison with Other Platforms
    Add Someone to a FaceTime Call on iPhone or iPad

    Adding participants to a FaceTime call is a straightforward process, but how does it compare to similar features on other video calling platforms? Understanding the differences can help users choose the best platform for their needs. Different platforms employ varying methods for adding participants, reflecting the unique design philosophies and functionalities of each.While FaceTime’s intuitive interface excels in simplicity, other platforms might offer more advanced features or integration options.

    This comparison highlights the similarities and distinctions in functionality, providing a clear picture of how each platform handles the addition of participants to a video call.

    Similarities Across Platforms

    Most video calling platforms share fundamental similarities in adding participants. They typically involve an invitation process, either through a link or a direct contact method. The goal is to seamlessly bring multiple individuals into a shared video conversation. Successful addition often depends on the recipient’s availability and the platform’s real-time communication capabilities.

    Differences in Functionality

    The process of adding participants to a call varies significantly across platforms. FaceTime, for example, relies on direct contact, while other platforms may offer group creation or dynamic linking.

    Process Variations

    Platform Method of Adding Participants User Experience
    FaceTime Directly contacting participants via contacts. Intuitive and straightforward.
    Zoom Sending a meeting invitation, which may include a meeting link. Offers more control over the meeting, with options for scheduling and managing participants.
    Google Meet Sharing a meeting link or directly inviting contacts. Combines aspects of FaceTime and Zoom, offering both direct contact and a link-based approach.
    Microsoft Teams Inviting participants to a Teams meeting. Focuses on integration with other Microsoft services and productivity tools.

    The table illustrates the different approaches. FaceTime is fundamentally a direct-contact method. Other platforms, like Zoom and Google Meet, offer more flexibility, enabling the creation of meeting links that allow broader access. Microsoft Teams emphasizes the seamless integration of video calls within its broader platform. This variation reflects the distinct functionalities and integration needs of different platforms.

    Integration with Other Features

    Some platforms, like Zoom and Google Meet, integrate the addition of participants with broader meeting management tools, such as scheduling and recording. FaceTime primarily focuses on the immediate video call aspect. This difference impacts how users handle larger group calls or scheduled meetings. Different platforms offer varying levels of meeting management, emphasizing distinct features and integration strategies.

    Last Recap

    In conclusion, adding someone to a FaceTime call on your iPhone or iPad is a straightforward process. This guide has covered various methods for adding participants, from using contact lists to phone numbers or emails. We’ve also addressed common troubleshooting steps and highlighted important security considerations. So, whether you’re a seasoned FaceTime user or just starting out, this comprehensive guide should help you navigate the process smoothly and confidently.

    Enjoy connecting with your loved ones through seamless video calls!
  • Change Your TikTok Region on iPhone/iPad

    Change Your TikTok Region on iPhone/iPad

    Change Your Region in TikTok on iPhone or iPad is a crucial guide for users seeking to access different content libraries and features. This detailed walkthrough explains the process of switching regions, common pitfalls, and best practices for maintaining account safety throughout the transition. Understanding the impact on your user experience, content availability, and security measures is key.

    This comprehensive guide breaks down the steps involved, from initial setup to potential troubleshooting. We’ll explore the reasons behind needing to change your TikTok region, highlighting the significance of choosing the correct region and how it impacts your TikTok experience.

    Introduction to TikTok Region Change

    TikTok, a global platform, allows users to connect with creators and content from various countries. However, some users may find their experience limited by region-specific content availability or features. Changing your TikTok region can open up a wider range of content and potentially access specific features tailored to that region.Changing your TikTok region on an iPhone or iPad is a straightforward process, often required to access certain features or content unavailable in your current region.

    This process involves adjusting your account settings to reflect the desired location. However, there are common pitfalls to watch out for to ensure a smooth transition.

    Reasons for Changing TikTok Region

    Understanding why someone might want to change their TikTok region is crucial. Users might seek access to content unavailable in their current region, including creators, trending challenges, or unique features. They might also be interested in engaging with a community more closely aligned with their interests or location.

    Process of Changing TikTok Region on iPhone/iPad, Change Your Region in TikTok on iPhone or iPad

    The process for changing your TikTok region on an iPhone or iPad is generally straightforward. Follow these steps to ensure a smooth transition:

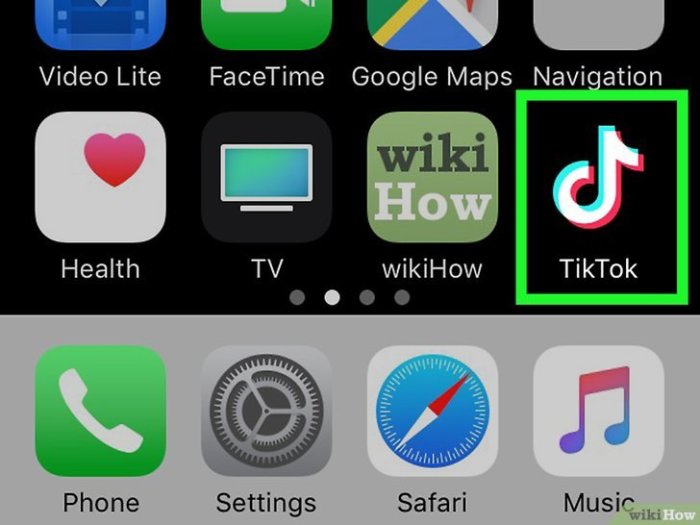
    • Open the TikTok app on your iPhone or iPad.
    • Tap on your profile picture in the bottom right corner.
    • Select “Settings and Privacy”.
    • Navigate to “Account”.
    • Look for the “Region” option. Tap it to choose a new region.
    • Confirm your selection and ensure the region is correct. You may need to confirm your choice by entering your details.

    Potential Issues Encountered During Region Change

    Several factors can lead to issues when changing your TikTok region. Common reasons include network connectivity problems, incorrect or outdated information provided during the process, or issues with the TikTok servers.

    • Network Connectivity: A weak or unstable internet connection can hinder the region-changing process. Ensure a reliable connection is available throughout the procedure.
    • Incorrect Information: Providing inaccurate information during the process can lead to verification issues and prevent successful region changes.
    • TikTok Server Issues: Occasionally, TikTok servers may experience downtime or malfunctions, which can affect the ability to change your region. This is an unavoidable circumstance that is beyond user control.

    Importance of Selecting the Correct Region

    Selecting the correct region on TikTok is vital for several reasons. It ensures you’re accessing the intended content, features, and community tailored to that region. Choosing the wrong region can lead to issues with accessing relevant content and interacting with the desired community.

    Steps for Changing Region on TikTok: Change Your Region In TikTok On IPhone Or IPad

    Changing your TikTok region can be useful for accessing content specific to a different country or region. This is particularly relevant for users who want to view content tailored to their local interests or engage with creators in their preferred language. This guide Artikels the steps involved in switching your TikTok region on an iPhone or iPad.

    Navigating the TikTok App

    To change your TikTok region, you need to access the app’s settings. This is usually done by tapping on the profile icon, located in the bottom right corner of the main screen. From there, a menu will appear, allowing you to navigate to the region settings.

    Figuring out how to change your region in TikTok on your iPhone or iPad can be a bit tricky, but it’s definitely doable. While you’re digging into those settings, you might also want to check out some new tunes! Bill Callahan just dropped 5 more new songs, and they’re absolutely worth a listen. bill callahan releases 5 more new songs listen Once you’ve got your region sorted, you can enjoy all the TikTok content available in your new area.

    Just remember to follow the instructions carefully, and you’ll be TikTok-ing in no time!

    Accessing Region Settings

    Once you’ve accessed the profile menu, you’ll likely see an option for “Settings” or “Account Settings”. This is where you’ll find the region change feature. If it isn’t immediately apparent, look for an option that explicitly relates to your location or account preferences.

    Changing Your Region

    This section details the procedure to change your TikTok region. Precise wording and the exact placement of options may vary slightly based on the app version. This procedure assumes a standard setup.

    1. Open the TikTok app on your iPhone or iPad.
    2. Tap on your profile icon (typically a silhouette of a person) located at the bottom right corner of the main screen.
    3. Select “Settings” or “Account Settings” from the menu.
    4. Look for an option labeled “Region,” “Location,” or similar. This is where you’ll initiate the region change.
    5. Tap on the current region listed. A list of available regions will appear.
    6. Select the desired region from the list.
    7. Confirm the region change. TikTok may prompt you to verify your identity or make other necessary changes.
    8. The app will then update your region settings. You may be required to log out and log back in for the changes to take effect. Close and reopen the app.

    Potential Issues and Solutions

    Changing your TikTok region on an iPhone or iPad, while straightforward in theory, can sometimes encounter unexpected hurdles. These issues, while not insurmountable, can be frustrating for users. This section delves into common problems, their underlying causes, and effective solutions. Understanding these potential pitfalls allows you to navigate the region-change process smoothly and avoid unnecessary complications.Many factors can affect a successful region change.

    Network connectivity, app updates, device settings, and even account history can all play a role. The following sections address potential difficulties and offer practical solutions to resolve them.

    Figuring out how to change your region on TikTok on your iPhone or iPad can be a bit tricky, but it’s totally doable! Speaking of things that are a bit tricky, did you know there’s a whole passionate fanbase dedicated to lil tecca we love you tecca? This awesome article dives deep into the fascinating world of tecca fandom.

    Once you’ve mastered TikTok’s regional settings, you’ll be able to access content from around the globe! So, get ready to explore!

    Common Error Messages

    Different error messages might indicate varying underlying issues. Identifying the specific error message you encounter is the first step toward finding a suitable resolution.

    • “Network Error” or “Connection Lost”: This often stems from unstable internet connections. Ensure a stable Wi-Fi or cellular data connection is active during the region change process. Try restarting your device or your internet router. If the issue persists, contact your internet service provider (ISP) for assistance.
    • “TikTok Server Error”: This suggests a temporary problem with TikTok’s servers. In this case, waiting a short period and retrying the process is often effective. If the error continues, try the region change at a later time.
    • “Account Restrictions”: If your account has restrictions, changing your region might be temporarily blocked. This could be due to violations of TikTok’s terms of service or previous issues with the account. Review your account activity for any potential causes. Contact TikTok support for assistance in resolving any account-related problems.
    • “Region Change Failed”: This generic error message could stem from a variety of issues. Ensure your device’s internet connection is stable, your account is up-to-date, and try restarting your device. If the problem persists, consider checking for any recent TikTok updates and trying the region change again after a while.

    Troubleshooting Steps

    Addressing potential problems requires systematic troubleshooting. This section Artikels crucial steps for diagnosing and fixing common issues.

    Figuring out how to change your region on TikTok on your iPhone or iPad can be a bit tricky, but it’s totally doable! While you’re browsing TikTok, you might also want to check out the new trailer for the upcoming TV show, “Beef House,” starring Tim and Eric. watch tim and erics first trailer for new tv show beef house Once you’ve caught that, remember to easily adjust your TikTok region settings for a more personalized experience.

    • Verify Network Connectivity: A stable internet connection is paramount. Ensure your Wi-Fi or cellular data is active and functioning correctly. Try a different network connection if possible.
    • Restart Your Device: A simple restart can often resolve temporary glitches. Force-quit the TikTok app and restart your device.
    • Check for TikTok Updates: Ensure you have the latest version of the TikTok app. Outdated versions might contain bugs that hinder the region change process.
    • Review Account Activity: Look for any suspicious or unusual activity on your TikTok account. Any violations of TikTok’s terms of service might prevent region changes.
    • Contact TikTok Support: If troubleshooting steps fail, reaching out to TikTok support is a last resort. This is especially important for account-related restrictions or persistent issues.

    Potential Account Issues During Region Change

    Account-related issues can significantly hinder the region change process.

    • Account Restrictions: Violations of TikTok’s terms of service or other issues might temporarily restrict account actions. Review your account activity and contact TikTok support for resolution.
    • Account Suspension: A suspended account will prevent region changes and other actions. Resolve any account suspension issues with TikTok support.
    • Account Inactivity: A prolonged period of inactivity might lead to restrictions on account actions. Ensure your account is active and log in regularly.

    Impact of Region Change on User Experience

    Change Your Region in TikTok on iPhone or iPad

    Changing your TikTok region can significantly alter your experience on the platform. This isn’t just about seeing different trending videos; it impacts the overall functionality, content availability, and even the features you can access. Understanding these nuances is crucial for a smoother and more enjoyable experience, regardless of your chosen region.The user experience on TikTok varies greatly depending on the region.

    Different regions have varying cultural norms, preferences, and regulations that shape the platform’s offerings. This means the content you see, the features you use, and even the language available can be drastically different based on your selected region.

    Content Availability Differences

    Understanding content availability across regions is key to adapting to a new TikTok experience. TikTok’s algorithm is tailored to each region, showing users content relevant to their specific interests and cultural context. This algorithm adjustment is vital to tailoring the platform’s offerings to each region. A user in the United States will likely see different content than a user in India, reflecting the diverse tastes and preferences of each region.

    • Specific Content Restrictions: Certain content types might be restricted in a particular region due to local regulations or community guidelines. For example, content promoting alcohol or tobacco might be restricted in some regions, while others might have different standards.
    • Trending Topics: Trending topics on TikTok often vary significantly between regions. This is a direct result of the algorithm’s tailoring. A trending dance in Japan might not be as popular in the United States, reflecting the regional differences in popularity and cultural trends.
    • Language and Accessibility: The language options and accessibility features available on TikTok can differ across regions. This is due to varying needs and preferences. For example, subtitles or closed captions might be more prevalent in some regions to cater to a wider audience.

    Feature Variations

    TikTok’s features might not be identical across all regions. Some features may be available in one region but not in another, due to regional differences in the platform’s functionality.

    • Specific Filters or Effects: TikTok might offer different filters or effects tailored to specific regions. This is related to local tastes and aesthetic preferences. A filter popular in one region might not be as popular or available in another.
    • Payment Features: In some regions, TikTok might have different payment features or monetization options than others. This reflects the varying approaches to digital payments and revenue generation across regions.
    • Live Streaming Capabilities: The functionality of live streaming on TikTok may vary based on region. This is due to regulations, local policies, and potential technical constraints.

    User Experience Comparison

    The user experience on TikTok varies across different regions due to the algorithm’s adjustments and content selection. This reflects the different cultural backgrounds, interests, and local norms of each region.

    Region Content Focus User Experience
    United States Diverse, including trending challenges, entertainment, and educational content. High engagement, wide variety of content
    India Local entertainment, including regional music, dance, and lifestyle content. Strong engagement, focus on local trends
    Japan Aesthetically pleasing content, anime, and trending challenges. High engagement, focus on aesthetic and unique content

    Examples of Content Availability Changes

    A user switching from the US region to the UK region might see a significant shift in the types of trending videos. This change is due to the differences in cultural tastes and trends between the two regions.

    Account Safety and Security During Region Change

    Changing your TikTok region can offer new content and features, but it’s crucial to prioritize account security throughout the process. A secure account is vital, not just for enjoying the platform but also for safeguarding your personal information. Neglecting security measures can expose your account to unauthorized access and data breaches.A region change, while usually straightforward, introduces a potential vulnerability if not handled cautiously.

    Taking proactive steps to secure your account before, during, and after the change can significantly reduce these risks. This involves understanding the security risks, implementing strong security measures, and monitoring your account for suspicious activity.

    Best Practices for Maintaining Account Security

    Careful attention to detail and consistent security practices are crucial during a region change. Implementing robust security measures is a proactive step towards minimizing potential risks. This includes utilizing strong passwords and enabling two-factor authentication (2FA).

    • Strong Passwords: Employ a unique and complex password for your TikTok account, ideally one that combines uppercase and lowercase letters, numbers, and symbols. Avoid using easily guessable passwords, like your birthdate or pet’s name.
    • Two-Factor Authentication (2FA): Enabling 2FA adds an extra layer of security. This requires a second verification method, such as a code sent to your phone or an authenticator app, alongside your password. This significantly reduces the risk of unauthorized access even if a password is compromised.

    Security Risks Associated with Changing TikTok Regions

    While TikTok region changes are typically safe, some potential risks exist. These risks can stem from factors like network vulnerabilities, unauthorized access attempts, and phishing scams. Understanding these risks empowers you to implement proactive security measures.

    • Compromised Networks: If you change regions while using a public or unsecured Wi-Fi network, your account information might be vulnerable to interception by malicious actors. Always prioritize using a secure, private network whenever possible.
    • Phishing Attacks: Be vigilant about suspicious emails or messages related to your TikTok account, especially after changing regions. Phishing attacks often attempt to trick you into revealing your password or other sensitive information. Never click on links or open attachments from unknown sources.
    • Data Breaches: While unlikely, the possibility of data breaches during a region change exists, though less frequent than other methods of attack. Be aware of the possibility and take necessary precautions. A strong password and 2FA will significantly reduce your vulnerability.

    Tips for Maintaining Account Security Throughout the Process

    Implementing a robust security strategy is paramount for maintaining account safety. Taking proactive steps can mitigate risks and maintain a secure account throughout the region change process.

    • Regular Account Reviews: Periodically review your account settings and activity log to identify any unusual or suspicious activity. This vigilance allows you to address any potential issues quickly.
    • Avoid Public Wi-Fi: Refrain from using public Wi-Fi networks during the region change process to prevent unauthorized access to your account information. Use a secure network, like your home Wi-Fi, for increased security.
    • Suspicious Activity: If you suspect any unusual activity on your TikTok account, immediately change your password and contact TikTok support for assistance. Quick action is key in such cases.

    Content Examples for Region Change

    Exploring TikTok’s global reach requires understanding the nuances of region-specific features. This section delves into practical examples, illustrating how regional variations impact the TikTok experience and how users can navigate potential issues during a region change.

    Regions Available on TikTok

    This table provides a snapshot of various TikTok regions, highlighting key distinctions in currency, language, and other relevant details. This information is crucial for understanding the diverse user base and the localized content that might be available.

    Region Name Currency Language(s) Other Details
    United States USD English Major content hub, significant creator base.
    India INR Hindi, English, other regional languages Vast user base, significant local content.
    Japan JPY Japanese Strong emphasis on animation and aesthetic content.
    Brazil BRL Portuguese Large user base, diverse content trends.
    Indonesia IDR Indonesian, English Massive user base, a growing hub for trending content.
    United Kingdom GBP English High engagement with global trends.

    Common Issues and Solutions During Region Change

    Navigating a region change on TikTok can present challenges. This table Artikels common issues and effective solutions, enabling users to troubleshoot potential problems.

    Problem Potential Causes Solutions
    Account login issues Incorrect region selection, network issues, server overload. Verify network connectivity, re-enter region settings, contact TikTok support.
    Content unavailability Content restricted by region, changes in content policy. Explore content from other regions, verify content policy for the new region.
    Currency issues during payments Incorrect currency settings, conflicting payment methods. Update payment method details to reflect the new region, contact payment provider.
    Language barrier Difficulties understanding TikTok interface, limited availability of translated content. Use translation tools, explore community support groups for the new region.

    Maintaining Account Security During Region Change

    Account security is paramount. Following these tips during a region change can help protect your TikTok account from potential threats.

    “Always use strong, unique passwords for your TikTok account. Avoid using the same password for other online services. Regularly update your security settings and monitor your account activity.”

    Comparing the TikTok Experience Across Regions

    The TikTok experience varies across different regions. This table compares available content, features, and other key differences.

    Region Available Content Features Other Key Differences
    United States Broad range of content, including entertainment, education, and social trends. Comprehensive features, including live streaming, duets, and challenges. High level of engagement with trending content.
    India Local content trends, entertainment, and social issues. Similar features to other regions but tailored to local trends. Strong emphasis on local languages and cultural expressions.
    Japan Aesthetically focused content, anime-inspired trends. Potential unique features for showcasing art. Content often focused on high-quality visuals and artistic expressions.

    Advanced Considerations

    Changing your TikTok region isn’t always a straightforward process. Beyond the basic steps, there are nuances and potential limitations to consider, particularly for international users and those seeking alternative approaches. These advanced considerations involve understanding specific requirements, potential pitfalls of alternative methods, and how these factors might impact your user experience and account security.This section delves into these intricacies, providing a more comprehensive understanding of the region-change process on TikTok.

    Alternative Approaches to Region Change

    There are no officially sanctioned, alternative methods to change your TikTok region. Attempting unofficial methods or third-party tools could pose significant risks to your account. TikTok’s platform is complex, and unauthorized access attempts can lead to account suspension or permanent ban.

    Specific Requirements and Limitations

    TikTok does not publicly list specific requirements for region changes. However, the platform’s terms of service and community guidelines implicitly dictate that users must comply with all applicable local laws and regulations in their new region. For example, if a user is attempting to change their region to avoid restrictions on certain content types, that content may still be restricted in their new region.

    Limitations of Alternative Methods

    Unofficial methods for changing your TikTok region are often unreliable and may violate the platform’s terms of service. Using such methods could lead to your account being suspended or permanently banned. Any potential benefit gained by bypassing official procedures is outweighed by the risk of account compromise. Moreover, these methods often lack support or guarantees, leaving users vulnerable to security issues.

    Considerations for International Users and Different Time Zones

    International users and those in different time zones should be aware of potential differences in content availability and platform functionality. TikTok’s content moderation policies and local regulations can vary significantly from region to region, influencing what types of content are allowed and how the platform operates. For instance, a user in a region with stricter content guidelines might encounter differences in their feed compared to a user in a region with more relaxed policies.

    Furthermore, potential variations in platform support and responsiveness to issues in different time zones could affect user experience.

    Conclusion

    Change Your Region in TikTok on iPhone or iPad

    Navigating TikTok’s regional settings can be straightforward with the right guidance. This guide equips you with the knowledge and steps to successfully change your TikTok region on your iPhone or iPad. Remember to prioritize account security throughout the process and understand how region changes impact your experience. By following this guide, you’ll unlock a wider range of content and features within TikTok.