Tag: home improvement

  • Install a Gas Fireplace Your Guide

    Install a Gas Fireplace Your Guide

    Install a Gas Fireplace: This comprehensive guide walks you through every step of the process, from choosing the perfect fireplace to ensuring a safe and efficient installation. We’ll explore different types, fuel options, safety considerations, and the environmental impact, equipping you with the knowledge to make informed decisions.

    Whether you’re a seasoned DIY enthusiast or a homeowner tackling this project for the first time, this guide will be your reliable companion. We’ll break down the installation process into manageable steps, providing clear instructions and detailed explanations. Safety will be paramount, and we’ll delve into potential hazards and preventative measures.

    Introduction to Gas Fireplaces

    Install a Gas Fireplace

    Gas fireplaces have become a popular choice for homeowners seeking a warm and inviting ambiance. They offer a convenient alternative to traditional wood-burning fireplaces, providing a quick and efficient way to heat a room. Beyond simple warmth, gas fireplaces come in various styles, each with its own set of advantages and disadvantages. This exploration delves into the different types, fuel sources, benefits, and potential drawbacks of these modern heating solutions.Gas fireplaces are a significant upgrade from traditional wood-burning alternatives.

    They offer greater convenience and safety, allowing homeowners to enjoy the ambiance of a fire without the hassle of wood storage, maintenance, and potential chimney issues.

    Types of Gas Fireplaces

    Gas fireplaces encompass a wide variety of designs and installations. Understanding the different types available is crucial for selecting the best fit for your home and personal preferences. These range from classic log sets to sleek, modern linear models.

    • Log Sets: These fireplaces often mimic the appearance of a traditional wood-burning fireplace, using realistic-looking gas logs and often incorporating decorative elements. They are popular for their aesthetic appeal and are often suitable for various room styles.
    • Linear Fireplaces: These models feature a long, continuous flame that often runs along a wall or a section of a room. They are known for their sleek design and often allow for a more modern look. This design can effectively heat larger spaces due to the efficient distribution of the heat.
    • Wall-mounted Fireplaces: Designed to be installed directly on a wall, these are typically compact and efficient, taking up minimal space while still providing warmth and ambiance.

    Fuel Types

    Gas fireplaces utilize various fuel sources. The choice of fuel often impacts the cost of installation, maintenance, and the overall efficiency of the fireplace.

    • Natural Gas: This is the most common fuel source for gas fireplaces, often directly connected to the home’s existing natural gas pipeline. This provides a consistent and readily available fuel supply, making it a popular option.
    • Propane: For homes without natural gas access, propane gas is a viable alternative. Propane fireplaces require a propane tank, which necessitates regular refills and potential storage space considerations. Propane is also often more expensive than natural gas.

    Benefits of Gas Fireplaces

    Gas fireplaces offer several advantages over other types of heating solutions.

    Installing a gas fireplace can be a rewarding project, transforming a room with its warm glow. While you’re admiring the cozy ambiance, consider putting on some chilled tunes, like the mellow soundscapes of the minimal wave tapes volume 2. The perfect background music for the soothing process will enhance the whole experience. After all, a properly installed gas fireplace adds a touch of elegance and comfort to any home.

    • Convenience: Gas fireplaces provide a quick and easy way to heat a room. They require minimal effort to operate compared to wood-burning alternatives, as they are simple to ignite and maintain.
    • Efficiency: Gas fireplaces are designed for efficient heat output, allowing for controlled temperature and minimal wasted energy.
    • Cleanliness: Gas fireplaces produce minimal soot or ash, eliminating the need for frequent cleaning and maintenance.

    Drawbacks of Gas Fireplaces

    Despite the advantages, gas fireplaces also have some drawbacks to consider.

    • Cost of Installation: Installing a gas fireplace can be a substantial investment, requiring professional installation to ensure safety and compliance with local regulations.
    • Potential Safety Concerns: Gas fireplaces, if not properly installed and maintained, can pose safety risks related to gas leaks or improper operation. Regular safety checks are essential to mitigate these concerns.

    Comparison Table

    Type Fuel Pros Cons
    Log Sets Natural Gas/Propane Aesthetically pleasing, often mimics traditional wood-burning fireplaces Can be more expensive to install, less efficient heat distribution compared to linear models.
    Linear Natural Gas/Propane Sleek design, efficient heat distribution, suitable for larger spaces May not be suitable for all aesthetics, installation can be complex
    Wall-mounted Natural Gas/Propane Space-saving design, often a cost-effective option May not provide the same heat output as larger models, less visually striking

    Installation Process

    Installing a gas fireplace is a significant undertaking that requires careful planning, meticulous execution, and adherence to safety regulations. It’s crucial to understand the entire process from initial preparation to final connections to ensure a safe, efficient, and aesthetically pleasing installation. Incorrect installation can lead to safety hazards, performance issues, and potential damage to your home. Properly trained and licensed professionals are highly recommended for this task.

    Initial Preparation, Install a Gas Fireplace

    Before any installation work begins, thorough preparation is paramount. This involves assessing the area where the fireplace will be installed, confirming adequate venting and gas supply, and ensuring the necessary permits are obtained. Proper planning minimizes potential complications and ensures a smooth installation process. The installation area must be clear of obstructions, allowing for easy access and movement of equipment.

    • Verify the gas supply line’s capacity and suitability for the fireplace’s needs. Consult with local gas companies to confirm the required pressure and flow rate.
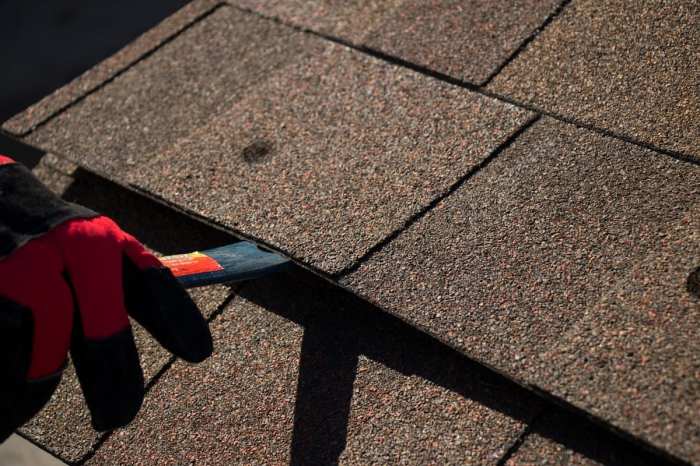
    • Determine the proper location for the venting system, considering factors like height, clearance, and accessibility. Ensure the vent system aligns with local building codes.
    • Obtain necessary permits and inspections from the local authorities to ensure compliance with building codes and safety regulations. Failure to do so could lead to costly delays or even project rejection.
    • Inspect the existing framing and ensure it can support the fireplace’s weight and installation requirements. Reinforcements might be necessary in certain cases.

    Safety Precautions

    Safety should be a top priority throughout the entire installation process. Understanding and adhering to safety precautions is crucial for avoiding potential accidents and ensuring the well-being of all involved. Never compromise safety for convenience or speed.

    • Always turn off the gas supply to the area before starting any work related to gas lines. This is an absolute necessity to prevent accidental gas leaks.
    • Ensure proper ventilation throughout the installation area. Adequate airflow helps to prevent the accumulation of flammable gases.
    • Wear appropriate safety gear, including gloves, safety glasses, and sturdy footwear, to protect yourself from potential hazards during the installation process.
    • Never work alone, especially when dealing with gas lines or electrical connections. Always have a second person present to assist with tasks and monitor safety procedures.

    Installation Steps

    The installation process involves a series of carefully orchestrated steps. Following these steps in the correct order is essential for a successful and safe installation.

    Installing a gas fireplace can be a fantastic upgrade for any home, adding warmth and ambiance. While you’re enjoying the cozy atmosphere, why not crank up the volume with some seriously good tunes like keep it goin louder ft nina sky and ricky blaze ? It’s a perfect way to set the mood for those chilly evenings, complementing the new fireplace’s inviting glow.

    Just remember to prioritize safety when handling gas appliances.

    1. Framing and Structure Preparation: Carefully mark the fireplace’s location and cut the necessary openings in the wall or floor. Reinforce the framing to support the fireplace unit’s weight. Ensure the structural integrity of the area.
    2. Plumbing Connections: Connect the gas supply line to the fireplace’s gas valve, ensuring a secure and leak-proof connection. Use approved fittings and follow manufacturer’s instructions carefully.
    3. Venting System Installation: Install the venting system according to the manufacturer’s instructions and local codes. Proper venting is critical for safe and efficient gas combustion.
    4. Fireplace Assembly: Assemble the fireplace components according to the manufacturer’s instructions. Pay close attention to the alignment and proper placement of all parts.
    5. Electrical Connections: Connect the electrical components, if any, to the fireplace and ensure proper grounding. Use approved electrical wiring and connectors.
    6. Final Checks and Inspections: Perform a thorough check for leaks, ensuring all connections are secure and sealed. Request a final inspection from the local gas and building authorities.

    Tools and Materials

    The following table Artikels the tools and materials required for each stage of the installation process.

    Step Tool Material Description
    Framing and Structure Preparation Measuring tape, saw, level, drill Framing materials, screws, anchors Tools for marking and cutting openings. Materials for reinforcement.
    Plumbing Connections Adjustable wrench, pipe cutter, Teflon tape Gas pipe, fittings, gas valves Tools for connecting gas lines and materials for leak-proof connections.
    Venting System Installation Vise grips, measuring tape Vents, flashing, insulation Tools for securing vents and materials for weatherproofing and insulation.
    Fireplace Assembly Screwdrivers, adjustable wrench Fireplace components, screws Tools for assembling the fireplace.

    Safety Considerations

    Installing a gas fireplace is a rewarding project, but safety should always be paramount. Understanding potential hazards and implementing preventive measures is crucial for a safe and enjoyable experience. This section details essential safety considerations to ensure a risk-free installation and operation.Properly installed and maintained gas fireplaces are generally safe. However, potential hazards exist, particularly if the installation or maintenance procedures are not followed meticulously.

    Careless handling of gas lines, inadequate ventilation, or faulty components can lead to significant risks. This section focuses on mitigating these risks by highlighting safety precautions and best practices.

    Potential Hazards of Gas Fireplaces

    Gas fireplaces, while aesthetically pleasing, present inherent safety risks if not handled correctly. These risks stem from the flammable nature of natural gas or propane used in the appliance. Faulty connections, inadequate ventilation, or improper installation can lead to gas leaks, fires, or carbon monoxide poisoning. It’s critical to identify potential hazards to mitigate them effectively.

    Importance of Proper Ventilation

    Adequate ventilation is essential for safe gas fireplace operation. Incomplete combustion of the gas can produce carbon monoxide, a colorless, odorless, and toxic gas. Insufficient ventilation can lead to dangerous levels of carbon monoxide accumulating in the room, posing severe health risks. Ensure the fireplace is installed in a location with adequate air exchange to prevent the buildup of harmful gases.

    Preventing Gas Leaks

    Gas leaks are a serious concern, potentially leading to explosions or fires. Regular inspections of gas lines, connections, and fittings are crucial to prevent leaks. Inspecting the gas supply lines for any cracks, corrosion, or loose connections is vital. Leaks can occur at various points, including the gas supply pipe, the gas valve, and the appliance itself.

    Installing a gas fireplace can be a rewarding DIY project. It’s a great way to add warmth and ambiance to your home. Before you start, however, you might want to make sure your Spotify account is all set up – Log in to Spotify to ensure you’ve got your favorite tunes ready to play as the fire crackles.

    Once you’ve got that sorted, you can focus on getting your new gas fireplace installed properly and safely.

    Frequent visual checks and professional inspections are necessary to ensure the safety of the gas lines.

    Handling Gas Leaks

    In the unfortunate event of a gas leak, immediate action is critical. Never attempt to approach or ignite the area if a leak is suspected. First, evacuate the building immediately. Alert the appropriate authorities, such as the fire department or gas company, and follow their instructions precisely. Turn off the gas supply at the main valve if it is accessible and safe to do so.

    Never use any open flames or electrical devices near the leak until the gas company personnel have confirmed the leak is contained and resolved.

    Maintaining Gas Fireplace Safety

    Regular maintenance is crucial for maintaining the safety of your gas fireplace. Professional inspections are essential to detect and address potential problems. Perform visual inspections regularly for signs of damage or wear to the gas lines, components, and the appliance itself. Follow the manufacturer’s guidelines for cleaning and maintenance procedures.

    Safety Checks Before and After Installation

    Regular safety checks are essential for ensuring the gas fireplace remains operational safely.

    Check Procedure
    Gas supply line integrity Visually inspect for cracks, corrosion, or loose connections.
    Gas appliance connections Verify all connections are tight and secure.
    Ventilation system Ensure adequate air intake and exhaust for proper combustion.
    Carbon Monoxide (CO) detector Verify the presence and functionality of the CO detector.
    Gas valve operation Test the gas valve operation to ensure proper shut-off mechanisms.
    Post-Installation Inspection Have a qualified technician perform a final inspection.

    Maintenance and Troubleshooting: Install A Gas Fireplace

    Keeping your gas fireplace in top condition requires regular maintenance. Neglecting this can lead to safety hazards, reduced efficiency, and costly repairs down the line. A well-maintained fireplace will provide years of enjoyable warmth and ambiance.Regular maintenance is crucial for the safe and efficient operation of a gas fireplace. It ensures that the appliance functions as intended, minimizes the risk of malfunctions, and helps to extend its lifespan.

    By following a simple maintenance routine, you can significantly reduce the chance of costly repairs and enjoy a reliable source of warmth and comfort.

    Importance of Regular Maintenance

    Regular maintenance is essential to prevent potential problems and ensure safe operation. It involves inspecting and cleaning various components to maintain optimal performance and prevent gas leaks, carbon monoxide buildup, and other safety issues. Proper maintenance also enhances the efficiency of the fireplace, optimizing its heat output and reducing energy consumption.

    Common Maintenance Procedures

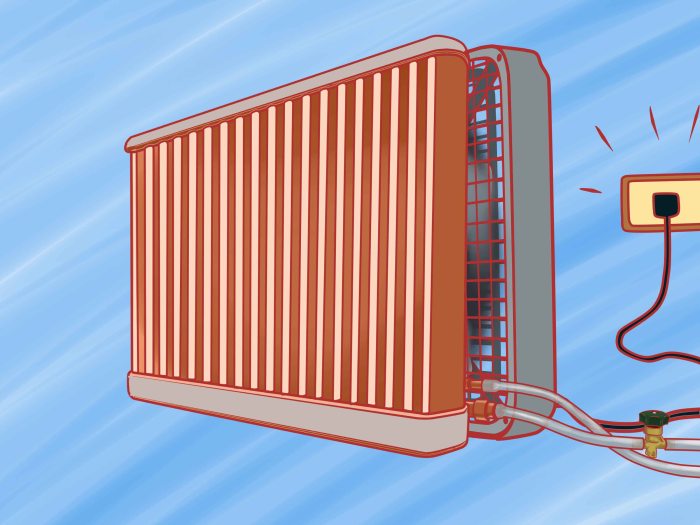
    A regular maintenance schedule involves several key procedures. These include checking the gas supply lines for leaks, ensuring proper airflow, and cleaning the heat exchanger and burner assembly. Regular inspections of the pilot light and ignition system are vital for consistent operation. Furthermore, proper ventilation is critical for the safe and efficient operation of the fireplace, preventing dangerous buildups of combustion gases.

    • Gas Supply Line Inspection: Visually inspect all gas supply lines for any signs of damage, leaks, or corrosion. Use a soapy water solution to detect leaks, as a small bubble indicates a potential leak. If any issues are found, contact a qualified professional immediately.
    • Airflow Check: Ensure proper airflow to the fireplace by inspecting the vents and openings. Blockages can impede combustion and reduce efficiency. Keep the area around the fireplace clear of obstructions.
    • Heat Exchanger and Burner Cleaning: Clean the heat exchanger and burner assembly regularly to remove soot and debris. This helps maintain optimal heat transfer and prevents inefficient operation. Follow the manufacturer’s instructions for safe cleaning procedures.
    • Pilot Light and Ignition System Inspection: Inspect the pilot light and ignition system to ensure proper function. Ensure the pilot light is lit and the ignition system is operating correctly. Address any issues immediately.
    • Ventilation Check: Ensure proper ventilation to prevent the buildup of combustion gases. Check for any obstructions in the venting system and make sure the vents are unobstructed.

    Troubleshooting Common Gas Fireplace Issues

    Troubleshooting common issues can often be done safely and effectively by homeowners. By understanding the potential causes of problems, you can identify and fix many issues without professional intervention. A thorough understanding of the system’s components will enable homeowners to diagnose problems more accurately and effectively.

    1. Pilot Light Won’t Light: Verify the gas supply, ensure the igniter is functioning correctly, and check for any obstructions in the gas line or burner assembly. If the problem persists, contact a qualified professional.
    2. Fireplace Won’t Ignite: Check for proper airflow, gas supply, and ignition system issues. Ensure the igniter is functioning correctly and that there are no blockages. If the problem persists, consult a professional.
    3. Unusual Noises: Unusual noises, such as clicking, popping, or hissing, may indicate a problem with the igniter, gas valve, or burner assembly. Check for loose connections or obstructions and contact a professional if the issue persists.

    Troubleshooting Procedure Example

    To troubleshoot a gas fireplace that won’t ignite, first, ensure the gas supply is turned on and check the gas valve for any obstructions. Next, verify that the pilot light is properly lit. If the igniter clicks but the pilot light won’t light, inspect the igniter’s electrodes for cleanliness. If the issue persists, consult a qualified technician.

    Problem Cause Solution Prevention
    Pilot light won’t stay lit Low gas pressure, dirty burner, or faulty igniter Check gas pressure, clean burner, replace igniter if needed Regular cleaning and inspection of burner and igniter
    Fireplace won’t ignite Blocked air intake, faulty igniter, low gas pressure Clear air intake, replace igniter, check gas pressure Regular cleaning and inspection of air intake and igniter
    Hissing or popping sounds Loose connections, gas leaks, or faulty valve Tighten connections, check for leaks, replace valve if needed Regular inspection of connections and valves

    Choosing a Gas Fireplace

    Choosing the right gas fireplace for your home is a significant decision, impacting both aesthetics and functionality. It’s crucial to consider various factors to ensure the fireplace seamlessly integrates into your existing décor and provides the desired ambiance and warmth. A well-chosen fireplace can elevate a room, while a poorly chosen one can detract from the overall design.Selecting a gas fireplace involves more than just picking a pretty face.

    Careful consideration of size, style, features, and budget are vital to achieving a harmonious and efficient addition to your living space. Understanding these factors will help you make an informed decision that perfectly complements your home’s unique characteristics.

    Factors to Consider

    A comprehensive evaluation of the available options is crucial for a successful installation. Factors such as the fireplace’s overall aesthetic appeal, compatibility with the room’s existing design, and its functional capabilities significantly influence the decision-making process.

    • Aesthetic Harmony: Matching the fireplace’s style to the room’s existing design is paramount. A modern fireplace in a traditional room would likely clash, while a rustic fireplace in a contemporary setting could achieve a striking juxtaposition.
    • Room Dimensions: The fireplace’s size should be proportionate to the room’s dimensions. A massive fireplace in a small room can overwhelm the space, while a compact fireplace in a large room might appear insignificant. Careful measurement and planning are crucial to avoid such issues.
    • Desired Features: Consider the specific features you desire, such as different types of fuel sources, adjustable heat settings, and various decorative options. A fireplace with multiple features will enhance its functionality, but can also increase the overall cost.
    • Budget Constraints: Gas fireplaces vary significantly in price, ranging from budget-friendly models to high-end, elaborate designs. Establishing a realistic budget early on will help narrow down the selection and prevent financial overruns.

    Styles, Sizes, and Features

    Gas fireplaces come in a wide array of styles, sizes, and features, allowing for customization to match any desired aesthetic.

    • Styles: Gas fireplaces are available in a diverse range of styles, including traditional, contemporary, rustic, and modern. Careful consideration of the existing home decor will help determine the most suitable style.
    • Sizes: Gas fireplaces are offered in various sizes, from compact units suitable for smaller rooms to larger models designed for expansive living spaces. The size of the fireplace should be proportionate to the room’s dimensions to ensure a balanced look.
    • Features: Features can include adjustable heat settings, different fuel sources (e.g., natural gas, propane), decorative glass options, and remote controls. These options can significantly enhance the fireplace’s usability and visual appeal.

    Brand and Model Comparisons

    Comparing different brands and models is crucial for finding the ideal fireplace. Researching customer reviews and examining technical specifications will help determine the best fit for your needs.

    Design Features Dimensions (approx.) Price Range (USD)
    Traditional Mantel Adjustable heat, remote control, decorative glass 36″W x 48″H x 18″D $1,500 – $3,000
    Modern Sleek Built-in thermostat, remote control, hidden controls 48″W x 60″H x 12″D $2,500 – $5,000
    Rustic Log Set Natural gas, adjustable heat, electronic ignition 42″W x 54″H x 24″D $1,800 – $4,500
    Contemporary Wall-Mount Propane gas, variable heat, remote control 30″W x 42″H x 8″D $1,000 – $2,500

    Cost and Budget

    Install a Gas Fireplace

    Installing a gas fireplace is a significant investment, and understanding the associated costs is crucial for budgeting. Factors like the type of fireplace, features, installation complexity, and local labor rates all influence the final price tag. Careful planning and research can help you avoid unpleasant surprises and stay within your budget.

    Average Installation Costs

    The average cost for installing a gas fireplace ranges from $3,000 to $8,000. This broad range encompasses various factors, including the size and complexity of the fireplace, the materials used, and the labor costs. Installation in a new home often involves more extensive work than retrofitting an existing space.

    Costs of Different Gas Fireplace Types

    Different types of gas fireplaces have varying price points. For instance, a simple, traditional gas fireplace with basic features will likely cost less than a more sophisticated model with features like remote control, enhanced flames, or specialized venting systems. The materials used and the level of customization also affect the overall cost.

    Cost Breakdown Examples

    A typical cost breakdown for a gas fireplace installation might include the cost of the fireplace itself, professional installation labor, venting materials (if required), and any necessary modifications to the existing structure. For example, a more complex installation involving a custom mantel, chimney modifications, or extensive plumbing work will naturally increase the overall cost. Similarly, the price of the fireplace itself can vary considerably depending on the manufacturer and the features.

    Estimated Gas Fireplace Installation Costs

    Item Cost Notes
    Fireplace unit (basic model) $1,500 – $3,000 Price varies greatly based on size, features, and brand.
    Installation labor $1,500 – $3,500 Labor costs depend on the complexity of the installation and local rates.
    Venting system (if needed) $500 – $1,500 Chimney work or venting modifications can add significantly to the cost.
    Plumbing and gas line connections $500 – $1,000 These costs vary depending on the complexity of the gas line connection.
    Permitting and inspections $100 – $500 Local regulations influence permitting fees.
    Total Estimated Cost $4,000 – $9,000 A broad estimate covering various installation scenarios.

    Environmental Impact

    Gas fireplaces, while offering a cozy ambiance, come with environmental considerations. Understanding their impact on the environment, alongside comparisons to other heating methods, is crucial for responsible decision-making. Choosing a heating source involves evaluating factors beyond just comfort and cost.Gas fireplaces, like any fuel-burning appliance, release emissions into the atmosphere. The type of gas used, the efficiency of the fireplace, and even the maintenance practices play significant roles in determining the environmental footprint.

    Comparing their impact with alternative heating options reveals a nuanced picture.

    Gas Type and Emissions

    Different types of natural gas have varying emission profiles. Methane, the primary component of natural gas, is a potent greenhouse gas. Propane, another common gas used in fireplaces, also releases greenhouse gases, although the specific composition and concentrations may differ. Furthermore, incomplete combustion, often a byproduct of improper maintenance or appliance design, can lead to the release of harmful pollutants like carbon monoxide and nitrogen oxides.

    Understanding these differences helps in making informed choices.

    Comparison to Other Heating Options

    Electric heating, often touted as environmentally friendly, relies on electricity generation, which, depending on the source, may not always be carbon-neutral. Wood-burning stoves, while often perceived as a more natural heating source, contribute to air pollution through particulate matter emissions. Furthermore, their environmental impact also depends on the source of the wood and the efficiency of the stove.

    Energy Efficiency of Gas Fireplaces

    The efficiency of gas fireplaces is a crucial factor in evaluating their environmental impact. Highly efficient models, often incorporating advanced combustion technologies, minimize the amount of fuel wasted as emissions. This is reflected in the efficiency rating of the appliance, typically expressed as a percentage. For instance, a 90% efficient fireplace uses 10% less fuel to produce the same amount of heat compared to a 70% efficient one.

    Higher efficiency ratings directly translate to lower greenhouse gas emissions and a reduced environmental impact.

    Environmental Impact Comparison

    Heating Source Emissions Energy Efficiency
    Natural Gas Fireplace (High Efficiency) Methane, nitrogen oxides (variable based on combustion efficiency) 90%+ (typical)
    Electric Resistance Heating Emissions from electricity generation (variable depending on source) 95%+ (typical)
    Wood-Burning Stove (High Efficiency) Particulate matter, carbon monoxide (variable based on combustion efficiency) 60-80% (typical)

    Note: Efficiency percentages are approximate and can vary based on model and usage. Emissions are general indicators and can vary based on specific conditions and maintenance practices.

    Visual Representations

    Gas fireplaces, whether modern or traditional, offer a captivating visual appeal that transforms a room. Their design choices, from the materials used to the layout of the installation, greatly influence the overall aesthetic and ambiance. Understanding these visual elements is crucial to choosing a fireplace that complements your home’s style and personality.

    Modern Gas Fireplace Installation

    Modern gas fireplaces often feature sleek, minimalist designs. Materials used in these installations frequently include high-quality metal, such as brushed stainless steel or polished aluminum, for the fireplace enclosure and surround. Glass panels, often tempered and heat-resistant, are common, allowing for a clear view of the flames. The layout is frequently integrated into the existing room design, blending seamlessly with the architecture.

    For instance, a modern installation might feature a floating mantel or a recessed fireplace built into a wall, maximizing space and minimizing visual clutter. The fireplace’s design can often include integrated lighting systems, enhancing the ambiance.

    Traditional Gas Fireplace Design

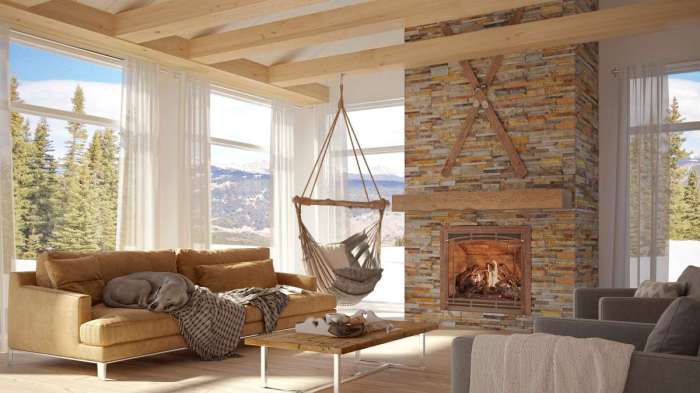
    Traditional gas fireplaces evoke a cozy and inviting atmosphere. These installations often incorporate intricate details, such as ornate mantels, decorative surrounds made of stone, brick, or tile, and detailed metalwork. The overall design often emphasizes warmth and craftsmanship, evoking a sense of heritage. The fireplace’s layout is typically more prominent in the room, acting as a focal point, and the design frequently incorporates a larger, more substantial hearth.

    Many traditional designs incorporate cast iron or wood accents.

    Gas Fireplace in a Contemporary Setting

    A gas fireplace in a contemporary setting can be a stylish centerpiece. Consider a setting with clean lines and a neutral color palette. The fireplace itself might feature a minimalist design with a large glass viewing area. The surround could be a sleek, light-colored stone or a modern tile pattern that matches the room’s decor. The surrounding lighting should be carefully considered to highlight the fireplace’s beauty.

    Ambient lighting, such as recessed lighting or strategically placed sconces, can complement the fireplace’s design.

    Gas Fireplace Designs

    Different gas fireplace designs offer various aesthetic possibilities. One design might showcase a linear, elongated fireplace, while another could feature a more rounded, curvaceous shape. Some designs emphasize the hearth and surround, creating a warm, inviting focal point. Other designs focus on the flames, using a larger glass viewing area for maximum visual impact. The fireplace’s finish, whether polished metal, stone, or tile, can also be tailored to match the surrounding room’s design.

    Installation in a Living Room

    A gas fireplace in a living room adds a unique element to the space. The installation can be a focal point or integrated into the existing decor. For example, in a living room with a warm, rustic theme, a stone-encased gas fireplace with a wood-burning mantelpiece might complement the existing design. The surrounding decor should complement the fireplace’s style.

    Warm wood tones, comfortable seating, and soft lighting can create a cozy atmosphere. If the room’s design is contemporary, a modern gas fireplace with clean lines and a neutral color palette would work well. Natural lighting and ambient lighting fixtures can be integrated with the design to maximize the visual impact of the fireplace.

    Final Review

    In conclusion, installing a gas fireplace is a significant undertaking, but with careful planning, adherence to safety guidelines, and a well-researched approach, it can be a rewarding home improvement project. This guide has provided a comprehensive overview of the entire process, from initial selection to ongoing maintenance. Remember to prioritize safety throughout the entire installation and remember that ongoing maintenance is key to long-term enjoyment of your new fireplace.

  • Replace Damaged Roof Shingles A Comprehensive Guide

    Replace Damaged Roof Shingles A Comprehensive Guide

    Replace Damaged Roof Shingles: A comprehensive guide to assessing damage, identifying shingle types, planning the replacement, understanding costs, finding professionals, and maintaining your roof. This in-depth look will walk you through each step, from identifying the extent of damage to choosing the right materials and ensuring a smooth replacement process. We’ll cover everything from the various types of shingle damage to the factors that influence the overall cost.

    Get ready to tackle your roof repair project with confidence.

    From understanding the different types of roof shingles and their lifespan to the essential safety precautions, this guide provides a detailed overview of the entire process. We’ll explore the nuances of each stage, ensuring you’re well-equipped to make informed decisions. This guide will empower you with the knowledge needed to handle this crucial home improvement project.

    Assessing Damage

    Roof damage, unfortunately, is a common occurrence, often exacerbated by weather events. Understanding the various signs of damage is crucial for prompt action and effective repair. Ignoring early signs can lead to more extensive and costly problems down the line. Proper assessment allows homeowners to make informed decisions about repair strategies.

    Common Signs of Roof Shingle Damage, Replace Damaged Roof Shingles

    Recognizing the early signs of roof shingle damage is key to preventing further deterioration and costly repairs. Different types of damage manifest in various ways, and a careful visual inspection can reveal critical issues. By paying close attention to subtle changes, homeowners can take proactive steps to maintain their roof’s integrity.

    • Missing shingles: Noticeable gaps or empty spaces where shingles should be present are clear indicators of missing shingles. This often occurs due to wind damage, improper installation, or aging. These gaps expose the underlying roof structure, making it vulnerable to further water damage.
    • Cracked shingles: Cracks can appear as hairline fractures or larger fissures, ranging from minor imperfections to significant damage. These cracks can result from impact, excessive heat, or even poor material quality. Identifying cracked shingles promptly is crucial to prevent water penetration.
    • Curled shingles: Shingles that are curling upward or downward are a sign of moisture damage or improper installation. This warping can expose underlying layers, increasing the risk of leaks and rot. Curling may be localized or extensive, depending on the cause.
    • Worn shingles: Over time, shingles can become worn and brittle, losing their original shape and color. This wear can be gradual or rapid, depending on environmental factors and the quality of the materials. This can increase the likelihood of leaks.

    Types of Roof Shingle Damage

    Different types of damage manifest in various ways, requiring different repair strategies. Identifying the type and extent of damage is critical for accurate estimations and efficient repairs.

    • Localized damage: This type of damage affects a small area of the roof. It could be a result of a specific impact or a localized weather event. Examples include a single missing shingle or a small section of curled shingles.
    • Widespread damage: This type of damage affects a larger area of the roof, potentially across multiple sections. This may result from strong winds, hail storms, or prolonged exposure to extreme weather. Examples include numerous missing shingles or extensive shingle curling across a considerable portion of the roof.

    Importance of Professional Inspection

    A professional inspection is crucial for accurate assessment of roof damage. Trained inspectors can identify subtle signs of damage that might be missed by homeowners. Their expertise helps in determining the extent of damage, necessary repairs, and long-term maintenance strategies.

    Damage Comparison Table

    | Damage Type | Description | Visual Representation | Extent of Damage ||—|—|—|—|| Missing Shingles | Gaps where shingles should be present. | Imagine a missing tile on a roof. | Localized or widespread. || Cracked Shingles | Cracks on the shingle surface. | A shingle with a visible fracture.

    | Localized or widespread. || Curled Shingles | Shingles warped upward or downward. | Imagine a shingle that has risen slightly. | Localized or widespread. || Worn Shingles | Shingles showing signs of wear and tear.

    Replacing damaged roof shingles is a crucial home maintenance task. It’s important to prioritize safety and choose the right materials. To stay organized, consider a helpful technique like the one used in Fill Salt and Pepper Shakers – keeping everything in its place can streamline the process. Once you’ve got your materials sorted, you can tackle the roof repairs with confidence.

    | Imagine a faded or brittle shingle. | Localized or widespread. |

    Identifying Shingle Types

    Choosing the right roofing shingle type is crucial for both the longevity and cost-effectiveness of your roof replacement project. Understanding the various materials, their maintenance needs, and their lifespan is essential to making an informed decision. Different shingle types react differently to weather conditions, and their repair and replacement costs can vary significantly.A thorough evaluation of your existing roof’s shingle type, combined with an assessment of your budget and climate, will guide you towards the optimal solution.

    This includes considering factors like wind load, rainfall, and potential future weather patterns in your region.

    Shingle Materials

    Various materials are used for roofing shingles, each with its own set of characteristics. Understanding these differences is key to selecting the right material for your home.

    • Asphalt Shingles: These are the most common type of shingle, known for their affordability and relatively straightforward installation. They come in a variety of colors, styles, and warranties, offering homeowners a broad range of choices to match their aesthetic preferences. The wide availability of asphalt shingles also translates to easier access for repairs and replacements.
    • Slate Shingles: These are naturally occurring, durable shingles crafted from stone. They provide a classic, elegant look but are significantly more expensive than asphalt shingles. Slate shingles are known for their longevity, potentially lasting for over a century with proper maintenance. Their high initial cost is often offset by their exceptional lifespan, making them a worthwhile investment for many homeowners.

    • Tile Shingles: Ceramic or concrete tiles offer a distinctive, often traditional aesthetic. They are known for their durability and resistance to fire, making them a good option for high-risk areas. The higher cost and more complex installation process of tile shingles are often factors to consider.
    • Wood Shingles: Historically used, wood shingles provide a rustic, natural appeal. They are less common now due to susceptibility to rot, fire, and insect damage. Proper maintenance, including regular inspections and treatments, is essential to preserve their integrity and lifespan. Their lifespan is significantly shorter compared to other options and requires ongoing maintenance.

    Maintenance and Repair Requirements

    The maintenance and repair requirements of each shingle type differ significantly.

    • Asphalt Shingles: Require regular inspections for damage and deterioration, typically every few years. Repairing or replacing damaged sections is relatively straightforward and affordable. Frequent cleaning can also help maintain the longevity of asphalt shingles.
    • Slate Shingles: Due to their durability, slate shingles require minimal maintenance. However, any damage needs to be addressed promptly to prevent further deterioration. Repairing slate shingles is often more complex and costly than repairing asphalt shingles.
    • Tile Shingles: Require regular inspections to identify any cracks or loose tiles. Repairing or replacing damaged tiles should be performed by experienced professionals to ensure proper installation and long-term functionality. Tile shingles are typically low-maintenance, but any issues require expert attention.
    • Wood Shingles: Require frequent inspections for signs of rot, insect damage, or fire damage. Prompt repairs are crucial to maintain the integrity of the roof. Wood shingles demand meticulous maintenance and regular treatment to prevent premature deterioration.

    Lifespan and Susceptibility to Damage

    The lifespan of shingles varies greatly based on the material and the level of maintenance.

    • Asphalt Shingles: Typically have a lifespan of 15-30 years, depending on the quality and the weather conditions. They are susceptible to damage from wind, hail, and ice. Proper installation and regular maintenance can significantly extend their lifespan.
    • Slate Shingles: Have an exceptionally long lifespan, potentially lasting over 100 years. Their resistance to damage is high, but they can be susceptible to damage from heavy impact or severe weather events.
    • Tile Shingles: Offer a lifespan comparable to slate, potentially lasting for several decades or even longer with proper care. Their resistance to fire and high temperatures is a notable advantage, but they can be prone to cracking from temperature fluctuations.
    • Wood Shingles: Have a relatively short lifespan compared to other materials, often lasting only 20-50 years. They are highly susceptible to rot, insect damage, and fire, making them a less desirable choice in high-risk areas.

    Cost-Effectiveness Comparison

    The cost-effectiveness of different shingle types varies considerably.

    Shingle Type Initial Cost Maintenance Cost Lifespan Overall Cost-Effectiveness
    Asphalt Moderate Low Moderate Generally cost-effective
    Slate High Low Very High Potentially high long-term value
    Tile High Low High High long-term value
    Wood Moderate High Low Generally less cost-effective

    Preparation and Planning

    Replace Damaged Roof Shingles

    Roofing replacement isn’t just about slapping new shingles on top. Thorough preparation is crucial for a successful and safe job. This stage involves meticulous planning, ensuring the job is done right the first time, minimizing risks, and maximizing the longevity of the new roof. Proper preparation sets the foundation for a durable and aesthetically pleasing outcome.A well-planned roofing project involves much more than just the replacement itself.

    It requires careful assessment of the existing roof structure, accurate identification of necessary materials, and a clear strategy for executing the entire process. This includes considering factors like weather conditions, access limitations, and potential complications.

    Roof Structure Preparation

    Preparing the roof for shingle replacement involves several key steps. First, all loose debris, including old shingles, dirt, and other unwanted materials, must be carefully removed. This crucial step prevents foreign materials from interfering with the new installation and ensures a clean surface for adhering the new shingles. Damaged or deteriorated wood and flashing should be replaced before proceeding with shingle replacement to prevent further issues.

    This proactive approach prevents costly repairs down the line.

    Safety Precautions

    Safety is paramount during any roofing project. Falls are a significant risk. Use appropriate fall protection equipment, such as safety harnesses and ropes, whenever working at heights. Proper scaffolding and protective gear are essential to mitigate risks. Always be aware of your surroundings, including potential hazards such as electrical wires or overhanging branches.

    Furthermore, weather conditions should be carefully monitored. Extreme temperatures, strong winds, or inclement weather can significantly affect the work and pose significant safety risks.

    Replacing damaged roof shingles is crucial for a house’s longevity and curb appeal. While I’m focused on getting those shingles replaced, I couldn’t help but check out U2’s new song, “Ahimsa,” which I found really interesting – you can listen to it here: u2 share new song ahimsa listen. Hopefully, the new song inspires me to tackle the roofing project with renewed energy! I’m looking forward to getting that job done right.

    Necessary Tools and Equipment

    A comprehensive toolkit is essential for a smooth and efficient shingle replacement. The right tools simplify tasks and prevent unnecessary delays. This is crucial for minimizing project completion time and maintaining the quality of the work.

    • Roofing tools are vital. This includes a variety of tools like pry bars, roofing hammers, and specialized shingle cutters.
    • Safety equipment is paramount. This includes harnesses, ropes, and safety glasses. These are critical to preventing falls and protecting against other potential hazards.
    • Measuring tools are necessary for accurate measurements. This includes measuring tapes and levels. These tools ensure precision in the replacement process.
    • Cleaning tools are needed for the roof’s preparation. This includes scrapers, brooms, and dustpans. These tools ensure the roof surface is ready for new shingles.
    • Materials handling equipment can be helpful. This might include heavy-duty lifting equipment and materials handling tools to ensure the safe handling of materials.

    Securing the Roof Structure

    Securing the roof structure is crucial to ensure the integrity of the entire roof system and the safety of the workers. Proper securing techniques are essential to prevent structural issues from occurring. This involves inspecting and addressing any existing damage to the roof’s framework before starting the replacement. Properly securing the roof structure ensures that the new shingles are adequately supported and that the roof can withstand the expected stresses and weather conditions.

    Use appropriate fasteners and anchoring methods to prevent movement or detachment of the new shingles.

    Tool/Equipment Description Usage
    Roofing Hammer Heavy-duty hammer for driving nails and other fasteners Used for driving nails and fasteners into the sheathing for shingle attachment.
    Pry Bar Metal bar used for prying and lifting shingles and other materials. Used for lifting and removing old shingles and other materials.
    Shingle Cutter Specialized tool for cutting shingles to size. Used for precisely cutting shingles to fit irregular roof areas.
    Safety Harness Provides secure attachment to safety lines. Essential for fall protection when working at heights.
    Measuring Tape Used for measuring distances and dimensions. Critical for accurate shingle placement and material calculations.

    Replacement Process

    Roofing replacement is a crucial home maintenance task that requires careful planning and execution. Following the proper steps ensures a safe and effective repair, preventing future issues and extending the lifespan of your roof. A damaged roof, left unrepaired, can lead to significant water damage, structural issues, and higher energy bills. Thoroughness in the replacement process is essential for optimal results.The replacement process involves several key steps, from preparing the area to installing the new shingles.

    Each step is critical to achieving a professional and lasting repair. Proper techniques and adherence to manufacturer guidelines are paramount to ensure the new roof is structurally sound and aesthetically pleasing.

    Replacing damaged roof shingles is a crucial home maintenance task, ensuring your house stays protected from the elements. Just like you might act around someone you don’t like, sometimes you have to “act” a bit differently when tackling a home repair, like strategically planning your time to avoid the worst of the weather and to get the job done effectively.

    You’ll need to be extra careful and organized, just like navigating a social situation. Remember, proper roof maintenance is key to a happy and healthy home. Check out this article for tips on how to act around someone you do not like: Act Around Someone You Do Not Like and you’ll find the same level of attention to detail is needed for replacing damaged shingles.

    Preparing the Work Area

    Before commencing shingle replacement, the work area must be prepared for efficient and safe operation. This preparation involves clearing debris, securing the surrounding area, and ensuring proper ventilation. A safe work environment is paramount. Improper preparation can lead to accidents, damage to surrounding structures, and inefficient work.

    • Clearing the area around the roof is essential to prevent injury and damage to surrounding property. Remove all tools, equipment, and debris from the immediate work zone. This includes removing any loose shingles, nails, or other materials that may pose a tripping hazard. Ensure the area is free of obstructions.
    • Protecting the surrounding areas from debris and damage is critical. Covering landscaping, vehicles, and any other structures around the roof is essential to prevent damage from falling debris. Tarps and other protective coverings are vital.
    • Adequate ventilation is needed for the workers and to prevent the build-up of hazardous materials. Open windows or other ventilation sources will help ensure a safe work environment.

    Removing Damaged Shingles

    Carefully removing the damaged shingles is crucial to prevent further damage to the roof structure. The removal process requires precision and caution. Improper removal can damage the underlying roofing material, causing leaks and further structural damage. Always use appropriate safety gear, such as gloves and eye protection.

    • Using the correct tools, such as a pry bar and a roofing shovel, carefully remove the damaged shingles. Work systematically, starting with the damaged sections and moving outward. Be cautious not to damage the underlying felt or the surrounding good shingles.
    • Remove any nails or other fasteners using appropriate tools. Ensure all fasteners are removed completely. Carefully inspect the roof deck for any damage. Note any repairs that need to be done.
    • Dispose of the old shingles properly. Follow local regulations for disposal of roofing materials.

    Installing New Shingles

    The installation of new shingles is a critical step in the replacement process. The correct installation techniques are crucial to ensure the roof’s longevity and structural integrity. Proper adherence to manufacturer instructions is paramount. Misaligned or improperly installed shingles can lead to leaks and structural damage.

    Step Description Image Description
    1 Lay the underlayment over the sheathing. This layer protects the roof deck and provides a barrier against moisture. Visualize a roll of roofing felt being carefully laid over the wood sheathing, ensuring it overlaps previous sections to create a continuous moisture barrier.
    2 Install starter shingles along the eaves and ridges. This is the initial layer, and a crucial step in ensuring the proper layout for the rest of the shingles. Imagine a row of starter shingles being placed at the edge of the roof, following the contour of the eaves. Ensure they are firmly nailed to the roof.
    3 Install the new shingles, ensuring proper overlap and alignment. Pay attention to the manufacturer’s instructions for the correct shingle placement. Visualize the new shingles being carefully placed, ensuring the shingles are correctly overlapped, with the appropriate shingle tab (or other element) positioning in relation to the previous row.
    4 Secure the shingles with appropriate fasteners, following the manufacturer’s instructions for spacing and type. Visualize nails or other appropriate fasteners being driven into the shingle to ensure secure attachment. Check the manufacturer’s specifications for proper spacing and fastener types.

    Cost Estimation and Materials

    Knowing the precise cost of your roof shingle replacement is crucial for planning and budgeting. This section delves into the factors influencing the cost, methods for accurate estimation, necessary materials, and pricing strategies. Understanding these elements will empower you to make informed decisions and avoid unexpected expenses.

    Factors Affecting Replacement Costs

    Several factors contribute to the overall cost of a roof shingle replacement project. These include the size of the roof, the type of shingles being replaced, the complexity of the roof structure, labor costs in your area, and the availability of materials. For instance, a steeply pitched, multi-layered roof will demand more labor hours and materials than a flat roof.

    Furthermore, specialized shingle types, like those designed for high winds or extreme weather conditions, can significantly increase the cost.

    Estimating Total Replacement Cost

    A precise cost estimate involves careful assessment of the roof’s dimensions and the specific shingle types required. Tools like online roof calculators or consultations with roofing contractors can assist in this process. Roofing contractors often provide detailed estimates, factoring in material costs, labor expenses, and any additional work needed. These estimates are valuable for budgeting purposes.

    Materials Needed for Replacement

    This section Artikels the key materials required for a typical roof shingle replacement project. The list includes quantities and specifications to ensure accurate purchasing.

    • Shingles: The primary material. Quantities are determined by roof size and shingle dimensions. Choosing premium asphalt shingles or specialized materials will affect the price.
    • Underlayment: A protective layer beneath the shingles. The quantity depends on the roof’s size and type. This often includes waterproof membranes.
    • Roofing nails: Crucial for securing the shingles. Different types of nails are available, each with varying price points and specifications for durability.
    • Starter shingles: Used along the edges of the roof to create a seamless look and protect the edges from the elements. These will vary based on the overall roof design and shingle type.
    • Flashing: Essential for sealing vulnerable areas around chimneys, vents, and other protrusions. These materials are vital for preventing leaks and are often customized to the specific design.

    Pricing and Sourcing Replacement Materials

    Material prices fluctuate based on market conditions and supplier availability. Local building supply stores and online retailers are potential sources. Comparing prices from multiple vendors is recommended to ensure the best value. In some cases, contractors may provide materials at a negotiated rate. It’s wise to obtain quotes from different contractors to compare their pricing strategies and material sourcing.

    Estimated Cost Breakdown

    The table below illustrates a sample cost breakdown for different shingle types. Keep in mind that these are estimates and actual costs may vary based on location and specific project details.

    Shingle Type Estimated Cost (per square) Additional Notes
    Asphalt shingles (standard) $100 – $150 Common choice; good value for most homes.
    Asphalt shingles (premium) $150 – $250 Enhanced durability and aesthetic appeal.
    Wood shingles $250 – $500 Higher cost; often used for aesthetic appeal.
    Metal shingles $200 – $400 High durability and longevity; higher initial cost.

    Finding Professionals

    Choosing the right roofing contractor is crucial for a successful and lasting repair. A qualified professional ensures the job is done correctly, using the right materials, and adhering to safety standards. This protects your investment and guarantees a long-lasting roof. Poorly executed repairs can lead to further damage and costly future repairs.Hiring a qualified roofing contractor is not just about getting the job done; it’s about getting it done right.

    This means selecting a contractor with the necessary experience, licenses, and insurance to handle the work. This is a critical step in ensuring the longevity and structural integrity of your roof. A reputable contractor understands the specifics of your roof’s type, the nuances of local building codes, and the potential challenges of the project.

    Importance of Qualified Contractors

    Hiring a qualified roofing contractor is paramount. They possess the knowledge and expertise to assess damage accurately, select appropriate materials, and execute the replacement process safely and efficiently. This minimizes the risk of further damage and ensures a high-quality result. Furthermore, qualified contractors are often insured and bonded, protecting both the homeowner and the contractor in case of accidents or issues.

    Factors to Consider When Choosing a Contractor

    Several factors play a critical role in selecting the right roofing contractor. These include their experience, licensing, insurance, reputation, and references. Evaluating these factors ensures you’re working with a trustworthy and capable professional. Look for contractors who have a proven track record of successfully completing similar projects. Check for proper licenses and insurance coverage to ensure legal compliance and liability protection.

    Thorough research and verification of these elements are essential before making a decision.

    Questions to Ask Potential Contractors

    Thorough questioning of potential contractors is essential. This process ensures you choose a contractor who understands your needs and can meet your expectations. Here’s a list of crucial questions to ask:

    • What is your company’s experience with this type of shingle replacement?
    • Do you have any certifications or specializations related to roofing?
    • What is your company’s licensing and insurance status?
    • Can you provide references from previous clients for similar projects?
    • How do you handle potential weather delays or unforeseen complications during the replacement process?
    • What is your warranty policy on the materials and workmanship?
    • What is your proposed timeline for the entire project?
    • What payment terms do you offer?

    Importance of Multiple Bids

    Obtaining multiple bids is critical for making an informed decision. Comparing bids allows you to assess the costs and services offered by different contractors. This competitive approach ensures you’re getting the best possible value for your investment. This process helps identify the most cost-effective and suitable contractor for your specific needs.

    Contractor Comparison Table

    Comparing potential contractors based on their services and pricing is essential. The table below illustrates a sample comparison, highlighting key factors for decision-making:

    Contractor Experience (Years) Licensing Insurance Estimated Cost Warranty Additional Services
    Roofing Solutions Inc. 15 Yes Yes $5,500 5-year Roof cleaning, gutter maintenance
    Apex Roofing Co. 10 Yes Yes $6,000 3-year Free consultation, project management
    Reliable Roofing Experts 8 Yes Yes $5,000 10-year 24/7 emergency service

    Post-Replacement Maintenance: Replace Damaged Roof Shingles

    Congratulations on your new roof! A freshly replaced roof is a significant investment, and taking proactive steps to maintain it will ensure its longevity and protect your home’s value. Proper post-replacement maintenance extends the lifespan of your roof and minimizes the risk of costly repairs down the road.Investing in routine maintenance after a roof replacement is crucial. This proactive approach will not only prevent future damage but also maintain the warranty on your new roof shingles.

    Regular inspections and upkeep will identify any potential problems early, preventing them from escalating into major issues and saving you money in the long run.

    Importance of Routine Roof Maintenance

    Routine roof maintenance is essential for preserving the integrity and longevity of your newly installed roofing system. Ignoring routine maintenance can lead to costly repairs or replacements in the future, impacting your budget and home’s structural integrity. By consistently checking for signs of damage and addressing minor issues promptly, you can significantly extend the lifespan of your roof and avoid major problems.

    Steps for Inspecting the Roof After Replacement

    A thorough inspection after the roof replacement is crucial for identifying any issues that might have arisen during the installation process. This ensures the integrity of the new roof and allows for prompt resolution of any problems.

    • Visual Inspection: Carefully examine the entire roof surface for any signs of damage, such as missing shingles, loose flashing, or gaps in the sealant. Look for signs of water damage, particularly around valleys, chimneys, and vents. Inspect the edges of the roof and ensure proper installation of any gutters and downspouts.
    • Check Flashing and Sealants: Inspect all flashing around chimneys, vents, and other penetrations. Ensure that the sealant is properly applied and free of cracks or gaps. These areas are particularly vulnerable to water intrusion and require careful attention.
    • Examine Gutters and Downspouts: Ensure that gutters are properly installed, directing water away from the house. Check downspouts to make sure they are clear and draining effectively. Blocked gutters can lead to water damage on the roof and surrounding areas.
    • Assess the Overall Structure: Look for any signs of structural damage or instability, such as sagging or warping. If you notice any anomalies, contact a roofing professional immediately for assessment and repair.

    Preventative Measures to Avoid Future Damage

    Implementing preventative measures can significantly reduce the risk of future damage to your roof. These measures focus on protecting the roof from environmental factors and ensuring the long-term health of the installation.

    • Regular Cleaning: Remove debris, leaves, and other accumulated materials from the roof to prevent clogging and water damage. This is particularly important in areas prone to heavy rainfall or leaf accumulation.
    • Proper Ventilation: Ensure proper ventilation in the attic to prevent moisture buildup, which can lead to structural damage and affect the overall performance of the roof.
    • Addressing Leaks Promptly: If you detect any leaks, address them immediately to prevent water damage to the roof’s structure, interior walls, and ceilings.
    • Protecting from Ice Dams: In areas with freezing temperatures, take preventative measures to protect your roof from ice dams. This may include installing ice and water shield products, or consulting with a professional for tailored solutions.

    Checklist for Regular Roof Maintenance

    A comprehensive checklist for regular roof maintenance will help ensure that your roof is properly maintained and protected from potential issues.

    • Visual Inspection (monthly): Regularly inspect the roof for any visible signs of damage, such as missing shingles, cracked sealant, or signs of water damage.
    • Gutters and Downspouts (quarterly): Clear gutters and downspouts of debris to ensure proper water drainage and prevent clogging. Check for any damage to gutters and downspouts.
    • Flashing and Sealants (biannually): Inspect flashing and sealants around chimneys, vents, and other penetrations for any cracks, gaps, or deterioration. Repair any issues promptly.
    • Attic Ventilation (yearly): Check attic ventilation for proper airflow and ensure that moisture is not accumulating. Address any issues to prevent moisture damage.

    Ongoing Roof Maintenance and Inspections Checklist

    This table Artikels a recommended schedule for ongoing roof maintenance and inspections, helping to ensure a long-lasting roof.

    Task Frequency Description
    Visual Roof Inspection Monthly Check for missing shingles, signs of water damage, or other visible issues.
    Gutters and Downspouts Cleaning Quarterly Clear gutters and downspouts of debris. Inspect for damage.
    Flashing and Sealants Inspection Biannually Inspect flashing and sealants for cracks or gaps.
    Attic Ventilation Check Annually Ensure proper ventilation and moisture control in the attic.
    Professional Roof Inspection Annually or as needed Consult a professional for a thorough inspection and identify potential issues.

    Ultimate Conclusion

    Replace Damaged Roof Shingles

    In conclusion, replacing damaged roof shingles is a significant home improvement undertaking. This guide provides a thorough framework for understanding the entire process, from assessment and planning to replacement and maintenance. Armed with this knowledge, you can confidently approach this project, ensuring a safe and successful outcome. Remember, proper planning and expert guidance are key to a lasting solution.

  • Hang a Garland Outside Your Outdoor Decorating Guide

    Hang a Garland Outside Your Outdoor Decorating Guide

    Hang a Garland Outside is your comprehensive guide to transforming your outdoor space with the magic of garlands. From choosing the perfect garland to mastering the art of hanging and maintenance, this post will equip you with the knowledge and inspiration to create breathtaking outdoor displays. We’ll explore different garland types, suitable locations, hanging techniques, and seasonal variations, so you can deck your halls (or your porch, garden, or patio) for any occasion.

    This guide will cover everything from selecting durable materials to understanding safety precautions when working with heights. You’ll find detailed instructions, helpful tips, and creative ideas to make your outdoor garland displays truly unique and lasting. Get ready to bring your outdoor space to life!

    Choosing the Garland

    A well-chosen garland can transform an outdoor space, adding a touch of festive cheer or a subtle touch of elegance. Selecting the right garland involves considering several factors, from the material and color to the intended aesthetic and the specific outdoor environment. This guide will help you navigate the various options available and make an informed decision for your project.The key to a successful outdoor garland is understanding its intended use and the environment it will inhabit.

    Different materials react differently to sun, rain, and temperature fluctuations. Choosing the right garland ensures your investment will last and continue to enhance your space for years to come.

    Garland Types for Outdoor Use

    Various types of garlands are suitable for outdoor use, each offering unique visual appeal and durability. Natural materials like pine boughs, evergreen sprigs, and berry clusters provide a classic, rustic touch, often used in winter holidays. Fabric garlands, with their vibrant colors and patterns, are versatile and can be adapted for any season or theme. Metal and plastic options offer a modern twist, allowing for intricate designs and bold colors, suitable for year-round use.

    Material Durability and Weather Resistance

    The longevity of an outdoor garland depends heavily on the material’s resistance to the elements. Natural materials like wood and wicker, while beautiful, may not be the most durable choice for prolonged outdoor exposure. These materials can easily fade, warp, or rot. Plastic and metal, however, are generally more resistant to weathering, offering longer lifespan. Fabric garlands require careful consideration; while they can be quite festive, they might need additional protection, such as weather-resistant coatings, to withstand harsh weather.

    Festive and Non-Festive Garland Options

    Garlands are not solely for holidays. For example, a simple, muted-color fabric garland can add a touch of elegance to a garden path, while a string of twinkling lights can illuminate a patio during the evening. For the holidays, consider pine cone garlands, which bring a natural touch to the winter ambiance, or a vibrant red and green garland for a Christmas display.

    Matching Garland to Outdoor Aesthetic

    Matching the garland to your existing outdoor aesthetic is crucial. If your home boasts a traditional style, a wicker or natural garland might be a perfect fit. A modern home might benefit from a sleek metal or plastic garland. A more rustic or bohemian style could embrace the charm of natural materials like wood or dried flowers.

    Consider the color palette of your outdoor space when choosing a garland to create a cohesive and visually appealing environment.

    Garland Material Comparison Table

    Material Durability Weather Resistance Cost Aesthetic Appeal
    Plastic High High Medium Versatile, modern
    Paper Low Low Low Rustic, festive
    Fabric Medium Medium (with treatment) Medium Vibrant, diverse
    Metal High High Medium-High Modern, sleek
    Wood Medium Medium (depending on treatment) Medium Rustic, natural

    Preparing the Space

    Choosing the perfect location for your garland is crucial for maximizing its visual impact and ensuring its longevity. A well-placed garland can elevate the festive ambiance of a room, while a poorly chosen spot can diminish its effect. Consider the surrounding environment, architectural details, and the overall aesthetic you’re aiming for.Careful consideration of the space’s structural integrity is essential to avoid accidents and ensure the garland’s safety.

    A secure and stable location minimizes the risk of damage or injury. This involves a thorough evaluation of the support available and the potential for movement or shifting. Proper preparation of the area also involves practical steps like cleaning and ensuring the area is ready to receive the garland without interference.

    Selecting the Ideal Hanging Location

    Proper placement of the garland significantly impacts its visual appeal and the overall festive atmosphere. Factors like lighting, architectural features, and visibility should be considered. Good lighting enhances the garland’s sparkle and color, while architectural details can be beautifully highlighted by strategic placement. Visibility ensures that the garland is prominently displayed and easily appreciated.

    Assessing Structural Integrity

    Before hanging any garland, carefully evaluate the structural integrity of the chosen location. Look for sturdy supports, ensuring the chosen location can bear the weight of the garland without risk of damage or displacement. Examine the ceiling or wall for any cracks or weak points. This proactive step helps to avoid potential accidents and ensures the long-term safety of the garland and the environment.

    Hanging a garland outside is a simple way to add a touch of festive cheer. It’s a great way to bring a little bit of the outdoors in and create a welcoming atmosphere. Thinking about the sheer power and athleticism of Calvin Johnson, a wonderful beast , it’s easy to see how something as seemingly small as a garland can bring a burst of joy and vibrancy.

    A perfect addition to any home’s exterior décor, it’s a quick and easy project to brighten up your surroundings.

    Preparing the Area

    Thorough preparation of the space before hanging a garland enhances its visual impact and safety. Cleaning the area ensures a smooth surface for the garland to rest on, removing any debris that could interfere with the hanging process. Trimming branches or foliage, if necessary, improves the garland’s aesthetic and allows for a clean and well-defined presentation. Proper marking of the placement points aids in accurate hanging and helps maintain alignment.

    Safety Precautions and Support Requirements

    • A sturdy, level surface is essential for hanging a garland. Consider the weight of the garland and the material it is made of. A heavy garland requires more robust support than a light one.
    • Using appropriate hanging hardware is critical to prevent damage to the structure and ensure the garland’s safety. Hooks, clips, or other appropriate fixtures should be used for support, depending on the garland’s weight and the surface it is being attached to. For example, a heavy, intricate garland made of glass or metal might require stronger, more secure hanging mechanisms than a simple, lightweight garland made of fabric or paper.

    • Safety measures like securing the garland to prevent accidental detachment are paramount. Use appropriate fasteners to ensure the garland remains securely attached throughout the display period.

    Example Table: Garland Hanging Preparation

    Location Structural Support Requirements Necessary Safety Precautions
    Ceiling Strong hooks, brackets, or wires capable of holding the garland’s weight. Ensure hooks are firmly anchored and securely attached to prevent falling.
    Mantels Secure brackets or hooks designed for mantelpieces, considering the mantel’s weight capacity. Ensure the garland’s weight does not exceed the mantel’s load limit.
    Walls Strong adhesive strips or specialized wall-hanging hardware appropriate for the garland’s weight. Use appropriate adhesives or hardware suited to the wall material and garland weight.

    Hanging the Garland

    Hang a Garland Outside

    Transforming your chosen garland into a festive display requires careful execution. Proper hanging ensures the garland’s longevity and aesthetic appeal. This step-by-step guide will equip you with the knowledge and techniques to hang your garland with confidence and precision.The right approach to hanging a garland depends on several factors, including the garland’s material, the structure of the space, and your personal preferences.

    Whether you opt for a simple, symmetrical arrangement or a more elaborate, dynamic design, the methods Artikeld below will help you achieve a beautiful and lasting result.

    Methods for Attaching the Garland

    Different attachment methods cater to various garland types and surfaces. Understanding the options will allow you to select the most appropriate technique for your project.

    • Using Hooks: Hooks are ideal for hanging garlands on railings, fences, or other structures with pre-existing hooks. Ensure the hooks are strong enough to support the weight of the garland and are securely attached to the surface. Use appropriate size hooks to avoid damage or slippage. For example, if you’re hanging a delicate, lightweight garland, small, fine hooks would be a good choice.

      If the garland is heavy, use sturdy hooks.

    • Employing Clips: Clips are versatile and suitable for a variety of surfaces, including branches, walls, or railings. They provide a quick and easy way to attach the garland without causing damage to the structure. Choose clips that match the garland’s material and size. Ensure the clips are firmly engaged to prevent slippage or damage.
    • Utilizing Adhesives: Adhesives are a good choice for hanging garlands on smooth surfaces like walls or ceilings. Select an adhesive specifically designed for outdoor use or the material of the garland to avoid damage or peeling. Apply a thin layer of adhesive to the back of the garland, ensuring proper adhesion to the surface. Carefully press the garland against the surface to secure it.

      This method is suitable for hanging garlands on trees or other natural surfaces, offering an attractive aesthetic.

    Necessary Tools and Supplies

    Gathering the right tools and supplies will streamline the hanging process and prevent potential complications.

    • Garland: Your chosen garland is, of course, essential.
    • Hooks/Clips/Adhesive: Select appropriate attachments based on the garland and surface.
    • Measuring Tape: Accurate measurements are crucial for a symmetrical arrangement.
    • Scissors/Utility Knife: Useful for trimming the garland to fit or for cutting adhesive strips.
    • Level (optional): For hanging the garland straight and ensuring even spacing.
    • Gloves (optional): Protect your hands when handling the garland or adhesives.

    Safety Considerations

    Prioritizing safety is paramount during the hanging process. Understanding potential hazards and taking necessary precautions will ensure a smooth and secure installation.

    • Working at Heights: If hanging the garland from a high place, use a sturdy ladder or scaffolding and ensure proper footing. Never compromise safety for speed or convenience.
    • Electrical Hazards: Avoid hanging garlands near electrical wires or outlets to prevent accidents.
    • Sharp Objects: Exercise caution when handling sharp objects like scissors or utility knives.
    • Weather Conditions: If hanging the garland outdoors, consider the weather forecast and take precautions to protect the garland from rain or strong winds.

    Hanging Procedures

    This structured approach will help you hang the garland efficiently and safely.

    1. Planning the Arrangement: Visualize the desired layout before starting to hang the garland. This will save time and prevent mistakes.
    2. Marking the Placement: Use a measuring tape and level to mark the placement of hooks, clips, or adhesive points on the surface.
    3. Attaching the Garland: Apply the chosen method to attach the garland to the surface, ensuring a secure hold.
    4. Checking the Alignment: Regularly check the alignment and spacing of the garland to maintain the desired aesthetic.
    5. Troubleshooting: If problems arise, refer to the solutions below. For example, if the garland slips, ensure the hooks are secure, the adhesive is properly applied, or the clips are correctly fastened.

    Maintaining the Garland: Hang A Garland Outside

    A beautiful garland, meticulously chosen and artfully hung, deserves the same care and attention to maintain its splendor and extend its life. Proper maintenance is key to preserving its vibrant colors and preventing premature wear and tear. This section delves into the essential practices for keeping your garland looking its best, from cleaning to storage.Maintaining a garland’s quality requires a proactive approach.

    By following the best practices Artikeld below, you can ensure your festive decorations remain beautiful and usable for many years to come. This proactive approach will prevent costly replacements and ensure your investment is worthwhile.

    Cleaning and Care Procedures

    Garlands crafted from different materials require unique cleaning methods. Understanding these distinctions is crucial for preventing damage and maintaining the garland’s aesthetic appeal. Different cleaning techniques are vital to preserve the garland’s integrity and beauty.

    • Natural Fiber Garlands (e.g., pine, cedar): These garlands often benefit from gentle brushing with a soft-bristled brush to remove dust and debris. For more stubborn dirt, a damp cloth can be used, ensuring the cloth is wrung out thoroughly to prevent water damage. Avoid using harsh chemicals or excessive water, as these can weaken the natural fibers.
    • Artificial Fiber Garlands (e.g., plastic, metallic): These garlands are often more resilient and can be cleaned with a mild detergent solution. Mix a small amount of mild dish soap with lukewarm water and use a soft cloth to gently wipe down the garland. Thorough rinsing is essential to prevent residue buildup. Avoid using abrasive cleaners or scrubbing, which can damage the artificial fibers.

    • Mixed Material Garlands: When dealing with garlands featuring a combination of natural and artificial materials, prioritize gentle cleaning methods. Separate the different components and clean them individually using the appropriate techniques described above. This strategy ensures the longevity of the entire garland.

    Preventing Weather Damage

    Protecting your garland from harsh weather conditions is essential for its longevity. Specific measures can safeguard your investment from the elements. Exposure to the elements can quickly diminish the beauty and lifespan of your garland.

    • Rain and Snow: To prevent water damage, consider storing the garland indoors during periods of heavy rain or snowfall. If the garland must remain outdoors, ensure it is positioned in a sheltered location, away from direct exposure to precipitation. Materials like plastic and metallic coverings are less susceptible to water damage than natural fibers. Proper storage and covering can mitigate the impact of these elements.

    • Wind: High winds can cause damage to the garland, especially if it’s not securely fastened. Use appropriate fasteners and secure the garland to prevent it from being blown away or damaged by the wind. Consider using weighted elements or stakes to anchor the garland and reduce the impact of high winds.

    Storage Practices

    Proper storage techniques are essential to preserve the quality of your garland for future use. This meticulous care ensures that the garland remains intact and beautiful for future use.

    • Cleaning and Drying: Thoroughly clean and dry the garland before storing it. Ensure all moisture is removed to prevent mold or mildew growth. Remove any loose or broken pieces to prevent further damage.
    • Storage Location: Store the garland in a cool, dry place away from direct sunlight and extreme temperatures. Avoid storing it in areas with high humidity, as this can lead to damage and decay. A storage area that is well-ventilated and not subject to extreme temperature fluctuations is ideal.
    • Protective Measures: Wrap the garland in acid-free tissue paper or use a protective covering to prevent damage during storage. Avoid using plastic wrap, as this can trap moisture and promote mold growth. Consider a suitable storage container to prevent crushing or damage to the garland’s structure.

    Maintenance Comparison Table

    This table summarizes the different garland maintenance procedures, outlining the steps and necessary supplies for each method.

    Garland Type Cleaning Method Supplies Needed Storage Method
    Natural Fiber Gentle brushing, damp cloth Soft-bristled brush, damp cloth Acid-free tissue paper, cool, dry storage
    Artificial Fiber Mild detergent solution, soft cloth Mild dish soap, lukewarm water, soft cloth Protective covering, cool, dry storage
    Mixed Material Separate components, gentle cleaning Appropriate cleaning supplies for each material Individual protective coverings, cool, dry storage

    Inspirational Ideas

    Garlands, when strategically placed and creatively designed, can transform any outdoor space into a captivating and welcoming environment. Beyond the basic aesthetic appeal, they can evoke specific moods and themes, adding depth and personality to your outdoor décor. This section explores various inspirational ideas for incorporating garlands into your outdoor design, from simple enhancements to elaborate displays.Outdoor garland displays offer a canvas for personal expression.

    Whether you envision a rustic charm, a whimsical fantasy, or a sophisticated elegance, garlands can be tailored to match your vision. Different types of garlands, combined with thoughtful lighting and thematic elements, can create unique and memorable outdoor settings.

    Creative Garland Uses

    Garlands are not limited to simple decorative functions. They can serve as functional elements, adding a touch of elegance and organization to outdoor spaces. For instance, a delicate floral garland draped across a pergola can create a charming backdrop for a romantic dinner. A string of lanterns intertwined with a leafy garland can highlight a pathway, making it safe and aesthetically pleasing.

    Similarly, a woven garland can be incorporated into a rustic fence or trellis, adding a touch of warmth and natural beauty.

    Decorative Themes

    A well-chosen theme can elevate a garland display from simple decoration to a captivating experience. A whimsical fairy garden theme can be achieved by using pastel-colored garlands with miniature figurines and fairy lights. A rustic theme might incorporate twine or burlap garlands accented with wooden accents and string lights. A sophisticated contemporary theme could involve sleek metallic garlands and modern lighting fixtures.

    Consider the mood you want to create and select a theme that resonates with your style.

    Combining Garland Types

    Combining different types of garlands can lead to a unique and personalized design. For example, a mix of leafy garlands with string lights, combined with a burlap garland and lanterns, can create a warm and inviting atmosphere. Adding a touch of elegance can be achieved with a combination of metallic garlands and colorful floral garlands. A delicate mix of these types of garlands could be perfect for a garden party, offering a balance of textures and colors.

    This approach allows for a dynamic display that is both visually appealing and personalized.

    Hanging a garland outside always brightens up the place, a simple act of festive cheer. It’s a great way to get into the spirit of things, especially around the holidays. Speaking of festive, did you hear about the new director and composer for Paul McCartney’s animated film, High in the Clouds ? It’s inspiring to see such creative projects in motion, and maybe that’ll get me motivated to hang some extra garlands this year! It’s a small thing, but a nice way to bring a little joy to the neighbourhood.

    Lighting Options

    Lighting plays a crucial role in enhancing the beauty of a garland display. String lights, lanterns, and fairy lights can be incorporated into or alongside garlands, creating a warm and inviting ambiance. Warm-toned lights can evoke a cozy atmosphere, while cool-toned lights can create a more contemporary feel. Consider the time of day you want to enjoy your display when choosing your lighting options.

    Unique Garland Designs

    • Rustic Farmhouse Entryway: A garland crafted from dried wildflowers and grasses, hung across a rustic wooden archway, accented with lanterns and string lights, creates a welcoming and inviting entrance.
    • Bohemian Garden Pathway: A tapestry of woven plant garlands, interspersed with colorful beaded garlands, and adorned with fairy lights along a winding pathway, adds a touch of magic and whimsy to the garden.
    • Coastal Cottage Porch: A combination of seagrass garlands, combined with white-painted wood garlands and nautical-themed lanterns, can create a tranquil and serene coastal atmosphere for a porch.
    • Elegant Garden Arbor: A cascading garland of white and ivory roses, complemented by subtle fairy lights, can create a romantic and elegant ambiance around a garden arbor.

    These are just a few examples, and the possibilities are endless. By experimenting with different materials, colors, and lighting, you can craft a garland display that truly reflects your personal style and the unique character of your outdoor space.

    Hanging a garland outside always feels so festive, a little touch of autumnal cheer. Plus, with the announcement of Death Cab for Cutie’s fall tour, death cab for cutie announce fall tour , I’m already picturing cozy nights listening to their music under the twinkling lights of my garland. It’s the perfect way to embrace the crisp air and celebrate the upcoming season.

    Seasonal Variations

    Garlands, more than just festive decorations, are a dynamic way to express the spirit of each season. Adapting garland displays to reflect the changing colors, temperatures, and celebratory events of different times of the year can transform your home into a living calendar of joy and beauty. This section explores how to tailor your garland creations to embrace the unique charm of every season.Seasonal garlands provide a visual bridge between the natural world and our homes.

    They’re more than just decorative elements; they’re a way to bring the spirit of the season indoors, connecting us to the rhythms of the year. From vibrant autumn leaves to snowy winter themes, we can create displays that capture the essence of each season.

    Holiday-Themed Garlands

    Holiday-themed garlands, such as those for Christmas, Hanukkah, or Diwali, often feature specific colors and symbols. Christmas garlands typically use deep reds, greens, and golds, incorporating elements like pine cones, holly berries, and ornaments. Hanukkah garlands might incorporate blue and gold, along with menorah shapes. Diwali garlands often use warm oranges, golds, and reds, featuring diyas or rangoli patterns.

    The specific symbols and colors associated with each holiday are essential in creating a recognizable and authentic atmosphere.

    Garlands for Other Seasons

    Spring and summer garlands often embrace a brighter palette, featuring pastel colors, flowers, and foliage. Spring garlands may incorporate pastel shades of pink, purple, and yellow, with delicate blossoms and sprigs of greenery. Summer garlands could incorporate vibrant hues of red, orange, and yellow, with flowers and fruits. These seasonal garlands often reflect the bounty and vibrancy of the warmer months.

    Creating Seasonal Garland Displays

    Creating a garland display for a particular holiday or season requires careful consideration of color scheme and accessories. For example, a fall garland could use warm, earthy tones like burnt orange, deep reds, and golds, accented with gourds, pumpkins, and fall leaves. A spring garland might incorporate pastel shades like lavender, mint green, and peach, with delicate flowers, and flowering vines.

    Color Schemes and Accessories, Hang a Garland Outside

    The color scheme of a garland is crucial to its seasonal identity. For example, a Christmas garland typically features deep reds, greens, and golds, while a summer garland might use vibrant blues, yellows, and greens. Accessories, such as ornaments, figurines, or other decorative elements, further enhance the theme. A winter garland might include icicles, snowflakes, or miniature snowmen, while a summer garland might feature miniature birds or butterflies.

    Seasonal Garland Examples

    Season Color Scheme Accessories Description
    Autumn Burnt orange, deep reds, golds Pumpkins, gourds, fall leaves A warm and inviting display, evoking the beauty of fall foliage.
    Winter Deep blues, whites, silvers Icicles, snowflakes, miniature snowmen A serene and peaceful display, mirroring the tranquility of winter.
    Spring Pastels (pinks, purples, yellows) Delicate flowers, flowering vines A vibrant and refreshing display, celebrating the arrival of spring.
    Summer Vibrant blues, yellows, greens Miniature birds, butterflies, fruits A joyful and lively display, reflecting the energy of summer.

    These examples showcase how the choice of colors and accessories can powerfully convey the essence of a particular season. By understanding these principles, you can create displays that are not only beautiful but also evocative of the spirit of the season.

    Final Wrap-Up

    Hang a Garland Outside

    In conclusion, hanging a garland outside can be a rewarding experience that elevates your outdoor aesthetic. By carefully considering the garland type, preparation, hanging methods, and seasonal adjustments, you can create stunning displays that will delight you and your guests. Remember to prioritize safety and enjoy the process of bringing your vision to life! From festive holidays to casual evenings, garlands can add a touch of charm and personality to any outdoor setting.

  • Get Stickers off Wood A Complete Guide

    Get Stickers off Wood A Complete Guide

    Get Stickers off Wood, a common household conundrum, is tackled in this comprehensive guide. Whether it’s stubborn adhesive labels, decals, or posters stuck to your beloved wooden furniture, this guide provides the knowledge and methods to remove them safely and effectively without damaging the wood. We’ll explore various wood types, different sticker types, and a range of removal techniques, from gentle approaches to advanced strategies for intricate designs.

    From identifying the right tools to understanding safety precautions, we’ll walk you through every step of the process, ensuring a successful and damage-free removal experience. Learn how to prepare your wood surface, clean up afterward, and troubleshoot any issues that may arise along the way.

    Introduction to Removing Stickers from Wood

    Removing stickers from wooden surfaces is a common task, whether it’s removing old price tags from furniture, unwanted decals from doors, or remnants of promotional materials. This process can be straightforward, but a careful approach is essential to avoid damaging the wood’s finish or structure. Understanding the type of sticker, the wood’s composition, and the best removal techniques is crucial for a successful and damage-free outcome.Proper sticker removal from wood involves more than just pulling; it’s a process of identifying the right tools and techniques to prevent scratches, splinters, or permanent marks.

    The choice of method will depend on the type of sticker, the material of the wood, and the overall desired outcome.

    Types of Stickers

    Various types of stickers can be found on wooden surfaces. These include, but are not limited to, price tags, promotional decals, decorative stickers, and even remnants of labels. Each type might require a different approach to removal to avoid damaging the wood. For example, a thick, pressure-sensitive sticker will likely need a more forceful removal method than a thin, easily removable sticker.

    Wood Materials

    Different types of wood have varying levels of hardness and density. Knowing the material is essential for selecting the right removal technique. Common wood types include:

    • Plywood: A composite material made of thin layers of wood glued together. Its layered structure can make it more prone to damage if not handled carefully.
    • Hardwood: Known for its strength and durability. However, hardwoods can still be scratched or damaged if the removal process is not handled properly.
    • Medium-density fiberboard (MDF): A manufactured wood product that is less dense than hardwood but still requires a gentle approach to avoid damaging the surface.

    Importance of a Proper Approach

    A proper approach to sticker removal from wood is critical to preserving the wood’s integrity and aesthetic appeal. Improper methods can lead to:

    • Scratches and damage to the wood’s finish:
    • Splintering of the wood surface, especially on softer wood types.
    • Lifting or tearing of the wood grain if the sticker is not removed gradually.
    • Adhesive residue left on the wood surface, making future cleaning and maintenance difficult.

    Sticker Removal Techniques

    The best removal method depends on the sticker type and the wood’s material. Common techniques include:

    • Using a plastic scraper: A plastic scraper can gently lift stickers without scratching the wood. This method is particularly useful for stubborn stickers or those on delicate surfaces.
    • Applying heat: Heat can soften the adhesive, making it easier to remove the sticker. However, use caution and apply heat gently to prevent burning or warping the wood.
    • Using a sticker removal solution: A specialized sticker removal solution can dissolve the adhesive, allowing the sticker to be peeled away easily. Follow the product instructions carefully to ensure proper application and avoid damaging the wood.

    Precautions

    Always test any removal method on a less visible area of the wood first to avoid unexpected damage. This is particularly important when using heat or chemical solutions.

    Methods for Removing Stickers

    Removing stickers from wood can be a delicate process, requiring careful consideration of both the sticker type and the wood’s surface. A hasty approach can easily damage the wood, leaving unsightly marks or even causing permanent damage. Understanding the various techniques available and choosing the appropriate method for your specific situation is crucial for achieving a successful removal without compromising the integrity of your furniture or decorative pieces.The effectiveness and safety of each method vary depending on the adhesive type of the sticker and the type of wood.

    For instance, a stubborn sticker on a delicate piece of antique furniture will necessitate a gentler approach than a sticker on a sturdy plywood surface. This section will explore different techniques for removing stickers, focusing on preserving the wood’s surface while achieving complete removal.

    Gentle Approaches

    Prioritizing a gentle approach is often the best way to avoid damaging the wood’s surface. Starting with the least abrasive methods and progressing to more assertive techniques is recommended. Often, a simple application of patience and the correct tools will prove more effective than forceful removal. This often involves using solvents or specialized sticker removers, which are gentler than heat or scraping.

    Using a Heat Gun or Hairdryer, Get Stickers off Wood

    Applying heat can loosen the adhesive of some stickers, making removal easier. A heat gun or hairdryer, set to a low or medium setting, can be used to carefully heat the sticker’s adhesive. Be cautious to avoid overheating the wood, as this can cause damage. It’s recommended to use a heat gun or hairdryer at a controlled temperature, ensuring that the heat is applied evenly across the sticker’s surface.

    Test in an inconspicuous area first to gauge the wood’s reaction to the heat. This method is best suited for stickers with a relatively weak adhesive, like those made with paper or plastic.

    Using a Specialized Sticker Remover

    Specialized sticker removers are specifically formulated to dissolve adhesive without harming the underlying surface. These products are designed to penetrate the adhesive and break it down, allowing for easy removal. Apply a small amount of the remover to the sticker, allowing it to sit for the specified time on the product label. Gently scrape away the softened sticker with a plastic scraper or a soft spatula.

    Always test the remover in a hidden area first to confirm it won’t damage the wood.

    Using a Scraper or Putty Knife

    For stubborn stickers, a scraper or putty knife can be used to lift the sticker from the wood. However, this method requires extreme caution to avoid scratching or marring the wood. Place the scraper at a slight angle to the sticker and gently lift, working from one edge to the other. It is crucial to apply a consistent, steady force to avoid damaging the surface.

    Start with a soft-edged scraper, and if necessary, use a harder one. Avoid using a metal scraper directly on the wood to minimize the risk of scratching.

    Comparing Methods

    Method Effectiveness Safety Sticker Type Wood Type
    Heat Gun/Hairdryer Moderate to High Moderate Paper, Plastic Most Wood Types
    Sticker Remover High High Most Types Most Wood Types
    Scraper/Putty Knife High Low Stubborn Stickers Hardwoods, Plywood

    Different methods work best with different types of stickers and wood. A specialized sticker remover is generally the safest and most effective approach for most sticker types and wood surfaces. Heat is a viable option for certain types of stickers, but care must be taken to avoid damaging the wood. For stubborn stickers on hard woods, a scraper might be necessary, but use caution and a soft scraper initially to test.

    Tools and Supplies

    Getting sticker residue off wood requires the right tools and supplies. Choosing the correct approach depends on the type of sticker, the wood’s surface, and the desired outcome. Careful selection and proper application of these tools will save you time, effort, and potential damage to your project.

    Tools for Mechanical Removal

    Mechanical methods often involve scraping or prying the sticker away. The appropriate tools for these techniques depend on the sticker’s size, the wood’s hardness, and the sticker’s adhesion.

    • Utility knife: A versatile tool for cutting and scraping. A utility knife with a replaceable blade is ideal for precision cutting around edges and removing stubborn sticker parts. A standard utility knife with a dull blade will not be effective and may damage the wood surface.
    • Putty knife: A flexible blade that is useful for scraping away stubborn sticker residue. Its flexible nature helps to avoid scratching the wood surface. A wide, flexible putty knife is ideal for large areas of sticker removal, while a narrower one can be used for detailed work.
    • Plastic scraper: A plastic scraper is perfect for delicate surfaces or when you want to avoid scratching the wood. The smooth plastic surface prevents scratches and damage. A plastic scraper can be used on both smooth and textured surfaces.
    • Razor blade/Exacto knife: For precise cutting around edges and detailed work. Choose a razor blade or Exacto knife with a sharp blade to avoid damaging the wood. These tools are useful for removing small pieces of sticker residue or getting into tight corners.

    Tools for Chemical Removal

    Chemical methods are often needed for stubborn stickers. Proper use of solvents is crucial to avoid damaging the wood.

    • Isopropyl alcohol: A common solvent for sticker removal. It’s relatively safe and effective for many types of stickers. Isopropyl alcohol can be used on various wood types and finishes, but always test in an inconspicuous area first.
    • Goo Gone: A commercially available adhesive remover specifically designed for various types of stickers. It’s effective on a range of materials and often leaves the surface clean. It’s important to follow the product instructions for best results.
    • WD-40: A versatile lubricant and solvent that can be effective in softening and removing some stickers. It’s often used for stubborn adhesive, but can potentially damage certain finishes. Always test in a hidden area first.

    Comparing Tool Effectiveness

    Tool Name Description Image Description
    Utility Knife A versatile knife for cutting and scraping. A typical utility knife with a replaceable blade.
    Putty Knife A flexible blade for scraping away residue. A wide, flexible putty knife with a smooth, flat edge.
    Plastic Scraper A scraper with a smooth plastic surface for delicate surfaces. A plastic scraper with a flat, smooth surface.
    Razor Blade/Exacto Knife For precise cutting and detailed work. A sharp razor blade or Exacto knife blade.
    Isopropyl Alcohol A common solvent for sticker removal. A bottle of isopropyl alcohol (often labeled as rubbing alcohol).
    Goo Gone A commercial adhesive remover. A container of Goo Gone adhesive remover.
    WD-40 A lubricant and solvent for sticker removal. A spray bottle of WD-40.

    Substitutes and Considerations

    Sometimes, specialized tools might not be readily available. Consider these substitutes, but be aware of potential drawbacks.

    • Instead of a utility knife, a sharp knife or even a butter knife can be used, but be extra cautious not to damage the wood. A sharp butter knife may be adequate for removing smaller stickers, but for larger stickers or more stubborn residue, a utility knife is recommended.
    • Instead of Goo Gone, white vinegar or a mixture of baking soda and water can be used as a less aggressive alternative for sticker removal. Vinegar may damage some wood finishes, so always test in an inconspicuous area first. Baking soda and water mixture may require more time for removal.

    Specific Sticker Types and Removal Strategies

    Sticker removal from wood surfaces can be a delicate process, requiring careful consideration of the sticker type and its adhesive strength. Understanding the specific nature of the adhesive is key to avoiding damage to the wood’s finish or the underlying material. Different removal methods work best for different sticker types, and knowing which to use can save time and prevent frustration.

    Adhesive Labels

    Adhesive labels, commonly found on furniture or containers, often have a relatively simple adhesive. A gentle approach is often sufficient. Begin by using a soft cloth or a plastic scraper to loosen the edges of the label. Applying a solvent, like rubbing alcohol or a citrus-based cleaner, can help soften the adhesive, but apply sparingly and test in an inconspicuous area first.

    If the label is still resistant, consider using a specialized adhesive remover designed for labels. Work slowly and methodically, ensuring not to apply too much pressure, as this could damage the wood.

    Decals

    Decals, often found on decorative items, frequently have a more robust adhesive than labels. Similar to removing labels, use a soft cloth or scraper to release the edges of the decal. If this proves insufficient, carefully apply a solvent to the adhesive, but be mindful of the wood’s finish. A plastic scraper can be used to gently lift the decal away.

    Removing stickers from wood can be tricky, but careful scraping and the right tools are key. Understanding energy conversions, like converting Kilojoules to Calories, can actually be helpful in certain situations. For example, if you’re trying to calculate the energy required to remove a particularly stubborn sticker, you might find Convert Kilojoules to Calories a useful tool.

    Ultimately, the best way to get those stickers off your wood furniture is still with a little elbow grease and the right technique.

    Some decals may require a combination of methods. Consider starting with a solvent to loosen the adhesive and follow up with a scraper to detach the decal.

    Trying to get those pesky stickers off the wood? It’s a real pain, right? Luckily, there are some great techniques out there, and while I’m researching the best methods, I stumbled across some amazing news – Dead Can Dance have announced a new LP tour! dead can dance announce new lp tour Definitely a cool thing to check out.

    I’m hoping some of these methods will help me get these stickers off the wood so I can properly appreciate the beauty of the wood underneath. Stay tuned for the results!

    Posters

    Posters, often larger and more complex than decals, require a more strategic approach. Start by carefully lifting one corner of the poster. Apply a solvent to the adhesive, being cautious to avoid spreading the solvent too widely, which can damage the wood. Using a plastic scraper or a putty knife (carefully), work along the poster’s edges to lift it off.

    For stubborn adhesives, applying a heat source (such as a hairdryer, used on a low setting and with a considerable distance from the wood) can help soften the adhesive and make removal easier.

    Long-Term Stickers

    Stickers that have been on wood for an extended period may have their adhesive deeply embedded in the wood grain. A combination of techniques might be needed. Begin by applying a solvent, like a citrus-based cleaner or a specialized adhesive remover. Let the solvent work for a sufficient time to soften the adhesive. Then, use a plastic scraper to lift the sticker, working gradually to avoid damage to the wood.

    Repeated applications of solvent and scraping might be necessary.

    Intricate Wood Carvings and Designs

    Removing stickers from intricate wood carvings or designs requires extreme care. Avoid using solvents or heat sources near the carvings, as these can damage the delicate design. Start by using a soft cloth or a plastic scraper to loosen the edges of the sticker. A specialized adhesive remover, if used, must be applied with the utmost care.

    Work in small, controlled sections, and examine the wood frequently to ensure no damage is occurring. Use a toothpick or a similar small tool to carefully lift the sticker from the carvings. A magnifying glass may prove helpful in areas with fine details.

    Different Adhesive Strengths

    Different stickers have different adhesive strengths. A general guideline is to start with gentler methods for weaker adhesives. As the adhesive strength increases, gradually move to more aggressive methods. Using a solvent to soften the adhesive can be effective in most cases. For stronger adhesives, a specialized adhesive remover may be necessary.

    Test the remover on a hidden area first to ensure no damage is caused to the wood’s finish. Remember, patience and meticulous work are key to successfully removing stickers of any strength without causing damage to the wood.

    Safety Precautions and Considerations

    Get Stickers off Wood

    Removing stickers from wood can be a rewarding task, but it’s crucial to prioritize safety. Improper techniques or the use of harsh chemicals can lead to damage to the wood surface, personal injury, or environmental harm. This section details essential safety precautions to ensure a successful and safe sticker removal process.Understanding the potential hazards and taking proactive measures is paramount.

    Whether you’re using heat, solvents, or specialized tools, safety should always be your top priority. By following the Artikeld precautions, you can protect yourself, the surrounding environment, and the integrity of your wooden surfaces.

    Heat Application Safety

    Using heat to soften and loosen stickers requires careful consideration. Direct contact with the wood can cause scorching, warping, or discoloration. A heat gun or hair dryer should be used with caution, keeping a safe distance from the surface. The heat source should be moved frequently to prevent localized heating and damage. Always use a heat-resistant surface to protect the work area from accidental burns.

    Solvent Application Safety

    Solvents, while effective for some sticker types, pose significant risks. Always wear appropriate personal protective equipment (PPE), including gloves, eye protection, and a respirator. Work in a well-ventilated area to minimize exposure to fumes. Apply solvents sparingly and test them in an inconspicuous area first to ensure compatibility with the wood type. Dispose of used solvents according to local regulations.

    Tool Safety

    Using tools like scrapers or razor blades requires careful handling. Sharp tools can cause cuts or abrasions. Ensure proper grip and control when using these tools. Work on a stable surface to avoid accidents. Store tools properly after use to prevent injuries.

    Environmental Protection

    Protecting the environment is crucial. Properly dispose of any chemical waste or solvents according to local regulations. Avoid using chemicals that are harmful to the environment. If you’re using a heat gun, ensure it’s not emitting harmful fumes or causing excessive pollution.

    Safety Hazard Prevention Table

    Safety Hazard Prevention Measure Example
    Burns from heat gun Maintain a safe distance from the wood surface, use a heat-resistant surface, move the heat gun frequently Using a heat gun too close to the wood, causing a burn mark
    Chemical burns/skin irritation Wear gloves, eye protection, and a respirator when using solvents, work in a well-ventilated area, test solvents on a hidden area first Applying a solvent without gloves, leading to skin irritation
    Cuts from sharp tools Use proper grip, maintain a stable work surface, be aware of the blade’s position Using a scraper with improper grip, leading to a cut
    Solvent inhalation Work in a well-ventilated area, use a respirator if needed Working with solvents in a closed area without proper ventilation, leading to inhalation of harmful fumes
    Environmental pollution Proper disposal of chemicals according to local regulations, use environmentally friendly solvents if possible Improper disposal of solvents, leading to environmental contamination

    Wood Surface Preparation and Post-Removal Care: Get Stickers Off Wood

    Sticker removal can sometimes leave behind residue or damage. Proper preparation of the wood surface both before and after removal is crucial for restoring its beauty and protecting it from future problems. Understanding how to clean, condition, and address any potential damage will ensure a smooth and successful outcome.

    Getting stickers off wood can be a real pain, especially if they’re stubborn. I was completely engrossed in trying to remove some tricky ones the other day, and honestly, it got me thinking about the Pearson family attending Jack’s funeral on This Is Us. the pearson family attend jacks funeral on this is us was such a powerful scene, highlighting the emotional weight of loss.

    Anyway, back to the stickers – I eventually found a great method for getting them off without damaging the wood, so I’ll share that in a future post!

    Surface Preparation Before Sticker Removal

    Thorough preparation of the wood surface before sticker removal minimizes the risk of damage during the process. This often involves assessing the wood’s existing condition. For example, if the wood has a protective coating like varnish or polyurethane, it’s crucial to understand how it interacts with the sticker adhesive and the removal methods. Knowing the finish type is essential for selecting the right removal technique.

    Using inappropriate methods can compromise the wood’s integrity, leading to scratches or other imperfections.

    Cleaning and Conditioning the Wood

    After removing the sticker, cleaning and conditioning the wood is essential for restoring its appearance and protecting it. This involves meticulously removing any residual adhesive and ensuring the surface is clean and free of contaminants. Different wood types may require varying cleaning solutions. For instance, softwoods may tolerate harsher solutions than hardwoods. Carefully selecting cleaning agents and using gentle scrubbing techniques is vital.

    Applying a wood conditioner or sealant is a crucial step after cleaning, as it fills in minor imperfections and protects the wood from moisture and further damage.

    Addressing Damage Caused by Removal

    Sticker removal can sometimes lead to damage. This can include scratches, gouges, or adhesive residue. Addressing these issues effectively is crucial for restoring the wood’s original condition. If scratches are shallow, using wood filler can effectively mask the damage. Deep scratches or gouges might require sanding and refinishing.

    For stubborn adhesive residue, employing specialized adhesive removers is necessary. The choice of repair method depends on the severity of the damage.

    Wood Finish Compatibility with Removal Methods

    Wood Finish Suitable Removal Methods Potential Issues Mitigation Strategies
    Varnish Chemical strippers (with caution), heat, or specialized sticker removers Strippers can damage the finish if not used correctly. Heat can cause warping or discoloration. Apply strippers in small areas, monitor the process closely, use low heat if necessary. Sanding and refinishing might be required if significant damage occurs.
    Polyurethane Chemical strippers (with caution), specialized sticker removers, heat (with caution). Similar to varnish, improper use of strippers or heat can damage the finish. Test the stripper in an inconspicuous area first. Use low heat and monitor closely. Consider sanding and refinishing if significant damage occurs.
    Oil-based stain Mechanical methods (scrapers, solvents), specialized sticker removers Solvents can damage the wood if used incorrectly. Test the solvent on a small, hidden area first. Use caution and ventilation when working with solvents.
    Water-based stain Mechanical methods (scrapers), specialized sticker removers, water-based cleaners Water-based stains are generally more resilient to sticker removal methods. Water-based cleaners and scrapers are usually sufficient.
    Natural finish (no added finish) Mechanical methods, specialized sticker removers, gentle cleaning agents. The wood itself might be susceptible to damage. Use extreme caution and minimize force when using scrapers. Employ very gentle cleaning agents.

    The table above provides a general guideline. Always test any method in an inconspicuous area before applying it to the entire surface to avoid potential damage.

    Troubleshooting Common Issues

    Sticker removal can sometimes be tricky, and unexpected problems can arise. Understanding potential pitfalls and their solutions is crucial for a successful and damage-free outcome. This section details common issues encountered during sticker removal from wood and provides effective solutions.Often, the success of sticker removal hinges on careful preparation and the correct application of methods. Recognizing the specific type of sticker and the wood’s characteristics are key to avoiding damage and achieving a pristine finish.

    By addressing potential problems proactively, you can ensure a smooth and efficient removal process.

    Identifying Sticker Types

    Different sticker types react differently to removal methods. Understanding the sticker’s composition (e.g., adhesive type, material) is essential to selecting the right approach. For instance, a vinyl sticker may require a different technique than a paper sticker. Carefully inspecting the sticker before attempting removal helps in choosing the most effective strategy.

    Dealing with Stubborn Adhesive

    Some adhesives are notoriously difficult to remove. This often requires a multi-step approach. For example, applying a solvent-based adhesive remover (like Goo Gone or similar) directly to the adhesive, allowing it to soften and loosen the bond, is a common solution. Following this, scraping or using a specialized tool to lift the sticker can be necessary.

    Protecting the Wood Surface

    It’s important to protect the underlying wood during removal. Using protective coverings (like plastic sheeting or tape) can prevent scratching or marring. Careful handling of tools and the application of pressure are crucial to avoid damaging the wood grain. This step is critical for maintaining the wood’s original beauty.

    Troubleshooting Table

    Potential Issue Cause Remedy
    Sticker residue remains Inadequate adhesive removal or improper scraping Apply a suitable adhesive remover, allow it to sit for a few minutes, and gently scrape or use a specialized tool to lift the sticker.
    Wood surface damage (scratches, gouges) Using too much pressure when scraping, improper tool selection, or inadequate surface protection Reduce pressure, use a different tool (e.g., a soft-edged plastic scraper), or apply a protective covering to the wood before removal.
    Sticker tears or breaks during removal Incorrect removal method for the sticker type or excessive force applied Employ a gentler removal method, such as using a heat gun (for heat-activated adhesives) or a specialized sticker removal tool. Apply pressure gradually and strategically.
    Solvent damage to the wood Improper solvent application or prolonged contact with the wood Use solvents sparingly and only on the adhesive. Avoid prolonged contact. If solvent does come into contact with the wood, immediately rinse the area with water and allow to dry completely. Consider using a solvent-resistant sealant after removal.

    Advanced Techniques and Examples

    Tackling stubborn stickers and tricky wood types requires a bit more finesse. This section dives into advanced methods for removing even the most resilient adhesive residue, catering to different wood types and surface complexities. We’ll explore specialized tools and techniques for curved, irregular, and delicate areas, along with a detailed example of removing a challenging sticker from a wooden chair.

    Specialized Tools for Complex Removal

    Specialized tools can significantly simplify the removal process for stubborn or complex sticker situations. A variety of tools beyond the basic scraper and putty knife are essential. These tools enhance efficiency and minimize damage to the wood surface.

    • Heat Gun or Hair Dryer: Applying controlled heat can soften the adhesive, making it easier to lift or scrape off. Be cautious not to overheat the wood, which can cause warping or discoloration, especially with delicate woods like pine or maple. Always use a low heat setting and monitor the wood closely.
    • Rotary Tool with a Detail Attachment: This tool can be incredibly effective for removing stubborn residue from tight spaces, crevices, and corners, especially when a scraper or putty knife can’t reach. The variable speed and precision of a rotary tool are beneficial for such applications. Ensure the attachment is appropriate for the wood type to avoid scratching.
    • Plastic Spatula or Serrated Knife: These tools can be used to gently pry stickers loose from intricate surfaces without damaging the wood. The flexibility and precision of a plastic spatula can help lift and peel sticker material away from tight spaces without causing damage.

    Removing Stickers from Curved or Irregular Surfaces

    Curved or irregular surfaces pose unique challenges. Direct scraping or prying can be difficult and may damage the surface. These methods provide a safe approach for such cases.

    • Use of a Soft, Non-Abrasive Material: Apply a soft cloth or cotton swab to the curved area, saturated with the adhesive remover. This avoids unnecessary pressure and potential scratches on the surface. This method allows for careful and controlled application of the remover, especially on the curves.
    • Gentle Lifting and Peeling: Work in small sections, using a soft tool like a plastic spatula or a soft cloth to gently lift the sticker, working along the curve. This technique is crucial to avoid scratching or damaging the wood surface. Be patient and methodical to prevent tearing the sticker material.
    • Precise Application of Adhesive Remover: Carefully apply adhesive remover only to the sticker, avoiding contact with the surrounding wood. This method focuses on targeting the adhesive without compromising the integrity of the wood itself.

    Removing a Complex Sticker from a Wooden Chair Armrest: A Detailed Example

    Consider a large, stubborn sticker stuck to a curved wooden chair armrest. The sticker is difficult to remove by hand and has a strong adhesive.

    1. Preparation: Apply a suitable adhesive remover, such as Goo Gone or a citrus-based solvent, to the sticker. Allow the remover to soak into the adhesive for a few minutes. Monitor the wood carefully for any signs of damage from the remover.
    2. Controlled Heat: Use a low heat setting from a heat gun or hair dryer, keeping the distance to the surface adequate to prevent damage to the wood. Avoid direct contact. This method gently softens the adhesive and loosens it from the wood surface.
    3. Gentle Removal: Using a soft plastic spatula, gently lift and peel away the sticker in small sections. Work along the curve, applying pressure only where needed to avoid damage. If necessary, reapply remover to stubborn areas.
    4. Final Steps: After the sticker is removed, wipe the armrest with a clean, damp cloth to remove any residue. Allow the wood to dry completely before applying any protective finish.

    Last Word

    Get Stickers off Wood

    Removing stickers from wood can seem daunting, but this guide has armed you with the knowledge and techniques to tackle any sticker situation. We’ve covered everything from initial assessments to advanced procedures, emphasizing safety and preservation of your wooden surfaces. By following these steps, you can confidently remove stickers and restore your wood to its pristine condition, ready for its next adventure.

  • Build Your Own Air Conditioner A DIY Guide

    Build Your Own Air Conditioner A DIY Guide

    Build Your Own Air Conditioner: This comprehensive guide delves into the exciting world of DIY air conditioning, exploring everything from evaporative coolers to refrigeration-based systems. We’ll cover the potential benefits and drawbacks, necessary resources, and safety precautions. Prepare to dive into the intricacies of designing, constructing, and maintaining your own personalized cooling solution.

    From basic schematics and material selection to troubleshooting potential issues, we’ll provide a practical and detailed approach. Learn about the pros and cons of different systems, and discover how to tailor your design to your specific needs and budget. Get ready to cool things down, literally!

    Introduction to DIY Air Conditioning

    Build Your Own Air Conditioner

    Building your own air conditioning system can be a rewarding project, offering potential cost savings and a deeper understanding of how these systems work. However, it also presents significant challenges, requiring careful planning, precise execution, and a thorough understanding of the potential hazards involved. Successfully tackling a DIY air conditioning project often hinges on a comprehensive grasp of the different types of systems, the necessary resources, and the inherent risks.This guide explores the various avenues for creating a DIY air conditioning solution, highlighting the benefits and drawbacks of each approach.

    It delves into the specific materials, tools, and safety precautions essential for each system type, enabling a more informed decision-making process. We will cover evaporative coolers, DIY swamp coolers, and refrigeration-based systems, providing a comprehensive comparison of their pros and cons.

    Types of DIY Air Conditioning Systems

    DIY air conditioning systems broadly fall into two categories: evaporative cooling and refrigeration-based cooling. Each approach has its own set of advantages and disadvantages.

    Evaporative Coolers

    Evaporative coolers, also known as swamp coolers, are a simpler and often more cost-effective DIY option. They rely on the evaporation of water to cool the air. The process of water evaporation absorbs heat from the surrounding environment, resulting in a decrease in air temperature.

    • These systems typically involve a water reservoir, a fan, and a system of baffles or pads to facilitate water evaporation. They are relatively straightforward to build, with many readily available DIY tutorials available online.
    • Essential materials include a water tank, a fan, a porous material (like wood fiber or fabric), and piping or tubing to channel water. Tools needed may include saws, drills, and measuring equipment.
    • Evaporative coolers are generally less complex to construct than refrigeration-based systems. They require less specialized equipment and are often more accessible to individuals with a basic understanding of home improvement.

    Refrigeration-based Systems

    Refrigeration-based systems, while more complex, offer a potential for greater cooling capacity and control. These systems leverage the principles of thermodynamics, using a refrigerant to absorb heat and transfer it to the outside air.

    • Building a DIY refrigeration-based system requires a deeper understanding of refrigeration cycles and components, including compressors, condensers, evaporators, and expansion valves. Detailed knowledge of safety protocols is crucial due to the use of refrigerants.
    • Necessary resources encompass compressors, refrigerants (with strict adherence to safety regulations), tubing, and specialized fittings. The tools needed are more sophisticated, potentially including specialized tools for working with refrigerant lines and compressors.
    • While offering potentially greater cooling power, these systems present a greater risk of safety issues and require a more advanced skill set compared to evaporative coolers.

    Safety Considerations

    Safety is paramount in any DIY project, especially when dealing with potentially hazardous materials or equipment. Care must be taken to avoid injuries and ensure compliance with safety regulations.

    Building your own air conditioner can be surprisingly rewarding, but sometimes you just need a little chill in your life. Speaking of chill, have you heard about the new Charli XCX Valentine? This new track is seriously giving me some serious inspiration for my DIY AC project. Hopefully, with a little more research, I can get my own air conditioning unit up and running soon!

    • Working with refrigerants requires strict adherence to safety protocols. Improper handling can lead to serious health risks. Always consult safety data sheets (SDS) for specific refrigerants and follow local regulations regarding refrigerant disposal.
    • Electrical components must be installed and maintained correctly to avoid electrical hazards. Ensure proper grounding and insulation to prevent short circuits or shocks.
    • Proper ventilation and protective equipment should be used throughout the project to minimize exposure to potential contaminants.

    Comparison of DIY Air Conditioning Systems

    System Type Pros Cons Complexity
    Evaporative Cooler Relatively inexpensive, easy to construct, effective for mild climates Limited cooling capacity, may not be effective in hot or humid climates, requires water source Low
    Refrigeration-based System Higher cooling capacity, better control over temperature, potentially suitable for diverse climates Higher cost, more complex construction, potential safety hazards associated with refrigerants High

    Design and Planning

    Designing a DIY air conditioning system requires careful planning and consideration of various factors. A well-thought-out design ensures the system is efficient, effective, and meets the specific needs of the space it will cool. This section will detail the crucial aspects of design and planning, including schematic diagrams, materials, tools, and a step-by-step guide.

    Basic Schematic Diagram

    A basic schematic diagram visually represents the flow of the DIY air conditioning system. It illustrates the key components and their interconnections, making the design easier to understand and implement. This diagram helps in visualizing the refrigerant flow, air movement, and the function of each component.

    Example of a basic schematic diagram: A simplified schematic might show a compressor connected to a condenser, which in turn connects to an evaporator. The evaporator would be situated in the area needing cooling, and a fan would circulate the cooled air. Connecting pipes would show the refrigerant’s path. Labels would identify each component (e.g., compressor, condenser, evaporator, expansion valve).

    Factors to Consider, Build Your Own Air Conditioner

    Several factors significantly influence the design and effectiveness of a DIY air conditioning system. Understanding these factors is crucial for a successful project.

    Ever fancied building your own air conditioner? It’s surprisingly doable, requiring some technical know-how and a good understanding of thermodynamics. Diving into a project like this can be quite rewarding, but remember to consider the complexities involved, like the intricacies of bing ruth no home of the mind when dealing with the many factors at play.

    Ultimately, building your own air conditioner is a fascinating challenge for those seeking a unique cooling solution.

    • Climate: The local climate significantly impacts the design. Areas with high humidity may require a dehumidification system, while areas with extremely high temperatures may necessitate a more robust cooling capacity. For example, a system designed for a dry, hot desert climate will differ from one designed for a humid subtropical region.
    • Budget: The budget directly influences the choice of materials, components, and the complexity of the system. A more complex system with higher-quality components will likely cost more. Careful cost analysis and prioritization of needs are essential.
    • Space: The available space dictates the size and layout of the system. Sufficient space is needed for the components, installation, and maintenance. Consider the space needed for the condenser unit and any ductwork required for air distribution.
    • Energy Efficiency: The energy efficiency of the system is crucial. Choosing energy-efficient components, such as high-efficiency compressors and insulation, can minimize operational costs over time. A well-insulated system and strategically placed vents contribute to greater energy efficiency.

    Suitable Materials

    Choosing the right materials is critical for the performance and longevity of the DIY air conditioning system. Materials must withstand the operating conditions and have the necessary properties.

    • Refrigerant: Selecting the correct type of refrigerant is essential. It should be environmentally friendly and compatible with the components. R-22 is a widely used refrigerant but is being phased out due to environmental concerns.
    • Pipes and Tubing: Copper tubing is commonly used for its durability and conductivity. Other materials like PVC might be suitable for specific applications, but copper is generally favored.
    • Insulation: Insulation materials prevent heat transfer and maintain the temperature difference between the inside and outside of the system. Appropriate insulation materials are crucial to achieving efficiency.
    • Electrical Components: The choice of electrical components (wiring, switches, fuses) must adhere to local electrical codes. Over-sized wiring or incorrect fuses can lead to safety hazards and system malfunctions.

    Required Tools

    Having the right tools is essential for a successful DIY project. This list includes tools needed for various aspects of the project, from initial design to final installation.

    • Measuring tools: Measuring tapes, rulers, and levels are crucial for accurate measurements and installations.
    • Plumbing tools: Wrenches, pipe cutters, and soldering equipment (if applicable) are needed for pipe connections.
    • Electrical tools: Screwdrivers, wire strippers, and crimpers are required for electrical connections.
    • Safety equipment: Safety glasses, gloves, and appropriate clothing are vital for personal protection.

    Step-by-Step Design Guide

    Step Action Materials Tools
    1 Determine the size and location of the cooling unit, considering the space available and the climate. Space dimensions, climate data Measuring tape, ruler, level
    2 Select suitable components, including refrigerant, pipes, insulation, and electrical components, based on the design and budget. Refrigerant, pipes, insulation, wiring, switches, fuses Catalogs, online resources, electrical schematics
    3 Create a detailed schematic diagram of the system, including all connections and components. Paper, drawing tools, components list Pencil, ruler, protractor, drafting tools
    4 Calculate the required cooling capacity based on the size of the space and the local climate. Climate data, space dimensions Calculator, online tools

    Construction Methods: Build Your Own Air Conditioner

    Building your own air conditioning system is a rewarding project, but careful construction is crucial. Proper materials and techniques ensure efficient cooling and long-term performance. This section dives into the practical aspects of building various components and addresses essential safety considerations.Different construction methods are available for each component of a DIY air conditioning system. Choosing the right method depends on factors like budget, desired efficiency, and available tools and skills.

    Understanding these options allows you to make informed decisions throughout the entire building process.

    Evaporator Coil Construction

    Copper tubing, often used for its excellent thermal conductivity, is a common material for evaporator coils. A coiled configuration maximizes surface area for heat exchange. This setup is typically soldered to create a leak-proof system, ensuring proper refrigerant flow. Alternatively, pre-fabricated evaporator coils are available, reducing the construction time and complexity, though often at a higher cost.

    Condenser Coil Construction

    Aluminum or copper coils are suitable for condenser coils. The larger surface area compared to the evaporator facilitates efficient heat rejection. For DIY systems, carefully measuring and cutting the coil to the necessary length is vital. The condenser coils are often mounted on a frame for structural support and optimal airflow.

    Ductwork Construction

    Ductwork is essential for directing airflow throughout the house. Insulated metal ductwork offers better efficiency than non-insulated options. Consider using flexible ductwork for easily maneuvering around obstacles in your home. Measure the ductwork carefully to ensure it matches the air handler and vents. Securely attaching ductwork with appropriate fasteners is critical to prevent leaks and ensure proper airflow.

    Insulation Methods

    Proper insulation minimizes heat transfer, which directly impacts the system’s efficiency. Fiberglass insulation is a common choice for its affordability and effectiveness. Spray foam insulation provides a higher level of insulation but requires specialized application. The selection of insulation material should consider the desired level of efficiency and the potential for environmental impact.

    Insulation Material Pros Cons
    Fiberglass Affordable, readily available Can be dusty to work with, less effective than spray foam
    Spray Foam High R-value, airtight seal Specialized application, potentially higher cost

    Component Assembly

    Assembling the components of your DIY air conditioner involves precise steps. First, securely attach the evaporator coil to the refrigerant lines. Next, install the condenser coil, ensuring proper airflow around it. Connecting the refrigerant lines to the compressor is crucial, and the installation of the ductwork completes the airflow system. Proper sealing of all connections is paramount to prevent refrigerant leaks and maintain efficiency.

    A leak in the refrigerant system can significantly reduce the efficiency of your DIY air conditioning system. Regular checks and proper sealing are crucial.

    Safety Precautions

    Working with refrigerants requires caution. Always follow safety guidelines and use appropriate personal protective equipment (PPE). Avoid working in confined spaces without adequate ventilation. Ensure proper handling of electrical components to prevent electrical hazards. Refrigerant leaks can be dangerous; use proper ventilation and safety equipment when handling refrigerants.

    Troubleshooting

    Troubleshooting potential issues during construction is important. If the system isn’t cooling efficiently, check for leaks in the refrigerant lines and ensure proper airflow through the condenser. A lack of airflow can cause reduced cooling. Verify that the electrical connections are secure.

    Operation and Maintenance

    Build Your Own Air Conditioner

    Bringing your DIY air conditioning system to life requires understanding its operational principles and implementing a regular maintenance schedule. Proper operation ensures efficient cooling and a long lifespan for your system. Maintenance prevents breakdowns and optimizes performance, making your home comfortable and energy-efficient.This section details the crucial aspects of operating and maintaining your DIY air conditioning system, from startup procedures to troubleshooting potential issues and energy-saving techniques.

    Operation Principles

    Your DIY air conditioning system, like any refrigeration cycle, relies on the principles of vapor-compression refrigeration. A refrigerant absorbs heat from the indoor air, vaporizes, and then releases this absorbed heat outdoors. The cycle repeats, constantly moving heat from inside to outside. Understanding this cycle is key to optimizing performance.

    Importance of Regular Maintenance

    Regular maintenance is crucial for the longevity and efficiency of your DIY air conditioning system. Neglecting maintenance can lead to decreased cooling capacity, increased energy consumption, and premature component failure. A well-maintained system operates more efficiently and quietly, providing long-term comfort.

    Starting and Operating the System

    A step-by-step guide for starting and operating your DIY air conditioning system is essential.

    1. Check the refrigerant level. Ensure the correct amount of refrigerant is in the system. Insufficient refrigerant will reduce cooling capacity. Excessive refrigerant can cause compressor overload.
    2. Verify electrical connections. Confirm all electrical connections are secure and properly insulated. Faulty wiring can lead to electrical hazards and system malfunction.
    3. Inspect the condensate drain. A clogged condensate drain can cause water to overflow, potentially damaging your home’s interior. Ensure the drain is clear.
    4. Turn on the power. With all checks completed, turn on the power supply to the system.
    5. Monitor the cooling output. Observe the cooling performance and adjust settings as needed.

    Common Maintenance Tasks

    Regular maintenance tasks are vital for preventing problems and maintaining optimal performance.

    • Cleaning the condenser coils. Accumulated dust and debris on the condenser coils can significantly reduce the system’s efficiency. Regular cleaning (e.g., monthly) with a brush and compressed air improves heat dissipation.
    • Checking and cleaning the evaporator coils. The evaporator coils inside the unit should also be checked and cleaned regularly. This can be done with a vacuum cleaner.
    • Inspecting the refrigerant lines. Examine the refrigerant lines for leaks. Refrigerant leaks can lead to reduced cooling capacity and safety hazards.
    • Checking the compressor. Inspect the compressor for any unusual sounds or vibrations. Unusual sounds can indicate a potential problem.
    • Maintaining the outdoor unit. Ensure adequate airflow around the outdoor unit by removing any obstructions. This will maintain optimal cooling performance.

    Potential Problems and Solutions

    Addressing potential issues during operation is crucial.

    • System not cooling:
      • Check the refrigerant level.
      • Inspect for leaks.
      • Ensure the condenser coils are clean.
    • System making unusual noises:
      • Check the compressor for damage.
      • Inspect the motor for problems.
      • Check the refrigerant lines for kinks.
    • System leaking water:
      • Check the condensate drain for clogs.
      • Ensure proper drainage.

    Energy-Saving Techniques

    Implementing energy-saving techniques can significantly reduce operating costs.

    • Use a programmable thermostat. Programmable thermostats allow you to set different temperatures for different times of the day, reducing energy consumption.
    • Seal air leaks around windows and doors. Air leaks can significantly reduce the efficiency of your DIY air conditioning system. Sealing these gaps can save energy.
    • Install proper insulation. Insulating your home can significantly reduce heat transfer and decrease the load on your air conditioning system.
    • Optimize the positioning of the unit. Place the outdoor unit in an area with adequate airflow.

    Environmental Impact

    Building your own air conditioning system can be a rewarding project, but understanding its environmental footprint is crucial. From the refrigerants used to the materials employed in construction, every aspect of DIY air conditioning has an impact on the environment. Careful consideration of these factors ensures a more sustainable approach.The environmental impact of a DIY air conditioning system encompasses a range of factors, from the energy consumption during operation to the materials used in its construction.

    Choosing sustainable materials and refrigerants, and optimizing energy efficiency, are vital for minimizing the overall environmental impact.

    Ever thought about building your own air conditioner? It’s a fascinating DIY project, but sometimes you just need a chill vibe, like listening to some tunes. Check out this awesome track, “zed bias trouble in the streets ft mark pritchard” zed bias trouble in the streets ft mark pritchard , to really get that cool feeling going.

    Regardless of the source of your chill, building your own AC system is a seriously rewarding project, though! It’s all about the process, right?

    Refrigerant Choices and Their Impact

    Different refrigerants have varying global warming potentials (GWP). Selecting refrigerants with lower GWP values is crucial for reducing the system’s contribution to climate change. Hydrofluorocarbons (HFCs), while often used in conventional systems, have high GWP values. In contrast, natural refrigerants like ammonia and carbon dioxide have significantly lower GWP. Proper selection and handling of refrigerants are essential to minimize environmental damage.

    This careful consideration can significantly reduce the system’s environmental footprint.

    Material Sustainability in Construction

    The materials used in the construction of a DIY air conditioning system play a crucial role in its overall environmental impact. Using recycled or sustainably sourced materials reduces the demand on natural resources and minimizes waste. For example, opting for reclaimed wood or recycled metals can lessen the environmental impact of the construction process. Consideration of material lifespan and recyclability is also vital for long-term sustainability.

    Energy Efficiency and Operational Impact

    The energy efficiency of a DIY air conditioning system directly affects its environmental impact. A well-designed and properly maintained system will consume less energy, thereby reducing greenhouse gas emissions. Energy-efficient components, such as high-performance compressors and insulation, can significantly improve the system’s energy efficiency. Proper sealing and maintenance of the system are crucial to avoid leaks, which can lead to increased energy consumption and environmental harm.

    Optimizing the system’s operation for the specific climate and usage patterns is also important.

    Impact on Local Ecosystems

    A DIY air conditioning system can impact local ecosystems in several ways. The energy used to power the system contributes to the emission of greenhouse gases, which can have cascading effects on ecosystems, including temperature changes and shifts in precipitation patterns. The use of certain materials in construction might affect local biodiversity, depending on the extraction and processing methods.

    Minimizing the energy consumption of the system is crucial to limit these effects.

    Safety Considerations

    Building your own air conditioning system is a rewarding project, but it’s crucial to prioritize safety throughout the process. Ignoring safety precautions can lead to serious injuries or property damage. This section Artikels the essential safety measures to follow for a successful and secure DIY air conditioning installation.

    Potential Hazards

    DIY air conditioning work involves various potential hazards. Working with electricity, refrigerants, and potentially high-pressure components necessitates careful attention to detail. Improper handling of these elements can result in electric shocks, chemical burns, refrigerant leaks, and equipment damage. Furthermore, improper installation can lead to reduced efficiency, performance issues, and even safety risks for the system’s operation.

    Safety Procedures and Precautions

    Adhering to established safety procedures is paramount. Before starting any work, thoroughly review the manufacturer’s instructions for the equipment and materials being used. Always disconnect power to the electrical components before any work on the system. Wear appropriate personal protective equipment (PPE), including safety glasses, gloves, and a respirator, especially when working with refrigerants or other chemicals. Proper ventilation is essential when handling refrigerants to prevent inhalation of harmful vapors.

    Having a fire extinguisher readily available is crucial, as well as a first-aid kit for immediate treatment of minor injuries.

    Safe Handling of Refrigerants and Other Chemicals

    Refrigerants, like R-22 and R-410A, are essential components of air conditioning systems. However, they are also potent and potentially hazardous. Always handle refrigerants in a well-ventilated area and avoid skin contact. Use appropriate safety equipment like gloves and safety glasses. Refrigerant leaks can be dangerous and should be addressed immediately by trained professionals.

    Proper disposal methods for refrigerants and other chemicals are vital to prevent environmental contamination.

    Emergency Procedures

    Accidents can happen, even with the best safety precautions. Having clear emergency procedures in place can mitigate potential risks. Familiarize yourself with the location of emergency exits, fire extinguishers, and first-aid supplies. In case of an electrical shock, immediately disconnect the power source and seek medical attention. For refrigerant leaks, evacuate the area and contact a qualified technician.

    For fire, activate the building’s fire alarm system and follow evacuation procedures. Know your local emergency response numbers and be prepared to report any incident promptly.

    Safe Operation and Maintenance

    Regular maintenance is crucial for ensuring the safe and efficient operation of your DIY air conditioning system. Periodically check for leaks in the refrigerant lines and other components. Inspect electrical connections for any signs of damage or wear. Keep the system’s surroundings clean and free from obstructions that could impede airflow. Ensure proper ventilation and avoid overheating the system.

    Consult with qualified professionals for any repairs or maintenance tasks that fall outside your expertise.

    Closure

    In conclusion, building your own air conditioner is a rewarding project that allows for customization and potentially significant energy savings. However, it’s crucial to understand the associated risks and to prioritize safety throughout the process. This guide equips you with the knowledge and tools to make informed decisions, from initial design to final operation. So, are you ready to take on the challenge of crafting your own cooling masterpiece?

  • Measure a Roll of Carpet A Complete Guide

    Measure a Roll of Carpet A Complete Guide

    Measure a Roll of Carpet: From understanding the various units of measurement to mastering different techniques, this guide walks you through the entire process. Whether you’re tackling a home renovation or a commercial installation, accurate measurements are key. We’ll explore the importance of precision, different tools, and potential pitfalls, equipping you with the knowledge to get it right every time.

    This comprehensive guide covers everything from choosing the right measuring tools to calculating area coverage. We’ll dissect the factors that can affect accuracy, and provide practical examples to illustrate how these measurements apply to real-world scenarios. Get ready to master the art of carpet measurement!

    Defining Measurement

    Understanding the different units of measurement for carpet rolls is crucial for accurate estimations and successful installations. Precise calculations ensure you have enough material, avoid costly mistakes, and complete the job efficiently. This section delves into the various units, their conversions, and the importance of accuracy.

    Units of Measurement for Carpet

    Carpet is typically measured in linear feet, square yards, and meters. Each unit has its own application and advantages, and understanding their relationship is essential. Linear feet measure the length of the carpet, while square yards and meters measure the area.

    Linear Feet

    Linear feet measure the length of the carpet roll. This is useful for calculating the total length of carpet needed for a project. For instance, if you need to cover a 10-foot-wide hallway with a 15-foot-long carpet roll, the length needed in linear feet is 15 feet. Using linear feet alone, however, does not give the area covered.

    Square Yards

    Square yards measure the area of the carpet. This unit is commonly used for carpet calculations because it directly relates to the surface area to be covered. Converting between linear feet and square yards is necessary for accurate material estimations. For example, a 10-foot by 10-foot room requires 11.11 square yards (approximately) of carpet.

    Meters

    Meters, the standard metric unit, are also used to measure carpet. This unit is increasingly common in international markets and for some architectural specifications. Converting between meters and square yards is necessary for accurate calculations. For instance, a 3-meter by 3-meter room needs approximately 9 square meters of carpet.

    Conversions Between Units

    Accurate conversions are essential to ensure you have the correct amount of material. Understanding the relationships between linear feet, square yards, and meters is key. For example:

    1 square yard = 9 square feet

    1 square meter = approximately 10.76 square feet

    1 yard = 3 feet

    Importance of Accuracy in Measuring Carpet Rolls, Measure a Roll of Carpet

    Accuracy is paramount when measuring carpet rolls. Small errors in calculation can lead to significant overages or shortages of material. This can result in extra costs, wasted material, or the need for additional trips to the store. Accurate measurements ensure efficient use of resources and project success.

    Comparison of Measurement Units

    Measurement Unit Advantages Disadvantages
    Linear Feet Simple to understand; useful for measuring length Doesn’t directly represent area; requires additional calculations for area coverage
    Square Yards Directly represents area; common in the industry Requires conversion for length calculations; may not be intuitive for those unfamiliar with the unit
    Meters Standard metric unit; widely used internationally Requires conversion to other units; may require specialized tools for accurate measurement

    Measuring Techniques

    Mastering the art of carpet measurement is crucial for accurate estimations and successful installations. Knowing how to measure a roll precisely ensures that you have the correct amount of material for the job, avoiding costly mistakes and potential material shortages. Different methods offer varying degrees of accuracy and efficiency, making it essential to choose the appropriate technique based on the specific circumstances.

    Tape Measure Method

    The tape measure is a classic and widely used tool for measuring carpet. Its simplicity and accessibility make it a go-to choice for many professionals and DIY enthusiasts. This method is particularly useful for straightforward rectangular or square areas.

    • Unroll the carpet: Ensure the carpet roll is completely unrolled and placed flat on a stable surface. This prevents any potential inaccuracies caused by unevenness or curvature.
    • Measure the width: Use the tape measure to precisely determine the width of the carpet roll. This measurement is typically taken from the outermost edge to the outermost edge.
    • Measure the length: Carefully measure the length of the carpet roll, ensuring the tape measure is held straight and parallel to the roll’s edge.
    • Record measurements: Document the width and length measurements accurately. This crucial step prevents errors during calculations.

    Measuring Wheel Method

    The measuring wheel, a mechanical device with a rotating wheel that measures distance, provides a more efficient approach for larger areas. This method is particularly beneficial for irregular shapes and complex layouts.

    • Prepare the area: Ensure the area to be measured is clear of obstacles and obstructions to allow for smooth movement of the measuring wheel.
    • Calibrate the wheel: Before starting the measurement, verify that the measuring wheel is properly calibrated. This ensures the accuracy of the recorded measurements.
    • Begin the measurement: Roll the measuring wheel along the length and width of the area. Ensure consistent and steady movement to avoid errors.
    • Record measurements: The measuring wheel usually displays the accumulated distance. Record the total length and width values.

    Comparison of Techniques

    Feature Tape Measure Measuring Wheel
    Accuracy High, especially for straight lines. High, provided proper calibration and technique are followed.
    Efficiency Lower, potentially time-consuming for large areas. Higher, ideal for large areas and irregular shapes.
    Versatility Suitable for various shapes and sizes, particularly simple ones. Well-suited for complex or irregular shapes.

    Step-by-Step Measuring Wheel Procedure

    1. Safety Precautions: Always wear appropriate safety gear, such as sturdy shoes and eye protection, to prevent injuries. Be mindful of the surroundings and potential hazards while operating the measuring wheel.
    2. Surface Assessment: Examine the surface to be measured for any irregularities or obstacles that might affect the accuracy of the measuring wheel. Ensure the surface is level and free from debris.
    3. Calibration Verification: Double-check the measuring wheel’s calibration before starting. This crucial step ensures the accuracy of the measurements.
    4. Initial Measurement: Begin by measuring the length of the area using the measuring wheel. Ensure the wheel rolls smoothly and steadily along the length.
    5. Width Measurement: Measure the width of the area using the measuring wheel in a similar manner as the length measurement.
    6. Record and Verify: Record the length and width measurements displayed on the measuring wheel. Double-check the readings to avoid errors.

    Factors Affecting Measurement

    Measure a Roll of Carpet

    Accurately measuring a roll of carpet is crucial for precise pricing and project planning. Several factors can influence the measurement process, potentially leading to significant errors. Understanding these factors is vital for achieving reliable results. These factors are explored in detail to ensure accurate measurement, regardless of the specific type of carpet or tools used.The accuracy of a carpet roll measurement depends on a variety of factors that often interact.

    These factors include the characteristics of the carpet itself, the tools used for measurement, and even environmental conditions. By understanding and mitigating these influences, we can achieve more precise and reliable results.

    Roll Diameter

    Roll diameter significantly impacts the calculation of carpet length. A larger diameter roll will yield more carpet length than a smaller diameter roll for the same amount of material. For instance, a roll with a diameter of 4 feet will have a significantly different length compared to a roll with a diameter of 3 feet. This difference is due to the fact that the material’s length is wrapped around a larger or smaller cylinder.

    Properly measuring the roll’s diameter is critical to avoid errors in the length calculation.

    Carpet Type

    Different carpet types exhibit varying degrees of stretch and compression. Woven carpets might have slightly different stretch characteristics than tufted or other types of carpet. This characteristic impacts the final measurement. For instance, a highly resilient carpet might have a tendency to stretch slightly during the measuring process, while a less resilient carpet might not stretch as much.

    Knowing the type of carpet helps account for these potential variances in the measurement.

    Measuring Tool Precision

    The precision of the measuring tool used is a crucial factor. A tape measure with a high degree of accuracy will produce more reliable results than a less precise tape measure. Even small inaccuracies in the measurement of the roll’s diameter or the carpet’s length can accumulate over the entire roll, potentially leading to significant errors in the final calculation.

    Using a calibrated and high-quality tape measure minimizes such errors.

    Carpet Width

    Carpet width is an essential factor that directly impacts the total area that can be covered. Ignoring the width during measurement can lead to significant inaccuracies. For example, if the width is not accounted for, the estimated amount of carpet may be insufficient for the project. A narrow carpet roll will cover less area compared to a wide carpet roll.

    Always measure the carpet’s width to ensure accurate coverage calculations.

    Calculating Area Coverage

    Unveiling the secrets of carpet coverage is crucial for any flooring project. Knowing how much carpet you need prevents costly mistakes and ensures a smooth installation process. This section delves into the formulas and considerations for accurate area calculations, helping you avoid over- or under-buying carpet.Accurate carpet area calculations are vital for successful flooring projects. This section provides the necessary tools to determine the exact amount of carpet needed, factoring in various carpet characteristics and room dimensions.

    Calculating Carpet Area

    Calculating the total area a roll of carpet can cover is straightforward when you understand the dimensions of the roll. The key is to use the correct formulas, taking into account the width and length of the roll.

    Carpet area = width × length

    This formula is fundamental for calculating the total area a roll can cover. For instance, a roll with a width of 12 feet and a length of 20 feet has a total area of 240 square feet.

    Adjustments for Patterns and Designs

    Carpet patterns or designs can affect the usable area. Some patterns may require extra carpet to ensure a full coverage without cutting or repeating the pattern within the same room.

    • Repeat patterns often require extra material to complete the design without repeating it within a single room. For example, if a carpet has a repeating pattern every 3 feet, you may need to purchase additional material to ensure seamless coverage and to avoid the repetition of the pattern within a single room.
    • Patterns can reduce the usable area of a roll. This is because you need to account for the repeating pattern or design and calculate the usable area in relation to that pattern. For instance, if a carpet pattern repeats every 2 feet, you must consider this repetition when calculating the actual area to cover. This means you must take into account the size of the pattern and its repetitions when calculating the required amount of carpet for the room.

    Determining the Number of Rolls Needed

    Knowing the total area of the room and the area covered by one roll allows you to determine the number of rolls required for a complete project.

    Room Area (sq ft) Carpet Roll Area (sq ft) Number of Rolls Needed
    300 200 2
    400 200 2
    500 200 3

    Divide the total area of the room by the area covered by one roll to determine the number of rolls needed. For instance, if a room needs 300 square feet of carpet and a roll covers 200 square feet, you need two rolls.

    Practical Applications

    Knowing how to measure a roll of carpet accurately is fundamental for a variety of projects, from small home renovations to large-scale commercial installations. Precise measurements are critical to ensure materials are sufficient, avoid costly errors, and ultimately, create a successful project. Understanding the process is crucial for both the efficiency and the quality of the work.

    Real-World Scenarios

    Accurate carpet measurements are vital in many situations. Home renovations, from a simple bedroom refresh to a complete kitchen and living room makeover, require precise measurements to ensure the right amount of carpet is purchased. A miscalculation could lead to significant material waste or, worse, a need for a second trip to the store, adding time and expense to the project.

    Measuring a roll of carpet can be surprisingly tricky, especially if you’re not sure how to account for the different dimensions. Luckily, listening to the new album by kittin the hacker, kittin the hacker third album , really got me thinking about how much space I actually have in the living room! Ultimately, measuring a roll of carpet precisely is crucial for a successful home renovation project.

    Commercial installations, such as offices or retail spaces, often involve larger areas and more complex designs, making precise measurements even more critical to avoid delays and costly mistakes. Proper measurement is essential for successful project completion.

    Importance of Accurate Measurement

    Precise measurements are essential to ensure that the correct amount of carpet is ordered, minimizing material waste and project costs. Accurate measurements guarantee the project is completed within the estimated budget. This accuracy also affects the project timeline. If measurements are inaccurate, the installation process could be significantly delayed due to ordering issues or the need to acquire additional material.

    Furthermore, accurate measurements are crucial to ensure the carpet fits the intended space without any significant cutting or waste.

    Carpet Installation Scenarios

    Different carpet installation scenarios have unique measurement considerations. For instance, a simple installation in a rectangular room with no obstacles involves a straightforward measurement process. However, rooms with irregular shapes, alcoves, or complex architectural features necessitate careful, detailed measurements to account for the unique design elements. The installation of carpet in stairwells requires precise calculations for the cut patterns and stair lengths to ensure a seamless, safe installation.

    Also, areas with pre-existing flooring or obstacles like baseboards or windowsills need careful measurement consideration. This detail ensures that the carpet installation is precise, without any visible gaps or irregularities.

    Measurement in Larger Projects

    Measuring a roll of carpet is an integral part of larger projects, such as interior design and flooring installation. Interior designers rely on accurate measurements to create design plans that include the necessary carpet materials. Flooring installers use these measurements to calculate the exact amount of carpet needed, ensuring they have the appropriate materials to complete the job efficiently.

    The measurements support project planning, scheduling, and budget management, making it a crucial element in project success. Carpet measurements are a critical part of the larger project process.

    Tools and Equipment

    Choosing the right tools is crucial for accurate and efficient carpet measurement. Incorrect measurements can lead to costly mistakes, impacting both the project’s budget and the customer’s satisfaction. A well-equipped measuring kit ensures that the measurements are precise and the carpet is cut to fit perfectly, minimizing waste and maximizing the use of the material.

    Types of Measuring Tools

    Accurate carpet measurement relies on the appropriate tools. Different carpet types and sizes may require specific measuring tools. For example, a long, thin roll of carpet might necessitate a measuring wheel, while a smaller, more intricate design might call for a laser distance meter for precise measurements.

    Key Characteristics of Measuring Tools

    Understanding the capabilities and limitations of various measuring tools is essential for selecting the best option. This section details the key characteristics of common measuring tools used for carpet measurement.

    Measuring a roll of carpet can seem straightforward, but there are a few crucial steps to ensure accuracy. Calculating the total square footage is essential, and that often involves some complex math. While figuring out those dimensions, I was strangely drawn to the intricate sound of 5 10 15 20 kurt vile 5 10 15 20 kurt vile , a captivating album that perfectly matched the measured precision I needed.

    Ultimately, understanding how to accurately measure a roll of carpet is key for any DIY flooring project.

    Measuring Tool Key Characteristics Use Cases
    Tape Measure Classic tool with a flexible measuring tape. Comes in various lengths and with different features such as locking mechanisms and retractable designs. Ideal for linear measurements, such as the length and width of smaller carpet rolls or sections of a larger roll. Effective for taking quick measurements of rooms or specific areas.
    Measuring Wheel A wheel that rolls along the surface to measure distance. Often includes a counter to display the total distance traveled. Efficient for measuring long distances, especially when dealing with large carpet rolls or measuring the length of hallways or other long spaces. Provides a quick, easy way to measure the total roll length.
    Laser Distance Meter Measures distances using laser beams. Provides highly accurate readings, particularly useful for precise measurements of irregular shapes or areas with obstacles. Essential for measuring the dimensions of complex rooms or when high accuracy is required. Excellent for measuring distances across obstacles or irregular areas. Useful for determining the total area of a room.
    Folding Rule A rigid, folding measuring tool, providing precise and accurate linear measurements. Useful for interior wall-to-wall carpet measurements, particularly in smaller rooms. Ideal for accurate, linear measurements within a space.

    Importance of Choosing the Right Tool

    Selecting the right measuring tools is paramount for achieving accurate results. Using the incorrect tool can lead to inaccurate measurements, resulting in incorrect calculations of the required carpet area. For instance, using a tape measure to measure a large area might be tedious and prone to errors, whereas a measuring wheel could provide a faster and more reliable approach.

    Troubleshooting and Error Correction

    Accurately measuring a roll of carpet is critical for avoiding costly mistakes and ensuring project success. Inaccurate measurements can lead to significant overages or shortages of material, impacting both the budget and the project timeline. Understanding potential errors and their impact is crucial for preventing these issues.

    Potential Measurement Errors

    Carpet measurement involves several steps, each with its own potential for error. Human error, such as misreading a tape measure, misinterpreting room dimensions, or incorrect calculations, is a significant factor. Environmental factors, such as temperature fluctuations or uneven flooring, can also affect the accuracy of the measurements. Incorrect use of measuring tools, like a faulty tape measure or improper placement of the measuring instrument, can lead to inaccuracies.

    Figuring out how much carpet you need can be tricky, especially when measuring a roll. It’s all about those dimensions, isn’t it? Recently, I was inspired by the creative collaborations, like the new EP from Caroline Polachek, Danny L Harle, and Superfruit with Pentatonix, which sparked a fresh perspective on how to tackle a home improvement project.

    Ultimately, accurately measuring a roll of carpet is crucial for a smooth installation. You’ll need the right tools and a good strategy.

    Using the wrong measurement unit or rounding errors during calculation are also possible pitfalls. Finally, overlooking important details like stairs, doorways, or complex architectural features can lead to incorrect estimations.

    Identifying and Correcting Errors

    Identifying measurement errors is essential for correcting them. A crucial first step is to double-check all measurements, using different methods and measuring tools. For instance, measuring the same section with a laser measure and a standard tape measure can help identify discrepancies. Carefully review the room layout drawings and diagrams for any discrepancies in the measurements. Comparing the measurements to the room’s dimensions is vital to detect possible errors.

    If a significant difference is found, the measurement process should be revisited, taking extra care to account for any previously overlooked factors. Using a more advanced measuring tool or seeking a second opinion can help identify the source of the errors. For example, using a laser distance measure can help eliminate parallax errors common with standard tape measures.

    Impact of Measurement Errors

    The impact of different measurement errors on the final project varies depending on the extent of the inaccuracy. Minor errors may only lead to a small amount of excess or shortage of material, whereas substantial errors can significantly affect the cost and timeline of the project. Overestimating the required material will result in extra expenditure, while underestimating can cause delays and the need for additional purchases, which can compromise the project’s overall success.

    Accurate measurements minimize these risks and ensure that the project is completed efficiently and within budget.

    Verifying Measurement Accuracy

    A procedure for verifying the accuracy of carpet measurements involves several key steps. First, carefully re-measure the dimensions of the room using multiple methods. Then, verify that the calculations for the area coverage are correct, using both manual and digital methods. Third, compare the calculated area with the area of the carpet roll to ensure that there is enough material for the project.

    Finally, double-check the measurements with the blueprints and floor plans, ensuring that all relevant details are accounted for. This procedure helps to mitigate potential errors, ensuring that the final result aligns with the project’s specifications.

    Visual Representation: Measure A Roll Of Carpet

    Measure a Roll of Carpet

    Visual representation is crucial for understanding and effectively applying the principles of carpet measurement. A clear visual guide, whether a table, flowchart, or combination of both, simplifies the process and helps avoid common errors. This section presents a visual roadmap for measuring and calculating carpet area coverage, facilitating a better grasp of the entire procedure.

    Carpet Measurement Steps

    A well-structured table outlining the steps involved in measuring a carpet roll enhances comprehension and provides a clear guide for each phase. The order of these steps directly impacts accuracy and efficiency.

    Step Description Illustration
    1. Identify the Roll Dimensions Carefully examine the roll label for width and length. Note any special markings indicating patterns or unique features. An image of a carpet roll with visible width and length measurements clearly marked on the label.
    2. Determine Room Dimensions Measure the length and width of the area to be carpeted using a tape measure. Account for any irregular shapes or obstacles. A diagram of a room with a tape measure being used to measure the length and width of the room.
    3. Calculate the Room Area Multiply the length and width of the room to obtain the total area to be covered. A simple mathematical calculation, showing length multiplied by width, to get the room area.
    4. Determine the Total Roll Area Calculate the area covered by the entire roll using the given roll dimensions. An illustration of a carpet roll, showing the area it covers based on the width and length of the roll.
    5. Compare Room and Roll Areas Compare the calculated area of the room with the area covered by the entire roll. A comparison chart highlighting the room area and roll area, visually representing the comparison.
    6. Calculate the Number of Rolls Needed Divide the room area by the area covered by one roll. Round up to the nearest whole number to ensure sufficient carpet. A simple mathematical calculation, showing the room area divided by the roll area, to determine the number of rolls needed.

    Measuring Tools and Techniques

    Accurate measurements are fundamental to carpet installation. Various tools and techniques facilitate this process. Different scenarios may necessitate the use of specific tools.

    • Tape Measure: A standard tape measure is essential for precise linear measurements. Ensure the tape measure is calibrated and the readings are taken correctly. Avoid stretching or sagging of the tape.
      Tape Measure
    • Measuring Wheel: A measuring wheel is practical for larger areas or rooms with complex shapes. Carefully calibrate the wheel and record the measurements. Ensure the surface is level and the wheel is rolled smoothly.
      Measuring Wheel
    • Laser Distance Meter: This tool provides quick and precise distance measurements. Ensure the laser beam is directed correctly and the readings are taken from a stable position. Verify the accuracy of the meter by checking with a secondary measuring tool.
      Laser Distance Meter

    Carpet Measurement Flowchart

    A flowchart visually depicts the entire process, from measuring to calculating the necessary rolls. This diagram provides a step-by-step guide to ensure accuracy.[Flowchart image](A flowchart depicting the steps: 1. Room Measurement, 2. Roll Dimensions, 3. Room Area Calculation, 4.

    Roll Area Calculation, 5. Comparison and 6. Rolls Needed Calculation. Arrows connect each step with clear instructions and potential decision points, such as “Is room area greater than roll area?”)

    Ultimate Conclusion

    In conclusion, measuring a roll of carpet involves more than just grabbing a tape measure. Understanding the units, techniques, and potential factors affecting accuracy is crucial. This guide provides a clear roadmap, from initial measurements to calculating coverage and addressing potential errors. Armed with this knowledge, you’ll confidently navigate any carpet installation project, ensuring accurate results every time.

  • Install a Storm Door A Comprehensive Guide

    Install a Storm Door A Comprehensive Guide

    Install a Storm Door is a crucial home improvement project, offering enhanced security, energy efficiency, and curb appeal. This guide dives deep into every aspect, from selecting the perfect door style to tackling the installation process step-by-step. We’ll explore various materials, discuss potential challenges, and provide practical tips for a smooth and successful installation.

    Understanding the different types of storm doors – wood, fiberglass, and vinyl – is key to making the right choice for your home. Each material presents unique advantages and disadvantages, and we’ll present a detailed comparison to help you decide.

    Introduction to Storm Doors

    Storm doors are more than just a decorative addition to your home; they’re a practical investment that significantly improves the security, energy efficiency, and overall comfort of your entryway. They provide an extra layer of protection against harsh weather elements, intruders, and pests, while also helping to insulate your home and reduce drafts. Understanding the different types, styles, and installation scenarios can help you choose the perfect storm door for your needs.Storm doors offer a wide range of benefits beyond aesthetics.

    They enhance security by creating an additional barrier against forced entry, and they help reduce noise pollution from the outside world. They also provide an important energy-saving function by reducing drafts and heat loss, lowering your utility bills.

    Types of Storm Doors

    Storm doors are available in various materials, each with its own set of advantages and disadvantages. Common materials include fiberglass, wood, and vinyl. The choice of material often depends on your budget, desired aesthetic, and the specific needs of your home.

    Styles and Designs

    Storm doors come in a variety of styles, each offering unique aesthetic appeal and functional advantages. Classic styles include traditional double-hung or single-hung configurations, while contemporary designs feature more modern aesthetics and innovative features. The style you choose should complement the overall architectural design of your home. For example, a traditional-style home might benefit from a classic storm door, while a modern home could showcase a contemporary design.

    Consider the architectural style of your house when selecting the storm door to ensure a harmonious look.

    Installation Scenarios

    Storm doors are beneficial in various situations. They are particularly valuable in homes with frequent exposure to extreme weather conditions, such as strong winds, heavy rains, or snow. They also improve the security of homes located in high-crime areas. Furthermore, storm doors can significantly improve the energy efficiency of a home by preventing drafts and reducing heat loss.

    In colder climates, this is especially important. Furthermore, storm doors offer an additional layer of protection from unwanted pests.

    Material Comparison Table

    Material Pros Cons
    Wood Natural beauty, excellent insulation, often customizable with various finishes. Prone to rot and decay in humid climates, requires regular maintenance (staining, sealing), susceptible to insect damage, more expensive than vinyl.
    Fiberglass Excellent durability and weather resistance, low maintenance, resistant to rot and insects, good insulation properties. Can be less aesthetically appealing than wood, may not have the same level of customization as wood.
    Vinyl Low maintenance, resistant to rot and insects, affordable compared to wood and fiberglass, excellent durability against extreme weather. Can be less aesthetically pleasing than wood or fiberglass, may not offer the same level of insulation as wood or fiberglass.

    Planning and Preparation

    Getting ready for a storm door installation is crucial for a smooth and successful project. Proper planning minimizes potential problems and ensures a finished product that meets your expectations. Careful measurement and material selection are paramount to avoid costly mistakes or delays.Thorough preparation, from accurate measurements to a well-stocked toolkit, sets the stage for a successful storm door installation.

    This involves not only the physical aspects but also anticipating potential challenges and having a contingency plan.

    Essential Preparation Steps

    Careful planning is vital for a successful storm door installation. The process starts with accurate measurements and ends with a comprehensive checklist. Following these steps will significantly reduce the chances of encountering unexpected issues during installation.

    • Accurate Measurement: Precise measurements are critical. Incorrect measurements lead to doors that are too large or too small, causing fit issues and potentially damaging the existing frame. Measure the existing door frame meticulously to ensure a perfect fit for the new storm door. Using a measuring tape is crucial for getting precise measurements.
    • Material Gathering: A well-stocked toolkit is essential for a smooth installation. A comprehensive list of necessary tools and materials should be prepared before starting. This will ensure you have everything needed and avoid interruptions in the process.
    • Identifying Potential Challenges: Anticipating possible obstacles during installation is key. Potential issues include the complexity of the existing frame, variations in door frame dimensions, and hidden structural issues. Thorough pre-installation inspections help identify and mitigate these challenges.

    Tools and Materials Needed

    Having the right tools and materials is essential for a smooth and efficient installation. The necessary items should be gathered before starting the installation process.

    • Measuring Tools: A measuring tape, level, and pencil are essential for accurate measurements. A combination square and a framing square are helpful for precise angles.
    • Installation Tools: A drill, screwdriver, hammer, and saw are essential. A utility knife, pliers, and a reciprocating saw are also valuable tools.
    • Hardware: The appropriate screws, hinges, and other hardware specific to your storm door model are needed. Check the manufacturer’s specifications for accurate recommendations.

    Accurate Door Frame Measurement

    Accurate measurements are paramount for a proper fit. Errors in measurement can lead to significant issues, such as the door not fitting correctly or requiring extensive modifications.

    1. Exterior Dimensions: Measure the width and height of the existing door frame from the exterior. Use a measuring tape to get precise measurements.
    2. Interior Dimensions: Measure the width and height of the interior opening of the existing door frame. This ensures that the storm door will fit within the existing frame without obstructing the interior.
    3. Threshold Measurement: Measure the threshold of the existing door frame. This measurement is crucial for determining the appropriate storm door threshold height to avoid issues with water or air leakage.

    Checklist for Gathering Items, Install a Storm Door

    Creating a comprehensive checklist before starting the installation helps ensure you have all the necessary items. A detailed checklist prevents last-minute scrambles and potential delays.

    Category Items
    Measuring Tools Measuring tape, level, pencil, combination square, framing square
    Installation Tools Drill, screwdriver, hammer, saw, utility knife, pliers, reciprocating saw
    Hardware Screws, hinges, weather stripping, flashing, and other hardware specific to the storm door
    Materials Caulk, sealant, and any additional materials recommended by the storm door manufacturer

    Installation Process: Install A Storm Door

    Install a Storm Door

    Installing a storm door is a rewarding DIY project that enhances the security and energy efficiency of your home. Proper installation ensures a tight seal, preventing drafts and unwanted intruders. This detailed guide will walk you through the steps, from framing to finishing touches, making the process manageable and successful.The key to a smooth installation lies in meticulous preparation and precise execution.

    Carefully following the steps, paying close attention to measurements and alignment, will yield a sturdy and aesthetically pleasing storm door. This section provides a step-by-step guide to install your storm door, ensuring a perfect fit and a long-lasting addition to your home.

    Framing and Alignment

    Proper framing and alignment are crucial for a secure and weather-tight installation. Misalignment can lead to drafts, gaps, and ultimately, a poorly performing storm door. Ensure the frame is precisely aligned with the existing door frame to guarantee a snug fit and prevent any unwanted gaps. This step is critical for long-term performance.

    Attaching the Storm Door to the Existing Door Frame

    Several methods exist for attaching the storm door to the existing frame. The best approach depends on the specific door frame and storm door style. Common methods include using screws or nails to secure the storm door frame to the existing door frame. Ensure the screws are long enough to penetrate both the storm door frame and the door jamb, providing a secure hold.

    Securing the Door to the Frame for Stability

    Securing the storm door for stability involves more than just attaching the frame. Additional reinforcements and adjustments are necessary to ensure the door doesn’t sag or warp. Use appropriate hardware, such as hinges and braces, for added support. This prevents the door from moving or wobbling.

    Types of Hardware

    Storm doors use various hardware components to function properly. These components include hinges, latches, and handles. Each plays a specific role in the operation and security of the door.

    Installing Storm Door Hardware

    A detailed step-by-step guide for installing storm door hardware:

    
    Step 1:  Prepare the storm door and the door frame by ensuring they are clean and free of debris.
    Step 2:  Position the hinges on the storm door and the door frame, ensuring alignment.
    Step 3:  Mark the locations for the hinge screws on both the storm door and the door frame.
    Step 4:  Drill pilot holes to prevent the screws from splitting the wood.
    Step 5:  Secure the hinges using appropriate screws.
    Step 6:  Install the latch and handle according to the manufacturer's instructions.
    Step 7:  Test the latch and handle mechanisms to ensure smooth operation.
    Step 8:  Adjust the hinges as needed to ensure proper alignment and smooth operation of the storm door.
    Step 9:  Once the hardware is installed, check for any gaps or misalignments.
    Step 10: Secure the storm door with the necessary hardware.
    

    Safety and Considerations

    Install a Storm Door

    Installing a storm door is a rewarding project, but safety and careful planning are paramount. Proper attention to detail during installation, including the use of appropriate safety gear and proper ventilation, is crucial for a successful and safe outcome. Ignoring these aspects can lead to costly errors, injuries, and even damage to your home.

    Careful consideration of safety precautions and energy efficiency is vital to ensure a successful installation and protect your home and family. This section dives into essential safety measures, the importance of proper ventilation and weatherstripping, and how to mitigate potential hazards. We’ll also explore the significant impact of a storm door on energy efficiency, comparing different weatherstripping options.

    Safety Precautions During Installation

    Proper safety precautions are essential to prevent accidents during installation. Always wear safety glasses, gloves, and sturdy work shoes. Ensure the work area is well-lit and clear of obstructions. Never work alone, especially when handling heavy materials or using power tools. If possible, have a second person available for assistance.

    Always follow the manufacturer’s instructions for specific safety precautions and use of tools.

    Getting a storm door installed is a worthwhile home improvement project, especially if you’re aiming for better energy efficiency. While I’m busy prepping for that, I’ve been keeping tabs on the music scene, and heard some exciting news: a final UGK album is on the way! final ugk album on the way. Hopefully, this new project will be just as impactful as the installation of my new storm door, making my home both cozy and soundproof.

    It’s all about creating a space that’s both comfortable and secure.

    Importance of Proper Ventilation and Weatherstripping

    Proper ventilation is crucial during the installation process, especially when using adhesives or sealants. Adequate ventilation ensures proper curing and minimizes the risk of breathing harmful fumes. Weatherstripping is essential for energy efficiency and preventing drafts. Different types of weatherstripping provide varying levels of insulation and sealing.

    Potential Safety Hazards and Mitigation

    Potential hazards during storm door installation include cuts from sharp tools, falls from heights, and electrical shocks. Using proper safety equipment and following safety protocols can mitigate these risks. For example, using a ladder that’s stable and properly secured can prevent falls. Always disconnect electrical power to the area where you’re working, especially if you’re using power tools or working near electrical components.

    If you’re unsure about any aspect of the installation, consult a professional.

    Impact on Home’s Energy Efficiency

    Storm doors significantly improve a home’s energy efficiency. They reduce drafts, preventing heat loss in winter and heat gain in summer. Properly installed weatherstripping is crucial for achieving maximum energy savings. A well-sealed storm door can reduce energy bills, and this is reflected in many homeowners’ experiences. For example, homeowners often report a noticeable reduction in their heating and cooling bills after installing a storm door.

    Comparison of Weatherstripping Options

    Various weatherstripping options are available, each with its own characteristics and effectiveness. Consider the following:

    • Foam weatherstripping is relatively inexpensive and easy to install. It provides good insulation, but its effectiveness can vary based on the type of foam used.
    • Felt weatherstripping is a classic option, providing good insulation and a tight seal. Its durability is often high, though it may require more effort for installation.
    • Rubber weatherstripping is a popular choice due to its flexibility and ability to conform to various door frames. It provides a good seal and is available in different thicknesses.
    • Metal weatherstripping offers excellent durability and can withstand high pressure. It’s commonly used for commercial applications, but it’s also suitable for residential use.

    Different weatherstripping materials have varying performance characteristics. For example, foam weatherstripping might be suitable for a simpler installation, while rubber or metal weatherstripping might be better suited for a more complex or demanding installation.

    Troubleshooting and Maintenance

    Keeping your storm door in top condition involves proactive troubleshooting and regular maintenance. A well-maintained storm door not only enhances the curb appeal of your home but also increases its longevity, providing years of reliable protection against the elements. Proper maintenance can also help prevent costly repairs down the line.

    Addressing issues promptly and performing routine maintenance can save you time and money in the long run. This section will guide you through common problems, troubleshooting steps, and maintenance procedures for your storm door.

    Installing a storm door can really boost your home’s energy efficiency, but sometimes you need a little extra DIY know-how. For example, if you’re tackling a project like making a camping toilet, you’ll need some serious resourcefulness. Luckily, there’s a great guide on Make a Camping Toilet that can help with that. But back to storm doors, the right materials and proper installation are key to keeping your home cozy and protected from the elements.

    Common Installation Problems

    Troubleshooting potential installation issues is crucial for a functioning storm door. Common problems include misaligned frames, sticking or dragging doors, and improper weatherstripping application.

    • Misaligned Frames: Ensure the storm door frame is properly aligned with the existing door frame. Misalignment can cause the door to bind or not close properly. Use a level and a straightedge to check for any deviations. If misalignment is found, carefully adjust the screws or shims to realign the frame.
    • Sticking or Dragging Doors: A sticking or dragging door can be caused by obstructions, worn hinges, or improperly adjusted weatherstripping. Inspect the area around the door for any obstructions. Ensure hinges are lubricated and functioning correctly. If weatherstripping is worn, replace it. Adjust the door’s alignment if needed.

    • Improper Weatherstripping Application: Weatherstripping should be installed correctly to prevent air leaks and drafts. Check for gaps or loose areas in the weatherstripping. Ensure it’s properly compressed against the door and frame. If necessary, re-apply or replace the weatherstripping.

    Troubleshooting Techniques

    Correctly diagnosing and resolving problems is key to maintaining a well-functioning storm door. This involves careful inspection and systematic evaluation of the issue.

    • Visual Inspection: Begin by thoroughly inspecting the storm door for any visible damage, misalignment, or obstructions. Pay close attention to the hinges, weatherstripping, and any hardware components. A visual inspection can often identify the source of the problem.
    • Checking Hardware: Examine the hinges, screws, and other hardware components for signs of wear, looseness, or damage. Tighten loose screws and replace any damaged hardware. Proper hardware function ensures smooth operation of the door.
    • Adjusting Weatherstripping: Check for gaps or uneven compression of the weatherstripping. Use appropriate tools to adjust the weatherstripping for proper contact with the door and frame. Weatherstripping is critical for maintaining the energy efficiency of the door and preventing drafts.

    Regular Maintenance

    Regular maintenance significantly extends the lifespan of your storm door. Preventive maintenance will reduce the need for extensive repairs.

    • Cleaning: Regular cleaning of the storm door helps maintain its appearance and prevent the buildup of dirt, grime, and debris. Use a mild detergent and a soft cloth to clean the surface of the door and frame. Avoid using harsh chemicals that could damage the finish. Thoroughly rinse the door and frame after cleaning.
    • Lubrication: Regular lubrication of hinges, rollers, and other moving parts prevents friction and wear. Use a suitable lubricant specifically designed for metal components. Lubrication ensures smooth and efficient operation of the door.
    • Weatherstripping Inspection: Periodically inspect the weatherstripping for wear and tear. Replace worn or damaged weatherstripping to maintain the door’s seal and prevent drafts. Inspecting weatherstripping is a crucial step to ensure energy efficiency.

    Replacing Damaged Components

    Replacing damaged or worn components is essential for maintaining the storm door’s structural integrity and functionality.

    • Hinges: If hinges are damaged or show signs of wear, replace them with new ones. Damaged hinges can affect the door’s proper operation and alignment. Always use hinges compatible with the existing door and frame.
    • Weatherstripping: Replace worn or damaged weatherstripping to maintain the door’s seal and prevent drafts. Using the correct type of weatherstripping is crucial for preventing air leaks and maintaining energy efficiency.
    • Hardware: If any hardware components like handles, latches, or locks are damaged, replace them with new ones. Ensure the new hardware is compatible with the existing door and frame.

    Cost and Alternatives

    Installing a storm door can be a worthwhile investment for your home, but the upfront cost can sometimes be a deterrent. Understanding the potential costs, alongside alternative solutions, is crucial for making an informed decision. This section will explore the range of costs associated with different storm door types, and examine alternative options such as repairs or upgrades, to help you weigh the pros and cons before committing to a new installation.

    Estimating Installation Costs

    The cost of installing a storm door varies significantly based on several factors. These include the type of door (wood, fiberglass, or vinyl), the size and complexity of the installation, labor costs in your area, and any additional features like special hardware or glass types. A basic, standard storm door installation could range from $500 to $1500, but more elaborate or customized options can easily exceed this range.

    For example, a double-entry storm door with enhanced security features might cost considerably more. Homeowners should consult local contractors for precise estimates tailored to their specific needs.

    Potential Alternatives to Replacement

    Replacing a storm door isn’t always the only solution. Sometimes, a repair or upgrade might be more cost-effective and still achieve the desired results. A damaged storm door can often be repaired, fixing the broken components or replacing the damaged frame. This is generally more economical than a full replacement. In some cases, an upgrade to existing hardware, like better locks or stronger hinges, can enhance security and improve the door’s performance without the need for a complete replacement.

    Comparing Installation Options

    The decision to replace, repair, or upgrade a storm door should be based on a comprehensive cost-benefit analysis. A replacement might offer the best aesthetic match and the latest technology, but it comes with a higher initial investment. A repair, on the other hand, might be quicker and less expensive, but it may not provide the same level of improvement or longevity.

    An upgrade could be a suitable compromise between these two options, providing a functional improvement without the substantial cost of a complete replacement.

    Cost Breakdown of Storm Door Types

    The type of material significantly influences the cost of a storm door. Different materials offer varying levels of durability, energy efficiency, and aesthetics, which directly affect the price.

    Storm Door Type Estimated Cost (USD)
    Wood $600 – $1200
    Fiberglass $800 – $1500
    Vinyl $500 – $1000

    Note: These are estimated costs and can vary greatly based on the specific features and installation requirements.

    Installing a storm door can significantly improve your home’s energy efficiency, and honestly, it’s a pretty cool DIY project. While I’m tackling that, I’ve also been super excited about the new EP from boots, featuring Run the Jewels and more! boots announces new ep ft run the jewels and more is shaping up to be a must-listen, and I’m already planning to blast it while I finish up my storm door installation.

    Hopefully, I can get this storm door installed by the weekend!

    Visual Examples and Inspirations

    Choosing the right storm door isn’t just about functionality; it’s about enhancing your home’s aesthetic. The visual impact of a storm door can be substantial, dramatically altering the curb appeal and overall look of your property. This section explores various installation examples, highlighting different styles and how they complement different architectural designs.

    Understanding how a storm door interacts with the existing facade is crucial. The style, color, and material choices can either blend seamlessly or create a bold statement, reflecting your personal taste and the character of your home. This section will walk you through various examples to inspire your own storm door selection.

    Storm Door Installations for Different Home Styles

    Different architectural styles demand different storm door treatments. A classic craftsman home benefits from a storm door that echoes its architectural details, while a modern contemporary house might welcome a sleek, minimalist design. Matching the door’s style to the home’s architecture is key to achieving a harmonious look.

    Visual Impact of Different Storm Door Styles

    Storm doors come in a variety of styles, each with a unique visual impact. French doors, for instance, create a feeling of openness and grandeur, while sliding doors offer a clean, modern aesthetic. The choice of style directly affects the overall appearance of the exterior.

    Enhancing Curb Appeal with Storm Doors

    Storm doors are more than just a protective layer; they are an exterior design element. A well-chosen storm door can significantly boost curb appeal. A new, attractive storm door can update a tired facade, or complement a recently renovated home, adding visual interest and value.

    Storm Door Colors and Their Effects

    The color of a storm door can dramatically impact a home’s aesthetic. A bold, contrasting color can add a pop of personality, while a neutral tone blends seamlessly with the existing facade. Consider the existing colors of your home’s exterior when selecting a storm door color. For example, a dark gray storm door on a light beige house might create a striking contrast.

    Conversely, a light gray storm door on a light beige house would create a softer, more subtle look.

    Factors to Consider When Choosing a Storm Door Based on Architectural Style

    Choosing a storm door that complements your home’s architectural style is paramount. Consider these factors:

    • Material: Does the material of the storm door (e.g., wood, fiberglass, vinyl) align with the materials used in the home’s construction? Matching materials creates a cohesive look.
    • Style: Does the door style (e.g., traditional, modern, contemporary) reflect the overall design of your home? A craftsman-style home, for example, might look best with a traditional-style storm door.
    • Color: Does the color of the storm door complement the existing colors of your home’s exterior? Consider the color scheme and contrast with the siding, roof, and other exterior elements.
    • Size and Proportion: Does the size and proportion of the storm door harmoniously fit within the framework of the entryway and the overall home design? A disproportionately large or small storm door can detract from the aesthetic balance.

    Final Wrap-Up

    Installing a storm door is a rewarding project that can significantly improve your home. By following the steps Artikeld in this guide, you can confidently tackle the installation process, ensuring a secure, energy-efficient, and aesthetically pleasing addition to your property. Remember to prioritize safety and carefully consider the material and style that best suit your home’s needs and budget.

  • Take a Radiator Off the Wall A Comprehensive Guide

    Take a Radiator Off the Wall A Comprehensive Guide

    Take a Radiator Off the Wall – it sounds daunting, but with careful planning and the right know-how, it’s achievable. This comprehensive guide covers everything from safety precautions and tool selection to detailed disassembly and reinstallation procedures, making the entire process less intimidating and more manageable. We’ll explore different radiator types, potential problems, and troubleshooting strategies, ensuring you can tackle this project with confidence.

    This guide provides a step-by-step approach to safely removing and reinstalling a radiator. We’ll delve into the specific needs of various radiator types and the essential tools required for each stage of the process. From disconnecting water lines to securing the radiator, we’ll address every crucial aspect, ensuring a successful outcome.

    Safety Precautions

    Taking apart a radiator, while potentially rewarding, comes with inherent risks. Ignoring safety precautions can lead to serious injuries, property damage, or even environmental hazards. This section details crucial safety measures to ensure a safe and successful radiator disassembly project. Following these steps will minimize the risk of accidents and complications.Understanding the potential hazards associated with radiator disassembly is crucial for mitigating risks.

    Taking a radiator off the wall can be a surprisingly involved project. It’s not just about unscrewing a few bolts; you’ve got to consider the plumbing, electrical connections, and the overall impact on the room’s aesthetics. Interestingly, while contemplating such a DIY project, I stumbled across news that the Bruce Springsteen E Street Band will be performing at the Super Bowl, which, frankly, makes me want to immediately tackle that radiator job.

    So, while I’m researching how to best disconnect the heating system, I’ll be also checking out the performance details on bruce springsteen e street band to play super bowl. Hopefully, the energy from the music will inspire me to get that radiator off the wall faster!

    Radiators often contain trapped water, potentially pressurized, and may have concealed electrical connections or hidden components. Improper handling can lead to scalding, electric shocks, or mechanical injuries. Careful preparation and adherence to safety guidelines are essential.

    Potential Hazards and Mitigation Strategies

    Radiator disassembly involves several potential hazards, and careful planning is vital to mitigate them. Water, often under pressure, can cause serious burns if not handled correctly. Metal parts, particularly when hot, can lead to burns or cuts. Potential electrical hazards are present if the radiator has electrical components, which are sometimes concealed within.

    • Water Hazard Mitigation: Always drain the radiator completely before attempting any disassembly. Use appropriate tools for draining, and ensure the water is disposed of safely. If possible, disconnect the radiator from the water supply system to prevent accidental refilling during work. A slow and deliberate approach, checking for leaks at each step, is paramount.
    • Thermal Hazard Mitigation: Allow the radiator to cool completely before touching any metal parts. Using insulated gloves and protective eyewear is essential. A heat-resistant mat or surface beneath the radiator can protect the working area from potential damage.
    • Electrical Hazard Mitigation: If the radiator has electrical components, disconnect the power supply before starting any work. Ensure all electrical connections are properly insulated and protected. Consult an electrician if there are any doubts about the electrical safety of the radiator.
    • Mechanical Hazard Mitigation: Use appropriate tools for disassembly. Ensure tools are in good condition and fit for purpose. Wear safety glasses and gloves to prevent cuts or scrapes. Work in a well-lit area to minimize the risk of slips and falls.

    Importance of Ventilation and PPE

    Adequate ventilation is crucial when working with radiators, especially if they contain any potentially harmful substances. Proper ventilation reduces the risk of inhaling fumes or dust particles that could be released during the disassembly process. Personal Protective Equipment (PPE) is equally important for protecting against potential hazards.

    • Ventilation: Ensure good ventilation in the work area to prevent the buildup of dust, fumes, or other contaminants. Open windows and use fans if necessary. If possible, work outdoors in a well-ventilated area.
    • PPE Selection: The choice of PPE depends on the specific hazards present. For example, heat-resistant gloves and aprons are necessary for handling hot radiators. Safety glasses protect the eyes from flying debris. Appropriate respiratory protection, such as a dust mask, is essential if the radiator contains any hazardous materials.

    PPE Comparison Table

    The following table provides a comparison of different types of PPE and their suitability for radiator work.

    PPE Type Description Suitability for Radiator Work
    Heat-Resistant Gloves Gloves designed to protect against heat and burns. High
    Safety Glasses/Goggles Eye protection against flying debris and splashes. High
    Dust Mask/Respirator Protects the respiratory system from dust and fumes. Moderate to High (depending on radiator contents)
    Insulated Apron Provides protection against heat and spills. High
    Work Boots Provides protection for feet. Moderate

    Tools and Materials Needed: Take A Radiator Off The Wall

    Preparing to tackle a radiator removal project requires a well-stocked toolkit and a thoughtful consideration of the materials needed. This meticulous approach ensures a safe and efficient job, minimizing potential damage to the surrounding area and the radiator itself. Understanding the specific tools and materials involved is paramount to a successful and injury-free outcome.

    Essential Tools

    A comprehensive set of tools is crucial for safely and effectively removing a radiator. The right tools prevent damage and ensure the project is completed in a timely manner. The following list provides a detailed overview of necessary tools and their functions.

    Tool Name Description Function
    Adjustable Wrench A versatile wrench with adjustable jaws that can grip various pipe sizes. Used to loosen and tighten nuts and bolts securing the radiator to the pipes.
    Pipe Wrench A wrench designed specifically for plumbing tasks, featuring a pivoting head. Ideal for gripping and turning pipes, especially those that may be corroded or difficult to access.
    Basin Wrench A specialized wrench with a long handle and a basin-shaped head, providing leverage. Useful for turning stubborn or hard-to-reach nuts and bolts, enhancing leverage.
    Screwdrivers (Phillips and Flathead) Tools with pointed tips for turning screws. Used for removing screws securing the radiator’s mounting brackets and other accessories.
    Gloves Protective coverings for the hands. Protect hands from potential cuts and burns during the process.
    Safety Glasses Protective eyewear. Protect eyes from debris or flying particles that may be generated during the process.
    Hammer A tool for striking objects. Used to remove or detach items that are obstructing the radiator’s removal.
    Putty Knife or Utility Knife Tools for scraping and cutting materials. Assist in removing any caulking or sealant around the radiator’s base or connections.
    Measuring Tape A tool for measuring lengths and distances. Essential for ensuring proper alignment and measurements when replacing the radiator.
    Bucket A container for holding water. Used to collect any water draining from the radiator’s pipes during the removal process.

    Materials Needed

    Proper materials are essential for completing the radiator removal safely and effectively. The following list Artikels the different types of materials required.

    • Pipe Sealant or Thread Sealant: A crucial material for ensuring a watertight seal after the radiator is removed. It creates a barrier against leaks and prevents water damage. Proper application is vital to prevent future problems.
    • Insulation (optional): Adding insulation to the pipes after removal can reduce heat loss. The type of insulation will depend on the specific pipes and the desired level of insulation. For instance, pipe wrap insulation is often used for pipes exposed in the attic or crawl space.
    • Cleaning Supplies: Depending on the condition of the radiator and pipes, cleaning supplies such as wire brushes or solvents might be necessary to remove rust or grime before reinstallation.
    • Replacement parts (if necessary): If the existing pipes or valves require replacement, you’ll need to purchase the necessary components to ensure a proper fit and function.

    Types of Radiators

    Take a Radiator Off the Wall

    Radiators come in various materials, each with unique characteristics affecting their installation and removal. Understanding these differences is crucial for safe and efficient work. Choosing the right tools and approach for a particular radiator type prevents damage and ensures a smooth removal process.Different radiator materials offer varying levels of durability, heat transfer efficiency, and maintenance requirements. Proper identification of the radiator type is essential for determining the best course of action for disconnection and removal.

    Careful consideration of these factors will make the entire process more manageable and less prone to errors.

    Cast Iron Radiators

    Cast iron radiators are a classic choice, often found in older homes. Their robust construction and excellent heat retention make them popular. However, their weight and potential for rust or corrosion must be considered. Disconnecting these radiators requires extra care due to their size and potential for damage.

    • Cast iron radiators are typically connected using a series of threaded pipes. Connections may include nuts, bolts, and washers. The pipes may be copper, steel, or brass, each with its own characteristics in terms of corrosion resistance and handling.
    • Carefully inspect the connections for signs of corrosion or damage before disconnecting. Use appropriate wrenches to avoid damaging the connections or the radiator itself.
    • Disconnect the water supply valves first. Then, carefully disconnect the supply and return pipes using the appropriate wrenches.

    Steel Radiators

    Steel radiators are a more common choice in modern homes. They are generally lighter than cast iron, but may not offer the same level of heat retention. Their construction allows for a variety of designs and finishes, offering aesthetic options.

    • Steel radiators are typically connected in a similar manner to cast iron, often using threaded pipes and fittings. Ensure compatibility with the existing plumbing system when choosing replacement components.
    • Steel radiators may be equipped with valves and other accessories that need to be disconnected before removal. Proper identification and careful handling are essential for safe removal.
    • To disconnect steel radiators, follow the same procedure as cast iron, prioritizing safety and proper tools.

    Aluminum Radiators, Take a Radiator Off the Wall

    Aluminum radiators are lightweight and efficient. Their modern design often incorporates fins for improved heat transfer. They are generally more delicate than cast iron or steel, requiring extra care during removal.

    • Aluminum radiators are often connected using compression fittings or soldered joints, depending on the specific design. The connection method significantly impacts the disassembly process.
    • Aluminum radiators, being lighter, may not require the same level of support as cast iron or steel, but careful handling remains important to prevent damage.
    • Compression fittings are often easier to disconnect than soldered joints. Use appropriate tools for the connection type.

    Disassembly Steps Table

    Type Steps Tools
    Cast Iron 1. Disconnect water supply valves. 2. Disconnect supply and return pipes. 3. Carefully lift and remove the radiator. Adjustable wrenches, pipe wrenches, safety equipment.
    Steel 1. Disconnect water supply valves. 2. Disconnect supply and return pipes. 3. Disconnect any valves or accessories. 4. Carefully lift and remove the radiator. Adjustable wrenches, pipe wrenches, valve tools, safety equipment.
    Aluminum 1. Identify connection type (compression or soldered). 2. Disconnect connections using appropriate tools. 3. Carefully lift and remove the radiator. Compression fitting pliers, soldering equipment (if applicable), safety equipment.

    Disassembly Procedures

    Taking a radiator off the wall requires careful planning and execution. Improper handling can damage the radiator, plumbing, or even injure you. This section details the crucial steps for safely disconnecting water supply lines, removing the radiator, and handling it with the necessary support. Understanding these procedures ensures a smooth and efficient process.

    Disconnecting Water Supply Lines

    Before removing the radiator, you must first shut off the water supply to the unit. This prevents water damage and ensures a safe work environment. Locate the valves controlling the water flow to the radiator, usually located near the supply pipes. Turn the valves clockwise to fully shut off the water supply. It’s important to verify that the water is completely shut off by checking for any leaks.

    If you’re unsure of the location of the valves, consult a qualified plumber or refer to your home’s plumbing diagram.

    Removing the Radiator from the Wall

    Radiator removal involves several steps to ensure safety and avoid damage. Proper support and handling are critical during the process. The following section Artikels the procedures.

    Radiator Removal Procedure

    1. Preparation: Ensure the water supply is completely shut off and the room is well-lit. Gather necessary tools, including adjustable wrenches, screwdrivers, and a sturdy support like a piece of plywood or a similar material.
    2. Disconnect Fittings: Carefully disconnect any pipes or fittings connected to the radiator using appropriate wrenches. Be cautious not to over-tighten or damage the pipes.
    3. Support the Radiator: Place a strong support, such as a piece of plywood or a heavy-duty board, beneath the radiator. This will distribute the weight evenly and prevent damage to the wall or the radiator itself.
    4. Detaching Wall Brackets: If the radiator has wall brackets, carefully remove the brackets using appropriate tools. Ensure the brackets are securely fastened to the support and that the radiator is held firmly.
    5. Lifting the Radiator: Carefully lift the radiator using the support and ensure that it doesn’t tilt or shift during the removal process. Two people are recommended for lifting larger or heavier radiators.
    6. Inspect for Damage: Before moving the radiator, inspect for any signs of damage to the radiator or the wall. This helps prevent further issues later.
    7. Removal from the Room: Carefully carry the radiator out of the room. If possible, roll the radiator on a suitable surface to avoid causing unnecessary stress on the unit.

    Importance of Proper Support and Handling

    Proper support and handling during radiator removal are crucial to avoid damaging the radiator, wall, or surrounding fixtures. Improper lifting can lead to cracking the radiator, damaging the wall studs, or even causing injury. Using adequate support prevents the radiator from tilting or shifting during removal. A sturdy support evenly distributes the weight, preventing pressure points and ensuring the safety of the unit and the surrounding environment.

    Troubleshooting

    Taking a radiator off the wall can sometimes reveal unexpected challenges. This section details common problems encountered during the process, along with practical solutions. Understanding these potential issues and their fixes will help ensure a smooth and safe removal process, minimizing complications.The process of radiator removal, while generally straightforward, can sometimes encounter unforeseen obstacles. Careful attention to potential problems, combined with the correct tools and procedures, will greatly improve the likelihood of a successful and efficient job.

    Common Radiator Removal Problems

    This section Artikels potential issues encountered during radiator removal, providing context for each. Understanding these problems is crucial for efficient troubleshooting and resolution.Common problems during radiator removal include damaged pipes, loose connections, and unexpected obstructions. These problems often arise from the age or condition of the plumbing system, the type of radiator being removed, or the specific installation method used.

    Recognizing these issues early can help prevent more extensive problems during the process.

    Damaged Pipes or Connections

    Sometimes, the pipes connected to the radiator might be damaged or corroded. This damage can manifest as leaks, cracks, or weakened connections. Identifying and addressing these issues early in the process is essential to avoid further complications.Dealing with damaged pipes or connections requires careful assessment. First, isolate the affected area by turning off the water supply to the radiator.

    Then, inspect the damage. If the damage is minor, consider using pipe sealant or epoxy to repair the leak. For more extensive damage, it’s crucial to consult a qualified plumber for professional repair or replacement. Improper repair could lead to water damage or safety hazards.

    Unexpected Obstructions

    During the removal process, unexpected obstructions like electrical wiring, pipes, or hidden support structures might be encountered. These obstructions can complicate the removal process and lead to delays or damage if not addressed proactively.Thorough pre-removal inspection is vital to identify any potential obstructions. A thorough visual inspection of the area around the radiator, including the wall behind it, is highly recommended.

    Taking a radiator off the wall can be a surprisingly involved project, requiring careful planning and execution. It’s a bit like diving into a whole other world, almost a different kind of DIY challenge. You need to consider the plumbing and electrical connections, and the aesthetic impact of removing the radiator, which can make you feel like you’re part of a creative symphony.

    For inspiration, check out this awesome playlist of 5 10 15 20 kurt vile 5 10 15 20 kurt vile to really get you pumped for that radiator-removal project, and hopefully you’ll find some inspiration there. Then, you can get back to your DIY radiator makeover!

    If obstructions are found, careful planning is necessary to determine the best approach for navigating them without causing further damage. Sometimes, minor adjustments to the removal procedure might be required to accommodate these obstructions. This could involve using different tools or techniques to carefully remove or reroute the obstructions.

    Taking a radiator off the wall might seem like a drastic move, but sometimes it’s the only way to create the space you need. For instance, if you’re trying to make room for a new shower, especially if you have a baby and need to adapt your bathroom for easier access and safety, you might consider the practicalities of Shower with a Baby.

    It’s all about maximizing your space and making things work for your lifestyle. Ultimately, a little rearranging can completely change the flow and usability of a room, making your home feel more functional and comfortable, even with a radiator out of the way.

    Table of Common Problems, Causes, and Solutions

    This table provides a concise overview of common radiator removal problems, their potential causes, and recommended solutions.

    Problem Cause Solution
    Leaks or drips from pipes Damaged or corroded pipes, loose connections Turn off water supply, assess damage, use pipe sealant or epoxy for minor damage, consult a plumber for major repairs.
    Unexpected obstructions Hidden electrical wiring, pipes, or support structures Thorough pre-removal inspection, careful planning to reroute or remove obstructions, potentially involving adjustments to the removal procedure.
    Difficulty detaching connections Tight connections, rust, or corrosion Use appropriate tools (e.g., adjustable wrenches, pliers), apply penetrating oil to loosen connections, avoid forceful removal to prevent damage.
    Radiator won’t budge Embedded or faulty supports, insufficient tools Check for embedded supports, use appropriate tools for lifting, if necessary, consider professional help for stubborn radiators.

    Reinstallation Procedures

    Take a Radiator Off the Wall

    Getting your radiator back on the wall correctly is crucial for both efficient heating and safety. Proper reinstallation ensures the radiator functions optimally and prevents potential leaks or structural damage. Following these steps will guide you through the process, enabling you to complete the project successfully.

    Preparing the Wall for Reinstallation

    Before mounting the radiator, meticulous preparation of the wall is paramount. This involves ensuring the mounting points are clean and stable. Check for any damage or loose plaster, and repair any imperfections to prevent the radiator from shifting or causing future problems. Clean the area around the mounting holes thoroughly to remove any debris or residue that could interfere with the adhesive or screws.

    Reconnecting the Water Supply Lines

    Correctly reconnecting the water supply lines is essential for ensuring the radiator’s proper operation and preventing water leaks. Before connecting the lines, ensure that the water supply to the radiator is shut off. Carefully align the lines with their respective connections on the radiator. Apply Teflon tape to the threads of the connections to create a watertight seal.

    Tighten the connections firmly but avoid over-tightening, which could damage the fittings.

    Securing the Radiator to the Wall

    The radiator’s secure attachment to the wall is critical for both its stability and safety. Use the appropriate mounting hardware, ensuring that the screws are long enough to penetrate the wall studs. Pre-drill holes to prevent the wall from cracking. Use wall anchors if necessary for added support. Double-check that the radiator is level and plumb before tightening the screws completely.

    Radiator Reinstallation Steps

    1. Ensure the water supply to the radiator is completely shut off.
    2. Thoroughly clean the wall mounting points and surrounding areas, removing any debris or residue.
    3. If necessary, repair any damaged plaster or loose areas around the mounting points.
    4. Align the radiator with the mounting points, ensuring it’s level and plumb.
    5. Carefully reconnect the water supply lines, applying Teflon tape to the threads and tightening firmly but not excessively.
    6. Secure the radiator to the wall using appropriate mounting hardware and wall anchors where needed. Pre-drill holes to avoid cracking the wall.
    7. Carefully tighten all screws, ensuring the radiator is securely attached and level.
    8. Turn the water supply back on slowly and monitor for any leaks.

    Additional Considerations

    Taking a radiator off the wall is a task that demands careful planning and execution. Beyond the technical steps of disassembly and reinstallation, there are crucial aspects to consider regarding the wall structure, local regulations, and proper disposal. Understanding these factors ensures the job is completed safely and responsibly.Careful consideration must be given to the structural integrity of the wall to avoid causing damage.

    Knowing the specific type of wall construction and the placement of crucial support elements will help in avoiding potential issues. Following these precautions minimizes the risk of compromising the wall’s stability or compromising safety.

    Potential Wall Structure Issues

    Wall structures vary significantly, from simple plasterboard to complex brick or concrete. Understanding the construction is crucial to avoid causing damage during removal. Incorrect handling could lead to cracks, loose plaster, or even structural instability. Before starting any work, inspecting the wall and understanding its construction is essential.

    • Plasterboard walls might require careful handling of the surrounding area to avoid damage to the plaster or drywall. Any damage to the drywall needs to be repaired appropriately. If there is significant damage, professional help should be considered to prevent further issues.
    • Brick or stone walls might require specialized tools and techniques to avoid damaging the mortar or bricks themselves. Care should be taken to avoid unnecessary impact or pressure on the wall structure during removal and reinstallation.
    • Concrete walls typically present fewer issues during removal, but careful consideration of the anchoring points for the radiator is necessary. Incorrect removal techniques might lead to damage to the concrete. Specialized tools may be required.

    Local Regulations and Permits

    Local building codes and regulations may dictate specific requirements for radiator removal, especially in older buildings or historical areas. Before undertaking any work, checking local ordinances is essential. Contacting the relevant authorities can provide crucial information on permits, safety measures, or specific disposal procedures.

    • Some areas might require a permit for work involving the wall structure. Obtaining the necessary permit is crucial to avoid legal issues. It is always recommended to verify this with local authorities.
    • Regulations might exist for the disposal of old materials, such as lead paint, asbestos, or other potentially hazardous substances. Understanding and following these regulations is crucial for the safety of workers and the environment.

    Proper Disposal of Old Parts

    Proper disposal of old parts is essential to avoid environmental contamination and potential health hazards. Incorrect disposal can lead to contamination of soil or water sources. Following local regulations is crucial to ensure the safe and responsible disposal of the old radiator and related materials.

    • Check local regulations for the appropriate disposal methods for old radiators. Different materials within the radiator might have specific disposal requirements. Contacting the relevant waste management services can provide valuable information.
    • Ensure that any potentially hazardous materials, such as lead or asbestos, are handled and disposed of according to local regulations. Professional disposal services may be necessary for materials like these.

    Recycling or Disposal Procedures

    Recycling or disposal procedures for removed radiators vary depending on the type of radiator and local regulations. Following the correct procedures is essential to avoid harming the environment. Consult with local waste management services to determine the most appropriate disposal method.

    • Many municipalities offer recycling programs for metals. Radiators often contain significant metal components, which can be recycled. Check with your local recycling center to see if radiators are accepted.
    • Some types of radiators may contain hazardous materials, like lead paint. In these cases, specialized disposal methods are necessary to prevent environmental contamination. Local regulations should be followed, and professional waste removal services might be required.

    Illustrative Examples

    Radiator removal can vary significantly depending on the type of wall and the radiator itself. Understanding these differences is crucial for a safe and efficient job. This section provides a practical example to illustrate the process for a cast iron radiator in a plaster wall.

    Cast Iron Radiator Removal from a Plaster Wall

    This scenario details the specific steps for removing a cast iron radiator from a plaster wall. It emphasizes the importance of proper preparation and safety measures throughout the entire process.

    Tools and Materials Needed

    To safely and effectively remove a cast iron radiator from a plaster wall, you’ll need the following:

    • Screwdrivers (Phillips and flathead): Essential for disassembling the radiator’s connections and securing parts.
    • Adjustable wrench: Needed for loosening nuts and bolts on the radiator’s connections.
    • Pliers: Useful for gripping and manipulating small parts during the disassembly.
    • Hammer and chisel: Necessary for carefully removing plaster or any obstructions encountered around the radiator.
    • Safety glasses: Protect your eyes from flying debris.
    • Gloves: Protect your hands from sharp edges and potential hazards.
    • Dust mask: Prevent inhalation of dust and debris.
    • Bucket and rags: To collect water and debris from the radiator.
    • Level: To ensure the radiator is properly aligned for installation.
    • Measuring tape: To ensure accurate measurements for reinstallation.
    • Utility knife: To carefully cut away any stubborn plaster or drywall.
    • Possibly, a small amount of plaster patching compound, depending on the condition of the wall and whether you are planning to repair any damage to it after the removal.

    Disassembly Procedures

    This section Artikels the steps involved in disassembling a cast iron radiator in a plaster wall, ensuring you’re prepared for the task ahead.

    1. Turn off the water supply: This is paramount to prevent water damage and personal injury. Shut off the valves supplying water to the radiator, ensuring there’s no residual pressure.
    2. Assess the wall: Carefully inspect the wall around the radiator for any loose or fragile plaster. Note any unusual conditions or potential hazards.
    3. Remove any coverings: If there are any decorative covers or caps, carefully remove them to access the radiator’s connections.
    4. Disconnect the pipes: Loosen and remove the nuts and bolts connecting the radiator to the pipes. Use the appropriate tools and proceed with caution.
    5. Remove the radiator: Once the pipes are disconnected, carefully lift the radiator and remove it from its location. Be mindful of the weight and ensure there’s enough support to avoid dropping it.

    Detailed Removal Process for a Cast Iron Radiator

    This step-by-step procedure ensures a safe and effective removal of a cast iron radiator in a plaster wall.

    1. Safety First: Wear safety glasses, gloves, and a dust mask. Ensure the water supply is turned off and the area is well-lit.
    2. Locate the pipes: Identify the pipes connected to the radiator and carefully inspect their condition.
    3. Disconnect the pipes: Use an adjustable wrench to loosen and remove the nuts and bolts connecting the pipes to the radiator. Place a bucket underneath the radiator to catch any drips or residual water.
    4. Remove the radiator: Carefully lift the radiator and remove it from the wall, using appropriate support if needed. If the plaster around the radiator is loose, use a utility knife to carefully cut away any sections that might obstruct removal. A hammer and chisel might be necessary to gently remove obstructions.
    5. Inspect the wall: Examine the wall for any damage caused during the removal process. Document any issues for later repair.

    Outcome Summary

    Successfully removing a radiator involves meticulous planning, precise execution, and a deep understanding of the task at hand. This guide provides a comprehensive resource for safely and effectively taking a radiator off the wall, covering everything from essential safety precautions to detailed reinstallation steps. Remember, proper planning and execution are key to a smooth and safe outcome. Armed with this knowledge, you can confidently tackle this project, knowing you’ve got a solid foundation of information to draw upon.

  • Fill in Gaps in Wooden Floors A Comprehensive Guide

    Fill in Gaps in Wooden Floors A Comprehensive Guide

    Fill in Gaps in Wooden Floors: This guide dives deep into the world of repairing those pesky gaps in your wooden floors. From hairline cracks to wider gaps caused by settling or moisture damage, we’ll explore the causes, diagnosis, and various repair methods to get your floors looking and feeling their best again. We’ll also cover prevention strategies to keep your floors in tip-top shape for years to come.

    This comprehensive guide will equip you with the knowledge and tools to effectively identify, assess, and repair gaps in your wooden floors. We’ll cover everything from visual inspections and moisture testing to various repair methods and materials, ensuring you’re well-prepared for any situation.

    Identifying the Problem: Fill In Gaps In Wooden Floors

    Wooden floors, with their beauty and warmth, can subtly betray hidden issues. These issues, often manifested as gaps and inconsistencies, can stem from various factors, from improper installation to environmental conditions. Understanding the nature of these problems is crucial for effective and lasting solutions.Gaps in wooden floors, whether subtle or pronounced, often signal underlying problems that, if left unattended, can lead to significant damage and safety concerns.

    Proper diagnosis and understanding of the causes of these gaps are vital for effective repair and maintenance.

    Types of Gaps

    Gaps in wooden floors can vary significantly in appearance and severity. These differences directly correlate with the underlying causes and potential damage. Hairline cracks, for instance, might indicate minor stress, while wider gaps could signify more significant structural issues. Uneven settling, another common problem, results from varying degrees of support or pressure on the floorboards.

    Causes of Gaps

    Numerous factors can contribute to gaps in wooden floors. Moisture damage, a frequent culprit, can lead to swelling, shrinking, and warping of the wood, causing gaps to appear. Improper installation, such as inadequate subfloor preparation or incorrect nailing techniques, can also lead to premature deterioration. Structural issues, such as settling or shifting of the building itself, are also significant contributors.

    Visual and Structural Implications

    Gaps in wooden floors have both aesthetic and structural consequences. Visually, gaps detract from the overall appearance of the room, creating an uneven and potentially unprofessional look. Structurally, these gaps compromise the integrity of the floor. They can allow moisture to seep into the subfloor, leading to further damage and potentially impacting the structural stability of the entire house.

    Potential Dangers and Consequences

    Ignoring gaps in wooden floors can lead to several potential dangers. The gaps might allow for the accumulation of debris, insects, and moisture, creating a breeding ground for pests and rot. Uneven settling can lead to tripping hazards and cause the floor to buckle or sag, which is a safety concern, especially in high-traffic areas. Ignoring these problems can increase the likelihood of costly repairs down the line.

    Importance of Timely Repair

    Promptly addressing gaps in wooden floors is crucial for maintaining both the aesthetic appeal and structural integrity of the home. Early intervention prevents small issues from escalating into more significant and expensive problems. Addressing the underlying causes of the gaps, rather than just the visible symptoms, is key to long-term success. Prevention of further damage and the preservation of the floor’s value are the paramount goals.

    Fixing those pesky gaps in my wooden floor has been a real pain lately. It’s surprisingly tricky, and I’ve been scouring the internet for solutions. Speaking of quirky videos, have you seen the hilarious prank Jonny Greenwood pulled on Thom Yorke during a Radiohead show? watch jonny greenwood prank thom yorke during a radiohead show Anyway, back to the floor, I’m hoping some of the tips in those DIY repair guides will finally get these gaps sealed up properly.

    Assessment and Diagnosis

    Fill in Gaps in Wooden Floors

    Pinpointing the exact cause of gaps in a wooden floor requires a systematic approach, combining visual observation with more in-depth diagnostic techniques. A thorough assessment will help determine the extent of the damage, the underlying issues, and the best course of action for repair. A clear understanding of the problem is crucial for effective solutions and to avoid costly mistakes.

    Methods for Assessing Gap Extent and Severity

    Visual inspection, moisture testing, and structural analysis are essential tools for evaluating the condition of a wooden floor with gaps. Each method offers unique insights into the problem, helping to paint a comprehensive picture of the floor’s health.

    Method Description Advantages Disadvantages
    Visual Inspection A preliminary assessment involving careful observation of the gaps, their size, shape, and location on the floor. This includes noting any signs of damage to the surrounding wood, such as cracks, splinters, or discoloration. Quick, inexpensive, and readily available. Provides a first impression of the extent and nature of the problem. Subjective; may miss subtle signs of damage or underlying issues. Difficult to determine the precise cause of the gaps solely from visual inspection.
    Moisture Testing Utilizing specialized equipment to measure moisture content within the wooden floorboards. This helps determine if moisture intrusion is contributing to the gaps. Provides objective data on moisture levels, identifying potential causes like water leaks or excessive humidity. Requires specialized equipment and trained personnel; may not always pinpoint the exact source of the moisture. Can be time-consuming and potentially expensive.
    Structural Analysis Involves examining the subfloor, joists, and other structural components supporting the wooden floor. This could include checking for signs of rot, pest damage, or inadequate support. Provides insights into the structural integrity of the floor, revealing underlying issues like insufficient support or decay. Can be complex and expensive, often requiring the expertise of a structural engineer. May not always be necessary for minor gap issues.

    Factors to Consider When Diagnosing Gap Causes

    Diagnosing the cause of gaps requires careful consideration of various contributing factors. Understanding the potential origins will guide the repair process and prevent future issues.

    Factor Description Example
    Moisture Water intrusion or high humidity can cause wood to swell and shrink, leading to gaps. A leaky pipe or condensation from a bathroom.
    Subfloor Issues Problems with the subfloor, such as uneven surfaces, inadequate support, or rot, can create gaps in the overlying floor. Settlement of the house, insufficient subfloor support, or rot in the subfloor joists.
    Movement Expansion and contraction of the wood due to temperature changes or uneven settling can create gaps. Significant temperature fluctuations in a home, especially in areas with significant temperature swings.
    Pest Infestation Termites, carpenter ants, or other wood-destroying insects can weaken the wood and cause gaps. Presence of wood-destroying insects or signs of their activity, such as frass or tunnels in the wood.

    Tools and Equipment for a Thorough Assessment

    A thorough assessment necessitates the use of specific tools and equipment. A list of these tools will aid in a more efficient and accurate evaluation.

    • Moisture meter: Essential for measuring moisture content in the wood.
    • Measuring tape and level: Accurate measurements are crucial for determining gap sizes and ensuring flatness.
    • Hammer and screwdriver: Needed for checking the condition of the subfloor and floorboards.
    • Magnifying glass: To inspect for small signs of damage or insect activity.
    • Camera: To document the extent and location of the gaps and damage.
    • Safety glasses and gloves: Essential for personal protection during the assessment.

    Repair Methods and Materials

    Fixing gaps in wooden floors can be a tricky but rewarding task. Understanding the various repair methods and the suitable materials is crucial for achieving a lasting and aesthetically pleasing result. Careful consideration of the gap’s size, location, and the type of wood will dictate the best approach. A well-executed repair will not only restore the floor’s integrity but also enhance its overall appearance.

    Repair Methods

    Different repair methods cater to various gap sizes and complexities. Patching is a common approach for smaller gaps, while sanding is necessary for larger ones or to achieve a smooth finish. Specialized fillers, chosen carefully based on the type of wood and gap, offer a solution for more substantial damage.

    Patching

    Patching involves filling the gap with a suitable material and then carefully blending it with the surrounding wood. This method is ideal for small gaps that don’t significantly impact the floor’s structural integrity. The material used must closely match the wood’s color and grain for a seamless result.

    Sanding, Fill in Gaps in Wooden Floors

    For larger gaps or areas where patching isn’t suitable, sanding is a necessary step. This process involves removing excess material to level the surface and prepare it for filling. It’s essential to use appropriate sanding tools and techniques to avoid damaging the surrounding wood. This method ensures a smooth transition between the repaired area and the rest of the floor.

    Fixing those pesky gaps in your wooden floors can be a real pain, but thankfully, there are simple solutions. I was recently inspired by the imaginative world of free guy stranger things ai dustin steve , and the way characters overcome challenges, which reminded me of the satisfying feeling of perfectly filled-in floor gaps. Ultimately, choosing the right filler and method is key to achieving a flawless finish for your floors.

    Specialized Fillers

    Wood fillers are specifically formulated to match the properties of wood, making them ideal for filling gaps. Different types of wood fillers are available, each with unique properties and applications.

    Wood Filler Types

    The selection of wood filler depends on the type of gap and the desired outcome. A good understanding of the various filler types is critical to selecting the right material.

    Filler Type Properties Application Pros Cons
    Epoxy Filler Strong, durable, and water-resistant Large gaps, high-moisture areas Excellent bonding, long-lasting Can be difficult to work with, may be more expensive
    Polyurethane Filler Versatile, relatively easy to work with Various gap sizes, good for most woods Good adhesion, dries quickly May not be as strong as epoxy, may not match all wood types perfectly
    Wood Putty Easy to apply, good color matching Smaller gaps, decorative repairs Affordable, relatively easy to work with May not be as durable as other options, may not be suitable for high-traffic areas

    Applying Wood Filler (Example: Polyurethane)

    This demonstrates the process for applying polyurethane filler, a versatile choice for most wood gaps.

    1. Prepare the gap by removing any loose debris or dust. Ensure the surrounding area is clean and dry.
    2. Mix the filler according to the manufacturer’s instructions. A consistent mixture is crucial for optimal results.
    3. Using a putty knife or similar tool, carefully fill the gap with the mixed filler, ensuring a smooth and even surface.
    4. Allow the filler to dry completely according to the manufacturer’s instructions. Patience is key to avoiding unevenness.
    5. Once dry, lightly sand the filler to match the surrounding wood’s surface. Careful sanding is important for a seamless finish.

    Preparation and Installation

    Getting those pesky gaps in your wooden floors filled requires careful preparation and precise installation. Proper surface preparation is crucial for achieving a strong, lasting repair that won’t just mask the problem but truly fix it. Skipping these steps can lead to the filler failing prematurely, leaving you with the same issue in the future. This section will guide you through each stage, from cleaning and priming to the actual filling and finishing, ensuring a professional-looking and durable result.

    Surface Preparation

    Thorough surface preparation is the foundation of a successful gap-filling project. Ignoring this step can compromise the longevity of the repair, leading to potential issues down the line. The goal is to ensure a clean, stable surface that provides optimal adhesion for the filler. This means removing any loose debris, dust, or old sealant that could prevent the filler from bonding effectively.

    • Cleaning the Affected Area: Remove all loose dirt, dust, and debris from the gap and surrounding area. Use a stiff brush or vacuum cleaner to thoroughly clean the area. Pay special attention to removing any loose wood particles or remnants of previous attempts to fill the gaps.
    • Repairing Damaged Wood: If the gap is significant or the surrounding wood is damaged, address the underlying issue. This might involve patching damaged wood, repairing cracks, or using wood filler to create a smooth surface.
    • Removing Existing Filler: Carefully remove any existing filler from the gap. This ensures a clean surface for the new filler to adhere to. Use a putty knife or similar tool to carefully scrape away old material without damaging the surrounding wood. Be mindful of not harming the wood beneath.
    • Cleaning and Drying: Thoroughly clean the gap and the surrounding area again. A damp cloth and then a dry cloth will remove any residual dust or dirt. Ensure the surface is completely dry before applying the filler. Allow the wood to completely dry before continuing to prevent issues.

    Filler Selection and Application

    Choosing the right filler is essential for a successful repair. The filler must be compatible with the type of wood and should match the existing floor’s color and texture.

    • Filler Selection: Select a wood filler that is specifically designed for hardwood floors. Consider the color and texture match. Look for fillers that offer high adhesion and durability. Test the filler on an inconspicuous area first to ensure it blends with the existing floor.
    • Applying the Filler: Use a putty knife or similar tool to apply the filler to the gap. Ensure the filler is packed firmly into the gap, but avoid overfilling. Work in small sections, allowing each section to dry before moving on to the next.
    • Smooth and Level: Once the filler is in place, use a putty knife or a sanding block to smooth and level the filler to the surrounding wood. This ensures a seamless transition between the filled gap and the existing floor. Work in small sections, and don’t try to fill the gap too quickly.

    Finishing Touches

    Once the filler is dry, the final steps involve sanding and sealing.

    • Sanding: Sand the filled area with progressively finer grits of sandpaper to smooth out any imperfections and blend the filler seamlessly with the surrounding wood. Sanding ensures a smooth and polished finish.
    • Sealing: Apply a wood sealant or finish to protect the filled gap and the surrounding area. This step is crucial to prevent moisture damage and extend the lifespan of the repair.

    Tools and Equipment

    A variety of tools and equipment are needed for this task.

    • Putty Knife: For applying and smoothing the filler.
    • Sandpaper: Different grits for smoothing the filler.
    • Sanding Block: For easier and more controlled sanding.
    • Vacuum Cleaner: For cleaning the area.
    • Dust Mask: For personal safety.
    • Safety Glasses: For eye protection.

    Safety Precautions

    Safety is paramount during any repair project.

    • Dust Mask: Always wear a dust mask to prevent inhaling wood dust.
    • Safety Glasses: Protect your eyes from flying debris.
    • Gloves: Wear gloves to protect your hands from filler and wood dust.
    • Proper Ventilation: Ensure proper ventilation in the area to minimize exposure to dust and fumes.

    Maintenance and Prevention

    Fill in Gaps in Wooden Floors

    Keeping your wooden floors in pristine condition involves more than just filling gaps. Proactive maintenance is crucial to prevent future issues and extend the lifespan of your beautiful investment. Regular care and attention to environmental factors can significantly reduce the risk of further damage and costly repairs.Proper maintenance isn’t just about aesthetics; it’s about preserving the structural integrity of your floor.

    Fixing those unsightly gaps in my wooden floorboards has been a real pain lately. It’s a bit like trying to patch up a rift with a sibling, and sometimes, that’s exactly what it feels like! Just like needing to apologize to your older sister (check out Apologize to Your Older Sister for some helpful advice), finding the right filler and technique is key.

    Hopefully, this careful process will leave my floor looking seamless and beautiful again.

    By understanding the common causes of gaps and implementing preventive measures, you can maintain a healthy and durable wooden floor for years to come.

    Importance of Regular Maintenance

    Regular maintenance is paramount for preventing future gaps. Routine inspections can identify minor issues before they escalate into major problems. Early intervention can save you significant time, effort, and money in the long run. Addressing minor issues promptly is often far less expensive than dealing with larger, more complex problems later. Regular maintenance helps maintain the floor’s structural integrity and prevents warping or cracking.

    Methods for Preventing Future Gaps

    Preventing future gaps hinges on addressing the root causes. Moisture control is paramount. Controlling humidity levels within your home can significantly reduce the risk of warping and expansion. Consider using a dehumidifier in areas with high humidity or areas prone to moisture accumulation. Adequate structural support is equally vital.

    Ensure the subfloor is stable and adequately supported. Regular checks for signs of sagging or uneven settling can prevent future issues.

    Extending the Lifespan of Repaired Floors

    Proper maintenance extends the lifespan of repaired wooden floors. Regular cleaning and sealing help protect the wood from environmental factors. This can also help protect the repaired area from further damage. Maintaining the proper humidity levels is essential to prevent the wood from expanding or contracting, which can lead to further gaps.

    Long-Term Maintenance Strategies

    Long-term maintenance involves a combination of strategies to maintain the integrity of your wooden floors. Routine cleaning and polishing will keep the wood in top condition. Periodic inspections for signs of wear or damage are crucial for identifying potential issues before they become serious problems. Professional cleaning and refinishing can also help extend the life of your floor and enhance its appearance.

    Regularly checking for moisture accumulation, structural support, and overall stability is essential for the longevity of your floors.

    Common Causes and Preventive Measures

    Understanding the causes of gaps and implementing preventive measures is key to long-term success.

    Cause Preventive Measures
    Moisture fluctuations (high humidity or excessive dryness) Maintain stable humidity levels using dehumidifiers or humidifiers as needed. Seal the floor properly to prevent moisture penetration.
    Uneven subfloor or inadequate support Ensure the subfloor is level and properly supported. Use shims or other methods to address unevenness. Regular inspection is vital to prevent settling.
    Poor installation (incorrect nailing, improper fitting) If possible, hire a professional installer to ensure proper techniques. Careful and thorough installation is key. Inspect the work for potential problems.
    Heavy furniture placed on specific areas Distribute furniture weight evenly across the floor. Use floor protectors under heavy furniture to prevent concentrated pressure.
    Insect infestation Regular inspections for signs of pests and immediate treatment are crucial. Professional pest control can be necessary in some cases.

    Case Studies and Examples

    Filling gaps in wooden floors can be a rewarding DIY project, but success hinges on careful planning and execution. Understanding real-world scenarios and successful repairs provides valuable insight into best practices. This section delves into case studies, highlighting the specific challenges and solutions encountered in various repair projects.

    Case Study: Repairing a Gap with Epoxy Filler

    This case study details the repair of a 12-inch gap in a hardwood floor using an epoxy-based filler. The gap, caused by a shifting subfloor, was initially filled with a wood filler, which failed due to the continued movement of the floor.The solution involved a two-part epoxy filler specifically designed for flooring applications. The epoxy was mixed according to the manufacturer’s instructions and carefully injected into the gap.

    Once the epoxy cured, the surface was carefully sanded and finished to match the surrounding floor. This approach proved highly effective in addressing the root cause of the problem, ensuring long-term stability and preventing future issues.

    Real-World Example: A Kitchen Floor Repair

    A homeowner noticed widening gaps in their kitchen floor. The gaps initially appeared small but worsened over time. The cause was identified as insufficient moisture barrier under the floorboards. The solution involved removing the damaged floorboards, installing a moisture barrier, and replacing the floorboards with new ones. Using pre-finished flooring significantly reduced the labor and time needed to complete the repair.

    Careful measurements and precise installation ensured a seamless transition between the new and existing flooring.

    Detailed Image Descriptions

    • Image 1: A close-up view of a gap in a hardwood floor. The gap is approximately 1/2 inch wide and 6 inches long. The surrounding wood is in good condition. The gap is clearly visible against the light-colored wood.
    • Image 2: Shows the gap after the area around the gap has been prepared. The surrounding wood is cleaned and the area around the gap is sanded smooth. The gap is still visible, but the surrounding area is ready for filling.
    • Image 3: A close-up of epoxy filler being injected into the gap. The filler is a light gray color. The filler is being injected with a specialized tool, ensuring proper filling of the gap without creating any visible bumps or lumps. The surface of the surrounding wood is visible, and the epoxy is visibly filling the gap.
    • Image 4: The filled gap after the epoxy has cured. The epoxy is now a smooth, uniform color, matching the surrounding floor. No visible imperfections or gaps are present. The surface is ready for sanding and finishing.
    • Image 5: The sanded and finished repair area. The epoxy-filled gap is perfectly blended with the surrounding hardwood floor. The finish is smooth and even, with no noticeable difference between the repaired and original flooring. A slight sheen is present, indicating a high-quality finish.

    Comparison of Repair Approaches

    Type of Damage Wood Filler Epoxy Filler Replacing Boards
    Small, recent gaps Effective and inexpensive Excellent for long-term stability Excessive labor and expense
    Significant gaps, or gaps with moisture issues Ineffective in the long run Effective for gaps with moisture issues and long-term stability Necessary for significant structural issues
    Pre-finished floors May not match finish May not match finish Often matches existing finish

    Outcome Summary

    In conclusion, repairing gaps in wooden floors is a multifaceted process requiring careful assessment, selection of appropriate materials, and precise execution. By understanding the causes, employing effective diagnosis techniques, and utilizing the right repair methods, you can restore your floors to their former glory. Remember, prevention is key! Regular maintenance and proactive measures will help you avoid costly repairs in the future.