Tag: hair care

  • Use Coconut Oil for Your Hair A Deep Dive

    Use Coconut Oil for Your Hair A Deep Dive

    Use Coconut Oil for Your Hair, a natural remedy for luscious locks. This comprehensive guide explores the diverse benefits of coconut oil for hair health, from moisturizing and strengthening to potential growth stimulation. We’ll delve into different coconut oil types, application methods, and even share DIY recipes for customized hair treatments. Ready to unlock the secrets to healthier, shinier hair?

    Coconut oil, a versatile ingredient with a rich history in various cultures, has found a renewed appreciation in modern hair care. Its unique fatty acid profile makes it a potent moisturizing agent, potentially improving hair texture and reducing damage. This post delves into the science behind coconut oil’s effectiveness, comparing it to other natural oils and exploring the nuances of various application methods.

    Discover how to leverage this natural treasure to achieve your hair goals.

    Introduction to Coconut Oil for Hair

    Coconut oil has become a popular natural remedy for hair care, often touted for its moisturizing and nourishing properties. Its use in hair treatments stems from its rich composition, which includes fatty acids, vitamins, and antioxidants. Many people swear by its ability to improve hair texture, reduce breakage, and promote overall health. This exploration delves into the science behind coconut oil’s effectiveness, examining its chemical makeup, historical applications, and the variations within coconut oil types.Coconut oil’s effectiveness on hair stems from its rich chemical composition.

    It’s primarily comprised of saturated fatty acids, particularly lauric acid, a medium-chain triglyceride (MCT). These fatty acids penetrate the hair shaft, providing moisture and strengthening the hair structure. Lauric acid, in particular, is known for its antimicrobial properties, which may help prevent dandruff and scalp irritation. Additionally, coconut oil contains vitamins and antioxidants, further contributing to overall hair health.

    Chemical Composition and Potential Benefits

    The primary component of coconut oil, lauric acid, is a medium-chain triglyceride (MCT) that is easily absorbed by the hair shaft. This absorption leads to improved moisture retention, potentially reducing dryness and promoting a healthier hair appearance. Its antimicrobial properties are believed to reduce scalp infections and related issues like dandruff. Further, the vitamins and antioxidants present in coconut oil may contribute to overall hair health by supporting hair follicle growth and reducing damage.

    Historical and Traditional Uses

    Coconut oil has a long history of use in various cultures for hair care. In traditional Asian and Polynesian practices, it was often incorporated into hair masks and treatments. These practices recognized coconut oil’s ability to condition and moisturize hair, leading to healthier and more manageable hair. These traditional methods, passed down through generations, highlight the enduring belief in coconut oil’s benefits for hair.

    Different Types of Coconut Oil

    Several types of coconut oil are available, each with slight variations in their properties. The differences arise primarily from processing methods, impacting the oil’s purity, color, and aroma. These differences can affect the oil’s efficacy, although generally, all types of coconut oil can benefit hair.

    Coconut oil is amazing for hair health, right? But, hey, sometimes even the best beauty tips can’t fix everything. Like, after watching the latest Atlanta recap, the reactions on social media about how some people are going broke trying to keep up with the drama, atlanta recap reaction go broke really hit home. Regardless, coconut oil is still a great natural hair treatment, perfect for moisturizing and preventing dryness.

    Comparison of Coconut Oil Types

    Coconut Oil Type Description Potential Benefits Potential Drawbacks
    Virgin Coconut Oil Cold-pressed, unrefined oil, retaining natural components. Rich in vitamins, antioxidants, and natural compounds; may have a more potent effect on hair health due to higher nutrient content. Potential for a stronger odor; may have a slightly higher price point.
    Refined Coconut Oil Processed to remove impurities and color; resulting in a clear, odorless oil. Generally milder on the scalp; less likely to cause allergic reactions. Potential loss of some vitamins and antioxidants compared to virgin oil; may have less impact on hair health overall.
    Fractionated Coconut Oil Processed to separate different fatty acid components. May be more suitable for specific hair needs, such as moisturizing or styling; often used in hair products. May not offer the same comprehensive benefits as virgin or refined oils; potentially less effective in overall hair health.

    Note: The effectiveness of any coconut oil type will depend on individual hair type and specific needs. Results may vary.

    Benefits of Using Coconut Oil for Hair: Use Coconut Oil For Your Hair

    Coconut oil, a versatile natural ingredient, has gained popularity for its potential benefits in hair care. Its unique fatty acid profile and moisturizing properties have led to claims of improved hair health and appearance. Let’s delve into the purported benefits and examine the evidence behind them.

    Moisturizing and Conditioning Properties

    Coconut oil’s rich fatty acid composition, particularly lauric acid, makes it an effective moisturizer for hair. These fatty acids penetrate the hair shaft, replenishing lost moisture and sealing in existing moisture. This process can lead to improved manageability and a healthier, more hydrated look. The hydrophobic nature of coconut oil helps to create a protective barrier on the hair, preventing moisture loss and reducing dryness.

    Strengthening and Repairing Hair

    Coconut oil’s nourishing properties can potentially strengthen hair, promoting a healthier structure. The presence of vitamins and antioxidants may contribute to improved hair elasticity and resilience. This can lead to a reduction in hair breakage and split ends. By penetrating the hair shaft, coconut oil can potentially help repair damaged areas, restoring a stronger and healthier hair structure.

    Potential Effects on Hair Growth

    While anecdotal evidence suggests coconut oil can stimulate hair growth, rigorous scientific research in this area is limited. Some suggest that the improved moisture and nourishment provided by coconut oil can contribute to a healthier hair follicle environment, indirectly supporting growth. However, the effect of coconut oil on hair growth is not yet conclusively proven.

    Comparison to Other Natural Oils

    Coconut oil’s effectiveness in hair care is often compared to other natural oils like argan oil, jojoba oil, and olive oil. Each oil has a unique composition of fatty acids and potential benefits. Argan oil, rich in vitamin E, is known for its moisturizing and antioxidant properties. Jojoba oil, with its similar composition to sebum, may be beneficial for those with oily hair.

    Olive oil is also moisturizing but may not be as effective for strengthening hair as coconut oil. The best oil for an individual will depend on their hair type and specific needs.

    Evidence-Based Research

    Although numerous anecdotal accounts exist, scientific research on the effects of coconut oil on hair growth is not extensive. While there are studies on the potential benefits of coconut oil for skin health, more research is needed to confirm its efficacy in hair care. Limited research suggests that coconut oil’s moisturizing properties might improve hair health, but conclusive evidence on hair growth is lacking.

    Potential Benefits and Drawbacks

    Benefit Description Supporting Evidence (optional)
    Moisturizing Coconut oil’s fatty acids hydrate and condition hair, improving manageability and reducing dryness. Anecdotal evidence and general knowledge of fatty acid effects on skin/hair.
    Strengthening Coconut oil potentially strengthens hair structure, reducing breakage and split ends. Limited scientific evidence on hair strengthening, more research needed.
    Conditioning Coconut oil’s moisturizing properties can improve hair’s overall health and appearance. Limited scientific evidence, more research needed.
    Potential Hair Growth Anecdotal evidence suggests coconut oil can stimulate hair growth, but more research is required. Limited research; more research needed.
    Drawback (Potential) Some individuals may experience hair greasiness or buildup with excessive use. Anecdotal evidence and user reports.

    Methods of Applying Coconut Oil to Hair

    Coconut oil’s versatility extends beyond moisturizing; its application methods cater to various hair types and concerns. Understanding these methods is crucial for maximizing its benefits and achieving desired results. From pre-shampoo treatments to overnight masks, we’ll explore the best practices for incorporating coconut oil into your hair care routine.Applying coconut oil correctly is key to experiencing its moisturizing and nourishing properties.

    The method you choose depends heavily on your hair type and the specific issue you’re addressing. Whether your hair is dry, oily, or damaged, tailoring the application process is vital for optimal results.

    Pre-Shampoo Treatments

    Pre-shampoo treatments allow coconut oil to deeply penetrate the hair shaft before cleansing. This is particularly beneficial for dry, damaged, or brittle hair, as it helps to hydrate and strengthen the strands. A pre-shampoo treatment acts as a conditioning step, providing moisture and improving manageability.

    • Warm the oil: Gently warm a small amount of coconut oil in your hands to make it easier to apply and absorb. This also enhances the penetration process, allowing the oil to reach the hair shaft more effectively.
    • Even application: Distribute the oil evenly throughout your hair, ensuring all sections are coated, especially the ends, which are often the driest.
    • Cover and seal: Cover your hair with a shower cap or a warm towel to help trap heat and encourage absorption. This step is crucial for deeper penetration.
    • Time and Patience: Leave the oil in for at least 30 minutes, or preferably overnight, for maximum benefits. The longer it stays, the better the results.
    • Shampoo and Condition: Shampoo and condition your hair as usual after the treatment. The oil will have already prepped the hair for cleansing and conditioning.

    Overnight Treatments

    Overnight treatments are ideal for intensive hydration and deep conditioning. This method is particularly effective for dry, brittle, or damaged hair.

    • Oil Selection: Choose a high-quality virgin coconut oil for the best results. Ensure the oil is at room temperature, not too hot or too cold.
    • Application: Apply a generous amount of oil to your hair, starting from the ends and working your way up to the roots. Focus on areas that need the most hydration.
    • Protection: Protect your pillowcase with a silk or satin scarf or pillowcase to avoid oil transfer and friction against the pillow.
    • Morning Routine: Wash your hair as usual in the morning. This will remove excess oil and leave your hair moisturized and manageable.

    Deep Conditioning Masks

    Deep conditioning masks offer an intensive treatment for hair that needs intense hydration and repair. This is an excellent option for all hair types, particularly for those dealing with dryness, damage, or split ends.

    • Choose Your Ingredients: Mix coconut oil with other natural ingredients to create a custom mask. For instance, a mask with honey and eggs is known for its moisturizing properties. Some examples include avocado, yogurt, or honey.
    • Apply Carefully: Apply the mask evenly to your hair, concentrating on the areas that require the most moisture.
    • Cover and Relax: Cover your hair with a shower cap and let the mask sit for at least 15-30 minutes, or longer for more intense conditioning.
    • Rinse Thoroughly: Rinse the mask out completely with warm water, followed by a gentle shampoo and conditioner.

    Tailoring Application Methods

    The optimal method for applying coconut oil depends on your hair type and condition. For example, oily hair might benefit more from a pre-shampoo treatment to moisturize without adding excess oil. Dry or damaged hair might respond better to overnight treatments or deep conditioning masks for intensive hydration.

    Amounts of Coconut Oil

    The amount of coconut oil you need depends on your hair length and type. For short hair, a small amount is sufficient. For long hair, a larger quantity may be necessary.

    Table of Coconut Oil Application Methods

    | Method | Description | Amount | Suitable for | |—|—|—|—| | Pre-shampoo Treatment | Apply oil before shampooing | 1-2 tablespoons | Dry, damaged, or brittle hair | | Overnight Treatment | Apply oil before bed and wash in the morning | 2-4 tablespoons | Dry, damaged, or brittle hair | | Deep Conditioning Mask | Apply mask for 15-30 minutes | 2-4 tablespoons, depending on mask ingredients | All hair types, especially those needing intense hydration |

    Potential Drawbacks and Considerations

    While coconut oil offers numerous benefits for hair, it’s crucial to understand its potential drawbacks and limitations. Not everyone experiences the same results, and certain individuals might find that coconut oil isn’t the ideal choice for their hair type or condition. Careful consideration of these factors can help ensure a positive and effective hair care routine.

    Potential Side Effects

    Coconut oil, while generally safe, can sometimes cause side effects. One common concern is greasiness. Individuals with oily hair types may find that coconut oil exacerbates this issue, leading to a buildup of oil on the scalp and strands. This can result in a greasy or limp appearance, and may even contribute to product buildup over time.

    Using coconut oil for your hair is a great way to nourish and condition it. While I’m diving deep into the benefits of coconut oil for hair health, I also wanted to share that Crystal Castles just dropped a new track called “Fleece” – you HAVE to check it out! crystal castles share new song fleece listen.

    The rich moisturizing properties of coconut oil make it a fantastic choice for repairing damage and promoting healthy growth. It’s a simple, natural solution for beautiful hair.

    Another potential side effect is an allergic reaction. While rare, some people may develop a skin rash or irritation when using coconut oil. This could manifest as redness, itching, or swelling. If you experience any allergic reactions, discontinue use immediately and consult a dermatologist.

    Unsuitable Hair Types and Conditions

    Certain hair types and conditions may not respond favorably to coconut oil treatments. For instance, individuals with extremely fine or oily hair may find that coconut oil weighs down their strands, making them appear limp and greasy. Similarly, those with scalp conditions like dandruff or seborrheic dermatitis might experience worsening symptoms if coconut oil is applied directly to the scalp.

    Careful consideration of your hair type and any existing scalp issues is important before incorporating coconut oil into your routine.

    Avoiding Common Mistakes

    To maximize the benefits of coconut oil and minimize potential drawbacks, avoid these common mistakes:

    • Applying too much coconut oil:
    • Using an excessive amount of coconut oil can lead to greasiness and buildup. Start with a small amount and adjust as needed. A pea-sized amount is often sufficient for most applications.

      Using coconut oil for hair health is a fantastic idea, and I’ve been loving the results. While I’m digging into the benefits of this oil, I also can’t help but be excited about Toto’s recent cover of Weezer’s “Hash Pipe.” You can check out the awesome new version here: toto release cover of weezers hash pipe listen.

      The smooth, rich texture of the coconut oil makes it perfect for nourishing my hair, and I’m hoping it continues to work wonders. Overall, it’s been a great experience.

    • Applying coconut oil to the scalp only:
    • While scalp application can be beneficial, applying coconut oil to the hair shaft also plays a crucial role. A comprehensive application to both the scalp and hair shaft can help moisturize and nourish the entire hair shaft, leading to improved overall hair health.

    • Forgetting to wash out the oil:
    • For some individuals, overnight applications may be beneficial. However, for those with oily hair, it’s essential to wash out the oil thoroughly after a period of use to prevent excessive buildup.

    Addressing Potential Issues

    If you encounter greasiness or allergic reactions, these strategies can help mitigate the problem:

    • Reducing the amount of coconut oil used:
    • If greasiness is a concern, start with a smaller quantity of coconut oil and gradually increase as needed. Adjusting the application frequency can also be helpful.

    • Washing hair more frequently:
    • If greasiness persists, consider increasing the frequency of your hair washings to remove the excess oil.

    • Using a clarifying shampoo:
    • A clarifying shampoo can help remove product buildup, including excess coconut oil, from the hair and scalp.

    • Patch testing before full application:
    • For individuals concerned about potential allergic reactions, perform a patch test on a small area of skin before applying coconut oil to the entire scalp or hair. This allows for an assessment of individual tolerance levels.

    Potential Risks and Precautions, Use Coconut Oil for Your Hair

    | Potential Drawback | Description | Mitigation Strategies | |—|—|—| | Greasiness | Excessive oil buildup on the scalp and hair, leading to a greasy appearance and potentially exacerbating existing oily hair issues. | Use a smaller amount of coconut oil; adjust application frequency; consider using a clarifying shampoo. | | Allergic Reactions | Skin irritation, redness, itching, or swelling at the application site. | Perform a patch test on a small area of skin before full application; discontinue use immediately if any reaction occurs; consult a dermatologist. | | Worsening Scalp Conditions | Potential for exacerbating existing scalp conditions like dandruff or seborrheic dermatitis. | Avoid applying coconut oil directly to the scalp if you have existing scalp issues; use coconut oil sparingly and monitor for any worsening symptoms. | | Hair Type Incompatibility | Coconut oil may not be suitable for individuals with extremely fine or oily hair types. | Assess your hair type and condition; consider alternative moisturizing treatments if coconut oil doesn’t provide the desired results. |

    Recipes and DIY Hair Treatments

    Use Coconut Oil for Your Hair

    Coconut oil’s versatility extends beyond simple application. Transforming it into homemade hair masks and treatments allows you to tailor the ingredients to your specific hair needs, creating a personalized approach to hair care. These DIY recipes offer a cost-effective and often more potent solution than store-bought products.By understanding the different components of these recipes and the effects of various ingredients, you can create a regimen that addresses your unique hair concerns, whether it’s dryness, damage, or scalp issues.

    These personalized treatments can lead to noticeable improvements in hair health and appearance.

    Coconut Oil Hair Mask

    This mask deeply moisturizes and nourishes dry, damaged hair, leaving it feeling softer and more manageable.

    Recipe 1: Coconut Oil Hair MaskIngredients:

    • 1/4 cup coconut oil
    • 1 tablespoon honey
    • 1 egg yolk
    • 1 teaspoon olive oil (optional, for extra moisture)

    Instructions:

    1. In a small bowl, combine the coconut oil, honey, egg yolk, and olive oil (if using). Mix well until smooth.
    2. Apply the mixture evenly to your hair, focusing on the ends and mid-lengths. Avoid applying directly to the scalp if you have oily hair or scalp conditions.
    3. Cover your hair with a shower cap or plastic wrap and a towel to trap heat. Leave on for at least 30 minutes, or up to an hour.
    4. Rinse thoroughly with lukewarm water and shampoo as usual. Repeat once a week for best results.

    Coconut Oil and Yogurt Hair Treatment

    This treatment is excellent for those seeking to add shine and volume to their hair.

    Recipe 2: Coconut Oil and Yogurt Hair TreatmentIngredients:

    • 1/4 cup coconut oil
    • 1/4 cup plain yogurt (Greek yogurt is recommended)
    • 1 teaspoon lemon juice (optional, for shine)

    Instructions:

    1. Combine the coconut oil, yogurt, and lemon juice (if using) in a small bowl.
    2. Apply the mixture to your hair, ensuring even distribution from roots to tips.
    3. Cover your hair as described in the previous recipe and leave on for 45 minutes to an hour.
    4. Rinse thoroughly with lukewarm water and shampoo.
    5. For best results, repeat this treatment once or twice a week.

    Storing Homemade Treatments

    Proper storage is crucial for maintaining the quality and effectiveness of your homemade treatments.

    • Store leftover mixtures in an airtight container in the refrigerator. This will help to maintain the integrity of the ingredients and prevent spoilage. The cold will also help thicken the mixtures.
    • For mixtures containing eggs, be cautious about how long you can store them, as the egg proteins can start to break down more rapidly.
    • Always check the date of your ingredients and make sure that the ingredients are fresh.

    Comparison with Other Hair Care Products

    Coconut oil’s versatility as a hair treatment often leads to comparisons with other popular hair care products like conditioners and shampoos. While coconut oil excels in its ability to deeply moisturize and nourish, understanding its strengths and weaknesses relative to other options is crucial for optimizing hair health. This comparison highlights the unique benefits and potential drawbacks of each product, allowing you to tailor your hair care routine effectively.Coconut oil’s unique composition makes it a potent moisturizing agent, often exceeding the benefits of traditional conditioners.

    However, its thick consistency and potential for buildup require careful application and consideration. Shampoos, on the other hand, are designed to cleanse and remove product buildup, but can sometimes strip away natural oils, necessitating a balanced approach to hair care.

    Coconut Oil vs. Conditioners

    Coconut oil’s moisturizing properties often surpass those of conventional conditioners. It penetrates the hair shaft, providing deep hydration and reducing dryness. Conditioners, while important for detangling and adding shine, typically offer less intense moisture than coconut oil. This difference is particularly noticeable for individuals with severely dry or damaged hair.

    • Coconut oil’s superior moisturizing capacity is a key advantage. It can deeply hydrate and restore moisture to even the driest hair, whereas conditioners often rely on humectants to attract moisture.
    • Conditioners are typically formulated for easier detangling and smoothing. Coconut oil, while effective, may require additional detangling methods if your hair is excessively knotted.
    • Many conditioners contain silicones, which can build up over time, potentially leading to a less healthy scalp. Coconut oil, when used correctly, doesn’t contribute to this issue.

    Coconut Oil vs. Shampoos

    Shampoos are essential for cleansing the scalp and hair, removing dirt, oil, and product buildup. However, some shampoos can strip away the hair’s natural oils, leading to dryness and damage. Coconut oil, while not a replacement for shampoo, can provide added moisture and nourishment that shampoos might lack.

    • Coconut oil can be used as a pre-shampoo treatment to enhance moisture retention. It can also help balance scalp oils, reducing the need for overly harsh shampoos.
    • Shampoos formulated with harsh sulfates or detergents can be drying and damaging to the hair and scalp. Coconut oil, naturally, is gentler.
    • Coconut oil is not a replacement for shampoo. Shampoos are necessary for removing impurities and buildup. Using coconut oil as a pre-shampoo treatment or in conjunction with a sulfate-free shampoo can optimize moisture retention.

    Comparison Table

    Product Benefit 1 Benefit 2 Benefit 3
    Coconut Oil Deep Moisture Scalp Nourishment Natural Hydration
    Conditioner Detangling Shine Enhancement Temporary Moisture
    Shampoo Cleanse Remove Buildup Scalp Hygiene

    Maintenance and Follow-up

    Use Coconut Oil for Your Hair

    Maintaining the benefits of coconut oil treatments extends beyond the initial application. Consistent use and a well-rounded hair care routine are key to achieving and sustaining healthy, luscious locks. This section delves into strategies for incorporating coconut oil into your long-term hair care regimen and addressing any potential issues that may arise.Coconut oil’s nourishing properties are most effective when integrated into a holistic approach to hair health.

    Understanding how to maintain the results and avoid common pitfalls is crucial for realizing its full potential. This section will guide you through practical methods and recommendations for long-term success.

    Long-Term Hair Care Routine Recommendations

    A consistent routine incorporating coconut oil can dramatically improve hair health. The key is to find a routine that works for your hair type and lifestyle.

    • Regular Application: Fortifying and moisturizing benefits are amplified by regular application. Aim for at least once a week, or more frequently if your hair is dry or damaged. Adjust the frequency based on your hair’s needs and the results you’re seeing.
    • Scalp Health: Coconut oil’s nourishing qualities extend to the scalp. Incorporate gentle scalp massages during application to promote blood circulation and stimulate hair follicles. This can be done once a week or even a few times a week, as needed.
    • Hydration and Nutrition: Healthy hair begins from within. A balanced diet rich in vitamins, minerals, and protein is essential. Staying hydrated also supports hair health. Drink plenty of water daily.

    Combining Coconut Oil with Other Products

    Combining coconut oil with other hair care products can enhance its effects. Careful selection and application are crucial for optimal results.

    • Conditioners: Use coconut oil as a pre-shampoo treatment, leaving it on for a certain time (15-30 minutes). Then, apply your regular conditioner as usual. This allows the conditioner to penetrate more deeply and moisturize effectively. A good conditioner will enhance the moisturizing benefits of coconut oil.
    • Hair Masks: Coconut oil is a fantastic base for DIY hair masks. Combine it with other natural ingredients like honey, avocado, or eggs for a deeper conditioning treatment. This provides additional nutrients and moisture to the hair.
    • Heat Styling Protection: When using heat styling tools, apply a light layer of coconut oil before styling. This creates a protective barrier and reduces heat damage. Apply it after shampooing, before styling, for best results.

    Addressing Potential Concerns and Issues

    While generally safe, some individuals may experience minor issues after using coconut oil.

    • Oily Hair: If your hair becomes excessively oily after using coconut oil, reduce the frequency of application or use a smaller amount. This can happen when the oil isn’t absorbed by the hair well, which is often the case when applying large amounts to fine hair types.
    • Scalp Irritation: If you experience scalp irritation, discontinue use and consult a dermatologist. This might be a reaction to the oil or an underlying scalp condition. It’s best to avoid the product altogether.
    • Hair Loss: If you notice hair loss after using coconut oil, consult a doctor or dermatologist to rule out any underlying medical conditions. Hair loss is not a typical side effect of coconut oil, so a visit to a professional is warranted.

    Maintenance Strategies

    Maintaining healthy hair involves a proactive approach.

    • Regular Cleansing: Regular shampooing is important. However, use a sulfate-free shampoo to minimize stripping the natural oils from the hair and scalp. This can help prevent the buildup of product residue.
    • Avoiding Over-Processing: Over-processing, such as excessive heat styling or coloring, can damage hair. Limit these practices for healthy hair. Using coconut oil can protect the hair from damage, but it won’t eliminate the negative effects of over-processing.
    • Monitoring Results: Pay close attention to how your hair responds to coconut oil treatments. Adjust your routine based on your individual needs and results. If your hair feels better, keep doing it. If it doesn’t, consider trying a different approach.

    Closure

    In conclusion, using coconut oil for your hair care routine can be a valuable addition to your existing regimen. This guide has provided a comprehensive overview of its potential benefits, methods of application, and important considerations. Remember to consult with a dermatologist if you have specific concerns or conditions, and always conduct a patch test before applying any new product to your scalp.

    Embrace the natural power of coconut oil for healthier, happier hair!
  • Blow Dry Short Hair Your Ultimate Guide

    Blow Dry Short Hair Your Ultimate Guide

    Blow Dry Short Hair is your comprehensive guide to mastering the art of styling short hair. From pixie cuts to bobs, we’ll delve into diverse techniques, essential products, and the right tools to achieve any look you desire. Whether you’re aiming for sleek perfection, voluminous flair, or textured chic, we’ve got you covered.

    This guide will walk you through techniques tailored to different hair types (straight, wavy, curly), helping you choose the perfect products and tools for your specific needs. We’ll also explore troubleshooting common blow-drying mistakes and provide maintenance tips to keep your short hair looking its best.

    Styling Techniques for Short Hair

    Short hair, while often perceived as low-maintenance, offers a surprising range of styling possibilities. The key to achieving various looks lies in understanding the specific techniques tailored to different haircuts and hair types. From sleek and sophisticated to voluminous and playful, short hair can be styled to express any desired aesthetic. The right techniques, tools, and products are essential to unlocking the full potential of your short cut.Different short haircuts require unique styling approaches.

    A pixie cut, for example, might benefit from a texturizing spray to create a tousled effect, while a blunt bob might demand a sleek, polished finish. Understanding these nuances allows you to achieve the desired look and maintain the health of your hair.

    Blow-Drying Techniques for Pixie Cuts

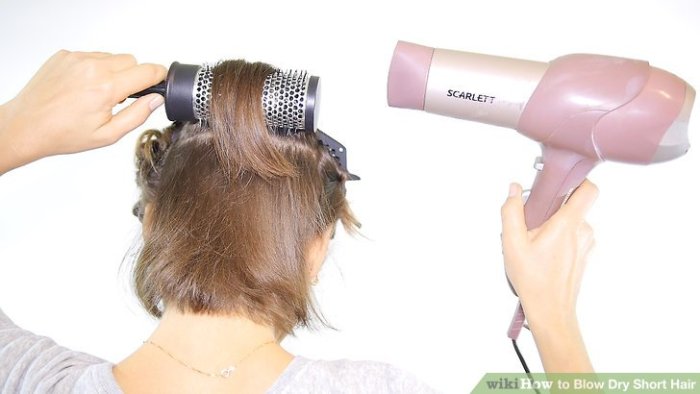
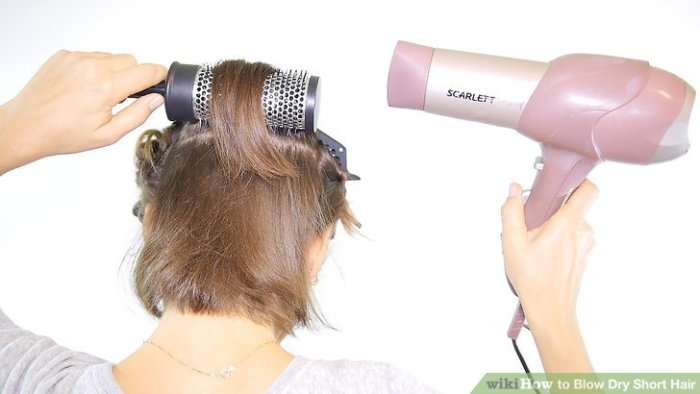
    Pixie cuts are incredibly versatile, and the styling options are just as numerous. To achieve a sleek, polished look, start by applying a heat protectant spray. Next, use a round brush with medium heat settings to smooth and direct the hair outwards. This technique helps create a defined shape and a polished appearance. Alternatively, for a textured, edgy style, apply a volumizing mousse, then use a diffuser with low heat to dry the hair.

    The diffuser gently lifts the roots, creating volume and texture, while preventing the hair from becoming overly crispy. Using a small round brush on sections of the hair will aid in shaping.

    Blow-drying short hair can be tricky, requiring precise techniques to avoid frizz and achieve that perfect style. Think about the meticulous attention to detail needed in something like call of duty wwii audio production , where crafting realistic soundscapes is crucial. Ultimately, mastering the blow-dry for short hair is about precision and a bit of artistry, just like any other creative endeavor.

    Blow-Drying Techniques for Bobs

    Bobs, in their many variations, demand precision and attention to detail. For a classic, sleek bob, start by applying a smoothing serum or cream. Use a large round brush with high heat settings, focusing on smoothing the hair down from the roots to the ends. This creates a straight, glossy finish. To create more volume, use a volumizing spray or mousse on the roots and blow dry with a large round brush and medium heat, lifting the roots for a more voluminous look.

    A diffuser can be used to add movement and texture for a slightly more relaxed look.

    Blow-Drying Techniques for Blunt Cuts

    Blunt cuts, with their straight, defined lines, demand a precision approach. A smoothing cream or serum is crucial for achieving a polished look. Use a large round brush with high heat settings, focusing on the length and ends to keep the hair straight. For a softer look, apply a texturizing spray or pomade to the ends and dry with a diffuser for a softer texture.

    This creates movement without losing the straight lines of the cut.

    Product Application for Different Looks, Blow Dry Short Hair

    Different products are crucial for achieving various looks. A heat protectant spray is vital for safeguarding hair during blow-drying. For sleek styles, smoothing creams and serums are essential. Volumizing mousses and sprays are key to achieving fullness and lift. Texturizing sprays and pomades add dimension and movement to the style.

    Hair Type Considerations

    Fine hair often requires lower heat settings and smaller round brushes to avoid over-drying. Thick hair benefits from larger round brushes and higher heat settings to ensure thorough drying and shaping. Curly hair needs a diffuser to prevent frizz and maintain curl definition. The choice of product should also be tailored to hair type; for example, fine hair might benefit from lightweight serums, while thick hair might require more substantial styling creams.

    Styling Tool Demonstration

    Round brushes are essential for shaping and directing hair during blow-drying. Different sizes are available for various hair types and cuts. Diffusers are perfect for adding volume, movement, and texture to various hairstyles. They help maintain curl definition and prevent frizz.

    Comparison of Blow-Dry Techniques

    Hair Style Technique Product Tools Desired Look
    Pixie Cut Texturizing spray, diffuser Volumizing mousse, heat protectant Small round brush, diffuser Tousled, textured, edgy
    Bob Smoothing serum, large round brush Smoothing serum, volumizing spray Large round brush, diffuser Sleek, polished, voluminous
    Blunt Cut Smoothing cream, large round brush Smoothing cream, texturizing spray Large round brush, diffuser Straight, polished, soft texture

    Products for Blow-Drying Short Hair: Blow Dry Short Hair

    Short hair, while requiring less time to style, still demands careful product selection to achieve the desired look and maintain healthy hair. The right products can enhance volume, tame frizz, and protect against heat damage. Choosing the right products for your short hair type is crucial for achieving optimal results and maintaining its health.

    Essential Products for Blow-Drying Short Hair

    A well-rounded product arsenal is essential for blow-drying short hair effectively. These products work in tandem to achieve the desired style while safeguarding the hair from heat damage.

    • Heat Protectant Spray: Protecting your hair from the heat generated by blow-drying tools is paramount. Heat protectants create a barrier between the hair and the heat, reducing damage and maintaining hair health.
    • Volumizing Spray or Mousse: Short hair often lacks the natural volume of longer hair. Volumizing products add body and lift to the roots, creating a fuller look. Look for lightweight formulas that don’t weigh down the hair.
    • Styling Cream or Serum: These products provide definition and control, essential for achieving a precise short hairstyle. They also help to smooth out frizz and flyaways.
    • Leave-in Conditioner or Hair Mask: Even short hair benefits from moisture. A leave-in conditioner or hair mask helps maintain hydration and softness, preventing dryness and brittleness. Choose a formula specifically designed for your hair type.
    • Texturizing Spray: This product can add a unique texture to short hairstyles. It can help to create a more sculpted or tousled look, depending on the specific formula.

    Benefits and Drawbacks of Different Products

    Understanding the advantages and disadvantages of various products allows for informed decisions and optimal results.

    • Heat Protectants: These products form a protective layer on the hair shaft, reducing damage from heat styling. Drawbacks include potential buildup over time if not properly rinsed out, and some formulas can leave hair feeling stiff.
    • Volumizing Sprays/Mousses: These products enhance the appearance of volume and lift. Drawbacks include the possibility of making hair feel stiff or crunchy if too much product is used. Also, some formulas might not be suitable for fine or oily hair types.
    • Styling Creams/Serums: These products provide definition and control. They are beneficial for taming frizz and shaping the hair. Drawbacks include some formulas that can be heavy and weigh down short hair.
    • Leave-in Conditioners/Hair Masks: These products provide moisture and hydration, preventing dryness. Drawbacks include the potential for leaving the hair feeling greasy if not applied correctly or if the formula is too rich for your hair type.
    • Texturizing Sprays: These products add texture and definition. Drawbacks include the possibility of leaving a residue or feeling sticky if not used correctly.

    Product Selection Based on Hair Type and Desired Look

    The right products for blow-drying short hair depend on the individual’s hair type and the desired style. A person with fine hair might need a volumizing spray, whereas someone with thick hair might require a heat protectant and styling cream.

    Popular Brands and Product Types

    Many reputable brands offer high-quality products for blow-drying short hair. Some popular brands include:

    • Schwarzkopf: Known for their wide range of heat protectants, volumizers, and styling products.
    • Moroccanoil: Popular for their moisturizing and smoothing products, including serums and leave-in conditioners.
    • Redken: A professional-grade brand offering various formulas for different hair types, including volumizing sprays and heat protectants.
    • Paul Mitchell: A professional hair care brand offering products designed for various hair types, including texturizing sprays.

    Product Comparison Table

    Product Type Benefits Drawbacks Pricing (Estimated)
    Heat Protectant Spray Reduces heat damage, protects hair from styling tools Potential buildup, can feel stiff $10-$25
    Volumizing Spray Adds volume and lift, ideal for fine hair Can weigh down hair, some formulas too harsh $8-$20
    Styling Cream Provides definition and control, tames frizz Can be heavy, not ideal for all hair types $12-$28
    Leave-in Conditioner Hydration, softness, prevents dryness Can make hair greasy if not used correctly $10-$25
    Texturizing Spray Adds texture, sculpts hair May leave residue, some can be sticky $10-$20

    Tools and Equipment

    Blow Dry Short Hair

    Choosing the right tools is crucial for achieving the perfect short hair blow-dry. From the dryer itself to the brushes and attachments, each piece plays a vital role in shaping the final look and ensuring a smooth, efficient process. Investing in quality tools will not only improve the outcome but also prolong their lifespan.Understanding the features and functions of each tool allows you to tailor your technique to the specific needs of each client’s hair type and desired style.

    This knowledge is essential for professional stylists and anyone seeking to master the art of blow-drying short hair at home.

    Essential Blow-Drying Tools

    A well-equipped station for short hair blow-drying requires a few key tools. Having the right tools and understanding their applications is key to achieving the desired style. The proper selection of tools will allow you to manage the hair effectively, creating the best possible outcome.

    • Blow Dryer: The heart of the blow-drying process, the blow dryer provides the heat and airflow necessary to style and dry hair. Different models offer varying heat settings, airflow strengths, and features, such as ionic technology or concentrators, which influence the final results. The right dryer selection is essential for controlling the drying process and ensuring optimal results.

    • Brushes: Round brushes, paddle brushes, and detangling brushes are essential for shaping and smoothing short hair. Round brushes are useful for adding volume and creating curls, while paddle brushes are great for detangling and drying longer sections. Detangling brushes help with smoothing and straightening.
    • Diffusers: A diffuser attachment is ideal for adding volume and definition to short, textured hair, while protecting the hair from the direct heat of the dryer. Diffusers evenly distribute the heat and air, minimizing frizz and allowing for a more natural-looking style. They are particularly useful for those with curly or wavy hair types.
    • Concentrators: Concentrators direct the airflow, enabling precise styling and targeted drying. They are beneficial for achieving smooth, straight styles or creating defined curls, depending on the technique used. The focused airflow is ideal for getting a uniform finish.
    • Clips and Sections: Hair clips and sectioning clips are necessary for managing and separating hair into manageable sections for targeted styling. This method reduces tangles and allows for more precise work, especially for shorter hairstyles. Using clips effectively helps to achieve even drying and styling results.

    Comparison of Blow Dryer Types

    Different blow dryers offer various features and benefits. Understanding the pros and cons of each type is key to choosing the best option for your needs. Considering factors such as price, features, and desired results is crucial.

    Blow Dryer Type Pros Cons
    Ionic Blow Dryer Reduces frizz, provides smoother results, helps maintain healthy hair, and offers a faster drying process. Can be more expensive than standard dryers. May not be as powerful as some non-ionic models.
    Ceramic Blow Dryer Distributes heat evenly, protects hair from heat damage, and promotes smoother hair. May not be as powerful as other types, and the cost might be higher than standard models.
    Professional Blow Dryer High power, speed, and temperature control. More robust and durable. Typically more expensive than consumer models. Requires proper maintenance to maintain performance.
    Lightweight Blow Dryer Easy to maneuver, comfortable to use for extended periods. May have lower power and speed compared to more powerful models. Performance might be limited compared to other types.

    Hair Types and Short Styles

    Short hair offers a world of styling possibilities, but the right techniques depend heavily on your hair type. Understanding how your hair naturally behaves – whether straight, wavy, or curly – is key to achieving your desired look. This section delves into the nuances of different hair types and the corresponding styling approaches for short cuts.Different hair types react uniquely to heat styling, and the results can vary significantly.

    Understanding these differences is crucial for achieving a polished and healthy-looking style. Knowing how your hair type responds to various techniques will empower you to create the perfect short style.

    Impact of Hair Type on Blow-Drying Techniques

    Understanding your hair’s natural texture and how it responds to heat is essential. Straight hair tends to dry quickly and hold its shape well. Wavy hair, while quicker to dry than curly, may require more precision to achieve the desired volume or curl definition. Curly hair, due to its inherent structure, needs more careful handling and specific techniques to prevent breakage and maintain its natural texture.

    Styling Approaches for Short, Straight Hair

    Straight hair, when short, offers a variety of styling options. A simple blow-dry with a round brush can create a sleek, polished look. Using a texturizing spray or a light-hold hairspray can add definition and control. The key is to control the movement of the hair while drying to achieve a desired finish. Different amounts of product can result in different degrees of shine, volume, and hold.

    Styling Approaches for Short, Wavy Hair

    Wavy hair, in a short cut, can be incredibly versatile. The key is to work with the natural waves rather than fight them. Using a diffuser attachment on a hairdryer can help to enhance the waves and create a textured, tousled look. Products with a medium hold can help maintain the desired shape and definition. Experimentation with different products and techniques is crucial for achieving the ideal wavy style.

    Styling Approaches for Short, Curly Hair

    Curly hair, when cut short, often requires specialized techniques. The use of a diffuser is crucial to prevent frizz and breakage. Using a curl-enhancing cream or mousse before drying can help define curls and maintain moisture. Avoiding excessive heat and focusing on gentle drying motions will help maintain the natural curl pattern. Products designed to add definition and hold will aid in creating the desired style.

    Examples of Short Hairstyles for Different Hair Types

    Hair Type Short Hairstyle Example Styling Technique
    Straight Short, layered bob Straightening brush and hairdryer, styling cream
    Wavy Textured pixie cut Diffuser, texturizing spray, mousse
    Curly Short, voluminous afro Diffuser, curl-enhancing cream, mousse

    Troubleshooting and Common Mistakes

    Blow-drying short hair can be tricky, even for seasoned stylists. Understanding common mistakes and their solutions is key to achieving the desired look and maintaining healthy hair. By addressing these issues, you can transform your blow-drying routine from frustrating to flawless.Short hair, with its limited length, is particularly susceptible to issues during styling. This is often due to the concentrated heat and friction applied during the blow-drying process.

    The absence of length often exacerbates issues like frizz and flyaways, which are magnified in short hairstyles. Knowing the underlying causes of these problems is the first step towards effective solutions.

    Identifying Common Blow-Dry Mistakes

    Common mistakes in blow-drying short hair often stem from improper technique or the misuse of products and tools. These errors lead to undesirable results like excessive frizz, lack of volume, and damaged hair. Recognizing these pitfalls is the first step to achieving a flawless blow-dry.

    Troubleshooting Frizz and Flyaways

    Frizz and flyaways are common problems when blow-drying short hair. These issues are often amplified by improper product application or inadequate technique. To minimize frizz and flyaways, always use a heat protectant spray before starting. This will shield your hair from the heat’s damaging effects. Apply a smoothing serum or oil to damp hair before blow-drying, and use a wide-tooth comb to detangle hair before beginning.

    Blow-drying short hair can be tricky, but mastering the technique is key for a polished look. Learning how to adjust the airflow and heat settings is crucial, just like learning how to adjust an E Z Go Golf Cart Governor Adjust an E Z Go Golf Cart Governor. You need to find the right balance to get a perfect style without damaging your hair.

    Ultimately, a good blow-dry routine is essential for maintaining healthy and stylish short hair.

    Direct heat from the blow-dryer can also cause frizz. Aim the dryer away from your scalp and hair and use a lower heat setting to minimize this.

    Addressing Lack of Volume

    Achieving volume in short hair can be challenging. Several factors influence volume, including hair type and texture, as well as blow-drying techniques. To maximize volume, use a volumizing mousse or spray. Focus the blow-dryer on the roots, lifting and directing the hair upwards. Using a round brush, especially a large one, can create added volume, especially for fine hair.

    Achieving Smoothness and Shine

    Smooth, shiny short hair can be achieved through careful selection of products and proper technique. Hair that has been excessively heat-styled is more prone to damage and dryness. Using a heat protectant is crucial. Apply a smoothing serum or oil after blow-drying to seal the cuticle and enhance shine. Use a cool shot at the end of the blow-drying process to set the style.

    Table of Common Blow-Dry Problems and Solutions

    Problem Cause Solution
    Frizz High heat, improper product use, lack of moisture Use a heat protectant, apply smoothing serum or oil, use a lower heat setting, and direct the dryer away from the scalp.
    Flyaways Static electricity, improper brushing or combing Use a detangling spray or serum, brush or comb hair gently, and apply a smoothing serum.
    Lack of Volume Fine hair texture, improper drying technique, lack of volumizing product Use a volumizing mousse or spray, focus the blow-dryer on the roots, lift the hair upwards, and use a round brush.
    Dryness and Damage Excessive heat, lack of moisture Use a heat protectant, apply a moisturizing conditioner or serum, use a lower heat setting, and avoid over-drying.

    Styling for Different Occasions

    From a casual brunch to a glamorous wedding, your short hair can be styled to perfection for any occasion. Knowing the right techniques, products, and styles for various events will elevate your look and boost your confidence. This section delves into the world of short-hair styling, offering tailored approaches for different events and settings.Understanding the specific atmosphere and dress code is crucial for achieving the desired look.

    A sophisticated evening event demands a different approach than a relaxed brunch. This guide provides insights into choosing the right tools and products, and mastering the necessary techniques for each occasion.

    Blow-Drying Techniques for Various Occasions

    Different events require specific styling techniques to enhance the overall look. A casual style for everyday wear might involve a quick, effortless blow-dry, while a formal event necessitates a more intricate and polished finish. Understanding these distinctions will allow you to adapt your blow-dry techniques for the perfect look.

    • Everyday Styling: For a quick and effortless everyday look, focus on achieving a natural-looking style. Use a medium-sized round brush for smoothing and adding volume, and a light-hold styling cream or mousse for definition. A minimal use of product and a quick, but thorough, blow-dry will result in a neat, polished everyday look.
    • Special Events: Special events demand more elaborate styles. Consider incorporating techniques like backcombing for added volume or using a curling iron for subtle waves or curls, depending on the desired style. For extra hold and definition, opt for a strong-hold hairspray. Remember to practice beforehand to ensure the style holds throughout the event.
    • Weddings: Weddings often call for a polished and elegant look. Focus on creating a smooth, sleek style with minimal volume. Use a high-quality round brush to achieve a flawless finish. Use a strong-hold hairspray for lasting hold, ensuring the style maintains its shape throughout the ceremony and reception.

    Products and Tools for Different Occasions

    The right tools and products significantly impact the outcome of your blow-dry. Choosing appropriate tools and products for each occasion will create the desired look and maintain it throughout the event.

    • Everyday: For everyday styling, a medium-sized round brush and a light-hold styling cream or mousse are ideal. These tools provide a natural-looking style with manageable hold. Opt for a heat protectant spray to shield your hair from heat damage.
    • Special Events: Special events might require a variety of tools, including curling irons, backcombing tools, and various styling creams. The selection should depend on the specific style you want to achieve. High-quality heat protectant sprays are a must to protect your hair from the heat generated by these tools.
    • Weddings: For weddings, opt for high-quality round brushes, styling creams with a strong hold, and a volumizing spray. A high-hold hairspray is essential to ensure the style lasts throughout the day.

    Style Examples for Specific Events

    Tailoring your blow-dry to the occasion ensures your style complements the event. These examples provide inspiration for achieving the perfect look.

    • Everyday: A simple blow-dry with a side part and a light touch of texture spray provides a stylish yet relaxed look. A sleek, straight style with a slight volume at the roots is another option for everyday wear.
    • Special Events: For a special event, consider a style with soft waves or curls, using a curling iron and a volumizing mousse. This creates a touch of sophistication and romance. For a bolder look, opt for a more defined style, such as a sleek and sophisticated updo.
    • Weddings: A sophisticated and elegant updo with subtle volume is perfect for a wedding. Consider a sleek, straight style with strategic use of texturizing products to add a touch of elegance and glamour.

    Adjusting Styles for Different Settings

    The setting of the event often requires slight adjustments to your chosen style. Understanding the context will help you achieve a seamless and perfect look.

    • Indoor vs. Outdoor: Consider the lighting and weather conditions. An outdoor event might require a slightly more textured style to withstand the elements, while an indoor event allows for more structured and polished styles. Outdoor settings may require a stronger hold to prevent your style from being affected by wind and humidity.

    Style and Occasion Table

    Occasion Style Products Tools
    Everyday Sleek, straight, or slightly textured Light-hold styling cream, heat protectant spray Medium-sized round brush
    Special Events Soft waves, curls, or defined updos Volumizing mousse, curling iron, strong-hold hairspray, heat protectant spray Curling iron, round brush, backcombing tool
    Weddings Sleek, straight, or elegant updos Strong-hold styling cream, volumizing spray, high-hold hairspray, heat protectant spray Round brush, hairspray, styling cream

    Health and Maintenance of Short Hair

    Short hair, while stylish and convenient, requires special attention to maintain its health and vibrancy, especially when frequently blow-dried. Proper care is crucial to prevent damage and ensure your short style looks its best for longer. Neglecting these aspects can lead to dryness, breakage, and a less-than-desirable appearance.Maintaining healthy short hair involves a proactive approach to care, from choosing the right products to understanding the best techniques for blow-drying and styling.

    By understanding the importance of heat protection and proper maintenance, you can ensure your short hair remains strong, shiny, and beautiful.

    Importance of Hair Health in Relation to Blow-Drying

    Blow-drying, while essential for achieving certain styles, can be detrimental to the health of your hair if not done correctly. High heat can damage the hair cuticle, leading to dryness, split ends, and breakage. This damage can be exacerbated by improper use of tools or by using heat without adequate protection. Maintaining healthy hair is fundamental to preventing breakage and promoting a strong, healthy appearance.

    Minimizing Damage from Heat Styling

    Heat styling can be a crucial element of your short hair routine, but it’s essential to mitigate the damage it can cause. Using heat protectant sprays, serums, or oils before blow-drying creates a barrier between the heat and your hair, significantly reducing the risk of damage. This barrier protects the hair structure and helps maintain its moisture, resulting in healthier, less brittle hair.

    Importance of Using Heat Protectants

    Heat protectants are not merely optional; they are an essential step in a healthy hair care routine, particularly when blow-drying short hair. They form a protective layer around the hair strands, shielding them from the damaging effects of heat. This protection prevents excessive dryness, breakage, and split ends, resulting in longer-lasting styles and healthier hair.

    Tips for Maintaining Healthy Short Hair After Blow-Drying

    Maintaining healthy short hair after blow-drying involves a multi-faceted approach. Firstly, avoid over-styling or manipulating the hair too frequently, as this can further stress the hair and lead to breakage. Secondly, choose moisturizing products that suit your hair type and ensure you consistently moisturize. Lastly, remember to regularly trim split ends, which can also contribute to hair health.

    Quick blow-dry styling for short hair is super convenient, but finding the right technique takes practice. It’s amazing how a talented composer like Jonny Greenwood, who’s reportedly scoring a new Tilda Swinton film here , can transform a movie with music, just as a good blow-dry can completely change the look and feel of a short haircut. Ultimately, the perfect blow-dry for short hair is all about achieving the desired style and shine.

    By focusing on these key elements, you can effectively maintain the health of your short hair.

    Maintenance Tips to Prolong the Life of the Style

    A well-maintained style is more likely to last. Regular conditioning is crucial. Use deep conditioners weekly or as directed by your hair product instructions. Maintaining moisture is essential. Use leave-in conditioners and hydrating masks to keep your hair nourished.

    Proper brushing is essential to avoid tangles and breakage. Use a wide-tooth comb or brush when your hair is wet or detangled. Regular trims are essential. Trim split ends regularly to maintain the overall health and appearance of your style.

    Visual Representations

    Short hair, when styled correctly, can be incredibly versatile and expressive. From sleek and sophisticated to playful and voluminous, the possibilities are endless. Understanding the different achievable styles and the tools required to create them is key to unlocking your short hair’s full potential. This section explores various short hairstyles, their visual characteristics, and the techniques to achieve them.This section dives into the visual realm of short hairstyles, highlighting the distinct characteristics of each style.

    It details how different styling tools contribute to creating these looks, and Artikels the step-by-step processes involved. Visual examples are provided to aid in understanding and visualization.

    Short Bob with Volume

    This style is characterized by its layered structure, creating a desirable fullness and movement. The volume is concentrated at the crown, giving the hair a lift and bounce. The bob length allows for versatility in styling and can be adapted to various occasions.

    • Tools: A round brush, a hairdryer, and various styling products like volumizing mousse, texturizing spray, and hairspray are crucial for achieving this look.
    • Steps:
      1. Apply volumizing mousse to damp hair, focusing on the roots and crown.
      2. Use a round brush to lift the hair at the roots while blow-drying.
      3. Layer the blow-drying process with sections to ensure even drying and volume.
      4. Add texturizing spray for added grip and hold.
      5. Finish with hairspray for long-lasting hold.

    Pixie Cut with Texture

    This style emphasizes a sharp, defined shape with a variety of textures. The pixie cut, typically short and close-cropped, can have various levels of layering and texturizing, leading to a unique and modern aesthetic.

    • Tools: A fine-toothed comb, a small round brush, a hairdryer, texturizing spray, and hair wax are essential tools.
    • Steps:
      1. Apply texturizing spray to damp hair to create the desired texture.
      2. Use a fine-toothed comb to separate the hair and ensure it’s free of tangles.
      3. Use a small round brush to add volume and shape in specific sections, especially around the crown and face.
      4. Blow-dry each section thoroughly.
      5. Use hair wax to add definition to the layers and create the desired texture and hold.

    Sleek and Straight Bob

    A sleek and straight bob showcases a smooth, polished look. The hair appears straight and polished, with minimal volume. The emphasis is on creating a polished, effortless appearance.

    • Tools: A wide-tooth comb, a flat iron, a hairdryer, and smoothing serum are necessary.
    • Steps:
      1. Apply smoothing serum to damp hair.
      2. Use a wide-tooth comb to detangle hair.
      3. Divide hair into sections and carefully use a flat iron to straighten each section, ensuring even heat distribution.
      4. Use a hairdryer to complete the drying process.
      5. Finish with a light hairspray to maintain the sleek look.

    Table of Visual Examples

    Style Visual Characteristics Styling Tools Steps
    Short Bob with Volume Layered structure, concentrated volume at the crown, bounce. Round brush, hairdryer, volumizing mousse, texturizing spray, hairspray Apply mousse, lift at roots, layer drying, add texturizer, hairspray.
    Pixie Cut with Texture Sharp shape, various textures, close-cropped. Fine-toothed comb, small round brush, hairdryer, texturizing spray, hair wax. Apply texturizer, detangle, add volume, blow-dry, define with wax.
    Sleek and Straight Bob Smooth, polished, minimal volume. Wide-tooth comb, flat iron, hairdryer, smoothing serum. Apply serum, detangle, straighten sections, dry, hairspray.

    Final Wrap-Up

    Blow Dry Short Hair

    In conclusion, mastering Blow Dry Short Hair involves understanding your hair type, selecting the right tools and products, and practicing the appropriate techniques. By following the advice and tips in this guide, you can confidently style your short hair for any occasion, from everyday looks to special events. Remember to prioritize healthy hair practices to minimize damage from heat styling.

  • Lighten Your Hair Without Bleach A Guide

    Lighten Your Hair Without Bleach A Guide

    Lighten Your Hair Without Bleach: Discover safe and effective methods for achieving lighter locks without the harshness of bleach. This comprehensive guide explores natural and chemical alternatives, providing detailed information on each technique, safety considerations, and maintenance tips. From lemon juice to specialized lightening products, we’ll walk you through the process, ensuring beautiful results and healthy hair.

    This guide dives deep into various methods, offering a clear comparison of their effectiveness, safety, and cost. We’ll also explore the science behind these methods, enabling you to make informed decisions about your hair lightening journey.

    Introduction to Hair Lightening Alternatives

    Tired of harsh bleach treatments? Many people are opting for gentler alternatives to lighten their hair, recognizing the potential damage and environmental impact of bleach. These methods offer varying degrees of lightening power, safety, and cost, making informed choices crucial for achieving desired results without compromising hair health.Hair lightening without bleach involves a spectrum of methods, ranging from natural ingredients to chemical-based products.

    Each approach has unique characteristics that set it apart, impacting the final outcome and the overall experience. Understanding the benefits and drawbacks of each method is key to making a well-informed decision.

    Natural Lightening Methods

    Natural ingredients often offer a gentler approach to lightening hair, but their effectiveness can vary greatly. They typically require consistent application and patience for noticeable results.

    • Lemon Juice: Lemon juice’s acidity can slightly lift hair color, but it’s a slow process, often requiring multiple applications. It’s a budget-friendly option but can potentially damage hair if used excessively, leading to dryness and breakage. Results are often subtle and unpredictable, dependent on hair type and porosity.
    • Honey: Honey’s moisturizing properties can improve hair health, but it’s not known for its lightening capabilities. It is typically used in conjunction with other ingredients for additional benefits, but not as a standalone lightening agent.
    • Herbal Teas: Some herbal teas, like chamomile, might have a slight lightening effect, but this is often negligible. They can be beneficial for conditioning the hair, but not for substantial lightening.

    Chemical Lightening Alternatives

    Chemical alternatives to bleach offer more predictable results but can still pose risks if not used correctly.

    • Hair Lightening Powders: These powders, often containing hydrogen peroxide, can lighten hair without the harshness of bleach. They work by oxidizing the hair, creating a gradual lift. They are generally more gentle on the hair than bleach but still require careful handling and consideration of hair type and porosity. Results vary widely, with some products providing noticeable lightening and others offering subtle results.

    • Hair Lightening Creams: Cream-based lighteners are designed for a more controlled application, often with less potential for over-processing. They provide a gentler alternative to bleach, but their lightening effect can be less intense and may require multiple applications for optimal results. The consistency and texture of the creams can be a factor for some users.

    Comparison of Lightening Methods

    Method Effectiveness Safety Cost
    Lemon Juice Low Moderate (potential for damage with overuse) Low
    Honey Minimal High Low
    Herbal Teas Very Low High Low
    Hair Lightening Powders Moderate to High (depending on product) Moderate (potential for damage if misused) Moderate
    Hair Lightening Creams Moderate Moderate Moderate to High

    Effectiveness is measured by the degree of color lift achievable, safety considers the potential for hair damage, and cost is relative to the product’s price. Always follow product instructions and consult a professional for best results.

    Natural Hair Lightening Techniques: Lighten Your Hair Without Bleach

    Unlocking the secrets of sun-kissed tresses without harsh chemicals is achievable with natural lightening methods. These techniques harness the power of nature’s ingredients to gently lighten hair, offering a safer alternative to bleach. While not as dramatic as chemical lightening, natural methods can achieve subtle yet effective results.Natural ingredients like lemon juice, honey, and henna work by subtly altering the hair’s pigment structure.

    This process is often gradual and requires patience. The effectiveness varies depending on the individual’s hair type and initial color.

    Understanding the Science Behind Natural Lightening

    The science behind natural hair lightening lies in the interaction of the chosen ingredients with the hair’s cuticle and melanin. Some ingredients, like lemon juice, contain citric acid which can potentially lift the pigment slightly. Others, such as henna, are known to deposit pigments, which can, in some cases, create a lighter shade when used in conjunction with other lightening agents.

    The overall effect is a delicate interplay of chemical reactions and pigment alteration.

    Preparing Natural Hair Lightening Mixtures

    Creating a natural lightening mixture involves carefully combining the chosen ingredients. Precise measurements and understanding the properties of each ingredient are key. For instance, using too much lemon juice can lead to dryness and damage, while inadequate application may not produce the desired results.

    Examples of Natural Hair Lightening Mixtures

    • Lemon Juice Lightener: Dilute fresh lemon juice with a carrier oil like coconut oil or olive oil. Apply to damp hair and leave for a specified time. The duration should be adjusted according to the desired lightening level and the hair’s initial condition. This mixture can lighten hair slightly.
    • Honey and Lemon Lightener: Mix equal parts honey and lemon juice. Apply to hair, ensuring even distribution. The honey acts as a humectant, helping to retain moisture during the lightening process. The mixture should be applied for a shorter time compared to using only lemon juice.
    • Henna Lightener: Combine henna powder with a suitable developer. The developer’s role is to activate the lightening effect of henna. The resulting mixture may require longer application times to achieve a desired level of lightening, potentially weeks or even months. The mixture should be applied to hair according to the product instructions.

    Safety Precautions and Considerations

    It is crucial to conduct a patch test before applying any natural lightening mixture to your entire head. This preliminary test will help determine if you have any allergic reactions to the ingredients.

    Natural Hair Lightening Ingredient Guide

    Ingredient Effect Precautions
    Lemon Juice Slight lightening, potentially removing some melanin. Can cause dryness and damage if used excessively. Avoid direct sun exposure after application.
    Honey Moisturizes and helps retain moisture during the lightening process. May not lighten on its own but can complement other lightening agents.
    Henna Can lighten hair, depending on the shade used, but may also deposit pigment. Requires careful preparation and application. Patch testing is essential.
    Coconut Oil/Olive Oil Acts as a carrier oil, helps distribute the mixture evenly and adds moisture to the hair. Not a lightening agent, but helps prevent dryness.

    Chemical-Based Alternatives to Bleach

    Beyond bleach, several chemical hair lightening products offer alternatives. These options often utilize different chemical compounds to achieve a lighter shade, but with varying degrees of safety and effectiveness. Understanding the active ingredients and their mechanisms of action is crucial for informed decision-making when choosing a lightening product. Carefully weighing the potential benefits against the risks is paramount for achieving the desired results without compromising your hair’s health.Chemical lightening products without bleach can be a viable option for those seeking to lighten their hair without the potential harshness of bleach.

    These products employ different chemical reactions to lift the hair’s natural pigment, achieving lighter tones. However, it’s essential to understand that these alternatives still involve chemical processes that can affect the hair structure, and careful consideration of safety measures is crucial.

    Comparison of Chemical Lightening Products

    Various chemical hair lightening products exist, each with its unique formulation. A comparative analysis of these products helps in understanding their potential effectiveness and associated risks. Different active ingredients and their concentration levels influence the product’s effectiveness and safety profile.

    Product Type Active Ingredients Effectiveness Safety
    Hydrogen Peroxide-based Lighteners Hydrogen peroxide (a common oxidizer), ammonia (optional, often used to open the cuticle), and other mild developers. Generally effective for achieving subtle to moderate lightening. The degree of lightening depends on the concentration of hydrogen peroxide and the product’s formulation. Generally considered safer than bleach, but can still cause irritation or damage if used improperly. Ammonia can cause respiratory issues, and higher concentrations of hydrogen peroxide may increase the risk of side effects. Proper application and dilution are essential.
    Peroxide-based Lighteners with Additional Agents Hydrogen peroxide, along with other lightening agents such as peroxides, organic acids, or other chemical compounds. Effectiveness can vary significantly depending on the specific combination of ingredients. Some may be more effective at lifting certain hair colors than others. Safety depends heavily on the specific ingredients and their concentration. Products containing strong oxidizers or potentially harmful agents need to be handled with extreme caution. Always follow product instructions and safety guidelines.
    Non-Oxidative Lighteners These products utilize chemical reactions that don’t involve oxidation, often relying on ammonia or other agents to lift pigment without the use of peroxide. Often result in a subtle lightening effect, making them suitable for those looking for a gradual change in shade. Generally, they are considered milder than peroxide-based options. However, the presence of ammonia or other potentially irritating chemicals should be carefully considered. Allergic reactions or irritation can occur.

    Active Ingredients and Mechanisms of Action

    The active ingredients in chemical lightening products are responsible for the lightening process. Understanding their mechanisms of action is crucial for evaluating the product’s potential impact on hair health.

    Hydrogen peroxide, a common ingredient, acts as an oxidizer, breaking down the pigment molecules in the hair. Different formulations and concentrations of these chemicals affect the lightening process and the resulting tone.

    Different chemical compounds are employed to modify the hair structure, impacting the lightness achieved and the safety profile of the product. It’s crucial to understand that even mild-seeming lightening products can still affect the hair’s integrity.

    Safety Considerations and Potential Side Effects, Lighten Your Hair Without Bleach

    Chemical lightening products, regardless of the specific formulation, can pose potential risks. It’s essential to be aware of the potential side effects and take necessary precautions. Proper use, following product instructions, and recognizing any signs of irritation are key.

    Allergic reactions, irritation, and hair damage are possible side effects of chemical lightening products. Hair breakage, dryness, and increased porosity are potential concerns. Always perform a patch test before applying the product to the entire head of hair.

    Proper dilution and application techniques are crucial for minimizing the risks associated with these products. A qualified professional should be consulted for any concerns. Strict adherence to the product instructions is essential to ensure safety.

    Looking for ways to lighten your hair without bleach? It’s totally possible! Thinking about how amazing hair color can be, especially after hearing about the passing of Frankie Knuckles, a Chicago house music legend, who sadly passed away at 59 frankie knuckles chicago house legend dead at 59. Natural hair lightening methods, like using specific toners or gradual color-lifting techniques, can be just as effective.

    So, explore your options beyond bleach for a lighter shade!

    Preparation and Application Procedures

    Lighten Your Hair Without Bleach

    Achieving lighter hair without bleach requires meticulous preparation and precise application. Understanding the chosen method’s specific needs is crucial for achieving the desired results safely and effectively. This section details the essential steps for various natural and chemical-based alternatives to bleach, highlighting crucial preparation steps, application guidelines, and safety precautions.

    Necessary Preparation Steps

    Thorough preparation is key to successful hair lightening. This involves evaluating your hair’s current condition, selecting the appropriate lightening method, and ensuring all necessary tools and materials are readily available.

    • Assess your hair’s health and porosity. Hair that is overly damaged or brittle may not respond well to lightening treatments, while hair with high porosity might absorb the lightening mixture too quickly, leading to uneven results. Evaluate your hair’s current condition and determine if it’s suitable for the chosen method.
    • Gather all necessary materials. This includes the chosen lightening mixture, gloves, a bowl, a brush or applicator, a timer, and a hair clip or towel.
    • Perform a strand test on a small, inconspicuous section of your hair. This preliminary test will indicate the mixture’s effectiveness and potential reaction on your hair.

    Step-by-Step Application Guide

    Applying lightening mixtures safely and effectively requires a methodical approach. This guide provides a general framework; specific instructions may vary based on the chosen method.

    1. Prepare the mixture according to the product instructions. Always follow the manufacturer’s guidelines for mixing ratios and application time. Using the incorrect ratio or applying for longer than recommended can damage the hair or cause an adverse reaction.
    2. Apply the mixture to the desired sections of your hair using a brush or applicator. Ensure even coverage. If using a developer, be cautious as it can cause irritation if it comes into contact with the skin.
    3. Monitor the process. Keep an eye on the color changes and ensure the mixture is working as expected. Regularly check for signs of over-processing, such as excessive dryness or breakage.
    4. Rinse the mixture completely after the desired level of lightening has been achieved. This removes the lightening agent and stops the lightening process.
    5. Condition your hair with a moisturizing hair mask to replenish moisture and restore its health. This is particularly important after chemical-based lightening methods.

    Importance of Hair Testing

    Hair testing is a critical step to avoid unwanted results and potential damage. It allows you to determine the mixture’s effect on your hair before applying it to your entire head.

    A strand test is essential to evaluate the lightening mixture’s effectiveness and potential reaction on your hair. This small-scale trial helps assess the lightening strength, color change, and overall impact on the hair’s condition. It allows you to adjust the lightening process or choose an alternative if necessary.

    Comparison of Application Methods

    Different methods for lightening hair without bleach offer varying levels of results and require different application techniques. Understanding the pros and cons of each method is crucial for selecting the best approach for your hair type and desired outcome.

    Looking for ways to lighten your hair without bleach? I’ve been exploring some natural alternatives, and honestly, it’s been a surprisingly fun journey. This whole process reminds me of the vibrant energy in the Finnish band oranssi pazuzu olen aukaissut uuden silman oranssi pazuzu olen aukaissut uuden silman. Hopefully, these methods will help me achieve the lightened look I want without harsh chemicals.

    It’s all about finding a safe and effective way to lighten your hair.

    • Natural lightening methods, such as lemon juice or henna, are gentler on the hair but may require multiple applications to achieve significant results. Their application is generally straightforward.
    • Chemical-based alternatives, like hair lighteners containing hydrogen peroxide, offer faster results but require careful monitoring and adherence to product instructions. These methods might have stronger effects and may need more careful application and monitoring.

    Proper Application Techniques

    Proper application techniques are essential to achieve even results and minimize potential damage. Precise application ensures that the lightening mixture is evenly distributed throughout the hair.

    Apply the mixture in small sections, ensuring each section is thoroughly coated. Avoid applying too much product at once, as this can lead to uneven lightening or over-processing. Use gentle, controlled strokes to prevent streaks or clumps.

    Tools and Materials

    Step Procedure Description
    1 Gather materials Gather all necessary materials, including the chosen lightening mixture, gloves, a bowl, a brush or applicator, a timer, and a hair clip or towel.
    2 Perform strand test Perform a strand test on a small, inconspicuous section of hair to determine the lightening mixture’s effectiveness and potential reaction.
    3 Prepare the mixture Prepare the mixture according to product instructions.
    4 Apply mixture Apply the mixture to the desired sections of your hair using a brush or applicator, ensuring even coverage.
    5 Monitor process Monitor the process for color changes and signs of over-processing.
    6 Rinse and condition Rinse the mixture thoroughly and condition the hair to replenish moisture.

    Maintenance and Aftercare

    Maintaining your lightened hair color requires dedication and the right approach. It’s not just about the initial lightening process; the ongoing care is crucial to preserving the vibrancy and health of your new shade. Proper maintenance minimizes damage and ensures your lightened hair looks its best for as long as possible.Lightened hair is more susceptible to breakage and dryness due to the chemical processes involved.

    Therefore, a consistent and gentle hair care routine is paramount to preventing further damage and maintaining its healthy appearance.

    Maintaining Lightened Hair Color

    Maintaining the desired lightened shade involves consistent upkeep. This includes regular treatments, the right products, and mindful hair handling techniques. Ignoring these aspects can lead to unwanted color fading, dryness, and damage. It’s a proactive approach to keeping your hair vibrant and healthy.

    Trying to lighten your hair without bleach can be tricky, but there are gentler options out there. Sometimes, it’s similar to acting around someone you don’t like – you might subtly change your behavior to fit in or avoid conflict, like using a temporary hair lightener to achieve a lighter shade without harsh chemicals. Learning how to navigate social situations, like Act Around Someone You Do Not Like , can also help you feel more comfortable and confident in your own skin, just like finding the right hair lightening method.

    Ultimately, finding the right approach for lightening your hair without bleach depends on your hair type and desired outcome.

    Tips for Healthy Hair After Lightening

    Regular trims are essential for removing split ends, which can lead to breakage and dullness. Avoiding harsh heat styling tools whenever possible minimizes heat damage, which can be particularly damaging to lightened hair. Applying a deep conditioner or hair mask at least once a week replenishes moisture and strengthens the hair structure.

    Importance of Hair Masks and Conditioners

    Hair masks and conditioners are vital for maintaining moisture and preventing dryness in lightened hair. They provide deep hydration, strengthening the hair shaft and restoring its natural oils. Regular use of these products helps to retain the lightened color and maintain a healthy, vibrant look.

    Regular Hair Care Routines

    Implementing a regular hair care routine that focuses on hydration and protection is key. This routine should include a gentle shampoo specifically designed for colored or lightened hair. Deep conditioning treatments, once or twice a week, are beneficial to restore moisture. Avoiding excessive heat styling, such as blow-drying, straightening, or curling, can help protect lightened hair.

    Avoiding Further Damage

    To prevent further damage, limit the use of heat styling tools and avoid harsh chemical treatments. Opt for gentle hair manipulation techniques. Using protective products, such as heat protectants, can significantly minimize the impact of heat styling.

    Recommended Products for Maintaining Lightened Hair Color

    • Shampoo: Look for sulfate-free, color-safe shampoos that are specifically designed for lightened hair. These help to retain color vibrancy and minimize dryness. Examples include products from brands like Olaplex, Kérastase, or Redken.
    • Conditioner: A deep conditioner or hair mask is crucial for maintaining moisture and preventing dryness. Look for products enriched with hydrating ingredients like argan oil, shea butter, or hyaluronic acid. A good option is to use a conditioner that specifically targets the needs of lightened hair.
    • Hair Mask: Use a hair mask at least once a week to deeply moisturize and nourish lightened hair. Look for masks containing ingredients like avocado oil, coconut oil, or honey, which are excellent for hydrating and strengthening the hair.
    • Heat Protectant: Use a heat protectant spray before using heat styling tools. This creates a protective barrier against heat damage, minimizing breakage and dryness.
    • Color-Safe Products: Always use color-safe hair care products to maintain the vibrancy and integrity of your lightened hair color.

    Troubleshooting Common Issues

    Lightening your hair without bleach can be a rewarding experience, but like any process, it’s not without potential challenges. Understanding common issues and their solutions is key to achieving the desired results and maintaining healthy hair. This section will address common problems, including discoloration, dryness, and damage, as well as strategies for fixing uneven results.Troubleshooting effectively requires a proactive approach.

    Recognizing the underlying cause of a problem is crucial for implementing the right solution. By understanding the potential pitfalls and having a plan for addressing them, you can navigate the process with confidence and achieve the desired hair lightening outcome.

    Identifying Discoloration Issues

    Discoloration, where the hair isn’t lightening evenly or achieves an undesirable shade, can stem from several factors. Inconsistent application of the lightening agent, varying porosity levels throughout the hair shaft, or inadequate mixing of the product can all contribute to uneven results. A thorough examination of your hair’s current condition and the chosen lightening method is critical. Knowing your hair’s texture and the specific product used will help you identify the root of the issue.

    Addressing Dryness and Damage

    Hair lightening, regardless of the method, can lead to dryness and damage. This is a common side effect due to the chemical processes involved. Maintaining hydration is crucial. Using moisturizing conditioners, deep conditioning treatments, and nourishing hair masks regularly can help combat dryness. The application technique also plays a significant role.

    Avoid over-processing or prolonged exposure to the lightening agent. Always follow the manufacturer’s instructions carefully.

    Correcting Uneven Lightening Results

    Uneven lightening can be frustrating, but it’s often manageable. Carefully assess the areas with inconsistent results. The application method may be inconsistent, or the product may not be distributed evenly. If the problem persists, consider reapplying the lightening agent to the under-lightened areas. Use a lower concentration or a gentler formula.

    Solutions for Common Issues

    Issue Cause Solution
    Discoloration (uneven lightening) Inconsistent application, varying porosity, improper mixing Re-apply the product to under-lightened areas using a lower concentration or a gentler formula; re-evaluate the application method, ensuring even distribution.
    Dryness and Damage Chemical processes involved in lightening, over-processing Use moisturizing conditioners, deep conditioning treatments, and nourishing hair masks regularly; avoid prolonged exposure to the lightening agent and follow manufacturer’s instructions carefully.
    Uneven Lightening Results Inconsistent application, uneven distribution of the lightening agent, varying porosity Re-apply the lightening agent to under-lightened areas with a lower concentration or a gentler formula; ensure thorough distribution.

    Hair Type Considerations

    Lighten Your Hair Without Bleach

    Different hair types respond uniquely to lightening treatments. Understanding these differences is crucial for achieving the desired results and preventing damage. This section explores how various hair types react to different lightening methods, offering recommendations for choosing the best approach and highlighting successful examples, as well as precautions to take.

    Impact of Hair Type on Lightening Methods

    Hair type, including its structure, porosity, and thickness, significantly influences how it reacts to lightening treatments. Fine hair, often characterized by low porosity, is more susceptible to damage during the lightening process, potentially leading to breakage or dryness. Conversely, thick, coarse hair with high porosity can be more resilient, but may require more careful attention to avoid over-processing.

    Understanding these characteristics is vital for selecting the most appropriate lightening technique.

    Recommendations for Choosing the Best Method

    Selecting the right lightening method hinges on a thorough evaluation of your hair type. For fine, low-porosity hair, gentler methods like gradual lightening techniques or toner application are often preferable. These techniques minimize the risk of over-processing and subsequent damage. Medium-porosity hair typically responds well to a variety of methods, but careful consideration of the product strength and application frequency is crucial.

    High-porosity hair, frequently characterized by its thickness and coarseness, can tolerate stronger lightening agents but requires meticulous application and aftercare to avoid breakage and dryness.

    Examples of Successful Lightening Results

    Several examples illustrate the diverse outcomes of successful lightening based on hair type. A client with fine, light brown hair achieved a natural-looking blonde shade using a gradual lightening technique, emphasizing the importance of gradual approaches for delicate hair. Similarly, a client with thick, dark brown hair successfully transitioned to a vibrant auburn color using a chemical-based alternative to bleach, showcasing the effectiveness of such alternatives for resilient hair types.

    These real-life examples underscore the importance of personalized lightening strategies.

    Precautions for Different Hair Types

    Implementing appropriate precautions is critical for all hair types during the lightening process. For fine hair, avoiding harsh chemicals and maintaining moisture balance is essential. Medium-porosity hair requires careful monitoring of the lightening process, ensuring the product isn’t left on for extended periods. High-porosity hair may benefit from a pre-lightening conditioning treatment to minimize damage and maintain moisture.

    It is also important to perform a strand test before applying any lightening solution to a larger section of the hair.

    Table of Recommended Lightening Methods

    Hair Type Recommended Method Precautions
    Fine, Low Porosity Gradual lightening techniques, toner application Avoid harsh chemicals, maintain moisture balance, frequent trims
    Medium Porosity Variety of methods, careful consideration of product strength and application frequency Monitor the lightening process, avoid over-processing
    Thick, High Porosity Stronger lightening agents, pre-lightening conditioning Meticulous application, frequent moisturizing treatments, avoid prolonged exposure to lightening solutions

    Final Review

    In conclusion, lightening your hair without bleach is achievable and can be a safe and rewarding experience. By understanding the different methods, their pros and cons, and proper application techniques, you can achieve beautiful results while keeping your hair healthy. This guide provides a thorough resource for anyone looking to lighten their hair without the harshness of bleach, from natural techniques to chemical alternatives.

  • Silk Press Natural Hair Your Guide

    Silk Press Natural Hair Your Guide

    Silk Press Natural Hair is a popular styling method for natural hair textures. This comprehensive guide explores everything from defining the technique to product recommendations, hair health considerations, and cultural interpretations. Learn how to achieve a beautiful, healthy silk press, understand the best products for your hair type, and discover the unique beauty of this versatile style.

    We’ll delve into the specifics of achieving a silk press, addressing the steps, tools, and products involved. This includes a detailed look at maintenance routines, common mistakes to avoid, and a step-by-step approach tailored to different hair types. The discussion also touches on the importance of product selection, considering the impact on hair health and the avoidance of potential damage.

    Defining Silk Press Natural Hair

    A silk press is a popular styling technique for natural hair that aims to straighten the hair without compromising its natural texture. It involves using a flat iron to create a smooth, sleek look while preserving the integrity of the hair strands. This method allows natural hair to achieve a straight appearance while maintaining its natural curl pattern underneath.

    It’s a versatile option that provides both style and care.This method offers a transition between the natural curl pattern and a straighter look, providing a range of styles. It’s important to understand the specifics of the silk press, the hair types suitable for this technique, and how it differs from other natural hair styling methods.

    Loving my silk press natural hair lately! It’s so much easier to style and maintain than other techniques. Plus, I’ve been really into writing handwritten messages again, and discovering how to write handwritten messages on an iPhone here has been a game-changer. The whole process of meticulously crafting notes feels so fulfilling, and it complements the polished look of my silk press perfectly.

    Characteristics of Silk Press Natural Hair

    The silk press is characterized by its smooth, straight appearance. The hair’s natural texture is subtly retained, creating a transition between straight and natural. The key characteristic is that the hair remains in a straightened state, without using heat to alter the curl pattern, preserving the hair’s original texture.

    Textures and Hair Types Suitable for Silk Press

    A silk press can be adapted to a wide range of hair types and textures. Hair types 2A-4C can be suitable for a silk press, but the success and longevity of the style depend on the individual hair characteristics. The porosity, density, and thickness of the hair all influence the process and outcome. For example, hair with high porosity might require more conditioning or a more precise straightening approach.

    Styling Techniques

    The silk press is a styling method that aims to straighten the hair using a flat iron. The process often involves using heat protectant products to minimize damage. Careful preparation, including deep conditioning treatments and using the appropriate heat settings, is crucial to achieve a smooth, healthy silk press.

    Difference Between Silk Press and Other Natural Hair Styling Methods

    Unlike a relaxer, a silk press doesn’t chemically alter the hair’s structure. It aims to straighten the hair using heat, whereas other methods, such as braids or twists, focus on creating different textures or protecting the hair. The key difference is the level of intervention: the silk press only straightens the hair while other methods like braids or twists create a completely different look.

    Common Hair Types and Textures

    Hair types 2A-4C can be suitable for a silk press. The type of hair, its texture, and individual characteristics will influence the results. The best way to determine if a silk press is suitable is to consult with a stylist and have them assess your hair type and needs. It is important to remember that individual hair needs will vary and that a stylist can provide tailored advice.

    Silk Press vs. Other Natural Hair Styles

    Style Texture Maintenance Pros
    Silk Press Straightened, but with subtle natural texture retained Requires regular maintenance, including moisturizing and protective styling. Provides a sleek, straight look while preserving natural hair, allows versatility for different styles.
    Braids Various textures, often with twists and braids Requires consistent care and maintenance, but generally lasts longer than a silk press Provides a protective style, allows for a wide range of hairstyles, and offers great versatility.
    Twists Tightly coiled textures Requires frequent checks for moisture and hygiene, and can vary in duration Provides a protective style and adds dimension to natural hair

    Styling and Maintenance: Silk Press Natural Hair

    Maintaining a beautiful silk press requires dedication and understanding of your hair type. This section delves into the crucial steps for achieving and sustaining this sleek style, offering practical guidance and troubleshooting tips for optimal results. From choosing the right tools and products to mastering frequent washing and styling routines, we’ll equip you with the knowledge to keep your silk press looking its best.

    Silk Press Creation Steps

    Achieving a flawless silk press involves a meticulous process. Careful preparation is key to a successful outcome. Begin by thoroughly cleansing and conditioning your hair, ensuring all products are completely rinsed out. Next, section the hair into manageable portions to prevent tangles and ensure even heat distribution. Using a heat protectant spray is crucial to shield the hair from damage during the pressing process.

    Essential Tools and Products

    A variety of tools and products are essential for a successful silk press. A flat iron, preferably with adjustable temperature settings, is paramount. A heat protectant spray is crucial for protecting the hair from heat damage. A boar bristle brush, along with a detangling spray, is essential for preparing the hair before pressing and for smoothing the style after.

    Various styling creams and serums designed for silk presses can be used to add shine and manageability. A wide-tooth comb, detangling brush, and clips are also helpful in the process. Furthermore, having a selection of heat-resistant clips and sections will make the job easier.

    Maintaining a Silk Press

    Maintaining a silk press involves a regular routine. Washing frequency depends on your hair type and scalp’s oil production. For most individuals, washing every 2-3 days is ideal. Regular conditioning treatments are also vital for maintaining moisture and preventing dryness.

    When styling, avoid over-manipulating the hair. Use gentle handling and smoothing techniques to maintain the sleekness of the style. Use a wide-tooth comb to detangle and ensure no knots form. Applying a moisturizing serum after styling is highly recommended for added shine and protection.

    Common Mistakes to Avoid

    Several mistakes can negatively impact your silk press. Over-processing with heat can lead to hair damage. Insufficient heat protection can also lead to breakage. Using improper techniques during the pressing process may result in uneven results. Over-manipulation of the hair after the pressing can also cause frizz and breakage.

    Step-by-Step Silk Press Guide (Different Hair Types)

    This detailed guide caters to different hair types, offering a personalized approach. A consistent routine with proper tools and products is crucial for optimal results.

    1. Preparation: Thoroughly cleanse and condition hair. Section the hair into manageable portions, using heat protectant spray. Avoid over-sectioning; this can lead to uneven heating.
    2. Pressing: Use a flat iron to press each section, keeping the temperature appropriate for your hair type. Use gentle pressure and consistent movement. Avoid prolonged contact with the flat iron on any one section. Aim for even heating across the entire section.
    3. Styling: After pressing, use a boar bristle brush and detangling spray to smooth and style the hair. Use serum or cream to add shine and manageability. Apply clips as needed.
    4. Maintenance: Wash and condition hair as needed, avoiding over-manipulation. Use a moisturizing serum for added shine and protection.

    Essential Products for Silk Press Maintenance

    A selection of products can enhance your silk press maintenance routine. These include a heat protectant spray, moisturizing serum, and styling cream tailored for your hair type. A good quality detangling brush and a wide-tooth comb are also indispensable.

    • Heat protectant spray: Crucial for preventing heat damage.
    • Moisturizing serum: Provides shine and hydration.
    • Styling cream: Adds manageability and definition.
    • Detangling brush: Essential for gentle detangling.
    • Wide-tooth comb: For smoothing and distributing products.

    Hair Health and Safety

    Silk Press Natural Hair

    A silk press, while offering a sleek and stylish look, can put a strain on your natural hair if not approached with care. Understanding the potential impacts, choosing the right products, and practicing safe styling techniques are crucial for maintaining healthy, beautiful natural hair. Knowing the dos and don’ts can prevent damage and ensure your silk press lasts.Silk press styling, while glamorous, can potentially affect the health of your natural hair.

    Loving my silk press on my natural hair lately! It’s so smooth and manageable, but sometimes I need a little extra boost of confidence, like when I listen to basement jaxx what a difference your love makes. basement jaxx what a difference your love makes really helps me feel empowered and ready to take on the day, which is great for styling my natural hair.

    The silk press just shines brighter when I feel good, and honestly, it’s a win-win.

    The process of straightening and styling often involves heat, which, if not managed properly, can lead to dryness, breakage, and weakened strands. However, with mindful choices in products and techniques, the benefits of a silk press can be enjoyed without compromising your hair’s well-being.

    Impact of Silk Press Styling on Natural Hair Health

    Proper silk press styling, when done correctly, can enhance the natural beauty of your hair. However, improper techniques can lead to significant damage. Heat styling, especially if excessive or improperly applied, can lead to cuticle damage, dryness, and protein depletion. Frequent or harsh manipulation of the hair shaft during the pressing process can also contribute to breakage and hair loss.

    Loving my silk press on my natural hair lately! It’s so smooth and manageable, perfect for a busy week. Speaking of smooth, did you know how to say “I love you” in Dutch? You can find out all the different ways to express affection in Dutch here. Now, back to my silk press – I’m totally obsessed with how it makes my hair look and feel!

    Benefits and Risks Associated with a Silk Press, Silk Press Natural Hair

    Silk press styling offers a smooth, sleek appearance, often making natural hair easier to manage. The ability to style and maintain the look for extended periods is a significant advantage. However, this styling method does pose risks if not handled carefully. The use of heat can lead to dryness, breakage, and damage if precautions are not taken. Frequent silk pressing, without adequate rest periods for the hair to recover, can lead to significant damage.

    Careful consideration of hair type and condition, and the use of appropriate products, can minimize the risks.

    Choosing the Right Products for a Silk Press

    Selecting the right products is paramount for a healthy silk press. Products should be chosen based on your hair type and condition. For example, if you have dry or color-treated hair, choose moisturizing products with ingredients like shea butter, argan oil, or coconut oil. Products containing excessive sulfates, alcohol, or harsh chemicals should be avoided. Always read labels carefully and select products specifically formulated for heat styling.

    This is crucial for protecting your hair from the potentially damaging effects of heat.

    Precautions to Take When Styling Natural Hair with a Silk Press

    To prevent damage, certain precautions are essential during a silk press. Always use a heat protectant spray before applying heat. Use a low to medium heat setting on your flat iron, and avoid excessive heat or prolonged exposure. Ensure even heat distribution across the hair to avoid damaging certain sections more than others. Allow sufficient rest periods between styling sessions to allow your hair to recover.

    Avoid over-manipulation of the hair during the pressing process, which can lead to breakage.

    Ingredients to Avoid in Hair Products When Maintaining a Silk Press

    Avoid products containing ingredients that can strip natural oils or weaken the hair structure. Sulfates, alcohol, and harsh chemicals can cause dryness, breakage, and damage to the hair cuticle. Look for products with moisturizing and nourishing ingredients. Examples include shea butter, argan oil, and coconut oil. These ingredients help maintain moisture and strengthen the hair shaft.

    Identifying Signs of Damage and Dryness in Natural Hair After a Silk Press

    Recognizing signs of damage is crucial for maintaining healthy hair. Dryness manifests as brittle, easily breakable hair, and often feels rough or stiff to the touch. Excessive breakage, noticeable shedding, and split ends are other indicators of damage. Frequent dryness can lead to further damage and make the hair more susceptible to breakage. Addressing these issues promptly with the appropriate products and techniques is vital for maintaining healthy hair.

    Product Recommendations

    Choosing the right products is crucial for achieving a beautiful and healthy silk press. The right combination of products can significantly impact the longevity and appearance of your style, ensuring your silk press lasts and maintains its shine. From prepping your hair to sealing in moisture, each product plays a vital role in the overall process.

    Essential Products for Silk Press Styling

    A well-rounded product arsenal is key to a successful silk press. This includes products to cleanse, condition, moisturize, and protect your hair from heat damage. These products are tailored to different hair types and needs.

    Heat Protectant Products

    Heat protectant products are indispensable when styling with heat tools. They create a barrier between the heat and your hair, preventing damage and breakage. The best heat protectants create a shield to reduce heat penetration and protect hair from harsh temperatures. This minimizes the impact of heat styling and helps to maintain the health and integrity of your hair.

    Product Recommendations for Different Hair Types

    The ideal products for a silk press depend greatly on your hair type. Different hair textures and needs require specific product formulations to ensure optimal results.

    Hair Type Product Recommendation Reasoning
    Fine/Thin Hair A lightweight leave-in conditioner and a moisturizing cream Fine hair often lacks volume and moisture, necessitating products that won’t weigh it down. Lightweight formulas are ideal to maintain a sleek style.
    Medium Hair A leave-in conditioner with medium hold and a moisturizing oil Medium hair requires products that provide moisture without being too heavy. A blend of moisture and hold is necessary to create the desired texture and style.
    Thick/Coarse Hair A deep conditioner, a styling cream with strong hold, and a heat protectant spray Thick hair often requires more intense moisturizing and hold to achieve a smooth silk press. Products that offer more structure and moisture are essential to manage this hair type.
    Color-Treated Hair A color-safe leave-in conditioner, a moisturizing cream, and a color-safe heat protectant spray Color-treated hair is more susceptible to damage. Using color-safe products helps maintain the vibrancy and health of the hair color while ensuring a sleek and smooth silk press.

    Brand Comparison and Considerations

    Numerous brands offer excellent hair products for silk pressing. Comparing brands can help you identify the best options based on your hair type, budget, and specific needs. Factors such as ingredient lists, price, and user reviews should be considered. Conducting thorough research will ensure you choose products that work best for your hair.

    Minimizing Breakage and Maximizing Shine

    Several product choices can minimize breakage and maximize shine. A crucial step involves using heat protectant sprays before styling with a silk press to create a protective layer. Proper hydration and moisture retention are essential. Using moisturizing products before, during, and after styling can significantly minimize breakage and maximize shine.

    Community and Culture

    The silk press, a popular styling choice for natural hair, transcends simple aesthetics. It embodies a powerful intersection of personal expression, cultural identity, and evolving beauty standards. Understanding its cultural significance involves exploring diverse interpretations and historical trends, revealing how this versatile style reflects the richness of human experience.Silk press styles, while often associated with a desire for sleekness and manageability, are deeply rooted in personal choices and cultural contexts.

    The way a person chooses to style their hair, including a silk press, can be a powerful act of self-expression and cultural affirmation. This section will delve into the varied ways different communities embrace and interpret this styling method.

    Cultural Significance of Silk Press Styles

    Silk press styles hold varying significance across different cultures. In some communities, it’s a celebration of modern aesthetics, while in others, it may represent a more traditional approach to hair care. For example, some African American communities have long embraced a variety of hairstyles, including the silk press, as a way to showcase both cultural pride and personal style.

    Variations and Interpretations Across Cultures

    The silk press, while a fundamental styling technique, can be adapted and interpreted in numerous ways across diverse cultures. Variations include different textures of hair, use of extensions, and incorporation of other accessories. Some cultures may emphasize specific details in the silk press style, reflecting traditional hairstyles and cultural values.

    Reflection of Personal Preferences and Self-Expression

    The choice to embrace a silk press style often stems from a desire for versatility and ease of maintenance. It allows individuals to experiment with different looks, express personal preferences, and feel confident in their own image. The style can be tailored to complement individual features, creating a unique aesthetic.

    Evolution of Silk Press Styles Over Time

    The evolution of silk press styles reflects broader societal shifts in beauty standards and cultural trends. Early iterations of the style may have been more limited in terms of styling options compared to the current range of possibilities. This evolution has been influenced by media portrayals, celebrity endorsements, and the growing recognition of diverse beauty.

    Examples of Different Interpretations of Silk Press Styles

    • African American Community: A classic silk press can be styled with elaborate braids or twists incorporated, reflecting a rich history of hair adornment and cultural expression.
    • East Asian Community: A sleek silk press might be complemented by intricate updos, reflecting a focus on sophistication and precision in hairstyling.
    • Latin American Community: A silk press could be incorporated into various hairstyles, showcasing the diversity of Latin American cultures and traditions. It may be styled with bold colors or accessories.
    • South Asian Community: The silk press can be adapted to incorporate traditional hair accessories and ornaments, blending modern styles with cultural heritage.

    Styling Inspiration and Examples

    Silk Press Natural Hair

    Unlocking the versatility of your silk press requires exploring the vast array of styling possibilities. From sleek and sophisticated looks to playful and trendy options, the possibilities are endless. This section will delve into a variety of silk press styles, showcasing different lengths, textures, and colors, to inspire your next look. We’ll also examine the impact of accessories and how to choose the perfect style for any occasion.

    Diverse Silk Press Styles

    Silk press styles cater to a wide range of hair textures and preferences. Whether you have long, medium, or short hair, there’s a silk press style that can complement your unique features. Consider factors like face shape, hair color, and personal style when selecting a style.

    Popular Silk Press Hairstyles

    Some popular silk press hairstyles include the sleek straight look, the voluminous updo, and the side-swept style. These styles often utilize techniques like braiding, twisting, or adding extensions to achieve desired effects.

    Visual Inspiration Gallery

    Imagine a gallery featuring a variety of silk press styles. There would be a style for those with long hair, showcasing a sleek, straight look, highlighting the natural shine of the silk press. A medium-length silk press could be styled in a voluminous updo, emphasizing the fullness and bounce of the hair. A short silk press would display a trendy, side-swept style, demonstrating how even short hair can be styled beautifully with a silk press.

    Accessories and Silk Press Styles

    Accessories play a significant role in enhancing silk press styles. Scarves, headbands, and barrettes can add a touch of elegance or a pop of color to a silk press look. Hair clips, in various designs and colors, can be used to create intricate updos or hold back sections of hair. These accessories not only add flair but also can provide practical solutions for managing or styling certain sections.

    Silk Press Styles for Various Occasions

    Occasion Style Example Description
    Formal Event Sleek Straight with Headband A classic straight silk press with a delicate headband adds a touch of sophistication and elegance, suitable for galas, weddings, or other formal gatherings.
    Casual Day Out Side-Swept with a Scarf A relaxed side-swept silk press style, adorned with a patterned scarf, is perfect for a casual day out, brunch, or shopping.
    Special Date Night Voluminous Updo with Jewels A voluminous updo, featuring a combination of twists and braids, and adorned with jeweled clips or hairpins, exudes a romantic and glamorous aura, ideal for a special date night.
    Work Environment Straight and Polished A sleek and straight silk press with minimal styling provides a professional and polished look, appropriate for a work environment.

    Final Conclusion

    In conclusion, mastering a silk press on natural hair is a journey of understanding your hair type, selecting the right products, and embracing the style’s versatility. This guide has provided a framework for achieving a healthy and beautiful silk press, emphasizing the importance of proper maintenance and the selection of appropriate products. From defining the style to exploring its cultural significance, we’ve covered the full spectrum of this popular natural hair styling technique.

    Ultimately, a silk press allows for self-expression and celebrates the unique beauty of natural hair.