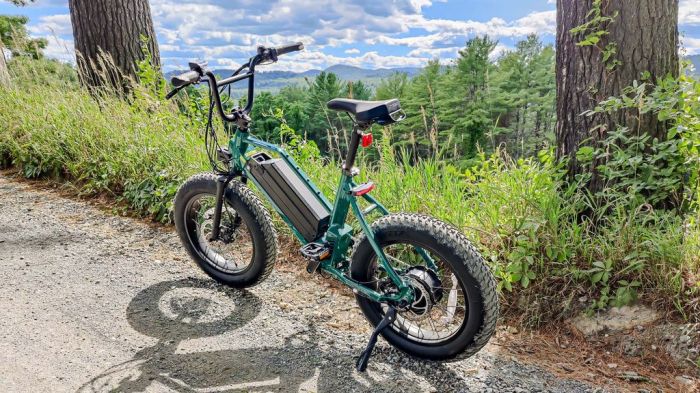
Build an Inexpensive Electric Bicycle: This guide dives deep into crafting your own electric bike without breaking the bank. We’ll explore all the essential components, from motors and batteries to safety features, while keeping costs manageable. Get ready to embark on a thrilling DIY adventure!
From choosing the right motor type to sourcing affordable components, this comprehensive guide walks you through every step of the process. We’ll also cover important considerations like budget allocation, safety measures, and maintenance tips, so you can build your dream electric bike without unnecessary stress.
Identifying Components
Building an inexpensive electric bicycle involves careful selection of components. Balancing performance with budget is crucial. Understanding the trade-offs between different options is key to creating a reliable and enjoyable ride. This section delves into the essential components, their costs, and the pros and cons of various choices.
Essential Components
The foundation of any electric bicycle lies in its core components. Choosing the right combination ensures a satisfying and efficient ride. These include the motor, battery, controller, and display, alongside other crucial accessories like brakes and tires.
| Component Name | Description | Cost Range (USD) | Pros | Cons |
|---|---|---|---|---|
| Motor | The motor converts electrical energy into mechanical energy, propelling the bicycle. | $100-$500+ | Different motor types offer varying performance. A more powerful motor will provide a better ride experience in hilly terrain. | Higher-power motors often come with a higher price tag and may require a larger battery. A weaker motor might not provide sufficient assistance in demanding situations. |
| Battery | Stores the electrical energy used by the motor. | $50-$300+ | Higher capacity batteries provide longer range and can accommodate steeper hills and higher speeds. | Larger battery packs can be heavier and more expensive. Lower capacity batteries are lighter and cheaper, but offer a shorter range. |
| Controller | Controls the flow of electricity from the battery to the motor, regulating the motor’s speed. | $20-$100 | A well-designed controller ensures smooth acceleration and braking. | A poorly designed controller can lead to jerky acceleration or slow response times. |
| Display | Shows information about the bicycle’s status, including speed, battery level, and assist level. | $10-$50 | Provides essential feedback for rider control. | Some displays might have limited features. |
| Brakes | Essential for safety. | $20-$50 | Reliable brakes are vital for safe operation. | Inadequate braking can pose significant safety risks. |
| Tires | Provide traction and support. | $20-$80 | Proper tires enhance stability and performance. | Low-quality tires might not offer adequate grip or puncture resistance. |
Motor Type Trade-offs
Different motor types offer distinct characteristics. Hub motors are often a cost-effective choice, while mid-drive motors offer a more integrated and responsive experience. A good example is a commuter bike with a 250W hub motor, ideal for urban use. This provides a suitable balance between affordability and performance.
Battery Capacity Considerations
Battery capacity directly impacts the range of the electric bicycle. A larger battery allows for longer rides, but increases the weight and cost. Consider your typical riding distance when choosing a battery. For instance, a daily commute of 10 miles might only need a 360Wh battery, whereas a longer, more adventurous ride could necessitate a 500Wh or higher battery.
Controller Selection
The controller manages the motor’s speed and responsiveness. A quality controller ensures smooth and efficient operation. A cheap controller might lead to issues like jerky acceleration or unresponsive braking. Choose a controller that matches the motor’s specifications.
Budget Considerations: Build An Inexpensive Electric Bicycle
Building an inexpensive electric bicycle requires careful budgeting to ensure you get the desired performance without breaking the bank. A well-planned budget allows for informed component choices and prevents overspending on unnecessary features. This section will delve into realistic budget breakdowns for various price points, helping you make informed decisions throughout the entire process.A critical aspect of building an electric bicycle is understanding the trade-offs between price and performance.
Higher-end components often offer better features, durability, and efficiency, but they come at a higher cost. Knowing the potential variations in price for similar components will empower you to select the best fit for your budget and desired functionality.
Realistic Budget Breakdown
Understanding the cost of each component is crucial to creating a viable budget. The price of components can vary significantly depending on the manufacturer, features, and quality. This necessitates a thorough examination of different price ranges for each part.
Component Price Ranges
Different price ranges for components like the motor, battery, controller, and display can dramatically impact the overall cost of the e-bike. A motor priced at $150 might be suitable for a beginner project but may not provide the same power as a higher-priced model. A battery with a lower capacity could be more affordable but might limit the range of the e-bike.
Similarly, the controller, responsible for managing the flow of power, and the display, which provides vital information to the rider, can also differ significantly in price.
- Motor: Budget-friendly motors (e.g., geared hub motors) start around $100 and can be found for as little as $50. Mid-range motors (e.g., geared hub motors with higher torque) might range from $150 to $300. Higher-end motors, potentially offering more power and features, could exceed $500. For example, a powerful mid-drive motor could cost upwards of $800.
The choice will depend on the desired riding experience and terrain.
- Battery: Budget-friendly batteries (e.g., smaller capacity) often start at $50 to $150. Mid-range batteries (e.g., 36V, 10Ah) typically cost between $150 and $300. Higher-end batteries with increased capacity and features, like longer range, can reach $500 or more. Factors like the required voltage and capacity significantly impact the price.
- Controller: Budget controllers, suitable for basic functionality, can be found for $20 to $50. Mid-range controllers offer more advanced features, such as different modes and adjustments, costing between $50 and $150. Higher-end controllers, with additional safety features and adjustments, can surpass $150.
- Display: Simple displays, showing speed and battery level, can be purchased for $20 to $50. More advanced displays, including additional features like cadence and distance tracking, usually cost between $50 and $100. Premium displays, with extra functionalities and sophisticated designs, might cost over $100.
Sample Budget Sheet
This table illustrates a sample budget sheet for an inexpensive electric bicycle, showcasing a range of component costs. This example emphasizes the importance of careful planning to stay within budget constraints.
| Component | Estimated Cost | Total Cost to Date |
|---|---|---|
| Frame | $100 | $100 |
| Motor | $150 | $250 |
| Battery | $200 | $450 |
| Controller | $50 | $500 |
| Display | $30 | $530 |
| Wheels and Tires | $60 | $590 |
| Other Accessories (e.g., Brakes, Cables) | $50 | $640 |
| Total Estimated Cost | $640 |
Sourcing Components
Finding the right components at the right price is crucial for building an inexpensive electric bicycle. This section will explore various avenues for sourcing components, comparing online and local options, and helping you identify reliable sellers. Careful consideration of pricing, shipping, and customer service will ultimately save you money and ensure a smooth assembly process.
Online Marketplaces
Online marketplaces like eBay, Amazon, and AliExpress offer a vast selection of components. This abundance of choices allows for comparison shopping and potentially finding deals on specific parts. However, navigating these platforms requires a keen eye for identifying reputable sellers and verifying product authenticity. A significant advantage is the potential for lower prices, especially on bulk purchases or items with lower demand.
- eBay: A well-established platform, eBay allows you to find both new and used components. However, be prepared to do thorough research on seller feedback and product history to avoid issues with counterfeit or faulty parts. Used components can save money but might need additional inspection and testing before installation.
- Amazon: Amazon provides a wider range of components, including well-known brands, alongside various smaller suppliers. It offers a robust buyer protection policy, but the price point for some items may not always be the lowest. Always check reviews and compare prices across different vendors.
- AliExpress: AliExpress excels in offering budget-friendly components. Expect potentially longer shipping times and verify the seller’s reputation thoroughly. Some components may require extra research to confirm compatibility with your chosen bicycle design. Ensure compatibility before purchase.
Local Retailers
Local bike shops, hardware stores, and electrical suppliers may offer components directly. This option provides the opportunity for in-person inspection and immediate support. However, the variety of components and pricing might be more limited than online options. The advantage is the convenience of local pickup and potentially better customer service.
- Bike Shops: Bike shops often specialize in bicycle parts, providing expertise and likely a broader selection of components. They frequently have in-stock parts, offering immediate availability and potential advice on compatibility. The price point might be higher than online marketplaces.
- Hardware Stores: Hardware stores might carry components like cables, screws, and brackets, but their selection is generally less focused on bicycle parts compared to bike shops. They could offer good prices for basic hardware components.
- Electrical Suppliers: For specific electrical components, suppliers dedicated to electronics might be a good choice. These stores often offer specialized expertise and a larger selection of components than a hardware store, but may not offer as much customization.
Identifying Reputable Sellers
Assessing seller reputation is paramount. Look for sellers with positive reviews, high ratings, and a history of successful transactions. Read through customer feedback carefully to identify patterns related to shipping times, product quality, and customer support. Avoid sellers with a history of negative reviews or inconsistent communication. Thorough research can help mitigate potential problems.
Vendor Comparison Table
| Vendor | Pricing | Shipping Policy | Customer Reviews |
|---|---|---|---|
| eBay | Variable; often competitive | Various; some may require international shipping | Mixed; thorough review essential |
| Amazon | Often competitive but can be higher than other sites | Generally reliable | Usually comprehensive; check for specific product reviews |
| AliExpress | Generally lower than others | Can be slow and unpredictable | Often mixed; verify seller reputation carefully |
| Local Bike Shop | Potentially higher than online options | In-person pickup or local delivery | Can be difficult to gauge from online resources; personal interaction is crucial |
Assembly Procedures
Building your own electric bicycle is a rewarding experience, but meticulous attention to detail and safety are paramount. Thorough planning and a step-by-step approach will ensure a successful build. This section Artikels the crucial assembly procedures, emphasizing safety measures and troubleshooting common problems. Following these instructions carefully will significantly reduce the risk of injury and ensure your bike functions correctly.The assembly process, while potentially complex, is manageable with proper preparation.
Having all components organized and easily accessible is key to a smooth build. Always consult the manufacturer’s instructions for each component for precise guidance. Furthermore, having a well-lit workspace and a stable surface are crucial to preventing accidents.
Safety Precautions During Assembly
Proper safety measures are critical throughout the assembly process. Always wear appropriate safety gear, including eye protection and work gloves. Ensure the work area is clear of obstructions and free from any potential hazards. If using power tools, ensure they are in good working order and follow the manufacturer’s instructions. Disconnecting the battery pack and ensuring its secure storage before any electrical work is also vital.
Step-by-Step Assembly Procedure
Step 1: Thoroughly inspect all components for damage. Ensure all parts are present and in good condition. Check for any signs of bending, cracking, or loose connections.
Step 2: Assemble the frame and fork. Carefully align the components according to the manufacturer’s instructions. Use appropriate tools for tightening bolts and screws, ensuring they are properly secured but not over-tightened.
Step 3: Mount the drivetrain components. Carefully install the chain, cassette, and crankset. Pay close attention to the alignment of the chain and sprockets.
Step 4: Install the handlebars and stem. Ensure the handlebars are correctly aligned and secured to the stem. Adjust the stem to your preferred height and angle.
Step 5: Install the wheels. Carefully mount the wheels to the frame and secure the quick-release levers. Ensure the wheels are securely aligned and true.
So, you’re looking to build an inexpensive electric bicycle? That’s awesome! Figuring out the best components and budget-friendly kits is key. However, sometimes life throws curveballs, and you might find yourself wondering what to do when a guy is kissing your neck. For some great advice on that, check out this article: What Should You Do when a Guy Is Kissing Your Neck.
Once you’ve got your neck-kissing situation handled, you can get back to focusing on your electric bicycle project and enjoy the freedom of two wheels and a little bit of power!
Step 6: Connect the electrical components. Carefully connect the battery pack to the motor controller. Follow the manufacturer’s instructions for the correct polarity.
Step 7: Test the functionality of the motor. Before connecting the battery, test all components to ensure they are operating correctly. Gradually increase the throttle to check the motor’s operation.
Step 8: Install the brakes. Properly install the brakes and test their functionality. Ensure the brakes are adjusted for proper stopping power. Ensure the pads are adjusted correctly.
Step 9: Adjust the seat and pedals. Adjust the seat height and angle for proper ergonomics. Tighten the pedals to ensure they are secure.
Step 10: Complete the final assembly. Check all connections and ensure all components are properly tightened. Test the bicycle’s functionality, including the brakes and gears. Conduct a thorough test ride on a safe and flat surface.
Potential Challenges and Troubleshooting
Common assembly issues include incorrect component alignment, loose connections, and faulty electrical components. Troubleshooting involves carefully checking each connection, ensuring proper torque on fasteners, and verifying the motor’s power output. If problems persist, consulting a bicycle mechanic or the manufacturer’s support resources can provide valuable assistance. Refer to the manufacturer’s instructions for troubleshooting specific components. Always prioritize safety when handling electrical components.
Battery Considerations

Choosing the right battery is crucial for your inexpensive electric bicycle. A poorly selected battery can significantly impact the bike’s performance, range, and even safety. Understanding the different types available and the factors to consider will help you make an informed decision. Let’s dive into the world of electric bike batteries.
Battery Types Suitable for Inexpensive Electric Bicycles
Several battery types are suitable for budget-conscious e-bike projects. Lead-acid batteries, while less expensive, often have a shorter lifespan and require more maintenance. Lithium-ion batteries, although more costly initially, offer significantly higher energy density, longer lifespans, and better safety features. For an inexpensive e-bike, the choice often comes down to balancing cost and performance.
Factors to Consider When Selecting a Battery
Several factors influence your battery choice. Battery capacity, measured in Ampere-hours (Ah), dictates the bike’s range. Higher capacity means more distance. Voltage, measured in volts (V), impacts the motor’s power. Safety is paramount; choose a battery with proper protection circuits to prevent overcharging, over-discharging, and short circuits.
Remember, a safe and reliable battery is worth the extra investment.
Battery Capacity
Battery capacity, typically measured in Ampere-hours (Ah), directly impacts the range of your e-bike. A higher Ah rating means a longer range on a single charge. For example, a 10Ah battery will generally provide more range than a 5Ah battery, assuming similar voltage and other factors. The specific range will depend on the motor’s power consumption and your riding style.
Battery Voltage
The voltage of the battery, measured in volts (V), determines the motor’s power and speed. Higher voltage batteries often translate to more powerful motors and faster acceleration. However, higher voltage also usually implies a greater cost. A 36V battery system is common in many budget e-bikes, offering a good balance between power and cost.
Battery Safety
Safety should be a top priority when selecting a battery. Look for batteries with built-in protection circuits to prevent overcharging, over-discharging, and short circuits. These circuits help maintain the battery’s lifespan and prevent potential hazards. Always follow the manufacturer’s instructions for safe handling and charging.
Lithium-ion Battery Technologies: Pros and Cons
Lithium-ion batteries are a popular choice for e-bikes due to their high energy density, lightweight nature, and longer lifespan compared to other technologies. However, they can be more expensive initially.
- Pros: High energy density, lightweight, longer lifespan, relatively efficient.
- Cons: More expensive than other options, potential for fire risk if not handled correctly.
Comparison of Battery Types
The following table provides a comparison of different battery types, highlighting key features and considerations.
| Battery Type | Cost | Energy Density | Lifespan | Safety | Maintenance |
|---|---|---|---|---|---|
| Lead-acid | Low | Low | Short | Moderate | High |
| Lithium-ion | Medium to High | High | Long | High (with proper protection) | Low |
Motor Selection

Choosing the right motor is crucial for an inexpensive electric bicycle. It directly impacts the performance, efficiency, and overall cost of the build. Different motor types offer varying characteristics, making informed decisions essential for achieving desired speed and torque output within a budget.
Motor Types for Inexpensive E-Bikes
Various motor types are suitable for budget-conscious e-bike projects. Understanding the key characteristics of each type is vital for making the best choice.
- Brushless DC (BLDC) Motors: These motors are a popular choice for e-bikes due to their high efficiency, relatively low maintenance, and long lifespan. They are typically more expensive than brushed DC motors but offer a better overall value proposition. BLDC motors often use a controller to manage power delivery, optimizing performance and efficiency.
- Brushed DC Motors: Brushed DC motors are simpler and generally less expensive than BLDC motors. However, they are less efficient, have a shorter lifespan, and require more maintenance. They often lack the sophisticated control features of BLDC motors.
- Hub Motors: Hub motors are integrated directly into the wheel hub, making installation straightforward. They often come in a compact design and are suitable for many e-bike configurations. This integration is a significant advantage for assembly.
- Mid-Drive Motors: Mid-drive motors are mounted directly to the bicycle’s crankset, delivering power to the pedals. They offer a more natural riding experience and often provide greater power output. They also have a more complex installation process, which may impact cost and effort.
Motor Characteristics Comparison
Comparing different motor types based on torque, speed, and efficiency is essential for selecting the best option for your project.
| Motor Type | Torque (Nm) | Speed (RPM) | Efficiency (%) |
|---|---|---|---|
| BLDC Hub Motor (Example: 250W) | 20-30 | 200-300 | 75-85 |
| Brushed DC Hub Motor (Example: 250W) | 15-25 | 250-400 | 60-75 |
| Mid-Drive Motor (Example: 500W) | 40-60 | 100-200 | 80-90 |
Note: Values in the table are examples and may vary based on specific motor models and specifications. Thorough research is recommended for accurate data. Consider factors such as wheel size, rider weight, and terrain when making your selection.
Factors Influencing Motor Selection
Several factors influence the best motor choice. Consider these elements for a well-rounded decision:
- Budget: BLDC motors generally cost more than brushed DC motors, while mid-drive motors tend to be the most expensive.
- Desired Performance: The desired speed and torque output will directly impact the motor’s power requirements. A higher power output will likely require a larger and potentially more expensive motor.
- Installation Complexity: Hub motors are often easier to install than mid-drive motors, impacting the time and effort required.
Customization Options
Turning your basic e-bike into a truly personalized machine is a rewarding part of the build process. Beyond the essential components, there’s a wealth of customization options that can enhance both functionality and aesthetics without breaking the bank. This involves considering safety and practicality alongside your personal preferences.Careful customization can improve the overall experience and performance of your e-bike, catering to individual needs and preferences.
A well-chosen set of customizations can make your ride safer, more comfortable, and more enjoyable.
Safety Enhancements
Safety should always be paramount when customizing an e-bike. Modifications to ensure rider safety and stability should always be prioritized over aesthetics.Investing in quality components for safety features, such as sturdy fenders, a reliable and well-maintained braking system, and a bright headlight and taillight system, are crucial for rider safety.
Aesthetic Enhancements
Beyond functionality, customization allows you to personalize your e-bike’s appearance. This can be as simple as choosing a different color for the frame or handlebars, or more involved, such as adding custom decals or graphics.Consider using high-quality paint or vinyl decals to achieve a professional-looking aesthetic. Custom paint jobs, while appealing, can be more expensive and require specialized skills.
Practical Enhancements
Practical enhancements can significantly improve your e-bike’s functionality.
- Cargo Capacity: Adding a rear rack and panniers allows you to transport groceries, packages, or other items easily. Consider lightweight but durable materials like aluminum for the rack and panniers to balance weight and durability.
- Comfort Features: A comfortable seat and well-padded grips can dramatically improve your riding experience over longer distances. Look for ergonomic designs that promote proper posture.
- Lighting Upgrades: Adding more powerful lights, especially a bright headlight and a rear taillight, enhances visibility, which is vital for safety, especially in low-light conditions. Consider waterproof and weather-resistant options for durability.
- Suspension: For a smoother ride on rough terrain, adding front or rear suspension can absorb bumps and vibrations. However, this addition will increase the cost and complexity of the build.
Component Selection Considerations
When choosing components for customization, it’s crucial to ensure compatibility with your e-bike’s existing frame and components.
Careful consideration of compatibility is key to avoid conflicts and ensure the components function as intended.
Building an inexpensive electric bicycle is a rewarding project, but sometimes you need a little extra motivation. Just like learning to layer cut your own hair (check out this guide for tips Layer Cut Your Own Hair ), tackling DIY projects requires a bit of know-how. Once you get the hang of it, the satisfaction of a well-built, budget-friendly e-bike is definitely worth the effort.
Compatibility issues can result in poor performance, safety hazards, or even damage to the e-bike’s components.
Building an inexpensive electric bicycle is surprisingly achievable. It’s all about resourceful parts and clever assembly. While you’re brainstorming your build, you might find yourself oddly craving some tasty tunes. Check out this hilarious remix, david ashley funny food remix ft xvrhldy , which perfectly captures the chaotic joy of a DIY project. Ultimately, it’s all about the satisfaction of a custom-built, budget-friendly electric ride.
Safety Features
Building a safe electric bicycle is paramount. Beyond the thrill of the ride, prioritizing safety is crucial for both the rider and those sharing the road. This section dives into the essential safety features, from robust braking systems to illuminating the path ahead. Understanding local regulations and proper adjustments further enhances the safety profile.
Braking Systems
Choosing the right braking system is critical for controlling speed and stopping safely. Different systems offer varying levels of performance and feel. This section provides a comparison to help you make an informed decision.
| Braking System | Description | Advantages | Disadvantages |
|---|---|---|---|
| Hydraulic Disc Brakes | Utilize hydraulic pressure to operate caliper brakes on disc rotors. | Excellent stopping power, consistent performance in various conditions, and good modulation. | More expensive than other options, potentially more prone to leaks if not maintained properly. |
| Mechanical Disc Brakes | Use cables and levers to operate caliper brakes on disc rotors. | Good stopping power, generally reliable, and cost-effective. | Stopping power can vary depending on the cable tension, and performance may be affected by weather conditions. |
| V-Brakes | Employ cable-operated brake arms that squeeze the rim. | Simple design and relatively inexpensive. | Lower stopping power compared to disc brakes, less consistent performance in wet conditions, and less precise modulation. |
Proper brake maintenance is essential for optimal performance. Regularly inspect brake pads for wear and replace them when necessary. Ensure cables are properly lubricated and adjusted to avoid sticking or binding.
Lighting
Adequate lighting is essential for visibility, especially at night or in low-light conditions. A combination of front and rear lights is recommended for both safety and compliance with regulations. Bright, reliable lights are vital for making your electric bicycle visible to other road users.
Compliance with Regulations
Understanding and adhering to local regulations and safety standards is critical. Regulations vary by jurisdiction, so research the specific requirements for electric bicycles in your area. This includes ensuring the bicycle meets the necessary safety standards for its intended use and complies with local laws concerning lights, brakes, and other components. Failure to comply with local regulations can lead to legal issues and fines.
Proper Fitting and Adjustments
Proper fitting and adjustments are crucial for rider comfort and safety. Ensure the bicycle’s components are correctly adjusted to prevent discomfort or potential accidents. This includes handlebars, seat height, and stem position. The rider’s body position and comfort directly influence their control over the bicycle and their ability to react to changing conditions. Properly fitted components also contribute to a more enjoyable and safer riding experience.
Maintenance and Troubleshooting
Keeping your budget-friendly electric bicycle in tip-top shape is crucial for its longevity and performance. Regular maintenance prevents small issues from escalating into costly repairs. Proper care also ensures a smooth and enjoyable ride. This section Artikels essential maintenance tasks, common problems, and troubleshooting steps to help you maintain your e-bike.Regular maintenance is key to extending the life of your electric bicycle and ensuring its smooth operation.
Addressing minor issues promptly prevents them from becoming major problems, saving you time and money in the long run. This section details the preventative measures and proactive steps needed to keep your e-bike running smoothly.
Essential Maintenance Tasks
Regular cleaning and lubrication are vital for preventing rust, wear, and tear on components. Cleaning the chain and drivetrain regularly is crucial to maintaining smooth shifting and preventing damage. Checking the tires’ air pressure is important to maintain proper handling and avoid punctures. Lubricating moving parts, such as the chain and cables, helps maintain smooth operation and prevents friction-related damage.
Inspecting the battery for any signs of damage or leakage is essential for safety and to ensure proper charging.
Common Issues and Troubleshooting Steps, Build an Inexpensive Electric Bicycle
- Chain Issues: A noisy or stiff chain can indicate inadequate lubrication. Troubleshooting involves cleaning the chain with a degreaser, lubricating it with appropriate chain lubricant, and adjusting the chain tension. Incorrect chain tension can cause issues with shifting and the bike’s overall performance.
- Battery Problems: Slow charging or a battery that won’t hold a charge may indicate a faulty battery cell or a problem with the charger. Troubleshooting includes checking the charger’s compatibility with the battery and inspecting the battery connections for any corrosion or damage. If the problem persists, consult a professional.
- Motor Malfunctions: Unusual noises or a loss of power from the motor can stem from a variety of issues, including a malfunctioning motor controller or a problem with the motor itself. Diagnosing the issue may require checking the motor connections, ensuring proper power supply, and, if necessary, seeking professional assistance.
- Brake Problems: Loose or unresponsive brakes can pose safety risks. Troubleshooting includes checking the brake cable tension and ensuring proper brake pad alignment. Regular brake pad inspection is essential to prevent brake failure.
- Electrical Issues: Problems with the lights, displays, or other electrical components can be caused by loose connections or faulty wiring. Troubleshooting includes inspecting the connections, checking for any damage to the wiring, and replacing faulty components if needed.
Importance of Regular Maintenance
Regular maintenance is essential for maintaining the e-bike’s performance, extending its lifespan, and ensuring safety. Proactive maintenance avoids costly repairs and unexpected breakdowns, keeping your bike in optimal condition for years to come. This proactive approach saves you money and hassle down the road.
Tools and Supplies
- Cleaning supplies: Degreaser, chain cleaner, and lubricant.
- Tools: A chain breaker, chain whip, Allen wrenches, and a torque wrench (for adjusting chain tension). Measuring tools like a tire pressure gauge.
- Spare parts: Spare tubes, brake pads, and other components depending on the specific needs of your e-bike.
Final Thoughts
In conclusion, building an inexpensive electric bicycle is achievable with careful planning and execution. This guide provides a roadmap to help you source components, manage your budget, and assemble your bike safely. Remember to prioritize safety and research reputable sellers throughout the process. Now get out there and ride!