Tag: crafts

  • Make a Memory Box A Keepsake Journey

    Make a Memory Box A Keepsake Journey

    Make a Memory Box: A journey into preserving precious moments. This project isn’t just about assembling items; it’s about crafting a tangible representation of your life’s narrative, a treasure trove of cherished memories. From carefully selecting photos and letters to designing a personalized container, this guide will walk you through creating a meaningful keepsake.

    Delve into the process of selecting, organizing, and preserving memories in a beautiful and meaningful way. We’ll explore various materials, design concepts, and organizational strategies to help you create a unique memory box that will stand the test of time. Discover the emotional depth of this craft and learn how to share these memories with loved ones.

    Understanding the Concept of a Memory Box

    A memory box is more than just a container; it’s a tangible representation of our past, a carefully curated collection of cherished moments. It acts as a personal time capsule, holding fragments of our lives that evoke powerful emotions and remind us of who we were, and who we are becoming. The process of creating and maintaining one fosters a deeper connection with our history.Creating a memory box is a deeply personal journey, a process of reflection and selection.

    It allows us to relive significant moments, from joyous celebrations to quiet moments of contemplation. It’s about recognizing the importance of these experiences and preserving them for future reference.

    Purpose and Significance

    A memory box serves as a repository for precious memories, fostering a sense of nostalgia and connection to the past. It allows us to revisit cherished moments and relive emotions associated with those events. The act of collecting and organizing memories within the box strengthens our connection to our personal history and can be a powerful tool for personal growth.

    Examples of Memories to Store

    The contents of a memory box can vary widely, reflecting the individual’s unique experiences. These can include photographs, letters, ticket stubs, concert programs, mementos, or even small objects that symbolize specific events. For instance, a faded ticket stub from a first concert can evoke the excitement of youth. A handwritten letter from a loved one can bring a sense of warmth and connection.

    A worn-out teddy bear from childhood could hold a wealth of comforting memories.

    Types of Memory Boxes

    Memory boxes can take various forms, from the traditional physical box to the more modern digital archive. Physical memory boxes are tangible containers that hold physical mementos. Digital memory boxes utilize technology to store and share memories, often in the form of photo albums, online scrapbooks, or video recordings. Each type offers unique advantages in terms of accessibility, preservation, and sharing.

    Emotional Connection

    The emotional connection to a memory box is profound. The act of collecting and arranging items within the box evokes feelings associated with each memory. Holding a cherished photograph, for example, can trigger a flood of emotions, reminding us of the joy, love, or even sorrow associated with that specific moment. The tactile experience of touching items adds a layer of depth to the emotional connection.

    Comparison with Other Memory Preservation Methods

    Compared to other methods of memory preservation, such as journaling or video recordings, a memory box offers a unique sensory experience. Journaling provides a detailed written account of events, while video recordings capture visual and auditory details. However, a memory box combines these elements with the tactile and visual experience of physical objects. This multi-sensory approach often creates a more profound and evocative connection to the past.

    Making a memory box is a fantastic way to preserve precious moments. It’s like capturing a fleeting feeling and tucking it away for later. You could even include something like a queen ant, carefully collected and documented in a similar way to Catch a Queen Ant , a fascinating little creature with its own unique life cycle.

    This helps you remember the process of collecting it as well as the memory itself. Ultimately, the memory box becomes a tangible representation of your journey, a personalized time capsule.

    The tangible nature of a memory box allows for a more intimate and personalized connection with the memories it holds, unlike a purely digital record.

    Materials and Supplies for Crafting a Memory Box

    Crafting a memory box is more than just collecting items; it’s a journey of preserving cherished moments and creating a tangible representation of your life’s narrative. The materials you choose play a crucial role in the box’s aesthetic appeal and the overall experience it offers. Careful selection of materials can elevate the box from a simple container to a truly meaningful keepsake.The right materials not only enhance the physical appearance of the memory box but also contribute to its emotional resonance.

    Selecting items that evoke strong feelings and memories is essential for transforming the box into a personal sanctuary. This process involves considering not only the aesthetic appeal but also the sentimental value each item holds. Choosing the right containers and embellishments is key to creating a box that resonates with the memories it encapsulates.

    Essential Materials

    The core materials for a memory box are the container, decorative elements, and sentimental objects. A sturdy and visually appealing container is the foundation. Decorative elements like fabric, paper, or paint can personalize the box and create a unique aesthetic. Finally, sentimental objects, such as photographs, letters, or small mementos, are the heart of the memory box, adding emotional depth to the entire experience.

    Aesthetic Choices and Customization

    Customization options are vast and depend entirely on your preferences. You can choose from a variety of colors, patterns, and textures for the container and decorative elements. Embellishments such as ribbons, buttons, and lace can add a touch of elegance and personality. Consider the overall theme of the memories you wish to encapsulate, and let that guide your choices.

    For example, a vintage-themed memory box might feature a wooden container, lace trim, and sepia-toned photographs. Conversely, a modern memory box could utilize a sleek metal container, with geometric patterns and contemporary art prints.

    Making a memory box is a fantastic way to preserve cherished moments. Thinking about all the amazing music, like the lineup for Animal Collective, Godspeed You! Black Emperor, Deerhunter, Diplo, Chromatics, and Glass Candy playing at MusicfestNW, this year’s lineup is shaping up to be epic. It’s a great way to capture these incredible moments in a physical form to relive them later, just like a memory box would.

    Types of Containers

    A wide array of containers can serve as memory boxes, each with its own unique characteristics. Cardboard boxes are budget-friendly and versatile, suitable for a variety of memory types. Wooden boxes offer a classic and elegant touch, suitable for special occasion memories. Fabric-lined boxes create a soft and cozy atmosphere, perfect for storing delicate items. Glass containers, due to their transparency, are ideal for showcasing cherished items.

    Making a memory box is a great way to preserve those special moments. While you’re crafting it, why not put on some chill tunes like Gucci Mane’s new mixtape, El Gato the Human Glacier ? The perfect soundtrack to help you reflect on those cherished memories as you assemble your box. It’s a fantastic way to add a little extra ambiance to the process.

    Ultimately, the choice depends on the desired aesthetic and the type of items to be stored.

    Sentimental Objects

    The inclusion of sentimental objects is critical to the memory box’s purpose. These objects should be carefully selected to evoke specific memories and emotions. Photos, letters, tickets, and small mementos can all hold significant meaning and create a powerful connection to the past. Choosing objects that evoke strong feelings and memories is key to transforming the box into a personal sanctuary.

    Alternative Decoration Materials

    Beyond traditional embellishments, various alternative materials can add unique character to your memory box. Dried flowers, pressed leaves, or small sculptures can add a touch of nature and creativity. Fabric scraps, patterned papers, and even beads can be used to create intricate designs and patterns. These alternative materials can reflect your personal style and add a layer of individuality to the box.

    Materials Suitability Table

    Material Description Suitability
    Cardboard Sturdy and versatile General use, inexpensive
    Fabric Soft and decorative Lining, embellishments, adding texture
    Wood Durable and elegant Special occasion boxes, adding a classic touch
    Glass Transparent and delicate Showcasing items, creating a display

    Designing and Organizing the Memory Box: Make A Memory Box

    Make a Memory Box

    A memory box isn’t just a container; it’s a tangible representation of cherished moments. Designing its layout and meticulously organizing its contents are crucial steps in preserving these memories for future reflection and enjoyment. This process allows us to engage with our past, present, and future in a profound way, fostering a deeper understanding of ourselves and the people around us.Careful planning ensures the box becomes a meaningful repository, not just a jumbled collection of items.

    By thoughtfully structuring the box and selecting appropriate items, you transform it into a personal time capsule, a source of joy and connection.

    Basic Layout for a Memory Box, Make a Memory Box

    The design of your memory box should reflect the types of memories you want to preserve. A basic layout might include sections for photographs, letters, mementos, and even small notes or ticket stubs. Consider creating designated spaces for specific types of memories, such as vacations, milestones, or relationships. This organization allows for easier retrieval and exploration of particular memories.

    Clear labeling of these sections can enhance the overall experience.

    Selecting Items for the Memory Box

    Careful selection of items is key to the memory box’s success. Start by considering the types of memories you wish to encapsulate. Ask yourself what truly represents significant moments or relationships. Don’t just collect items; select those that evoke strong feelings or carry special meaning. This process requires reflection and emotional connection to the items you choose.

    Prioritize quality over quantity.

    Preserving and Protecting Items

    Preserving the items inside the memory box is vital to maintaining their integrity. Proper storage methods will ensure longevity and prevent damage. For example, photographs should be carefully mounted or placed in acid-free sleeves. Sensitive documents and papers should be stored in archival-quality folders. Think about the potential for fading, warping, or deterioration, and take measures to prevent these issues.

    This meticulous care will guarantee that the contents remain as pristine as possible.

    Creating a Narrative within the Box

    Creating a narrative within the memory box elevates its significance. Think of the stories behind the items you choose. Include handwritten notes, anecdotes, or descriptions of events that happened. These narratives add context to the items and transform the box into a personalized scrapbook. The more detailed the descriptions, the richer the experience for the future viewer.

    Categorizing Memories

    Categorizing memories within the memory box facilitates easier retrieval and exploration. Common methods include:

    • Chronological: Arranging items by date or time period. This approach provides a linear progression of events, offering a sense of the passage of time.
    • Thematic: Grouping items based on themes or topics. For example, you might create sections for “Family Vacations,” “School Years,” or “Significant Relationships.” This allows for focused exploration of particular experiences.
    • Personal: Categorizing items based on their individual significance to you. This method is highly personal and reflects the importance of specific memories to the individual. This allows for exploration and reflection on what shaped you as a person.

    Organizational Systems for a Memory Box

    Different organizational systems can enhance the memory box’s usability. Here’s a table illustrating various methods:

    System Description Advantages
    Chronological Arranging items by date or time period. Easy to follow the progression of events.
    Thematic Grouping items based on themes or topics. Focused exploration of particular experiences.
    Personal Categorizing items based on individual significance. Meaningful and insightful to the owner.

    Preserving and Displaying Memories Inside

    Make a Memory Box

    Crafting a memory box isn’t just about collecting items; it’s about preserving the stories they tell. This crucial step ensures your cherished mementos remain intact for future generations to appreciate. Proper preservation and display techniques transform a simple box into a time capsule, a tangible link to the past.Effective preservation goes beyond simply placing items in a box.

    It involves understanding the unique needs of each item and employing suitable methods to prevent damage or deterioration. Thoughtful display enhances the storytelling aspect, allowing each piece to contribute to the overall narrative of your memory box.

    Preservation Methods for Physical Items

    Careful preservation methods are essential for maintaining the integrity of your memories. Using appropriate materials and techniques will ensure your items remain in pristine condition for years to come. Protecting these tangible links to the past ensures they can be enjoyed for generations.

    • Photographs: Mounting photographs on acid-free boards is a crucial step to prevent fading and deterioration. Acid-free materials are specifically designed to not react with the chemicals in photographs, preserving their vibrancy. This method is particularly important for preserving old or valuable photographs, as the quality of the paper and inks can degrade over time. Carefully selecting mounting boards and using archival-quality adhesive ensures the long-term integrity of the images.

    • Letters and Documents: Archival-quality envelopes and folders are vital for preserving letters, documents, and other paper items. These materials are specifically designed to resist acidity and other environmental factors that can damage paper. Using acid-free tissue paper or acid-free sleeves can also protect fragile documents from dust, dirt, and moisture.
    • Small Objects: Display cases or boxes are perfect for preserving small, delicate items. These containers protect objects from dust, light, and damage. Choose materials that won’t react with the objects inside, ensuring their long-term preservation. For particularly delicate items, consider using specialized display cases with climate control features.

    Display Techniques for Effective Storytelling

    The way you display items significantly influences how your memory box tells its story. A well-organized and thoughtfully presented collection enhances the viewer’s experience and allows the memories to resonate more deeply. A curated display brings the narrative to life.

    • Photographs: Arrange photographs in a chronological order or by theme. Use acid-free mounting boards to showcase photos effectively. Displaying them in a visually appealing manner, like a timeline or a thematic grouping, will engage viewers and enhance the storytelling. Consider using matting to highlight specific photographs and create visual interest.
    • Letters and Documents: Display letters and documents using archival-quality folders or display cases. Arrange them in a logical sequence to maintain the narrative flow. For example, letters from a particular period could be grouped together. Include captions or labels to provide context for each item and help viewers understand the story behind the document.
    • Small Objects: Display small objects using display cases or boxes, keeping in mind the delicate nature of the items. Arrange them in a way that showcases their beauty and adds to the story. A thematic arrangement, for instance, grouping items that relate to a specific event, can further enhance the visual narrative.

    Suitable Containers for Different Items

    Choosing the right container for each item is crucial for its preservation. Consider the size, shape, and material of the container to ensure it protects the item and enhances its presentation. The container plays a critical role in protecting and highlighting the items.

    • Photographs: Acid-free albums, boxes, or portfolios are ideal for displaying photographs in an organized manner. These containers provide protection and allow for a visually appealing presentation.
    • Letters and Documents: Archival-quality folders, boxes, or portfolios are perfect for organizing and preserving letters and documents. These materials protect the paper from damage and deterioration.
    • Small Objects: Display cases, small boxes, or decorative containers provide a secure and attractive way to showcase small objects. Choose containers that are appropriate for the size and type of object.

    Preservation Methods Table

    | Item | Preservation Method | Description ||—|—|—|| Photographs | Mounting on acid-free boards | Protects from fading and damage || Letters | Storing in archival-quality envelopes | Preserves ink and paper integrity || Small objects | Using display cases or boxes | Protects from dust, light, and damage |

    Sharing and Reflecting on Memories

    Creating a memory box is more than just collecting items; it’s a journey of personal discovery and connection. The process of selecting, organizing, and preserving these mementos fosters a unique relationship with the past. It’s a tangible representation of cherished moments, and the act of sharing and reflecting on these memories deepens their impact.Sharing these curated treasures allows for a powerful exchange of stories and emotions.

    It bridges gaps between generations, and strengthens bonds with loved ones. The act of reflection, triggered by these carefully chosen items, provides a unique lens through which to view past experiences, fostering personal growth and understanding.

    Stories of Memory Box Creation

    Many individuals have found profound meaning in creating memory boxes. A grandmother, meticulously assembling a box filled with photographs and letters from her children and grandchildren, discovered a newfound appreciation for the love and support within her family. This act of preservation transformed her perspective on the passage of time and the enduring nature of family bonds. Another person, inspired by a lost photograph, sought to document their own memories of a cherished trip, creating a detailed box filled with maps, tickets, and personal notes.

    This project served as a reminder of the significance of travel and the importance of capturing fleeting moments. Each story is unique, but the common thread is a powerful connection to the past.

    Importance of Sharing Memories

    Sharing memories with others enriches the experience for everyone involved. A shared laugh over a childhood photograph or a reflective discussion about a significant event can strengthen bonds and create lasting connections. When memories are shared, they become a part of the collective narrative of a family or community, weaving together individual stories into a rich tapestry of shared history.

    The process of recounting memories and hearing others’ perspectives fosters empathy and understanding.

    Methods for Reflecting on Memories

    Reflecting on memories in a memory box can take various forms. One can simply sit and examine the contents, allowing the items to trigger personal reflections. Writing down thoughts and feelings associated with each item or creating a narrative based on the contents can further deepen the reflective process. Looking at photographs and reading handwritten letters can transport you back in time, rekindling emotions and sensations.

    Engaging in conversations with others about the memories represented in the box can lead to deeper understanding and appreciation.

    Emotional Benefits of Creating and Revisiting a Memory Box

    Creating a memory box can offer a multitude of emotional benefits. The act of collecting and organizing items can be a therapeutic exercise, allowing one to process emotions and gain closure. Revisiting these memories, particularly through the physical objects within the box, can evoke powerful feelings of nostalgia and comfort. These tangible reminders of past experiences can provide a sense of grounding and connection to one’s identity and heritage.

    The process can also be a source of joy, peace, and contentment.

    Comparing and Contrasting Sharing Experiences

    Sharing memories with different people can lead to varied experiences. Sharing with a close friend might involve laughter and shared understanding, while sharing with a family member could evoke a sense of connection and family history. Sharing with a stranger or someone who wasn’t directly involved in the memory can open a window to a new perspective. These different interactions can highlight the diverse ways in which memories are perceived and interpreted.

    Benefits of Reflecting on Memories in a Memory Box

    Benefit Description
    Emotional connection Reconnecting with past feelings and emotions associated with the memory.
    Sense of nostalgia Experiencing feelings of longing, warmth, and fondness for the past.
    Personal growth Gaining perspective on past events, recognizing personal development, and understanding how experiences have shaped who you are today.

    Closing Notes

    Crafting a memory box is a deeply personal and rewarding experience. It’s about more than just preserving objects; it’s about preserving feelings, connections, and stories. This guide offers a comprehensive framework for creating a memory box that reflects your unique journey and allows you to revisit cherished moments. Let your memories live on, beautifully preserved within a tangible keepsake.

  • Repurpose Old VHS Tapes Creative Ideas

    Repurpose Old VHS Tapes Creative Ideas

    Repurpose Old VHS Tapes opens a world of possibilities for transforming those dusty, forgotten VHS tapes into something beautiful and useful. From crafting charming coasters to designing stunning home decor pieces, this guide dives deep into the creative process of breathing new life into these vintage treasures.

    This exploration will cover everything from the history and storage of VHS tapes to a variety of repurposing methods, project ideas, and even the environmental impact of your creative endeavors. Get ready to unleash your inner artist and discover the hidden potential of your old VHS tapes!

    Introduction to VHS Tapes

    The VHS (Video Home System) tape revolutionized home video viewing in the 1970s and 1980s. Prior to VHS, home video was largely limited to expensive, cumbersome, and often poor-quality formats. VHS offered a more affordable and accessible way to record and playback movies, television shows, and other video content, fundamentally changing how people consumed entertainment.VHS tapes became a ubiquitous part of households worldwide, capturing a significant portion of popular culture memories.

    Their prevalence reflects the technology’s accessibility and affordability during a specific historical period.

    Ever feel a pang of nostalgia for those old VHS tapes? Instead of letting them gather dust, why not repurpose them? You could create stunning artwork or even unique home decor. Speaking of creativity, I just discovered this incredible cover of Iggy Pop’s “Gimme Danger” and “Sister Midnight” by Interpol and Paul Banks, a perfect soundtrack to any DIY project.

    interpol paul banks covers iggy pop gimme danger and sister midnight listen. The raw energy of the music really inspires me to get crafting and find new ways to breathe new life into those old tapes!

    Different Types of VHS Tapes

    VHS tapes come in various types, each designed for specific purposes and with differing characteristics. Understanding these differences is crucial for proper storage and handling.

    • VHS-C tapes: Smaller and more portable than standard VHS tapes, VHS-C tapes are ideal for camcorders and offer a compact format for storage.
    • VHS Hi-Fi tapes: Designed for higher-quality audio reproduction, these tapes offer a richer sound experience compared to standard VHS tapes. They were commonly used for recording music and audio programs.
    • Super VHS tapes: This format was an upgrade to standard VHS tapes, featuring a higher resolution and improved picture quality. Super VHS tapes were particularly popular for recording high-definition signals and special events.

    Common Issues with VHS Tapes

    Several issues can affect the quality and longevity of VHS tapes. Understanding these problems is essential for proper care and maintenance.

    • Degradation of the magnetic tape: Over time, the magnetic coating on the tape can degrade, leading to loss of signal and image quality. Heat, humidity, and exposure to light can accelerate this process.
    • Head wear: The heads of the VCR (Video Cassette Recorder) can wear down over time, resulting in scratchy playback and loss of image clarity. Regular cleaning of the VCR heads can extend their lifespan.
    • Dust and debris: Dust and other debris can accumulate on the tape, leading to playback issues and a degradation of picture quality. Proper handling and storage can minimize this problem.

    Proper Storage of VHS Tapes

    Proper storage is crucial to maintain the integrity and longevity of your VHS tapes. Maintaining a stable environment for your tapes is key.

    • Temperature and Humidity Control: Store VHS tapes in a cool, dry place, away from direct sunlight, heat sources, and extreme temperatures. Fluctuations in temperature and humidity can negatively impact the magnetic coating of the tape.
    • Protection from Physical Damage: Avoid bending, scratching, or dropping the tapes. Store them in their original cases or archival-quality sleeves to prevent damage.
    • Avoid Exposure to Magnetic Fields: Do not store VHS tapes near strong magnetic fields, such as those generated by loudspeakers, magnetic storage devices, or other electronic equipment. This can affect the magnetic properties of the tape.

    Example of a VHS Tape Degradation Case

    A user reported a significant loss of picture quality on a 1980s-era VHS recording of a concert. The tape was stored in a hot, humid attic, and the degradation was attributed to both heat and humidity damage. This highlights the importance of storing VHS tapes in a stable environment to avoid this type of degradation.

    Methods for Repurposing

    Unveiling the hidden potential of old VHS tapes, we embark on a journey of creative repurposing. These once-ubiquitous media, now often relegated to dusty storage, hold a wealth of possibilities for transformation. From decorative accents to functional accessories, the possibilities are as varied as the tapes themselves. The process is not only environmentally friendly but also offers a unique opportunity to reclaim and reimagine discarded materials.Beyond the nostalgic value, repurposing VHS tapes offers a chance to infuse discarded materials with new life.

    Repurposing old VHS tapes is a fantastic way to give them a new life, and it’s surprisingly creative. Imagine turning those dusty tapes into something awesome, like a cool art piece or even a quirky storage solution. You could even use them as inspiration for a new project, like designing a custom dragon for Dragon City, and potentially even get a Heroic in Dragon City! Get a Heroic in Dragon City is a great resource for tips and tricks.

    The possibilities are endless, and it’s a fun way to embrace the past and give those old tapes a fresh, modern twist.

    The process allows us to appreciate the craftsmanship and materials embedded within these relics of a bygone era. Each repurposed item tells a story, a tangible reminder of the past, and a testament to the enduring appeal of creativity and resourcefulness.

    Creative Repurposing Ideas

    A multitude of creative projects await, drawing inspiration from the tapes’ physical attributes. The plastic casing, the reels, and the magnetic tape itself can all be incorporated into new designs. Transforming these familiar elements into something new and unique can be a rewarding experience.

    • Decorative Wall Art: The VHS case, with its distinctive shape and often vibrant colors, can be a striking focal point. Painted or decoupaged, the cases can be arranged as wall art, creating a gallery wall effect. Combining the cases with other repurposed materials, like wood or fabric, can add a layer of depth and visual interest. Consider using different sizes and colors of VHS cases to create a dynamic and eye-catching design.

    • Jewelry and Accessories: The plastic casing can be fashioned into unique earrings, bracelets, or necklaces. The textured surface can be embellished with beads, paint, or other decorative elements. This method allows for personalized and distinctive designs.
    • Planters and Holders: The sturdy construction of the VHS cases makes them suitable for use as planters or small storage containers. Painted or left in their original colors, the cases can hold small plants or succulents, adding a touch of vintage charm to any space. The reels themselves can also be incorporated into a unique holder for small items.

    Comparing Repurposing Techniques

    Different repurposing techniques cater to various materials and desired aesthetics. The choice of technique significantly impacts the final product’s appearance and functionality.

    Technique Materials Aesthetic Functionality
    Painting Plastic, Wood Vibrant, Monochromatic, Abstract Decorative, Protective
    Decoupaging Plastic, Cardboard Vintage, Detailed, Intricate Decorative, Protection
    Embellishment Plastic, Metal Unique, Customized, Detailed Decorative, Personalized

    Safe Removal of Magnetic Tape

    Proper removal of the magnetic tape is crucial to prevent damage to the tape itself and the VHS case. The process is relatively straightforward, but care should be taken to avoid scratching or tearing the tape.

    Proper handling ensures the tape is intact for any future reuse or restoration efforts.

    Carefully loosen the tape from the reel, working slowly and methodically. Avoid pulling the tape too hard or too fast. If the tape is sticky or stuck, a gentle application of a slightly damp cloth might help. Ensure the tape is unwound in a controlled manner to prevent damage.

    Repurposed Project Ideas

    Transforming old VHS tapes into something new and useful is a rewarding experience. From quirky decor to practical storage solutions, the possibilities are virtually endless. This section explores innovative ways to repurpose these nostalgic relics, turning them into cherished items for your home or unique gifts for friends.Repurposing VHS tapes offers a sustainable approach to crafting and decor.

    By giving these tapes a second life, we reduce waste and embrace creativity. This section provides practical project ideas, outlining materials and steps for creating various items, encouraging you to dive into the world of VHS tape upcycling.

    Home Decor Ideas

    Repurposed VHS tapes can add a touch of retro flair to any room. Their unique textures and colours offer a wide array of possibilities. From statement wall art to eye-catching table centerpieces, the possibilities are limited only by your imagination.

    Accessories

    VHS tapes can be transformed into stylish accessories. The flexible material allows for various shapes and sizes, making it ideal for creating personalized items like earrings, bracelets, or keychains. These handmade accessories are not only unique but also a conversation starter, showcasing your creative spirit.

    Crafts

    Beyond decor and accessories, VHS tapes can be incorporated into a multitude of crafts. The tapes’ durability and versatility make them ideal for creating various projects, such as photo frames, coasters, or even unique wall hangings. This section explores the possibilities of VHS tape crafting.

    Repurposed Project Examples

    Project Name Materials Steps
    VHS Tape Coasters VHS tape, hot glue, coaster base 1. Cut VHS tape into desired shapes. 2. Glue to coaster base.
    VHS Tape Wall Art VHS tape, glue, cardboard or wood backing, decorative elements (optional) 1. Cut VHS tape into desired shapes and patterns. 2. Arrange on cardboard or wood backing. 3. Secure with glue. 4. Add decorative elements (paint, beads, etc.) for extra flair.
    VHS Tape Jewelry VHS tape, jewelry making tools (pliers, wire cutters), beads (optional) 1. Cut VHS tape into desired shapes for earrings, bracelets, or necklaces. 2. Use jewelry tools to create the desired design. 3. Add beads for extra embellishment.

    Storage Solutions

    Transforming VHS tapes into functional storage solutions is a clever and creative approach. The tapes’ ability to be cut and molded allows for custom-fit organizers for various items.

    • VHS Tape Storage Boxes: Cut VHS tapes into strips and use them to create decorative and functional dividers within existing storage boxes, or construct your own custom boxes. This approach maximizes space and adds a personal touch to your storage solutions.
    • Repurposed VHS Tape Organizers: Use VHS tape to create custom organizers for small items like pens, pencils, or craft supplies. Cut the tape into various shapes and sizes to fit your needs and aesthetic.
    • VHS Tape Pencil Holders: Cut VHS tape into strips and arrange them to create a unique and decorative pencil holder. This provides a practical storage solution and adds visual appeal to your workspace.

    Creative Applications

    Repurpose Old VHS Tapes

    Unleashing the artistic potential of old VHS tapes is a fantastic way to repurpose these nostalgic treasures. Transforming them from discarded media to unique, personalized artwork opens up a world of possibilities. From vibrant jewelry pieces to eye-catching textile designs and even stunning home décor accents, the possibilities are limited only by your imagination.Beyond simple repurposing, these creative applications allow for a fascinating exploration of the interplay between vintage technology and contemporary artistry.

    The textured surface and familiar aesthetic of VHS tapes can become the canvas for a diverse range of artistic expressions.

    VHS Tape Jewelry Design

    The unique texture and visual appeal of VHS tape lend themselves perfectly to jewelry creation. Imagine delicate necklaces featuring intricate patterns formed from meticulously cut VHS tape, or bracelets woven with strips of varying colors.

    • Necklaces: For necklaces, carefully cut strips of VHS tape can be arranged in various patterns, like geometric designs or flowing curves, and strung together with wire or beads. The different colors and textures of the tape can create a striking visual effect.
    • Bracelets: Bracelets can be made by weaving VHS tape strips together in intricate patterns or by creating a layered effect with different colored tapes. Using different widths and colors of VHS tape can add visual depth and interest to the bracelet design.
    • Earring designs: Small, delicate earrings can be crafted from carefully cut VHS tape pieces, arranged in symmetrical or asymmetrical patterns, offering a unique touch to your style.

    Textile and Fabric Projects

    VHS tape can be a remarkable addition to textile and fabric projects. The tape’s unique texture can add visual interest and depth to various crafts.

    • Embellishments: VHS tape can be used as a decorative element for tote bags, scarves, or even clothing. Cut into strips or small squares, the tape can be glued or sewn onto fabrics, adding a unique and visually striking embellishment.
    • Wall hangings: Creating wall hangings using VHS tape is another exciting option. The tape’s color and texture can be combined with other fabrics or materials, resulting in a truly unique and eye-catching piece of art.
    • Textile art: VHS tape can be incorporated into various textile art projects, like quilts or tapestries. The tape’s colors and patterns can be used to create abstract or representational designs.

    Furniture Design and Restoration

    The use of VHS tape in furniture design and restoration is less common but holds surprising potential. The tape’s unique texture can be used to add a unique touch to existing furniture or to create a unique design in new furniture.

    • Accent pieces: In furniture restoration, VHS tape can be used to add accents to surfaces. For instance, it can be applied to the legs of a chair to add a touch of retro flair or used as a decorative band around the edges of a table.
    • Custom designs: In new furniture designs, VHS tape can be used as an integral element. It could be used to create patterned surfaces on drawers, or integrated into the frame of a piece to create a visually appealing contrast.

    Home Décor

    Incorporating VHS tape into home décor projects offers a fun way to showcase retro aesthetics while adding a unique touch.

    • Wall art: VHS tape can be used to create decorative wall art. The tape can be arranged in various patterns or shapes to create a visually striking piece of art.
    • Picture frames: VHS tape can add a unique touch to picture frames. It can be used to create a textured border around a picture or to add a decorative pattern to the frame itself.
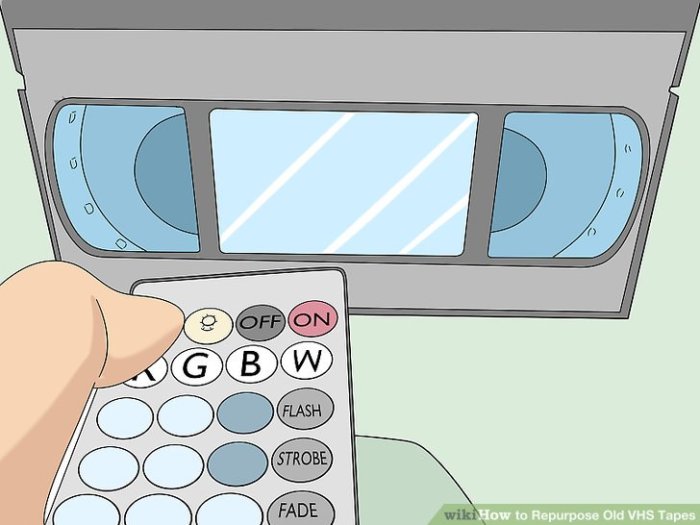
    • Lighting fixtures: VHS tape can be used as an element in creating unique lighting fixtures. The tape’s reflective properties can create interesting visual effects.

    Technical Aspects of Repurposing

    Transforming old VHS tapes into something new requires a careful approach. Understanding the technical aspects of the tape and its components is crucial to ensure successful repurposing and avoid damage. This section dives into the preparation steps, necessary tools, safety precautions, and different techniques for manipulating the tape.Careful handling of VHS tapes is essential to avoid scratching or damaging the magnetic coating, which directly affects the quality of the repurposed product.

    The process involves careful planning and precise execution to ensure that the tape retains its integrity throughout the repurposing process.

    Preparing the VHS Tape

    The first step in repurposing a VHS tape is proper preparation. This involves carefully separating the tape from its casing and ensuring that the tape itself is clean and free from damage. Handling the tape should be done with care to prevent scratching, which can affect the integrity of the tape’s magnetic coating.

    • Tape Removal: Carefully separate the VHS tape from its plastic casing. Use clean, lint-free cloths or specialized tape-handling tools. Avoid using sharp objects, as they can scratch the tape.
    • Cleaning the Tape: Gently clean the tape with a soft, lint-free cloth dampened with a mild cleaning solution. Avoid using harsh chemicals, as these can damage the tape’s magnetic coating. Always test any cleaning solution in an inconspicuous area first.
    • Inspecting for Damage: Thoroughly inspect the tape for any signs of damage, such as tears, scratches, or discoloration. Any significant damage may affect the quality of the repurposed project.

    Tools and Equipment

    The tools and equipment needed for repurposing VHS tapes vary depending on the specific method. A basic set of tools for most projects includes scissors, glue, and various materials for the intended repurposing project. More complex projects may require additional equipment, such as specialized cutting tools or a hot glue gun.

    • Basic Tools: Scissors (sharp, precise ones are recommended), craft knife, various types of glue (e.g., hot glue, fabric glue, epoxy), measuring tape, ruler.
    • Specialized Tools: For intricate cuts or designs, consider using rotary cutters, craft knives, or even specialized tape-cutting tools. These tools can create clean and precise cuts. For projects involving heat, ensure safety precautions are followed, such as using heat-resistant gloves and working in a well-ventilated area.
    • Auxiliary Materials: Depending on the repurposing method, other materials may be necessary, such as fabric, cardboard, wood, or other decorative elements. Proper selection of materials is crucial for the overall aesthetic and structural integrity of the project.

    Safety Precautions

    Handling VHS tapes and their components requires careful consideration of safety precautions. This includes protecting yourself from potential hazards and ensuring the workspace is safe. Proper disposal of any damaged tape is also an important safety measure.

    • Protective Gear: Always wear safety glasses or eye protection when working with sharp objects or heat sources. Use gloves to avoid contact with potentially harmful materials.
    • Workspace Considerations: Ensure the workspace is clean, well-lit, and free from distractions. Use a stable surface to avoid accidents. Ensure good ventilation, especially when using heat-sensitive materials or glues.
    • Disposal of Damaged Tapes: Damaged tapes should be disposed of properly to prevent potential hazards. Consult local guidelines for proper electronic waste disposal.

    Cutting and Shaping Techniques

    Different cutting and shaping techniques can be employed to repurpose VHS tapes. The best method depends on the specific project and desired outcome. Understanding the different methods will help you select the most appropriate technique for your repurposing project.

    • Basic Cutting: Using scissors or a craft knife, you can create basic shapes and cut the tape into desired lengths or strips. This method is straightforward and suitable for simpler projects.
    • Specialized Cutting: For more intricate shapes, consider using rotary cutters or specialized tape-cutting tools. These tools provide greater precision and control, allowing for more detailed designs.
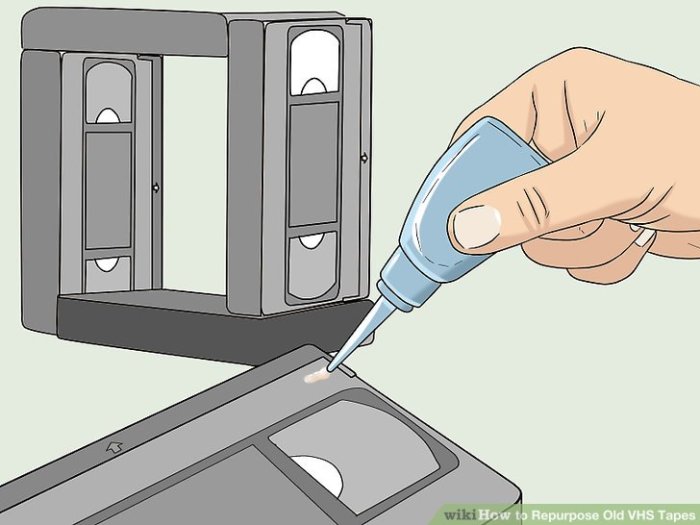
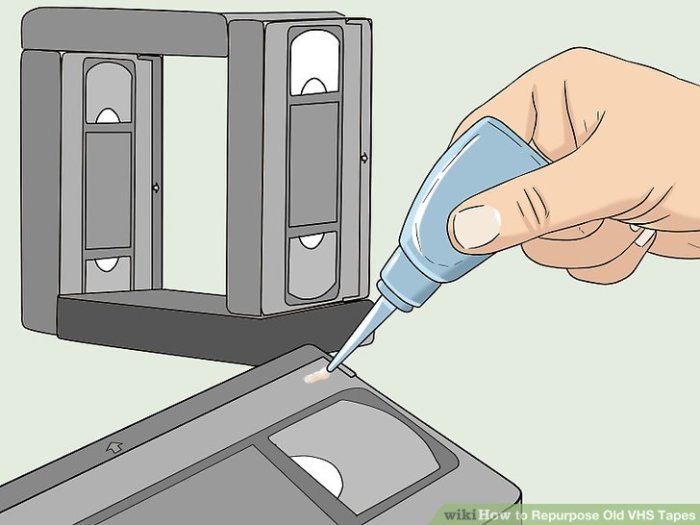
    • Gluing and Assembling: Once the tape is cut, you can use various adhesives to assemble it into different shapes or structures. Experiment with different glues to find the best fit for your specific project.

    Preparing for Different Projects

    The preparation steps for different repurposing projects vary slightly. Careful planning and preparation will enhance the overall quality and longevity of the repurposed project.

    • Cutting and Assembling: For projects involving cutting and assembling the tape, carefully measure and mark the desired cuts. Use appropriate cutting tools and ensure clean cuts to prevent fraying. Apply glue or adhesive carefully to avoid accidental spills.
    • Decorative Projects: For decorative projects, consider adding other materials to the tape to enhance the aesthetic appeal. Experiment with different textures and colors to achieve a unique design. Use appropriate adhesives to ensure that the added materials adhere securely.

    Environmental Considerations: Repurpose Old VHS Tapes

    Discarding VHS tapes, like many other forms of plastic media, contributes to landfill waste and environmental pollution. The manufacturing process of these tapes, involving various chemical components, also has an environmental footprint. Understanding the impact of disposal and exploring responsible alternatives is crucial for a sustainable approach to media preservation and repurposing.The lifecycle of a VHS tape, from production to disposal, presents several environmental challenges.

    The extraction of raw materials, the energy consumption during manufacturing, and the potential for leaching of harmful chemicals during decomposition all contribute to the overall environmental impact. Furthermore, the sheer volume of discarded VHS tapes in landfills globally underscores the need for innovative solutions to reduce waste and promote sustainability.

    Impact of Discarding VHS Tapes

    VHS tapes are largely composed of plastic, including various polymers. These materials take hundreds, if not thousands, of years to decompose in landfills, contributing to the accumulation of non-biodegradable waste. The manufacturing process also involves energy consumption and the use of potentially harmful chemicals. Discarded tapes can leach these chemicals into the soil and water, further contaminating the environment.

    This contamination can have detrimental effects on both the local ecosystem and human health.

    Recycling and Responsible Disposal

    Recycling VHS tapes is often challenging. Local recycling programs may not accept them, and there isn’t a widespread infrastructure for VHS tape recycling like there is for other plastics. When recycling is not possible, responsible disposal methods are crucial. Properly sorting and disposing of VHS tapes in designated landfill areas can minimize the risk of environmental contamination.

    Organizations dedicated to waste management can offer guidance on the correct disposal procedures.

    Repurposing VHS Tapes: Reducing Waste

    Repurposing VHS tapes provides a significant opportunity to reduce waste and promote sustainable practices. Transforming these often-discarded materials into new, useful items diverts them from landfills and conserves valuable resources. The process of upcycling VHS tapes reduces the demand for new materials, minimizing the environmental impact associated with their extraction and manufacturing.

    Eco-Friendly Repurposing Methods

    Various eco-friendly repurposing methods can be employed for VHS tapes. Crafting unique decor items, such as picture frames or decorative wall hangings, is a popular option. Using the plastic casing for creating planters, storage containers, or even decorative accents can transform the material into functional items. Innovative projects can use the tapes to create art pieces, such as mosaics or sculptural installations.

    Repurposing old VHS tapes can be surprisingly creative! Thinking outside the box, you might consider repurposing them into something more useful, like decorative elements. If you’re looking for a new challenge, why not try wiring an electric cooker? Wire an Electric Cooker is a project that might inspire you to explore other DIY options. Once you get a handle on the basic electronics, you could then apply that same ingenuity to your old VHS tapes, turning them into functional art pieces or unique storage solutions.

    It’s all about finding new life for those forgotten treasures!

    This repurposing reduces the need for virgin materials and contributes to a circular economy.

    Importance of Sustainable Practices

    Sustainable practices are crucial for minimizing the environmental impact of repurposing VHS tapes. Choosing eco-friendly materials for the repurposing process, like reclaimed wood or natural fibers, is a key component. Reducing the consumption of energy during the repurposing process is essential, such as using LED lighting or energy-efficient tools. Promoting awareness about the environmental benefits of repurposing VHS tapes is critical for driving widespread adoption of sustainable practices.

    These practices are vital for creating a more environmentally responsible future.

    Troubleshooting and Maintenance

    Repurpose Old VHS Tapes

    Repurposing old VHS tapes can be a rewarding experience, but like any craft project, there can be hiccups along the way. Knowing how to troubleshoot potential problems and maintain your repurposed items is crucial to ensuring a successful outcome and preserving your creations. This section delves into common issues, their solutions, and preventative maintenance strategies.Understanding the materials you’re working with is key to successful repurposing.

    Different repurposing methods will require different levels of care and attention. Knowing what to expect and how to address problems before they escalate is critical.

    Common Problems and Solutions, Repurpose Old VHS Tapes

    A thorough understanding of potential problems and their solutions is essential for a smooth repurposing process. Incorrect handling or inadequate preparation can lead to material damage. For example, using overly aggressive cleaning agents on the tape itself can damage the adhesive or backing.

    • Adhesive Issues: If the adhesive is failing or the tape is lifting, use a strong, but gentle, adhesive. Avoid using excessively strong adhesives that could damage the material. A carefully chosen adhesive will ensure a secure and long-lasting bond. Consider applying a thin, even layer of adhesive and allowing ample drying time.
    • Tape Damage: Physical damage to the VHS tape itself, such as tears or scratches, can impact the quality of your repurposed item. Carefully inspect the tape for any damage before beginning the repurposing process. If damage is extensive, it may be best to select a different repurposing method or source.
    • Color Fading or Staining: Exposure to sunlight or certain chemicals can cause discoloration or staining. Avoid direct sunlight and use protective coverings for storage.

    Troubleshooting Material Issues

    Troubleshooting material issues requires careful examination and a systematic approach. Each repurposed item might present unique challenges.

    • Structural Integrity: Assess the integrity of the VHS tape or the material it’s combined with. Are there any cracks, tears, or weaknesses? Reinforce these areas with additional materials like fabric or tape, using techniques that won’t compromise the final aesthetic.
    • Adhesive Compatibility: Ensure the adhesive used is compatible with both the VHS tape and the other materials in your project. Incompatible adhesives can cause damage or prevent a secure bond.
    • Environmental Factors: Extreme temperatures, humidity, and direct sunlight can damage both the VHS tape and the finished product. Store items in a stable environment to prevent these issues.

    Maintenance Tips for Repurposed Items

    Maintaining the integrity of your repurposed VHS tape items is essential to their longevity.

    • Cleaning: Gentle cleaning is key. Use a soft brush or a slightly damp cloth to remove dust or dirt. Avoid harsh chemicals. The frequency of cleaning depends on the environment where the item will be used.
    • Storage: Proper storage is crucial for preserving the integrity of your repurposed items. Store them in a cool, dry place away from direct sunlight. Use archival-quality storage materials if possible. Consider using acid-free boxes to protect from degradation.
    • Reinforcement: Regularly check for any signs of wear or tear, especially in high-stress areas. Reinforce any weakened areas to prevent further damage and maintain the structural integrity of the item.

    Storage Techniques

    Proper storage is essential to maintaining the quality and longevity of your repurposed VHS tape creations.

    • Environment Control: Maintain a stable environment with moderate temperature and humidity. Avoid extreme temperatures and direct sunlight.
    • Protective Materials: Use acid-free materials for storage containers to prevent degradation. Consider archival-quality boxes or folders to protect from dust and moisture.
    • Labeling: Label your repurposed items clearly to keep track of their contents, materials used, and any special handling instructions.

    Wrap-Up

    Transforming old VHS tapes into beautiful and functional pieces is a rewarding journey. This guide explored a spectrum of creative repurposing ideas, from home decor to crafting. By understanding the history, storage, and repurposing techniques, you can not only breathe new life into these vintage treasures but also reduce waste and embrace a more sustainable approach to creativity.

    So, go forth and create! Your unique repurposed VHS treasures await.