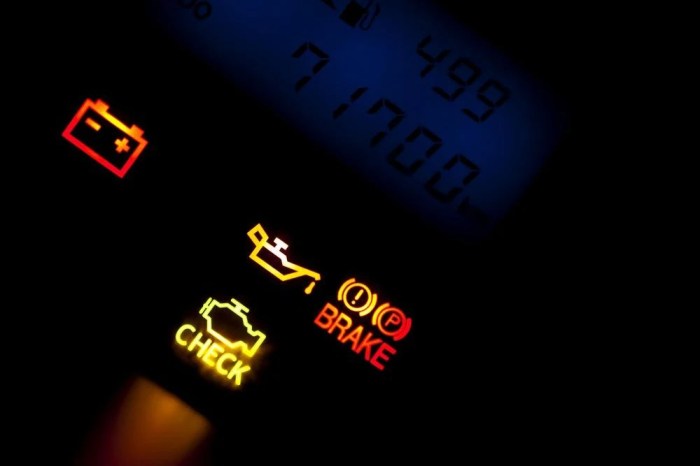
What Causes Brake Light on Dash to Stay on? This persistent dashboard warning light can be incredibly frustrating, leaving you wondering if you’re facing a minor or major issue. Is it a simple bulb, a tricky wiring problem, or something more serious like a brake system malfunction? This comprehensive guide will delve into the possible causes, from electrical problems to brake pedal malfunctions and instrument cluster issues.
We’ll explore everything from identifying the problem to fixing it, providing actionable steps for every mechanic and DIY enthusiast.
We’ll cover everything from understanding the electrical components of your brake system to diagnosing potential problems with the brake pedal and switch, as well as the role of the instrument cluster in displaying the brake light status. We’ll also explore the critical role of diagnostic tools and vehicle-specific information in getting to the root cause.
Electrical System Issues

Understanding the electrical components of your brake light system is crucial for diagnosing and resolving issues. A malfunctioning brake light circuit can lead to safety concerns for you and other road users. This section delves into the electrical aspects, common problems, and diagnostic methods.The brake light system is a vital part of your vehicle’s safety features. It relies on a network of electrical components to ensure that the brake lights illuminate when the brake pedal is pressed.
This network includes the brake light switch, wiring, bulbs, and the vehicle’s electrical system.
Brake Light System Components
The brake light system involves several critical components that work in tandem to signal your intention to stop. These components are interconnected, and a malfunction in any one of them can affect the entire system.
- The brake light switch: This switch is activated by the brake pedal. When the pedal is depressed, the switch completes the circuit, allowing current to flow to the brake lights.
- Wiring: The wiring harness carries the electrical current from the brake light switch to the brake light bulbs. Damage or corrosion in the wiring can interrupt the circuit, preventing the lights from working.
- Brake light bulbs: These bulbs convert electrical energy into light, illuminating the brake lights. Faulty bulbs are a common cause of brake light malfunctions. They often fail prematurely, leading to the need for replacement.
- Fuse and relay: Fuses and relays protect the circuit from overcurrent. A blown fuse or a malfunctioning relay can interrupt the circuit and prevent the brake lights from functioning. This is often an early indicator of a larger electrical issue.
Common Electrical Malfunctions
Several issues can disrupt the smooth operation of the brake light circuit. These malfunctions can range from simple to more complex problems.
- Wiring problems: Damaged or corroded wiring can cause intermittent or complete brake light failure. This includes frayed wires, exposed wires, or a short circuit within the wiring harness. The presence of moisture or physical damage can be a culprit.
- Faulty bulbs: Over time, brake light bulbs can burn out or malfunction. This is a common and relatively easy-to-diagnose issue. Incorrect bulb types can also be a problem, potentially leading to an intermittent failure.
- Brake light switch problems: The brake light switch, responsible for activating the circuit, can malfunction. This can lead to the brake lights not turning on when the brake pedal is depressed or showing intermittent failures. Worn or damaged components are common causes.
Diagnosing Electrical Faults
Diagnosing electrical faults requires a systematic approach. The process typically involves visual inspection, testing, and troubleshooting.
- Visual inspection: Carefully inspect the wiring harness for any signs of damage, such as cuts, abrasions, or corrosion. Look for loose connections or exposed wires.
- Testing the circuit: Use a multimeter to test the voltage and continuity of the circuit. This involves checking the voltage at the brake light switch and the brake light bulbs to determine if the circuit is complete. This is crucial for isolating the specific point of failure.
- Troubleshooting with a multimeter: Use a multimeter to check the continuity of the circuit between the brake light switch and the bulbs. This can help pinpoint if the problem lies in the wiring or the switch itself. Note the readings and compare them with the expected values to pinpoint the source of the issue.
Brake Light Switch Comparison
Different types of brake light switches have varying failure modes.
| Switch Type | Potential Failure Modes |
|---|---|
| Mechanical Switch | Sticking contacts, worn-out components, corroded contacts. |
| Electronic Switch | Wiring problems, faulty sensors, or issues with the integrated circuit. |
Troubleshooting Flowchart
The following flowchart Artikels the steps for troubleshooting a persistent brake light on the dashboard.
(A flowchart image would be presented here. It would visually represent the troubleshooting steps, beginning with a problem statement and progressing through different possibilities, such as checking fuses, testing the brake light switch, and inspecting the wiring. Each step would lead to a conclusion, such as “Problem solved” or “Problem persists,” directing the user to the next step in the process.)
Brake Pedal and Switch Issues
The brake pedal, a crucial component of the vehicle’s safety system, plays a vital role in activating the braking mechanism. Malfunctions in the brake pedal system, particularly the switch or related sensors, can lead to the brake light staying illuminated on the dashboard, indicating a problem with the braking system’s readiness. Understanding the workings of this system is key to identifying and rectifying these issues.The brake pedal’s function extends beyond simply applying pressure; it also triggers the activation of a series of mechanical and electrical components, ensuring the car responds effectively to braking input.
A malfunction in any part of this chain can result in the brake light staying on, prompting further investigation.
Brake Pedal Switch Function
The brake pedal switch, often integrated into the pedal assembly, is an essential component in the braking system. It’s a simple but critical sensor that detects when the brake pedal is depressed. When the pedal is pressed, the switch closes, completing a circuit and signaling the vehicle’s electrical system that the brakes are engaged. This action triggers the brake light to illuminate.
Conversely, when the pedal is released, the switch opens, and the brake light should extinguish.
Potential Malfunctions and Symptoms
Several malfunctions can cause the brake light to remain illuminated even when the brake pedal is not depressed. These include a faulty brake pedal switch, wiring issues, or problems with related sensors.
- Faulty Brake Pedal Switch: A defective switch may fail to open or close correctly, even when the pedal is in its neutral position. This can lead to the brake light staying on continuously. One common example is a switch that’s stuck in the “on” position. In other cases, the switch may have an internal short circuit or a damaged contact, consistently signaling brake application.
- Wiring Issues: Problems in the wiring harness connecting the brake pedal switch to the vehicle’s electrical system can disrupt the signal. A short circuit or a broken wire can cause the brake light to stay on. Damaged or corroded wires in the brake circuit are common sources of electrical malfunctions.
- Related Sensor Malfunctions: In some modern vehicles, the braking system includes sensors that monitor pedal position and pressure. Malfunctions in these sensors can also cause the brake light to remain illuminated. These sensors are often integrated with the pedal switch, adding complexity to diagnostics. For instance, a sensor may provide false signals, suggesting the brake pedal is depressed, regardless of its actual position.
Types of Brake Pedal Switches and Failure Modes
Brake pedal switches come in various types, each with its potential failure modes.
- Mechanical Switches: These switches typically have mechanical contacts that close or open based on the pedal’s position. Common failure modes include worn or damaged contacts, causing inconsistent or false signals. A seized or stuck contact would keep the brake light on even with the pedal released.
- Electronic Switches: These switches use electronic components and often integrate with other sensors. Failure modes in these switches can be more complex and may involve issues with the internal circuitry, such as shorted components, or problems with the sensor’s electronics, such as faulty integrated circuits. This may result in the brake light staying on even when the pedal is not pressed.
Inspection and Testing Procedures
Thorough inspection and testing are crucial to pinpoint the exact cause of the brake light issue.
- Visual Inspection: Begin by visually inspecting the brake pedal switch and the related wiring for any obvious damage, such as frayed wires, exposed connections, or corrosion. Look for signs of physical damage or tampering.
- Electrical Testing: Using a multimeter, verify the electrical continuity of the wiring between the brake pedal switch and the vehicle’s electrical system. This helps determine if any wires are broken or shorted. Check the resistance readings of the switch in different pedal positions.
- Sensor Testing: If your vehicle uses integrated sensors, refer to the vehicle’s technical documentation or a qualified mechanic for the appropriate testing procedures.
Brake System Problems
A persistent brake light on your dashboard can be a frustrating indicator, often pointing to a problem beyond the electrical system. Sometimes, the issue lies within the mechanical components of the braking system itself. These mechanical problems can manifest as a sticking caliper, a faulty sensor, or damaged brake lines, all of which can trigger the brake light to remain illuminated.A malfunctioning brake system can compromise your safety and require prompt attention.
Understanding how different components interact within the brake system is crucial for identifying and addressing the underlying cause of a persistent brake light. By inspecting the mechanical aspects of your braking system, you can often pinpoint the root cause and get your vehicle back on the road safely.
Brake Caliper Issues
Brake calipers are essential for applying the brakes. A sticking caliper, meaning one that doesn’t release properly, can trigger the brake light. This can occur due to seized pistons, corrosion, or worn-out seals. In some cases, a simple lubrication of the caliper components can resolve the issue. However, in more severe situations, a replacement caliper might be necessary.
Faulty Brake Sensors
Brake sensors are critical for communicating the status of the brake system to the vehicle’s computer. A malfunctioning sensor can send incorrect signals, leading the brake light to stay on. This could be due to a damaged wiring harness, a faulty sensor itself, or a problem with the sensor’s connection to the brake pedal. Diagnosis often involves a combination of visual inspection and diagnostic tools to isolate the specific sensor issue.
Damaged Brake Lines
Damaged brake lines can also cause the brake light to remain illuminated. Physical damage, such as a crack or a leak, can disrupt the hydraulic pressure required for proper braking. A visual inspection is necessary to identify any visible damage or signs of leaks in the brake lines. This includes checking for cracks, bulges, or any evidence of fluid leakage along the lines.
Any damage discovered necessitates professional repair to restore the integrity of the brake system.
Brake Pedal and Switch Issues (Revisited)
While already addressed in previous sections, some brake pedal and switch problems can stem from mechanical aspects of the system. For example, a bent or misaligned pedal arm could hinder proper activation of the switch, which would in turn cause the brake light to stay on. Also, issues with the switch itself, such as internal wear, could trigger the light without the pedal being fully depressed.
Visual Inspection of Brake Components
A thorough visual inspection of the brake system is crucial for identifying potential mechanical issues. Inspect the brake lines for any signs of damage, such as cracks, kinks, or leaks. Check the brake calipers for any visible corrosion, binding, or unusual wear. Look for any signs of fluid leaks around the brake components. If you spot any damage, seek professional repair immediately to prevent potential safety hazards.
Figuring out why that brake light stays stubbornly on your dashboard can be a real headache, right? Sometimes, though, it’s not about a faulty switch or worn-out wires. Maybe you need to focus on keeping the spark alive in your long-distance relationship. Check out some creative ideas on how to impress your boyfriend in a long-distance relationship, Impress Your Boyfriend in a Long Distance Relationship.
Ultimately, though, a persistent brake light often points to a simple fix like a loose connection or a problem with the light bulb itself. So, if all else fails, check the obvious!
Brake System Component Impact on Brake Light
| Brake System Component | Potential Impact on Brake Light |
|---|---|
| Brake Caliper (sticking) | Brake light illuminated due to improper release |
| Brake Sensor (malfunctioning) | Brake light illuminated due to incorrect signal transmission |
| Brake Lines (damaged) | Brake light illuminated due to disrupted hydraulic pressure |
| Brake Pedal/Switch (malfunctioning) | Brake light illuminated due to improper activation signal |
Dashboard Instrument Cluster Issues
The dashboard instrument cluster serves as a central control panel, displaying vital information about the vehicle’s performance. A persistent brake light on the dashboard, despite checking the brake system components, points to a potential issue within the instrument cluster itself. This section will delve into the instrument cluster’s role in brake light display, possible malfunctions, and troubleshooting steps.The instrument cluster is a complex assembly of electronic components, including microprocessors, LEDs, and sensors.
Its role in displaying the brake light status is to receive signals from the brake pedal switch and relay this information to the corresponding indicator on the dashboard. If the signal is misinterpreted or the display component malfunctions, a persistent brake light can occur, even if the brake system is functioning correctly.
Instrument Cluster Malfunctions Causing Persistent Brake Light
The instrument cluster, like any electronic device, is susceptible to various malfunctions. These malfunctions can lead to a persistent brake light, even when the brake system is operating normally. Common causes include faulty wiring, damaged components within the cluster, or issues with the signal transmission between the brake pedal switch and the cluster itself.
Troubleshooting the Instrument Cluster Display
Diagnosing issues within the instrument cluster requires a systematic approach. First, verify that the brake pedal switch is functioning correctly. If the switch is fine, proceed to inspect the wiring harness connecting the brake pedal switch to the instrument cluster. Look for any signs of damage, corrosion, or loose connections. If the wiring appears intact, the next step involves checking the instrument cluster itself.
Look for any visible signs of damage, such as cracks or burns. Next, use a diagnostic tool to read any error codes that might be stored in the vehicle’s computer system, as these codes can provide clues to the problem’s location.
How a Faulty Instrument Cluster Component Triggers a Persistent Brake Light
A faulty component within the instrument cluster, such as a damaged LED, a faulty microprocessor, or a malfunctioning signal transmission circuit, can cause the cluster to incorrectly interpret signals from the brake pedal switch. This erroneous interpretation leads to the persistent illumination of the brake light on the dashboard, even if the brake system itself is functioning normally. For example, a short circuit in the wiring connecting the brake pedal switch to the instrument cluster can trigger a false signal, resulting in a persistent brake light.
Instrument Cluster Types and Potential Failure Modes
| Instrument Cluster Type | Potential Failure Modes |
|---|---|
| Analog Instrument Cluster | Faulty gauge needles, damaged wiring, malfunctioning analog circuits. |
| Digital Instrument Cluster | Malfunctioning LEDs, LCD display issues, problems with the microprocessor, incorrect signal interpretation by the microprocessor. |
| Combination Analog/Digital Instrument Cluster | Issues with both analog and digital components, including gauge needles, LEDs, LCD displays, wiring, and microprocessors. |
Different types of instrument clusters have varying susceptibility to different failure modes. This table highlights some common potential issues based on the cluster type.
Diagnostic Tools and Procedures
Diagnosing a persistent brake light on your dashboard requires a systematic approach. Using diagnostic tools, specifically scanners, allows you to pinpoint the exact issue faster than relying on visual inspections alone. These tools can read error codes, providing valuable insight into the brake system’s health and potential malfunctions. Understanding these codes is crucial to identifying the root cause and guiding repair efforts.The use of diagnostic tools is essential for accurate troubleshooting.
Scanners connect to the vehicle’s onboard computer system, retrieving stored error codes related to various components, including the brake system. Interpreting these codes and clearing them are key steps in restoring the brake light’s normal functionality and ensuring safe operation.
Figuring out why that brake light stays on your dashboard can be a real head-scratcher. Sometimes it’s a simple fix, like a loose connection. Other times, it’s a more involved issue. Speaking of head-scratchers, remember those totally absurd moments in Gravity Falls, like the farewell salute? You know, the ones that make you laugh until your sides hurt?
It’s like those moments in wackiest Gravity Falls moments farewell salute , where everything feels so outlandish. Regardless of the reason, fixing that brake light is much less wacky and more straightforward than you might think.
Using Diagnostic Scanners
Diagnostic scanners, also known as code readers, are invaluable tools for accessing and interpreting the vehicle’s electronic control module (ECM) data. They provide a direct connection to the system’s memory, allowing technicians to retrieve error codes. These codes indicate specific problems within the brake system. The ability to read and interpret these codes is crucial for identifying the exact cause of the brake light malfunction.
Ever had that annoying brake light stuck on your dash? It could be a faulty switch, a dodgy wire, or even a problem with the brake light itself. Sometimes, though, the answer is a little less mechanical and a lot more political, like in the case of “grand duchy let the people speak” grand duchy let the people speak.
Regardless of the source of the light’s persistence, it’s always a good idea to get it checked out by a mechanic to ensure your safety on the road.
Retrieving Error Codes
The process of retrieving error codes varies depending on the specific scanner model. Generally, connecting the scanner to the vehicle’s diagnostic port (often located under the dashboard or in the engine compartment) and following the scanner’s instructions are the first steps. The scanner then displays the stored error codes. These codes are often represented by alphanumeric characters, and each code usually corresponds to a specific component or function within the brake system.
Interpreting Error Codes
Interpreting error codes requires consulting the vehicle’s specific repair manual or online resources. Each code corresponds to a particular problem. For example, code P0430 may indicate a problem with the catalytic converter, whereas a code related to the brake system may signal a faulty sensor or a problem with the brake fluid level. Accurate interpretation is crucial for effective troubleshooting.
Clearing Error Codes
Clearing error codes is a crucial step in the troubleshooting process. After identifying the error code, the scanner allows you to clear the stored codes. This action removes the warning from the system’s memory. The scanner’s instructions will guide you through the clearing process.
Verifying Brake Light Functionality
After clearing the error codes, it’s essential to verify that the brake light on the dashboard has extinguished. Restarting the vehicle ensures the system recognizes the cleared codes. Subsequent driving should confirm the brake light’s normal operation. If the light persists, further diagnostic steps may be necessary.
Interpreting Diagnostic Tool Output, What Causes Brake Light on Dash to Stay on
Diagnostic tool output typically displays error codes and, in some cases, provides additional information such as the sensor’s voltage or the status of a particular circuit. For instance, a reading showing low voltage for a brake pressure sensor may indicate a faulty sensor or wiring issue. The tool’s output should be carefully analyzed, alongside the vehicle’s repair manual, to pinpoint the specific cause of the problem.
Vehicle Specific Information: What Causes Brake Light On Dash To Stay On
Troubleshooting a persistent brake light on your dashboard requires a deep dive into your specific vehicle’s electrical system. Generic advice often won’t cut it; understanding your particular make, model, and year is crucial. This section delves into finding and interpreting the vital components and wiring diagrams for your vehicle’s brake light system.
Locating Vehicle-Specific Diagrams
The internet is a treasure trove of information for automotive enthusiasts. Finding the right diagrams for your vehicle’s brake light system depends on the resources you utilize. Reliable online forums, manufacturer websites, and specialized automotive repair manuals are key.
Online Resources for Diagrams
Manufacturer websites are often a fantastic starting point. They typically host detailed wiring diagrams and schematics. Searching for your specific vehicle’s model and year on these sites is often straightforward. Many automotive repair forums also offer access to shared wiring diagrams and discussions among users, providing valuable insights and troubleshooting tips from fellow mechanics and owners.
Automotive Repair Manuals
Comprehensive repair manuals, either purchased or accessed through subscription services, provide detailed diagrams and descriptions of the brake light system’s components and their connections. These manuals are an invaluable resource for accurate information, especially for intricate systems.
Methods for Identifying Relevant Wiring Diagrams
Finding the correct wiring diagrams for your vehicle requires careful attention to detail. Start by meticulously recording your vehicle’s year, make, and model. Then, utilize the online resources or repair manuals to locate the appropriate diagrams.
- Precise Model Identification: Ensure you’re searching for the exact year, make, and model of your vehicle. Slight variations between models can lead to incorrect diagrams.
- Cross-Referencing Information: Compare the diagrams you find with your vehicle’s actual components. Ensure the diagrams accurately represent the physical layout of your brake light system.
- Utilizing Search Terms: When searching online, use specific terms like “brake light wiring diagram [year] [make] [model].” Using multiple search terms increases the likelihood of finding relevant results.
Organizing Vehicle Model Information
Organizing information on various vehicle models and their associated brake light systems is best approached by creating a database or spreadsheet. Include columns for year, make, model, specific components (brake switch, light bulbs, etc.), and corresponding wiring diagram links.
| Year | Make | Model | Brake Light Switch | Wiring Diagram |
|---|---|---|---|---|
| 2020 | Toyota | Camry | Electric Switch | [Link to Toyota Camry 2020 Wiring Diagram] |
| 2022 | Honda | Civic | Mechanical Switch | [Link to Honda Civic 2022 Wiring Diagram] |
Steps for Identifying Relevant Wiring Diagrams
Locating the appropriate wiring diagram involves a systematic approach. Start with basic identification, then proceed to cross-reference and compare. The goal is to identify the correct diagram for your specific vehicle.
- Identify Your Vehicle: Note down the exact year, make, and model of your vehicle. This is crucial for accurate diagram retrieval.
- Utilize Online Resources: Search the manufacturer’s website or reputable automotive forums for wiring diagrams.
- Cross-Reference Diagrams: Compare the diagram with the actual components of your brake light system to verify accuracy.
Conclusive Thoughts

So, there you have it – a deep dive into the mysterious brake light on your dashboard. Hopefully, this guide has shed light on the various potential culprits behind this persistent warning. Remember, if you’re unsure about any step, it’s always best to consult a qualified mechanic. Armed with this knowledge, you can confidently tackle this common automotive issue, restoring your peace of mind and ensuring your safety on the road.