Category: Troubleshooting

  • Second Monitor Not Detected Troubleshooting Guide

    Second Monitor Not Detected Troubleshooting Guide

    Second Monitor Not Detected: This comprehensive guide dives into the various reasons why your second monitor might not be showing up. From potential hardware issues to complex operating system configurations, we’ll explore a range of troubleshooting scenarios to help you get your dual-monitor setup back up and running.

    We’ll cover everything from checking cable connections and driver updates to adjusting display settings and diagnosing potential hardware conflicts. This guide is your one-stop resource for tackling the “second monitor not detected” problem, no matter the cause.

    Troubleshooting Scenarios

    A second monitor not being detected can be a frustrating issue, but often a simple fix resolves the problem. This section explores various scenarios and troubleshooting steps to help you diagnose and resolve this common display problem.

    Potential Hardware Issues

    Several hardware-related problems can prevent a second monitor from being recognized. Faulty cables, defective video cards, or even issues with the monitor itself are possibilities. Physical damage to any of these components can also contribute to the problem.

    • Faulty video card: A malfunctioning graphics processing unit (GPU) can prevent the system from recognizing a connected monitor. Symptoms might include the monitor displaying garbled images or not displaying at all.
    • Defective monitor: A failing monitor might not respond to signals from the computer, resulting in the “not detected” issue. Check the monitor’s power supply and input signals.
    • Damaged cables: Loose connections, bent pins, or physical damage to the cables (HDMI, DisplayPort, VGA) can prevent the signal from reaching the monitor. Always check for any signs of damage to the cable before attempting other solutions.
    • Incorrect connection type: Using the wrong type of connection (e.g., connecting an HDMI cable to a DisplayPort port) will not allow the monitor to receive the signal and will cause detection failure.

    Software Conflicts

    Software-related issues can also cause the problem. Drivers, operating system settings, or even conflicting applications might interfere with the monitor detection process.

    • Outdated or corrupted drivers: Graphics card drivers are essential for proper communication between the computer and the monitor. Outdated or corrupted drivers can cause problems with signal recognition.
    • Conflicting applications: Certain applications might interfere with the operating system’s ability to detect and configure the second monitor. If a new application was installed recently, try uninstalling it and checking if the monitor is detected.
    • Operating system issues: Sometimes, a problem within the operating system itself can lead to the second monitor not being recognized. This can manifest as a general system instability issue, or specific display issues.

    Operating System Variations

    Different operating systems (Windows and macOS) have varying approaches to handling multiple monitors. Understanding these differences is important for effective troubleshooting.

    • Windows 10/11: Windows utilizes display settings to manage multiple monitors. Problems might stem from incorrect display resolution settings, display mode conflicts, or issues with the display adapter.
    • macOS: macOS uses similar principles to manage multiple monitors, with display settings and configurations playing a crucial role. Issues can be caused by conflicts with screen resolution or incorrect display settings.

    Post-Update/Driver Installation Issues

    After a system update or driver installation, the second monitor might stop working due to compatibility issues or configuration changes.

    • Compatibility issues: A recent update might not be compatible with the second monitor’s driver or hardware. This could result in the system not recognizing the second display.
    • Incorrect configuration: The update might alter display settings, causing the second monitor to be misconfigured. This could involve incorrect resolutions, refresh rates, or display modes.

    Troubleshooting Steps Based on Connection Type

    Troubleshooting steps vary based on the type of connection used for the second monitor.

    • HDMI: Verify the HDMI cable’s integrity and ensure a secure connection to both the monitor and the computer. Check the monitor’s input settings to ensure the correct HDMI input is selected.
    • DisplayPort: Similar to HDMI, check the DisplayPort cable’s integrity and secure connections. Confirm the monitor’s input selection matches the DisplayPort port.
    • VGA: Ensure the VGA cable is properly connected and that the correct VGA input is selected on both the monitor and the computer. Ensure the monitor is receiving power.

    Cable Connections and Security, Second Monitor Not Detected

    Proper cable connections are critical for signal transmission. Loose or improperly seated cables can lead to signal interruptions, causing the second monitor not to be detected.

    • Secure connections: Ensure all cables are firmly plugged into the appropriate ports on both the monitor and the computer. Loose connections can prevent the display signal from reaching the monitor.

    Monitor Settings and Display Configurations

    Incorrect monitor settings or display configurations can cause the system to fail to recognize the second monitor.

    • Resolution settings: Ensure the resolution settings for the second monitor are compatible with the system. Incompatible resolutions can lead to detection failures.
    • Display mode: Verify that the display mode for the second monitor is set correctly. This includes ensuring the monitor is set to the correct input source.

    Display Port Compatibility

    Display Port Type Compatibility with Devices
    HDMI Most modern computers and monitors
    DisplayPort High-end monitors and computers
    VGA Older computers and monitors

    Driver-Related Issues

    Driver conflicts are a frequent culprit behind second monitor problems. Outdated or incompatible graphics card drivers can prevent your system from recognizing the additional display. This section details how to identify, update, and resolve driver-related issues that might be preventing your second monitor from displaying.Often, the solution involves updating or reinstalling the graphics card drivers. Incorrect or outdated drivers can cause a multitude of issues, from poor performance to complete failure of certain components.

    Having trouble with your second monitor not being detected? Sometimes, fiddling with display settings isn’t enough. If you’re also looking to create a truly unique VRchat avatar, you might find some helpful troubleshooting tips for your display settings by checking out how to Make a Vrchat Avatar. It’s often a good idea to verify your graphics card drivers and monitor connections are all up to date before you dive into more advanced solutions for a second monitor not detected issue.

    This section provides the necessary steps to resolve these conflicts, ensuring optimal performance and compatibility.

    Identifying Potential Driver Conflicts

    Driver conflicts can manifest in various ways, including the second monitor not being recognized at all, displaying intermittently, or showing a distorted image. Sometimes, the problem is subtle, with the second monitor appearing but having limited functionality, such as a lack of refresh rate options. It’s essential to meticulously check for these symptoms to pinpoint the root cause.

    Driver conflicts can also arise due to a mismatch between the graphics card driver and the operating system version, or the monitor’s driver. A critical step is to confirm the driver version and its compatibility with your hardware and operating system.

    Updating or Reinstalling Graphics Card Drivers

    Updating drivers is crucial for maintaining compatibility and functionality. Using outdated drivers can lead to stability problems, performance issues, and the failure to detect peripherals. The process involves downloading the latest drivers from the manufacturer’s website, usually the graphics card’s manufacturer.

    Uninstalling and Reinstalling Display Adapters

    Sometimes, reinstalling display adapters can resolve problems stemming from corrupted or outdated driver files. This process removes existing drivers and allows the system to reinstall them correctly. This approach can help resolve compatibility issues, fix glitches, and improve overall performance. It’s important to note that uninstalling and reinstalling drivers should only be attempted as a last resort if other troubleshooting steps fail.

    Verifying Graphics Card Driver Version and Compatibility

    Ensuring compatibility between the graphics card driver, operating system, and monitors is critical. A mismatched driver can cause problems with the second monitor’s resolution, refresh rate, or overall display. Incorrect versions can also hinder or entirely prevent the recognition of the second display. Checking the driver version is often available within the device manager. Verify the driver’s compatibility with your operating system (e.g., Windows 10, Windows 11) and monitor specifications.

    My second monitor just isn’t showing up, which is a real bummer. I was hoping to finally get some serious work done, but now I’m stuck trying to figure out why it’s not connecting. Maybe I should check out some upbeat tunes to help me troubleshoot, like Corin Tucker’s bands stream corin tucker bands kill my blues in full.

    Hopefully, a little music will inspire me to find the solution to this second monitor issue! Fingers crossed it’s a quick fix.

    Compatibility information is usually available on the manufacturer’s website.

    Using the Correct Monitor Drivers

    Using the correct monitor drivers is essential for optimal display performance. Incorrect or outdated monitor drivers can result in various issues, including reduced display quality, color inaccuracies, and issues with screen resolution. Using the manufacturer’s official drivers, downloaded directly from their website, is crucial for ensuring proper functionality and compatibility. If the monitor manufacturer’s website doesn’t have updated drivers, check the manufacturer’s support forums or community pages.

    Common Graphics Card Driver Issues and Solutions

    Issue Solution
    Driver conflict with other hardware Uninstall conflicting drivers or update them. Check for compatibility issues between the drivers.
    Outdated drivers Download and install the latest drivers from the manufacturer’s website.
    Corrupted drivers Uninstall and reinstall the display adapters.
    Driver incompatibility with operating system Ensure the driver version is compatible with the operating system.
    Driver incompatibility with monitor Ensure the monitor’s driver is compatible with the graphics card driver. If possible, update the monitor driver as well.

    Operating System Configurations: Second Monitor Not Detected

    Your operating system plays a crucial role in recognizing and managing multiple monitors. Proper configuration ensures seamless display of content across both screens. Incorrect settings can lead to the second monitor not being detected, resulting in a frustrating experience. Understanding how to configure your OS display settings is essential for troubleshooting this issue.

    Display Settings Adjustments

    Adjusting display settings is a critical step in ensuring your second monitor is properly recognized. This involves configuring the resolution, refresh rate, and display mode for both screens. These settings determine how your operating system interacts with each monitor, impacting the detection process.

    • Resolution Selection: Selecting the correct resolution for each monitor is paramount. Using incompatible resolutions can cause issues with detection. The resolution should match the physical capabilities of the monitor. For example, if one monitor supports 1920×1080, and the other 1920×1200, you need to adjust the settings accordingly. Using a resolution that is too high for the monitor’s capabilities will lead to visual artifacts or a complete failure to display on the monitor.

    • Refresh Rate Adjustment: The refresh rate dictates how many times per second the image on the screen is updated. Mismatched refresh rates between monitors can also lead to issues with the display and detection. Matching or selecting compatible refresh rates for both monitors is essential for a seamless experience. A common cause of display issues is trying to use a refresh rate that the monitor does not support.

    • Display Mode Selection: The display mode dictates how the operating system arranges the screens. Common modes include “Extend these displays,” “Duplicate these displays,” and “Single display.” “Extend these displays” is often the preferred mode for utilizing both screens as separate workspaces. Incorrect display modes can result in only one screen being detected. Always choose the mode that suits your workflow.

    Display Settings Files

    Corrupted display settings files can sometimes lead to issues in recognizing the second monitor. These files store crucial information about the display configuration, and corruption can lead to errors.

    • System File Integrity: System file integrity checks can help identify and repair corrupted display settings files. This ensures the operating system’s files are consistent and working correctly. This is a critical step to resolve unexpected issues.
    • Resetting Display Settings: A simple reset of display settings to their default values can resolve various issues related to corrupted settings. This often involves using the operating system’s built-in tools to revert the settings to their initial state. Ensure you save your current settings before making this change.

    Resolution and Refresh Rate Comparison

    Choosing appropriate resolution and refresh rates is crucial for optimal display performance and monitor detection. Mismatched settings can lead to blurry images or a failure to detect the second monitor.

    Resolution Refresh Rate (Hz) Description
    1920×1080 60 Standard HD resolution, suitable for general use.
    2560×1440 144 Wide-screen resolution, offering a sharper image, suitable for demanding tasks.
    3840×2160 120 Ultra HD resolution, providing a highly detailed image, suitable for professional work.

    Monitor-Specific Problems

    Sometimes, the culprit behind a second monitor not being detected isn’t your computer, but the monitor itself. A faulty monitor can prevent it from being recognized by your system, regardless of your computer’s configuration. Understanding monitor-specific issues is crucial for accurate troubleshooting.

    Monitor Power and Functionality

    Proper power is fundamental to monitor operation. Ensure the monitor is plugged into a functional power outlet and that the power switch (if present) is turned on. Look for visual indicators like the power LED, which should illuminate when the monitor is receiving power. If the LED remains off or blinks erratically, the monitor might have a power supply issue.

    A functioning monitor will display a clear image and respond to input signals. If the image is distorted, blurry, or absent, the monitor itself might be faulty.

    Compatibility and Graphics Card

    Compatibility issues between the monitor and your computer’s graphics card can also cause detection problems. Different monitors support different resolutions, refresh rates, and input signals (e.g., DisplayPort, HDMI). Ensure your monitor’s specifications are compatible with your graphics card’s capabilities. For example, a monitor designed for a lower resolution might not work properly with a high-end graphics card capable of displaying a much higher resolution.

    Check your graphics card’s specifications to confirm compatibility with your monitor’s specifications.

    Monitor Settings and Configurations

    Monitor settings can sometimes interfere with detection. Incorrect display settings on the monitor, like incorrect resolution or refresh rate, can prevent the monitor from being recognized by the computer. The monitor’s settings should match the graphics card’s capabilities and the operating system’s display settings. Verify that the monitor is set to the correct input signal (e.g., DisplayPort, HDMI).

    Adjusting the monitor’s settings to match your computer’s capabilities is essential.

    My second monitor just isn’t showing up, which is a real bummer. I was really looking forward to watching Solange’s incredible performance of “Cranes in the Sky” and “Don’t Touch My Hair” on SNL, which you absolutely have to check out. Hopefully, a quick fix will get me back to enjoying my music videos and other visual entertainment without a hitch.

    This monitor issue is seriously getting in the way of my productivity!

    Cable Connections and Ports

    Incorrect or damaged connections can prevent your computer from recognizing the monitor. Ensure the cables connecting the monitor to the computer are properly seated in the appropriate ports. Loose or damaged cables, or faulty ports on either the monitor or the computer, can lead to detection issues. Inspect the cables for any visible damage, and if possible, try using a different cable to confirm if the problem lies with the cable itself.

    Manufacturer Support and Recommended Settings

    Consult your monitor’s manufacturer for support and recommended settings. The manufacturer’s website typically provides troubleshooting guides, FAQs, and specific instructions for setting up and using their monitors. Check for updates to the monitor’s drivers or firmware to ensure optimal compatibility. Follow the manufacturer’s instructions for optimal performance and compatibility.

    Monitor Brand-Specific Issues

    Monitor Brand Potential Issues
    Acer Known for occasional driver compatibility problems, particularly with older models.
    LG Some users report issues with certain models and specific operating systems, especially if the monitor’s display settings are not properly configured.
    Samsung Display signal issues can arise if the monitor is not properly calibrated to the input signal from the graphics card.
    BenQ Some users report difficulties in recognizing the monitor on certain systems, often due to incorrect display port configurations or conflicting drivers.
    HP Potential for display signal interference when using older models, especially when connected through older versions of the display port.

    This table provides a general overview of potential issues, but individual experiences may vary.

    Hardware Conflicts and Solutions
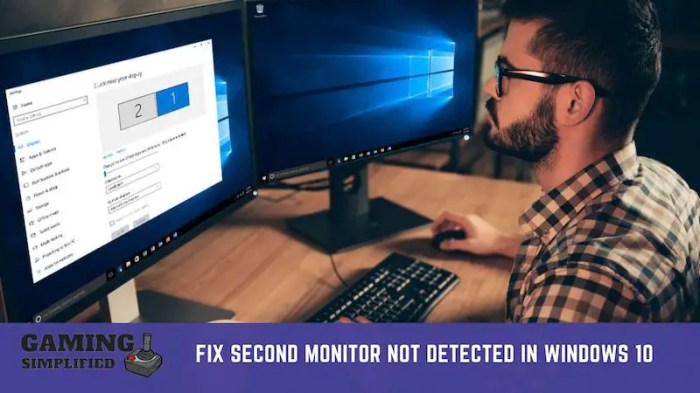
    Second Monitor Not Detected

    Troubleshooting second monitor issues often involves delving into potential hardware conflicts. These conflicts can arise from various sources, from incompatible components to subtle malfunctions. Understanding these conflicts and their potential resolutions is crucial to restoring a stable multi-monitor setup.

    Potential Conflicts Between Graphics Card and Other Hardware

    Hardware components can sometimes interfere with each other, especially when sharing resources like PCI Express lanes or system memory. A conflicting device might consume resources necessary for the graphics card to properly communicate with the second monitor. This can manifest as the second monitor not being detected or displaying improperly.

    Diagnosing and Resolving Hardware Conflicts

    To pinpoint the source of a hardware conflict, a systematic approach is essential. Begin by examining the hardware components connected to the computer. Ensure all connections are secure and free of any physical damage. Unplug any recently added peripherals or devices, one by one, to isolate the problem.

    Checking for Conflicting Devices or Software

    System resource conflicts can also stem from software interference. Check the device manager to identify any unrecognized or malfunctioning hardware devices. Update or reinstall drivers for suspect components, particularly the graphics card and the monitor. Review any recently installed software or drivers that might be competing for system resources. A utility program for monitoring system resources can assist in detecting such issues.

    Importance of Checking for Hardware Malfunctions

    Hardware malfunctions, including failing components like the graphics card or RAM, can lead to various issues, including the inability to detect a second monitor. Check for physical damage or overheating symptoms on all hardware components. A faulty component may not be immediately apparent, yet its subtle failures can cascade into larger problems like the inability to display the second monitor.

    Replacing malfunctioning components is crucial to ensuring reliable system performance.

    Identifying Potential Overheating Issues

    Overheating can severely impact the performance of hardware components, including the graphics card. Overheating can manifest as graphical glitches, slowdowns, or the second monitor going black. Regularly check the internal temperature of the computer using monitoring software or a hardware diagnostic tool. Ensure proper airflow around the computer to maintain a suitable operating temperature.

    Table of Possible Hardware Conflicts and Solutions

    Potential Hardware Conflict Possible Solution
    Conflicting PCI Express lanes Reinstall drivers for the graphics card. Check for conflicts with other PCI Express devices.
    Faulty RAM Run a RAM test using diagnostic tools. Replace faulty RAM modules.
    Overheating graphics card Ensure proper airflow in the computer case. Use a cooling pad for the graphics card if needed.
    Failing power supply Check the power supply for any damage. Replace if necessary.
    Conflicting USB devices Disconnect any recently added USB devices to isolate the conflict.

    Advanced Troubleshooting

    Second Monitor Not Detected

    Persistent second monitor issues often require a deeper dive than basic checks. This section details advanced troubleshooting techniques, leveraging system information tools, device manager, diagnostics, and system logs to pinpoint and resolve stubborn problems. A systematic approach is crucial for isolating the root cause.Advanced troubleshooting involves a methodical approach, progressing from general system checks to more specific diagnostics, enabling you to identify the source of the problem and implement the most effective solution.

    Using System Information Tools

    System information tools provide a comprehensive view of your hardware and software configuration. This information is vital for identifying potential conflicts or incompatibilities that might be hindering second monitor detection. Tools like System Information (msinfo32.exe) or the Windows System Information tool offer detailed reports on the installed hardware, drivers, and operating system, providing insights into potential problems.

    Utilizing Device Manager

    Device Manager is a valuable tool for inspecting and managing device drivers. Display adapter issues can manifest as detection problems. Inspecting the display adapter in Device Manager allows for the identification of problematic drivers. Right-clicking the display adapter and selecting “Properties” reveals detailed information about the driver, including its status and any reported errors. Identifying and updating outdated drivers or resolving conflicts can resolve display issues.

    Examine the device’s properties for any warnings or error codes, which can offer clues about the underlying problem.

    Running Graphics Card and Monitor Diagnostics

    Dedicated diagnostics for graphics cards and monitors provide valuable insights into hardware health. Graphics card manufacturers often provide utility software for running hardware tests, helping identify potential problems with the graphics card itself. These tools may help identify issues such as memory errors or malfunctioning components. Monitor diagnostics are also available and should be performed if the monitor’s functionality is suspected to be at fault.

    These tests can pinpoint defects in the monitor’s hardware, such as backlight issues or pixel problems. If the diagnostics reveal problems, consider replacing the faulty component.

    Analyzing System Logs

    System logs contain a record of events occurring on your system, including those related to the display. Event Viewer (eventvwr.msc) is a valuable resource for identifying errors or warnings related to the display adapter. Specific error codes or messages in the system logs can indicate the cause of the detection problem. Examining the logs for error messages related to the display can help pinpoint the root cause of the issue.

    Troubleshooting Table

    Troubleshooting Step Purpose
    Verify driver compatibility Ensures the driver for the graphics card and monitor are compatible with the operating system.
    Check for hardware conflicts Identifies any hardware conflicts that might be preventing the second monitor from being detected.
    Run diagnostics on the graphics card and monitor Evaluates the hardware health of the graphics card and monitor for potential issues.
    Inspect system logs Finds error messages or warnings related to the display, providing clues about the problem’s cause.
    Update drivers Ensures the most current drivers are installed, fixing compatibility problems or resolving errors.

    Outcome Summary

    In conclusion, resolving the “second monitor not detected” issue often involves a systematic approach. We’ve examined potential hardware problems, software conflicts, and operating system configurations. By thoroughly checking connections, updating drivers, and adjusting settings, you should be able to identify and fix the root cause of the problem. If the issue persists, consider reaching out to manufacturer support or seeking further technical assistance.

  • Hulu App No Sound iPhone Troubleshooting Guide

    Hulu App No Sound iPhone Troubleshooting Guide

    Hulu App No Sound iPhone is a frustrating problem, but don’t worry! This comprehensive guide delves into the various potential causes and provides actionable solutions to get your Hulu streaming back on track. We’ll explore everything from simple troubleshooting steps to examining app conflicts and even checking your device’s hardware.

    From software glitches to network hiccups, we’ll cover a wide range of possibilities. This guide aims to equip you with the knowledge and tools to pinpoint the root cause and restore your Hulu viewing experience. Let’s dive in!

    Troubleshooting iPhone Audio Issues with Hulu

    Hulu, a popular streaming service, can sometimes experience audio problems on iPhones. This often results in frustrating silences or distorted sound while attempting to enjoy your favorite shows and movies. This guide provides a comprehensive approach to diagnosing and resolving these issues, covering potential software, app, network, and even hardware-related causes.This comprehensive guide will walk you through various troubleshooting steps, from basic checks to more advanced techniques, ensuring a smooth and sound Hulu experience on your iPhone.

    Identifying the root cause is key to a swift resolution. Common error messages and symptoms will be explored, along with explanations of potential underlying problems.

    Common Symptoms of No Sound on Hulu

    Users often report experiencing a complete lack of sound, or intermittent audio issues, when using the Hulu app on their iPhone. Symptoms can include no sound at all during playback, muted audio, distorted sound, or audio that abruptly cuts in and out. These issues can be frustrating, disrupting the viewing experience and leading to considerable inconvenience.

    Potential Causes of No Sound Issues

    Several factors can contribute to audio problems with the Hulu app on iPhones. These include software glitches within the Hulu app itself, conflicts with other apps on your device, network connectivity problems, or even potential hardware issues.

    Troubleshooting Steps

    A systematic approach is crucial to resolving iPhone audio issues. Here are some troubleshooting steps, ranging from simple checks to more complex solutions:

    • Check iPhone Volume and Mute Settings: Ensure the volume on your iPhone is turned up and that the device’s mute switch is not activated. This is often the first and simplest troubleshooting step.
    • Restart the Hulu App: Sometimes, a simple app restart can resolve minor glitches. Close the Hulu app and reopen it to see if the sound returns.
    • Restart your iPhone: A full device restart can often resolve a variety of software-related problems. This may be necessary if the sound issue persists after restarting the Hulu app.
    • Check Network Connection: Poor or unstable network connections can lead to audio issues. Ensure your iPhone has a stable Wi-Fi or cellular connection. Try using Wi-Fi if you are using cellular data.
    • Update Hulu App and iOS: Outdated apps or operating systems can cause compatibility problems. Ensure the Hulu app and your iOS are up to date to prevent potential audio issues.
    • Clear Hulu App Cache and Data: Accumulated cache data from the Hulu app can sometimes cause problems. Clearing the app’s cache and data may resolve audio issues.
    • Check for App Conflicts: Sometimes, another app on your iPhone might be interfering with the Hulu app’s audio functionality. Try temporarily disabling other apps to see if the sound issue resolves.
    • Contact Hulu Support: If all other troubleshooting steps fail, contact Hulu support for further assistance. They may have specific troubleshooting steps or be able to identify any broader service issues.

    Troubleshooting Effectiveness Comparison

    The table below provides a comparison of different troubleshooting steps and their typical effectiveness:

    Step Description Expected Outcome Success Rate
    Check iPhone Volume & Mute Ensure volume is up and mute is off Sound restored if muted High
    Restart Hulu App Close and reopen the Hulu app Sound restored if minor glitch Medium
    Restart iPhone Completely restart the device Resolve various software issues High
    Check Network Connection Ensure stable Wi-Fi or cellular data Sound restored if network is stable Medium-High
    Update Apps Update Hulu app and iOS Resolve compatibility issues Medium
    Clear App Cache/Data Clear Hulu app cache and data Resolve cache-related problems Medium
    Check for App Conflicts Temporarily disable other apps Sound restored if other apps are interfering Low-Medium
    Contact Hulu Support Seek assistance from Hulu support Specific troubleshooting steps or service issues identification High (if other steps fail)

    Hulu App-Specific Sound Problems

    The Hulu app, while generally reliable, can sometimes experience audio issues on iPhones. These problems can stem from various factors unique to the app’s operation and its interaction with other software on your device. Understanding these specific issues can help you pinpoint the cause and find a solution.App updates, version incompatibility, and conflicts with other installed applications can all contribute to audio problems.

    My iPhone’s Hulu app is acting up again – no sound! This is seriously frustrating, especially when trying to watch a new show. I’ve tried the usual troubleshooting steps, but nothing seems to work. Maybe I should try making a dinosaur tail like the ones in the tutorial on Make a Dinosaur Tail instead. At least that would be a fun craft project! Hopefully, a restart will fix the Hulu sound issue though, because I need my shows!

    This article will explore these potential issues, offering troubleshooting steps to help isolate the problem.

    Common Hulu App Sound Problems

    The Hulu app, like any software, can encounter specific audio problems. These issues often stem from the app’s interaction with the iPhone’s operating system and other installed applications. Some common problems include:

    • Incompatibility with iOS versions: A newly released Hulu app version might not be fully compatible with an older iOS version. This can lead to audio playback issues. For example, a new version of the app might require a specific iOS version to function properly. If you are using an older iOS version, you may experience sound problems with newer Hulu app versions.

      An incompatibility between the Hulu app and the iOS version can also affect audio output.

    • Conflicts with other apps: Certain apps might interfere with the Hulu app’s audio output. For instance, if another app is using the audio hardware or changing audio settings, the Hulu app might not be able to play sound correctly. This is particularly true for apps that use background audio, such as music players or podcasts.
    • Corrupted app data: Occasionally, the Hulu app’s internal data can become corrupted, which may manifest as sound problems. This is less common but could still affect audio output. A forced restart or reinstalling the app can often solve this problem. This issue could affect other apps and may require a complete system restart.

    App Updates and Version Incompatibility

    Hulu regularly releases app updates to enhance functionality and fix bugs. However, these updates sometimes introduce unforeseen issues. Version incompatibility between the Hulu app and your iOS version or other installed apps can lead to audio problems. For example, a newer version of the Hulu app might have different audio encoding requirements than your iOS version, causing issues.

    My iPhone’s Hulu app is acting up again – no sound! It’s so frustrating, especially when I’m trying to catch up on my favorite shows. Luckily, I’ve been looking forward to seeing Phoenix on their North American tour, and tickets are selling fast, so I’m hoping to have some great music to distract me from the Hulu sound issues.

    phoenix line up north american tour is shaping up to be a fantastic show, but until then, I’m going to try a few troubleshooting steps to get my Hulu sound working again. Hopefully, it won’t be too much longer before I can binge-watch without the frustrating silence.

    Conflicts with Other Installed Apps

    The iPhone’s multitasking capabilities can lead to conflicts between apps. If another app on your device is competing for audio resources or interfering with the Hulu app’s audio settings, sound problems can occur. Examples include background audio players, media streaming apps, or apps using a lot of CPU processing power.

    Troubleshooting: Isolating the Problem

    Temporarily disabling or uninstalling other apps can help isolate the cause of the sound problem. This method is crucial for diagnosing conflicts.

    • Disable or uninstall other apps: Temporarily disable or uninstall apps that are potentially conflicting with Hulu, like background music players or other streaming services. Restart your iPhone after making these changes. This helps to determine if the issue is indeed caused by a conflict with another app.

    Hulu App Version Sound Stability

    This table compares different Hulu app versions and their reported sound output stability. Note that this is based on user reports and not definitive data.

    App Version Description Sound Issues Reported
    1.23.4 Initial release Some users reported sound crackling
    1.23.5 Minor bug fixes Sound issues resolved for most users
    1.23.6 Added support for Dolby Atmos Few users reported sound distortion with Dolby Atmos

    Network Connectivity and Sound

    A strong and stable internet connection is crucial for a smooth Hulu streaming experience, particularly when it comes to audio. Poor network performance can lead to frustrating issues like buffering, audio dropouts, and choppy sound, severely impacting the viewing enjoyment. Understanding the relationship between network connectivity and Hulu audio is essential for troubleshooting these problems.Poor internet connectivity significantly impacts the Hulu app’s ability to deliver a seamless audio experience.

    Insufficient bandwidth can cause audio to stutter, skip, or cut out entirely. Moreover, the quality of the audio stream directly correlates with the reliability of the internet connection.

    Impact of Different Network Types

    Different network types—Wi-Fi and cellular data—present unique challenges for Hulu audio streaming. Wi-Fi networks, generally, provide a more stable and reliable connection, resulting in consistent audio playback. However, interference from other devices or distance from the router can affect signal strength, leading to interruptions. Cellular data, while convenient for mobile viewing, is often less stable due to variable signal strength.

    This can result in audio buffering, especially in areas with weak cell service. The audio quality may also be lower due to the limitations of mobile data bandwidth.

    Network Latency and Buffering

    Network latency, the time it takes for data to travel between your device and Hulu’s servers, directly impacts the smoothness of the audio stream. High latency can lead to noticeable delays in audio playback, making the experience jarring and frustrating. Buffering, the process of downloading data to prepare for playback, is crucial for a smooth experience. Long buffering times can lead to significant pauses in the audio, further hindering the enjoyment of the streaming.

    For example, a user in a remote area with a spotty cellular connection may experience frequent buffering, leading to poor sound quality and a choppy viewing experience.

    Checking Network Connection Strength and Stability

    To determine the strength and stability of your network connection, utilize the built-in tools on your iPhone. Check your Wi-Fi signal strength indicator in the Wi-Fi settings. A strong signal generally means better audio quality. If using cellular data, assess the signal strength indicator within the cellular data settings. Stronger signals usually correlate to fewer audio issues.

    Furthermore, consider using a network speed test application to assess download and upload speeds. This can give a clearer picture of the bandwidth available and the potential for streaming issues.

    Network Conditions and Hulu Audio Impact

    Network Condition Description Impact on Sound
    Strong Wi-Fi Consistent signal strength, minimal interference. Clear, uninterrupted audio playback.
    Weak Wi-Fi Intermittent signal strength, potential interference from other devices. Potential for audio dropouts, buffering, and choppy playback.
    Strong Cellular Data Consistent signal strength in an area with good cellular coverage. Generally stable audio playback, though potentially lower quality than Wi-Fi in some cases.
    Weak Cellular Data Intermittent signal strength, especially in areas with poor cellular coverage. High probability of audio buffering, dropouts, and low-quality audio playback.
    High Network Latency Significant delay in data transmission between device and server. Audio playback delays, choppy playback, and potential for a poor viewing experience.

    iPhone System Settings and Sound: Hulu App No Sound IPhone

    Your iPhone’s sound settings play a crucial role in ensuring smooth audio playback for Hulu, or any other app. Understanding these settings can help diagnose and resolve sound issues. Incorrect configurations can lead to problems, so a careful review is often beneficial.Properly adjusting volume levels and output settings on both your iPhone and within the Hulu app is vital for a consistent audio experience.

    Many issues stem from mismatched volume levels or conflicting settings, impacting how the app interacts with your device’s audio system. Furthermore, understanding how your iPhone handles sound, especially with features like Do Not Disturb, can prevent unexpected audio interruptions.

    iPhone Volume Levels

    Adjusting volume levels within the Hulu app and on your iPhone separately can impact the final audio output. If the volume is too low in either location, the audio will be muted or barely audible. Conversely, setting volumes too high can lead to distortion. Matching the levels across both platforms provides the optimal audio experience.

    Do Not Disturb and Other Sound Modes

    The iPhone’s Do Not Disturb mode silences all incoming calls and notifications, often affecting the audio output of apps like Hulu. Other sound modes, like Airplane Mode or specific custom modes, can also impact the audio. It’s important to ensure that these settings aren’t unintentionally silencing or affecting the sound of Hulu.

    Headphones and External Speakers

    Using headphones or external speakers can change the audio output. If connected to headphones, the audio will primarily play through them. Conversely, external speakers will deliver sound from the device to these speakers. Understanding which output device is selected is crucial for diagnosing audio issues. If sound isn’t coming through headphones despite being selected, the headphones might be faulty, or a software issue could be present.

    Output Settings and Hulu Audio

    Correctly configured output settings are essential for Hulu audio. This includes selecting the appropriate audio output device (headphones, speakers) and verifying that the volume levels are appropriately balanced across both the app and the iPhone. It’s important to ensure the selected output is functioning properly.

    Table of iPhone Sound Settings and Hulu Audio, Hulu App No Sound iPhone

    Setting Description Effect on Hulu Sound
    iPhone Volume Overall volume control for the device. Adjusting this affects the overall volume of Hulu audio.
    Hulu App Volume Volume control specific to the Hulu app. Adjusting this controls the volume of Hulu audio only.
    Do Not Disturb Silences notifications and calls. May mute Hulu audio if the setting is active.
    Headphone/Speaker Selection Chooses the output device. Audio will play through the selected device.
    Ringtone/Notification Sounds Control settings for ringtone and notifications. May not directly affect Hulu audio, but other sound settings could indirectly influence it.

    Device Hardware Issues

    Troubleshooting sound problems in the Hulu app can sometimes involve looking beyond the software. Physical hardware issues with your iPhone, headphones, or external audio devices can lead to unexpected sound problems. Understanding these potential causes can help you pinpoint the source of the issue and get your Hulu streaming back on track.Often, subtle hardware issues can mimic software problems.

    A loose connection, a failing component, or a damaged part can manifest as sound issues within the Hulu app, just like a software glitch. This is why a systematic approach to troubleshooting is essential.

    Potential iPhone Hardware Problems

    Various internal components within the iPhone can impact sound quality. Problems with the speaker system, audio chip, or even the headphone jack can lead to distorted sound, muted audio, or complete silence when using the Hulu app, or any other audio-related app.

    Headphone/External Audio Device Issues

    Faulty headphones, damaged cables, or mismatched connections with external audio devices can lead to sound issues when streaming Hulu. A poor connection, a damaged connector, or a defect in the headphones themselves can prevent audio from playing properly. Similarly, using headphones or external speakers that aren’t compatible with your iPhone model can also lead to audio problems.

    Examples of Hardware Issues Causing Sound Problems

    A common example is a loose connection within the headphone jack. This can cause intermittent sound cuts or distorted audio when streaming Hulu, or even any audio-related app. Another scenario is a failing speaker system, where a particular speaker might stop working altogether. This could lead to a noticeable decrease in audio volume or complete silence on one side of the speakers, again when using the Hulu app.

    Having trouble with sound on your Hulu app on your iPhone? It’s a common issue, and while I haven’t found a definitive fix yet, some folks swear by checking for updates and restarting the app. Interestingly, a similar troubleshooting spirit applies to the musical talents of musicians like the bassist for the band Rip Fear, derf scratch.

    Hopefully, a similar approach to solving the sound problem will resolve itself. I’m still on the hunt for a foolproof method though.

    A damaged audio chip can cause a range of problems from muted sound to distorted audio. Even a tiny crack or damage to the iPhone’s speaker grill can reduce the volume or distort sound.

    Comparison of iPhone Models and Reported Sound Quality

    iPhone Model Description Reported Sound Issues
    iPhone 14 Pro Max High-end model with advanced features. Generally reported with high sound quality and few sound-related issues in the Hulu app. Some users report minor audio distortions in specific audio tracks, which may be due to software limitations or user configuration.
    iPhone 13 Mini Compact, entry-level model. Generally reported with comparable sound quality to the iPhone 13 Pro Max. However, some users have reported slightly lower volume compared to the high-end models, though not significantly impacting the Hulu experience.
    iPhone 11 Mid-range model with a smaller display. Reports vary on sound quality when using the Hulu app. Some users report a slightly less powerful speaker output compared to newer models. However, the sound quality is usually sufficient for the Hulu app.
    Older iPhone Models Preceding iPhone generations. Users have reported varied sound quality. Some report problems with low volume or distortion in the Hulu app, while others do not report any issues. The reported sound quality is sometimes dependent on the specific model and the age of the device.

    Troubleshooting Steps and Procedures

    Hulu App No Sound iPhone

    Sometimes, even the best streaming apps can experience audio issues. This section Artikels systematic troubleshooting procedures to help you resolve sound problems with the Hulu app on your iPhone. Following these steps in order can often pinpoint the source of the problem and restore your audio experience.

    Restarting the Hulu App

    This simple step can resolve temporary glitches within the app. A fresh start often clears up minor conflicts or cached data that might be interfering with audio playback.

    1. Open the Hulu app on your iPhone.
    2. Tap and hold the Hulu app icon on your home screen.
    3. Tap “Delete App” when prompted.
    4. Go to the App Store and search for “Hulu”.
    5. Download the Hulu app again.
    6. Open the Hulu app and try playing content.

    Restarting the iPhone

    A complete restart of your iPhone can refresh the system’s resources and resolve issues that may be impacting the Hulu app’s audio functionality.

    1. Press and hold the power button on your iPhone.
    2. Slide the “Power off” slider to the right.
    3. Wait for the iPhone to completely shut down.
    4. Press and hold the power button again until the Apple logo appears.
    5. Set up your iPhone as needed if prompted.
    6. Open the Hulu app and try playing content.

    Resetting Network Settings

    Sometimes, network configuration issues can lead to audio problems in streaming apps. Resetting network settings can resolve conflicts and ensure a stable connection.

    1. Open the “Settings” app on your iPhone.
    2. Tap “General”.
    3. Tap “Transfer or Reset iPhone”.
    4. Tap “Reset”.
    5. Tap “Reset Network Settings”.
    6. Enter your passcode if prompted.
    7. Allow the iPhone to restart and reconnect to your network.
    8. Open the Hulu app and try playing content.

    Last Point

    Hulu App No Sound iPhone

    So, your Hulu app isn’t playing sound on your iPhone? Hopefully, this guide has provided the insights and troubleshooting steps you need to get your streaming back on track. Whether it’s a software issue, a network problem, or something more involved, we’ve covered a multitude of potential causes. If you’ve tried these tips and the issue persists, don’t hesitate to reach out to Hulu support for further assistance.

    Happy streaming!

  • Repair a USB Flash Drive A Comprehensive Guide

    Repair a USB Flash Drive A Comprehensive Guide

    Repair a USB Flash Drive: This guide delves into the common issues plaguing USB drives, from simple connection problems to complex file system corruption. We’ll explore troubleshooting methods, software and hardware repair techniques, and crucial data recovery strategies. Learn how to identify and fix various USB drive failures, ensuring your data remains safe and accessible.

    Whether your drive isn’t recognized by your computer, exhibits write errors, or shows signs of file system corruption, this guide provides actionable steps to diagnose and resolve the problem. We’ll cover everything from checking connections to advanced data recovery techniques, making it a comprehensive resource for all USB drive woes.

    Introduction to USB Flash Drive Repair

    USB flash drives, ubiquitous in modern digital life, are susceptible to various failures. These portable storage devices, while convenient, can encounter problems ranging from minor glitches to complete data loss. Understanding the common causes and potential solutions for these issues is crucial for mitigating data loss and ensuring continued usability.A flash drive’s failure can manifest in different ways, from the drive not being recognized by the computer to encountering errors during data transfer.

    This multifaceted nature of drive failure often requires a methodical approach to diagnosis and repair, recognizing the underlying cause before attempting any solution. This article provides a detailed look into the most prevalent types of flash drive failures and their potential fixes.

    Common USB Flash Drive Failures

    USB flash drives can fail in several ways. The most common problems involve either the drive not being recognized by the computer, errors during read or write operations, or a complete inability to access the data stored on the drive. These issues stem from various sources, including physical damage, software corruption, or hardware malfunctions.

    Types of USB Flash Drive Failures

    Several types of USB flash drive failures can occur, each with distinct characteristics and potential solutions.

    • Drive Not Recognized: This scenario typically occurs when the computer fails to detect the USB drive. This could be due to a faulty connector, a damaged USB port, or a malfunctioning controller chip inside the flash drive. Sometimes, the problem stems from a driver issue or incompatibility with the computer’s operating system.
    • Read Errors: Encountering read errors indicates a problem with accessing the data stored on the drive. These errors often manifest as corruption or loss of data during retrieval. Possible causes include physical damage to the drive’s memory chips, controller malfunctions, or inconsistencies in the drive’s firmware.
    • Write Errors: Write errors occur when the drive fails to successfully record data. This can be caused by a variety of factors, including the drive’s controller malfunctioning, issues with the memory chips, or problems with the computer’s file system.
    • Data Loss: This encompasses several scenarios where data stored on the drive is inaccessible. It might be due to corrupted files, complete sector failure, or a malfunctioning operating system. Data loss can be devastating, but often steps can be taken to recover some or all of the data.

    Causes of USB Flash Drive Failures

    Several factors contribute to USB flash drive failures. Understanding these causes helps in preventing future issues and determining the appropriate course of action for repair.

    • Physical Damage: Dropping, bending, or exposing the drive to extreme temperatures or moisture can damage the internal components, leading to malfunctions or data loss. For example, a dropped drive might have its connector or internal circuitry compromised, rendering it unusable.
    • Software Corruption: Corrupted files, faulty drivers, or malware infections can lead to data corruption and difficulties accessing the drive’s content. This can be similar to a corrupted operating system file causing a system to become unstable.
    • Hardware Malfunction: The drive’s controller, memory chips, or other internal components might malfunction due to age, manufacturing defects, or overuse. Over time, the internal components can wear down, leading to data loss or drive failure.

    Troubleshooting Table

    This table provides a concise overview of common USB flash drive failure scenarios, their potential causes, symptoms, and possible solutions.

    Failure Scenario Possible Causes Likely Symptoms Potential Solutions
    Drive not recognized Damaged connector, faulty controller, driver issues, incompatible system Computer does not detect the drive, error messages Check connections, try different ports, update drivers, check system compatibility
    Read/Write errors Corrupted files, sector errors, hardware malfunction Data corruption, errors during file transfer, drive freezing Run a chkdsk (check disk) command, use file recovery software, consider professional data recovery
    Data loss Physical damage, software corruption, controller failure, virus Inability to access any data on the drive, blank or empty drive Professional data recovery services, file recovery software, check for viruses

    Troubleshooting Methods

    Unbeknownst to many, a seemingly dead USB flash drive often has a fixable problem. This section dives into the practical steps to diagnose and resolve issues, ranging from simple checks to more involved techniques. We’ll explore methods for pinpointing the root cause and various software tools for potential repairs.Identifying the specific problem with a USB flash drive is crucial for effective troubleshooting.

    This involves systematically examining various aspects of the drive’s functionality and physical state. Early diagnosis helps save time and resources, avoiding unnecessary or ineffective repair attempts.

    Identifying the Issue

    To effectively troubleshoot a USB flash drive, start by observing its behavior. Does it show up in the operating system at all? Does the operating system report any errors? Does it exhibit any specific symptoms, like a “not recognized” error message, or slow read/write speeds? Note these symptoms meticulously.

    Understanding the drive’s behavior is the first step toward pinpointing the problem.

    Disk Management Tools

    Disk management tools are essential for initial checks. Windows Disk Management, for example, allows you to view the drive’s status, file system type, and partition information. Using these tools, you can determine if the drive is recognized by the system and if it has any reported errors. This information often indicates the nature of the issue. For instance, a drive that appears as “unallocated” might require formatting or a repair attempt.

    Drive Health Checks

    Checking the physical health of the drive is another crucial step. Various software tools are available to assess the drive’s health. These tools often use algorithms to scan the drive’s sectors, detecting bad sectors or inconsistencies. Tools often report the overall health of the drive and identify problematic areas. A degraded drive might require professional attention or further troubleshooting.

    Software Tools for Repair

    Numerous software tools are designed to repair USB drives. Some tools specialize in recovering data from corrupted drives, while others focus on repairing the drive’s file system. When choosing a tool, consider the specific issue you’re facing. Some tools might be better suited for recovering files, while others can repair the drive’s structure. For example, Stellar Data Recovery is a popular data recovery tool, while some specialized USB repair software may address specific file system issues.

    Physical Inspection

    A physical inspection is important for ruling out obvious hardware problems. Examine the drive for visible damage, such as bent pins, cracks, or loose connections. Look for any signs of physical damage to the USB connector or the drive itself. Physical damage can be a significant factor contributing to the malfunctioning of the drive. A damaged connector or internal components might require a professional repair or replacement.

    Troubleshooting Steps

    1. Observe the Drive’s Behavior: Pay attention to any error messages, slow performance, or failure to mount the drive. This provides valuable insight into the potential problem.
    2. Use Disk Management Tools: Check the drive’s status, file system, and partition information using built-in tools. Identifying the drive’s status is a fundamental step in the troubleshooting process.
    3. Run Drive Health Checks: Employ dedicated software to assess the drive’s health and detect bad sectors. These scans can pinpoint the source of the problem.
    4. Assess Physical Condition: Examine the USB connector and the drive itself for any physical damage. This step often helps determine if a physical problem is the cause.
    5. Employ Repair Software: Use appropriate software tools to repair the file system or recover data if necessary. Proper selection of the right software can significantly increase the chances of successful repair.

    Software Repair Techniques

    Fixing a faulty USB flash drive often involves software-based solutions. These methods can range from simple formatting to more complex data recovery procedures. Understanding the tools and techniques available is crucial for effectively troubleshooting and restoring functionality.

    Using Disk Tools for USB Drive Repair

    Disk tools are essential for managing and repairing storage devices like USB drives. They provide a way to interact with the underlying hardware and perform various operations, including formatting and initializing. The most common disk tool is Disk Management, which is built into Windows. Knowing how to use it effectively can save you time and effort.

    DiskPart Commands for USB Drive Repair

    DiskPart is a powerful command-line tool for managing disks, partitions, and volumes. It’s highly effective for situations where you need precise control over the USB drive’s structure.

    • Opening DiskPart: Open the command prompt as an administrator. Type “diskpart” and press Enter to launch the DiskPart utility.
    • Listing Disks: Use the command “list disk” to view a list of all connected disks, including your USB drive. Note the disk number of your USB drive.
    • Selecting the Disk: Use the command “select disk [disk number]” to choose the specific USB drive you want to work with. Replace “[disk number]” with the number you noted previously.
    • Cleaning the Disk: Use the command “clean” to erase all data and partitions on the selected disk. This action is irreversible, so proceed with extreme caution. This prepares the drive for re-initialization.
    • Creating a Partition: Use the command “create partition primary” to create a primary partition on the disk. This is often necessary for formatting the drive and creating usable space.
    • Selecting the Partition: Use the command “select partition 1” to select the newly created partition. (This step might vary based on your specific partition structure.)
    • Formatting the Partition: Use the command “format fs=ntfs quick” to format the partition using the NTFS file system. “Quick” format is faster, but “full” format is more thorough in checking the drive’s sectors.
    • Assigning a Drive Letter: Use the command “assign” to assign a drive letter to the formatted partition.
    • Exiting DiskPart: Type “exit” to close the DiskPart utility.

    Different Disk Management Tools and Their Functionalities, Repair a USB Flash Drive

    The following table Artikels the functionalities of various disk management tools, providing a comprehensive overview of their uses.

    Tool Functionality Use Case
    Disk Management Format, initialize, and manage disks, volumes, and partitions. Repairing drive errors, creating partitions, formatting drives, changing drive letters.
    DiskPart A command-line utility for managing disks, volumes, and partitions. Performing advanced disk operations, such as cleaning disks, creating partitions, and formatting volumes in a highly controlled environment.
    Third-party tools Specialized tools for advanced data recovery, disk analysis, and more. Recovering data from severely damaged drives, examining disk health, and handling complex recovery scenarios.

    Formatting a USB Drive

    Formatting a USB drive prepares it for use with your operating system. It creates a file system (like NTFS or FAT32) that the computer understands, enabling you to store and access files. Formatting will erase all existing data on the drive. Always back up important files before formatting.

    • Using File Explorer: Right-click the USB drive in File Explorer and select “Format.” Follow the on-screen instructions, selecting the desired file system and allocation unit size.
    • Using Disk Management: Open Disk Management. Select the USB drive. Right-click and select “Format.” This provides more options for the formatting process.

    Recovering Data from a Damaged USB Drive

    Data recovery from a damaged USB drive is a critical skill. Software tools are often required for recovering data from severely damaged drives. A thorough backup strategy is essential to prevent data loss.

    • Using data recovery software: Several data recovery programs are available for recovering data from corrupted or damaged USB drives. These tools may vary in their functionality and price.
    • Important Considerations: Data recovery software may not always be successful in recovering all data. The extent of damage to the drive plays a significant role in the potential for recovery.

    Hardware Repair Options

    Repair a USB Flash Drive

    Sometimes, a USB flash drive’s issues stem from physical or internal component problems, not software glitches. In these cases, hardware repair becomes a viable option. This approach often requires more technical expertise and carries a higher risk of damaging the drive further if not performed correctly. Carefully weigh the potential benefits against the risks before embarking on hardware repair.Hardware repair, when successful, can often be a more permanent solution than software fixes, especially for drives with significant physical damage or faulty internal components.

    However, it’s crucial to understand the potential for irreversible data loss and the need for meticulous care during the process.

    Fixing a dodgy USB drive can be a real pain, but sometimes a little know-how can get you back on track. While I’m wrestling with a stubborn flash drive, I’m also excited to hear that shamir will be performing live on Instagram with Pitchfork here. Hopefully, this won’t take as long as getting that USB drive working again.

    Back to the technical task at hand; hopefully, I can get this drive working soon.

    Replacing the USB Flash Drive Controller

    The USB flash drive controller is a crucial component that manages data flow between the drive and the computer. A faulty controller can lead to read/write errors and ultimately prevent the drive from functioning. Replacing this component is a complex procedure and often requires specialized tools and knowledge.

    • The controller is usually soldered onto the circuit board. Disconnecting it requires careful desoldering, and improper techniques can damage the circuit board or the controller itself. A damaged circuit board often means the drive is beyond repair.
    • Ensure you have a replacement controller compatible with the flash drive’s specifications. Incorrect compatibility can lead to further damage and a complete loss of data.
    • Before attempting any soldering, thoroughly research the specific procedures for the controller type, considering the potential variations between different models and brands. Detailed instructions and diagrams are essential for safe and successful replacement.

    Checking and Replacing the USB Connector

    The USB connector is the physical interface between the drive and the computer. A damaged or loose connector can result in intermittent connectivity issues or complete failure.

    • Visually inspect the USB connector for any cracks, breaks, or bent pins. Careful observation is key to identifying any obvious physical damage.
    • If the connector is loose, use a magnifying glass to carefully check for any misalignment of the pins. This step is crucial to ensure a proper connection.
    • If the connector is damaged, a replacement is often necessary. Ensure the replacement connector is compatible with the drive and the USB port specifications to avoid further problems.
    • When replacing the connector, take great care to maintain the proper orientation and alignment of the pins to prevent future connection issues.

    Repairing Physical Damage

    Physical damage to the USB flash drive, such as cracks, dents, or water damage, can significantly affect its functionality.

    • Assess the extent of the damage. Severe physical damage might render the drive beyond repair. Minor damage might be repairable but still carry a high risk.
    • If the damage is localized, consider using specialized repair techniques to fix the housing. Use appropriate adhesives and tools to carefully repair the affected areas. Improper repair techniques could worsen the damage.
    • Water damage, in particular, requires immediate action and specialized drying techniques to prevent further corrosion. Ignoring water damage can lead to irreversible damage to the internal components.

    Hardware Repair vs. Software Repair

    Hardware repair often involves more advanced technical skills and potential risks.

    • Hardware repair, when successful, offers a potentially permanent solution to drive malfunctions. Software repairs, on the other hand, may only be temporary fixes or fail to address the root cause.
    • The cost of specialized hardware repair tools and expertise can be higher than software repair methods. The cost of replacing a faulty component or the cost of repair itself must be weighed against the value of the data on the drive.
    • Software repairs are generally faster and less risky. However, they might not always address the fundamental issues that cause drive failure.

    Data Recovery Strategies

    Repair a USB Flash Drive

    Recovering data from a corrupted USB flash drive can be challenging, but with the right approach, you can often salvage valuable files. A crucial first step is understanding the various data recovery techniques and the importance of proactive data backups. This section will guide you through these critical aspects, providing practical steps to recover lost data from your USB drive.Data recovery techniques vary depending on the nature of the corruption.

    Some methods are more effective for specific types of damage. Understanding the potential causes of corruption (e.g., improper removal, power surges, file system errors) can help you choose the most appropriate recovery strategy. A systematic approach is essential to maximize your chances of success.

    Backup Strategies

    Data loss is a serious concern. Regular backups are crucial to prevent significant data loss in case of corruption or physical damage to your storage device. Implement a backup strategy that includes regular data copies to an external hard drive, cloud storage, or other reliable media. This preventative measure is vital for safeguarding your precious files.

    File System Error Recovery

    File system errors are common causes of USB drive corruption. These errors can prevent the operating system from accessing files on the drive. Specialized data recovery software can often repair or bypass these errors, allowing you to retrieve lost files.

    Data Recovery Software

    Data recovery software is a powerful tool for retrieving lost data from damaged USB drives. These programs employ various algorithms to locate and extract files, even when the file system is severely damaged. Different software packages offer various features, including the ability to preview files before recovery. The selection of the right software depends on the type of damage and your technical skills.

    A user-friendly interface is a significant advantage, as it streamlines the process.

    Step-by-Step Guide to Recovering Files

    This detailed guide Artikels the process of recovering files from a damaged USB drive using data recovery software.

    Fixing a wonky USB drive can be a real pain, but sometimes, the best way to secure your data is to block off access altogether. Just like reinforcing a weak point in your home security with a properly installed barrier, you might need to take similar precautions with your digital assets. If you’re looking for more information on making sure your external doorways are as secure as possible, check out this helpful guide on Block Up an External Doorway.

    Ultimately, knowing how to repair a USB flash drive or other storage devices can save you a headache, and these steps can help you avoid data loss or security breaches.

    1. Initial Assessment: Before attempting recovery, assess the extent of the damage. Determine if the drive is physically damaged or if the problem lies with the file system. This assessment will help you select the appropriate recovery methods.
    2. Backup Your Data: If possible, create a backup of any data on the drive. This is critical to prevent further data loss. Use a separate and healthy drive for backup. This crucial step protects your data during the recovery process.
    3. Install Data Recovery Software: Download and install reputable data recovery software. Look for user reviews and features that match your needs.
    4. Connect the Drive: Connect the USB drive to your computer. Avoid any actions that might potentially damage the drive, like reformatting.
    5. Run the Recovery Scan: Launch the data recovery software and initiate a scan of the drive. Choose the scan type (deep scan, quick scan) depending on the extent of damage.
    6. Preview and Select Files: Review the files identified by the software. Select the files you wish to recover. This is your opportunity to verify the files you are about to recover.
    7. Save Recovered Files: Choose a location on your computer to save the recovered files. Avoid saving to the same drive that contains the damaged drive to prevent overwriting.
    8. Verify Recovery: After saving the files, verify that the recovered files are intact and accessible. Ensure that the data has been successfully recovered.

    Demonstrating Data Recovery Software Usage

    Using data recovery software effectively requires understanding its features. The software typically provides options for different scan types, file filtering, and previewing capabilities. These tools streamline the process, allowing users to recover lost files efficiently.

    Fixing a wonky USB drive can be a real pain, but sometimes a little troubleshooting goes a long way. It’s like deciphering a complex musical piece, especially when you’re trying to figure out the rhythm of a track like ken mode the terror pulse. Ultimately, though, getting that drive back online is more rewarding than any electronic music experience, and a much simpler fix.

    Prevention and Maintenance

    USB flash drives, while convenient, are susceptible to failure. Proactive measures significantly increase their lifespan and reliability. Proper handling, regular backups, and safe removal practices contribute to preventing data loss and drive malfunction. This section Artikels key strategies for maintaining the health and integrity of your USB drives.

    Preventative Measures

    A crucial aspect of maintaining a USB drive is preventing potential issues. Regularly backing up data is paramount. Even if the drive functions flawlessly, unforeseen circumstances like hardware malfunction or accidental deletion can lead to data loss. A robust backup strategy ensures data preservation.

    Proper Handling Techniques

    Physical damage is a common cause of USB drive failure. Avoid dropping, bending, or exposing the drive to extreme temperatures or moisture. Always handle the drive with care, using both hands to minimize the risk of dropping. Storing drives in appropriate cases and avoiding contact with abrasive materials are also essential preventative measures.

    Importance of Regular Data Backups

    Data loss is a significant concern. A critical preventative measure is establishing a regular backup routine. Employing cloud storage, external hard drives, or other backup solutions protects data from various threats, including drive failure, accidental deletion, or even natural disasters. Automated backups are recommended for added security and convenience. This systematic approach ensures data safety.

    Safe Removal Techniques

    Safely removing a USB drive is vital for preventing data corruption and drive damage. Never abruptly disconnect a USB drive while it’s in use. Always access the drive’s ‘Safely Remove Hardware’ or equivalent option in your operating system’s settings to ensure a proper shutdown sequence. This procedure prevents file system inconsistencies and maintains the drive’s integrity.

    Maintenance Checklist

    Regular maintenance tasks contribute significantly to the longevity of USB flash drives. A simple checklist can streamline these efforts.

    • Regular Backups: Implement a scheduled backup routine to protect data from various threats.
    • Physical Inspection: Periodically check the drive for any visible signs of damage or wear.
    • Avoid Extreme Temperatures: Store drives in environments with moderate temperatures to prevent thermal damage.
    • Proper Removal: Utilize the “Safely Remove Hardware” option to prevent file system errors and ensure data integrity.
    • Secure Storage: Protect drives from physical impacts, moisture, and dust by storing them in appropriate cases or designated locations.

    Common Errors and Solutions

    USB flash drives, while convenient, can sometimes malfunction. Understanding common errors and their solutions is crucial for maintaining data integrity and preventing costly data loss. This section delves into troubleshooting typical problems encountered during USB drive repair, focusing on practical solutions and specific error messages.Identifying the root cause of a USB drive malfunction is the first step towards effective repair.

    Often, a seemingly simple error can stem from a complex issue within the drive’s file system or hardware components. This section provides a structured approach to diagnosing and resolving these issues.

    Identifying Common Errors

    Various errors can prevent users from accessing or using their USB drives. These errors range from simple file system corruption to more complex hardware failures. Knowing these common errors helps in identifying the potential problem and selecting the appropriate troubleshooting steps.

    Troubleshooting Specific Error Messages

    Specific error messages can provide valuable clues about the nature of the problem. Carefully analyzing these messages can help pinpoint the cause and guide the repair process.

    Common USB Drive Errors and Solutions

    Error Cause Solution
    Drive not accessible File system corruption, hardware malfunction, or incorrect drive formatting. First, try a different USB port. If the problem persists, use a reputable data recovery tool. If the drive is physically damaged, professional repair may be necessary.
    “The disk is not formatted” The drive’s file system has been corrupted or the drive has not been formatted correctly. If the drive is recognized by the operating system but not formatted, try reformatting it. If the drive is not recognized, data recovery software might help recover the data.
    “Error reading the disk” Physical damage to the drive’s internal components, such as the flash memory chips. File system corruption is another possibility. If the error is persistent, professional repair or data recovery is highly recommended. If the problem is file system corruption, a data recovery tool can potentially salvage the data.
    “Device not recognized” Driver issues, hardware conflicts, or physical damage to the drive. Check for updated drivers for your USB controller. Try a different USB port. If the problem persists, examine the physical state of the drive for any visible damage. If the drive is recognized by other devices, a hardware problem is more likely.
    “Disk is write-protected” The drive is set to prevent writing. Disable the write protection feature, often through a small switch on the drive itself or a utility in the operating system.

    Using Data Recovery Software

    Data recovery software plays a crucial role in retrieving data from corrupted or inaccessible USB drives. These tools employ various techniques to scan the drive’s sectors, locate lost or damaged files, and restore them to a usable state. Careful selection and use of reputable data recovery software are essential for successful data retrieval. Using free tools is sometimes not a guarantee of successful recovery.

    Preventing Future Errors

    Regularly backing up important data on your USB drives is a critical preventative measure. Avoiding extreme temperatures, physical shocks, and frequent insertions and removals of the drive can also help extend its lifespan and prevent potential errors. Always safely eject the drive from the operating system before disconnecting it.

    Alternative Repair Methods: Repair A USB Flash Drive

    Sometimes, a USB flash drive’s issues aren’t immediately apparent. Trying different approaches can often pinpoint the problem and lead to a successful repair. This section explores alternative methods for troubleshooting, including utilizing different computers, operating systems, and formatting options.Alternative methods can be crucial in isolating whether the problem lies with the drive itself, the computer’s operating system, or the connection between the two.

    For instance, a drive that works perfectly on one computer might fail on another due to incompatible drivers or file system issues.

    Using a Different Computer

    A fundamental step in troubleshooting is testing the USB drive on a different computer. This helps determine if the problem is specific to the original computer or inherent to the drive itself. A functioning drive on a different system suggests the issue is with the original computer’s hardware, software, or configuration.

    Diagnosing with a Different Operating System

    Operating systems can handle USB drives differently. Attempting to access the drive on a system running a different operating system, such as macOS or Linux, can help isolate the issue. If the drive is recognized and functions correctly on a different OS, the original OS’s drivers or file system might be the problem.

    Using a USB Drive with Different Operating Systems

    USB drives can often be used across different operating systems without major issues. However, file systems can vary. For example, FAT32 is widely compatible, while NTFS is typically Windows-specific. Understanding the file system format of the drive and the compatibility of the destination operating system is key to successful data transfer. Using a drive formatted with a file system that is not natively supported by the destination operating system might require additional steps like converting or mounting the drive.

    Comparing and Contrasting USB Drive Formats

    Various file system formats (FAT32, NTFS, exFAT) are used on USB drives. Each has its own strengths and weaknesses in terms of compatibility and file size limits. FAT32 is a simpler, older format that’s compatible with most systems, but has limitations on file size. NTFS is a more advanced format that is natively supported by Windows, allowing larger files but not always fully compatible with other operating systems.

    exFAT, a newer format, offers a balance between compatibility and large file support.

    Formatting a Drive Using Different Tools

    Formatting a USB drive can resolve various issues, but it will erase all data on the drive. Different operating systems offer various formatting tools. Windows has the Disk Management tool, while macOS provides Disk Utility. Knowing how to format the drive using the appropriate tool for the operating system is crucial to avoid data loss or incompatibility issues.

    The correct format for the intended operating system use is critical to prevent problems.

    Closing Notes

    In conclusion, repairing a USB flash drive can be tackled effectively with a combination of troubleshooting, software, and potentially hardware repair techniques. Understanding the causes of drive failure, utilizing appropriate tools, and employing sound data recovery methods are key to successfully recovering your data. This guide provides a step-by-step approach to address various scenarios, from simple connectivity issues to complex file system corruption.

    Remember, prevention is always better than cure, so adopting safe handling practices and regular backups will safeguard your data in the long run.

  • Venmo Instant Transfer Not Working A Deep Dive

    Venmo Instant Transfer Not Working A Deep Dive

    Venmo Instant Transfer Not Working is a frustrating problem for many users. This post delves into the common causes, troubleshooting steps, and even user experiences to help you understand why your transfers might be failing. From checking your network connection to updating your Venmo app, we’ll explore various solutions to get your money moving again.

    The issue of Venmo Instant Transfer Not Working is often a result of a complex interplay of factors. This comprehensive guide will explore the potential causes, from simple network problems to more intricate software glitches within the Venmo application itself.

    Venmo Instant Transfer Not Working

    Venmo, a popular mobile payment app, often experiences hiccups with its instant transfer feature. Users frequently report problems with transactions failing to process quickly or not processing at all. This can be frustrating, especially when needing a quick payment for everyday needs.

    Problem Description

    The core issue with Venmo’s instant transfer feature revolves around the app’s inability to complete transactions in a timely manner. Users often find that their payments are delayed, or worse, rejected altogether. This issue can be especially concerning for transactions involving urgent or time-sensitive situations.

    Common User Complaints

    Frustration with the Venmo instant transfer feature often stems from the unpredictability and unreliability of the service. Users frequently report that payments are not processed instantly, as advertised. This results in inconvenience and delays, potentially impacting various aspects of daily life, such as bill payments or splitting restaurant costs.

    Troubleshooting Steps

    Before reaching out to Venmo support, users typically attempt several troubleshooting steps. These often involve checking their internet connection, verifying the recipient’s Venmo account information, and ensuring that the payment amount is within acceptable limits. These steps aim to identify and resolve potential local issues rather than immediately escalating to support.

    Scenarios of Failure

    The issue of Venmo instant transfers not working can manifest in various scenarios. One common scenario involves users experiencing connectivity problems. Weak or unstable Wi-Fi, or a poor cellular signal, can prevent the app from sending and receiving payment information, thus hindering the transaction. Furthermore, time of day can also play a role. High traffic periods on the Venmo platform may lead to slower transaction processing times.

    Also, the specific device being used can impact the user experience. Older devices or those with outdated software might not be compatible with the app’s latest functionalities, leading to issues in processing the payment.

    Device and Network Considerations

    Device compatibility is a crucial factor in successful instant transfers. Older smartphones with limited processing power may not be able to handle the complex operations required for instantaneous payments. Incompatibility with Venmo’s latest software updates can also lead to problems. Likewise, network conditions significantly affect Venmo transfers. Poor internet connectivity, whether Wi-Fi or cellular, can hinder the app’s ability to process transactions in real-time.

    Users experiencing intermittent connectivity issues might encounter delayed or failed payments. Network congestion during peak hours is another contributing factor, causing delays in payment processing. Furthermore, differences in network quality between the sender and receiver can also affect the transaction’s success.

    User Actions Prior to Support

    Before contacting Venmo support, users often attempt various steps to diagnose and resolve the issue themselves. These preliminary steps include checking their internet connection, ensuring sufficient data allowance for the transfer, and confirming that their Venmo account is active and linked to a valid payment method. They also often review their transaction history and verify that the recipient’s account information is correct.

    This proactive approach aims to identify and rectify any potential local causes before escalating to support.

    Possible Causes

    Venmo Instant Transfer Not Working

    Venmo’s Instant Transfer feature, while generally reliable, can occasionally experience hiccups. Understanding the potential reasons behind these failures is crucial for troubleshooting and resolving issues promptly. This section delves into various factors that might contribute to a failed Venmo Instant Transfer.Troubleshooting Venmo’s Instant Transfer issues often involves a multifaceted approach. A thorough examination of various factors, from network connectivity to software glitches, is essential for pinpointing the root cause of the problem.

    Network Connectivity Problems

    Network connectivity plays a critical role in the smooth execution of online transactions. Interruptions or instability in your internet connection can disrupt the transfer process, leading to failed Venmo Instant Transfers. Poor signal strength, congested networks, or temporary outages can all contribute to these issues. For instance, a weak Wi-Fi signal in a crowded coffee shop could cause a transfer to fail.

    Similarly, if your internet service provider experiences a temporary outage, your Venmo transactions might be affected.

    Software Glitches or Bugs

    Venmo, like any software application, can occasionally experience glitches or bugs. These software issues might manifest as temporary malfunctions in the Instant Transfer process, causing transfers to fail unexpectedly. These problems can range from minor errors to more significant system-wide malfunctions. A software update that introduces unforeseen bugs could disrupt the normal functioning of the transfer system.

    Furthermore, certain devices or operating systems may be more susceptible to these software-related issues.

    Recipient’s Account or Payment Settings

    The recipient’s account status or payment settings can also influence the success of an Instant Transfer. If the recipient’s account is temporarily restricted or deactivated, the transfer might fail. Additionally, problems with the recipient’s linked bank account, such as insufficient funds or temporary account issues, can also hinder the transfer. A change in the recipient’s payment settings, such as a recent change of bank account, could also be a factor.

    Third-Party Apps or Extensions

    Third-party applications or extensions installed on your device might inadvertently interfere with Venmo’s Instant Transfer process. Certain security software, VPNs, or browser extensions could cause conflicts that prevent the transfer from completing successfully. For example, a VPN with strict firewall settings might block the necessary network traffic required for the transfer. Likewise, outdated or incompatible extensions could also create problems.

    Comparison of Potential Causes

    | Cause | Description ||——————————————-|——————————————————————————————————————————————————————————————————————————————————————————————————|| Network Connectivity Problems | Issues with internet connection, including weak signal, congestion, or outages, can prevent successful transfers.

    || Software Glitches/Bugs | Temporary malfunctions within the Venmo application or on your device.

    || Recipient’s Account/Payment Settings | Issues with the recipient’s account, such as restrictions, deactivation, or linked bank account problems.

    || Third-Party Apps/Extensions | Conflicts with security software, VPNs, or browser extensions can block the necessary network traffic for the transfer.

    |

    Troubleshooting Steps

    Venmo Instant Transfer Not Working

    Frustrated with your Venmo Instant Transfer not working? Don’t worry, you’re not alone. This comprehensive guide walks you through a series of troubleshooting steps to resolve this common issue. Follow these steps systematically, and you’ll be back to seamlessly sending and receiving money in no time.

    Verifying Internet Connectivity

    Reliable internet access is crucial for Venmo Instant Transfers. Problems with your network connection can significantly hinder the transaction process. This section details methods to confirm your internet connection is stable and suitable for Venmo’s requirements.Checking your internet connection involves several steps. First, try accessing other websites or online services. If these load quickly, your internet connection is likely stable.

    If other sites are slow or unresponsive, you’ll need to address your internet connection before trying Venmo again. Next, check your Wi-Fi or mobile data signal strength. If the signal is weak, try moving closer to the router or finding a better location for mobile data reception. If using mobile data, ensure your data plan allows for sufficient bandwidth.

    In some cases, network congestion or temporary outages can also impede the process.

    Reviewing Venmo Account Information

    Correct account information is essential for successful Venmo Instant Transfers. Incorrect login details or payment methods can block transactions. This section Artikels the steps to double-check your Venmo account details.Review your Venmo login credentials (username and password) to confirm accuracy. Ensure your payment methods (linked bank accounts or credit cards) are correctly associated with your Venmo account.

    Confirm that the payment method is enabled for instant transfers and has sufficient funds. Double-check your linked bank account details for any recent changes. Ensure the bank account is active and has no restrictions on online transactions. Contact your bank if you encounter any issues with the account.

    Troubleshooting Flowchart

    The flowchart below provides a visual representation of troubleshooting steps based on observed symptoms. It guides you through various scenarios and suggests the appropriate actions based on the specific problem you encounter.

    Start
    |
    V
    Is internet connection stable?
    | Yes  -> Check Venmo Account Information
    | No   -> Troubleshoot Internet Connection
    |
    V
    Is Venmo app updated?
    | Yes  -> Clear App Cache & Data
    | No   -> Update Venmo App
    |
    V
    Check Account Details
    |
    V
    Still not working?
    |
    V
    Contact Venmo Support
     

    Updating the Venmo App

    Ensuring your Venmo app is up-to-date is vital for optimal functionality. Outdated versions may contain bugs or compatibility issues that can prevent instant transfers.

    This section details the steps to update the Venmo application.

    Open the app store (e.g., Google Play Store or Apple App Store). Search for “Venmo” and select the app. Tap “Update” if an update is available. Allow the update to complete. Once the update is finished, restart the Venmo app to apply the changes.

    After the update, try sending the Venmo Instant Transfer again.

    Clearing App Cache and Data

    Clearing the app cache and data can resolve issues caused by corrupted or outdated temporary files. This procedure is sometimes necessary when other troubleshooting steps fail. This section Artikels the steps to clear the Venmo app’s cache and data.

    Open your device’s settings. Navigate to the “Apps” or “Applications” section. Find the Venmo app. Select “Storage” or “Cache.” Tap “Clear Cache” and then “Clear Data.” Restart the Venmo app. After clearing the cache and data, try sending the Venmo Instant Transfer again.

    Troubleshooting Steps List

    The following steps are organized for a systematic troubleshooting approach. These steps are designed to help you resolve the “Venmo Instant Transfer Not Working” issue.

    • Verify your internet connection is stable.
    • Ensure your Venmo account information (login credentials, payment methods) is accurate.
    • Check if the Venmo app is updated to the latest version.
    • Clear the Venmo app cache and data.
    • Restart your device.
    • If the issue persists, contact Venmo support for further assistance.

    User Experiences

    Venmo’s instant transfer feature, while generally reliable, occasionally encounters hiccups. Understanding user experiences with these failures is crucial for identifying patterns, improving the service, and ultimately providing a smoother user journey. This section delves into the reported issues, examining their frequency, nature, and potential root causes.

    User experiences with Venmo instant transfer failures reveal a range of frustrations and technical challenges. Some users experience consistent delays, while others encounter intermittent failures. Understanding the specific circumstances surrounding these issues is essential for targeted troubleshooting and improved service reliability.

    Common User Complaints

    User feedback highlights a variety of issues with Venmo instant transfers. These include unexpected delays, transactions failing to complete, and receiving error messages. Identifying common themes in these complaints can provide valuable insights into the underlying causes of the problems.

    • Delayed Transactions: Users frequently report that their transactions are taking significantly longer than expected. Sometimes, the delay is a few minutes, but in other cases, the transfer may not complete for hours, leading to inconvenience and frustration. For example, a user might initiate a payment at 2 PM and expect it to be received immediately but instead see the transaction remain pending until 5 PM.

    • Failed Transactions: Another significant complaint involves transactions failing to process entirely. Users may see error messages or the transaction never appearing in their Venmo activity log. This issue can be especially frustrating if the funds are needed urgently.
    • Inconsistent Errors: The nature of the error messages received is often inconsistent. Some users report vague error messages, while others receive more specific codes or descriptions. This lack of clarity can hinder troubleshooting efforts and increase user frustration.

    Troubleshooting Success Stories

    Several users have successfully resolved issues with Venmo instant transfers. These successful attempts often involve basic troubleshooting steps. These successful resolutions offer a positive outlook and highlight the importance of user agency in addressing issues.

    • Checking Network Connectivity: A common and effective solution involves verifying the user’s internet connection. A stable and reliable internet connection is essential for the smooth operation of Venmo instant transfers. Users who experienced intermittent problems with their transfers have reported resolving the issue by ensuring a strong Wi-Fi signal or switching to a cellular data connection with a better signal.

    • Restarting the App: A simple restart of the Venmo application can often resolve temporary glitches or software conflicts that may be preventing the transfer from going through. Restarting the application allows the app to refresh and resolve temporary issues, which are sometimes overlooked.
    • Checking Account Balance: In some cases, the user may have insufficient funds in their account to complete the transfer. Double-checking the account balance can quickly identify and resolve this issue. This is a straightforward yet crucial step that users may overlook, often leading to unnecessary frustration.

    Comparison with Other Payment Apps

    Comparing Venmo’s instant transfer issues with those reported in other mobile payment apps reveals some common themes. For example, issues with network connectivity or temporary application glitches can affect multiple platforms. However, the specific error messages and frequency of these problems may vary across different apps.

    • Similar Patterns: Across various payment apps, network issues are a frequent cause of transaction delays or failures. This highlights the importance of reliable internet access for mobile payments.
    • Variations in Errors: The exact nature of errors encountered in Venmo differs from other apps, reflecting the unique architecture and implementation details of each platform.

    Summary of User Experiences

    The common thread in user reports is a need for more reliable and consistent instant transfer functionality. Delayed transactions, failed transfers, and inconsistent error messages contribute to a negative user experience. Understanding these themes and implementing effective solutions is crucial for Venmo’s continued success.

    Venmo Support Resources

    Navigating the digital world can sometimes lead to frustrating technical issues. When Venmo instant transfers aren’t working, understanding how to reach support is crucial for resolving the problem efficiently. This section details the various avenues Venmo provides for users to get assistance.

    Venmo offers multiple support channels to address user concerns and technical difficulties. Choosing the right method can streamline the process of getting your Venmo issues resolved.

    Venmo Support Channels, Venmo Instant Transfer Not Working

    Venmo provides several avenues for users to connect with support, each tailored to a different need or preference. This allows users to select the most convenient method to resolve their issues.

    • Website Help Center: The Venmo website boasts a comprehensive Help Center. This resource provides a wealth of information, including frequently asked questions (FAQs) and articles addressing common issues, such as instant transfer problems. This allows users to find solutions to their issues without needing to contact support directly.
    • Email Support: Users can directly contact the Venmo support team via email. This method is suitable for those who prefer written communication and detailed explanations of their problem.
    • Phone Support: For those who prefer a more direct interaction, Venmo offers phone support. This allows users to discuss their issues in real-time with a support agent.
    • In-App Support: Venmo’s mobile app offers in-app support, often via a chat feature. This option is convenient for users who prefer resolving issues within the app itself.

    Support Ticket or Inquiry Submission

    Submitting a support ticket or inquiry can vary depending on the chosen support channel. The process should be designed to streamline communication and gather relevant information for faster resolution.

    Ugh, Venmo Instant Transfer is down again. Seriously, is this a recurring problem? While I’m waiting for Venmo to get their act together, I’ve been jamming out to some new tunes by jp over here. Check out their latest single jp over here new song listen – it’s a real banger. Hopefully, Venmo will get their transfer system fixed soon so I can pay my friends back for the coffee we just had.

    • Website Help Center: Many Help Centers allow users to submit questions through a dedicated form, which should be readily available. Users can specify the nature of the problem and provide relevant details.
    • Email Support: When contacting Venmo via email, be clear and concise in your description of the problem. Include details such as your Venmo username, the specific transaction that is not working, and any relevant error messages.
    • Phone Support: Be prepared to provide your Venmo username and a detailed description of the issue. Phone support often requires more immediate information and resolution.
    • In-App Support: Venmo’s in-app chat support typically allows users to type out their concerns. Provide a clear and concise description of the problem, along with details such as your Venmo username and any relevant transaction details.

    Available Resources on Venmo

    The Venmo website and app are designed to provide readily accessible help. Users can often resolve their issues without needing to contact support by using the available resources.

    Support Option Description Contact Method
    Website Help Center FAQs and articles Venmo Website
    Email Support Contact Support Team Venmo Email
    Phone Support Contact Support Team Venmo Phone
    In-App Support Chat with Support Agent Venmo App

    Prevention Strategies: Venmo Instant Transfer Not Working

    Keeping your Venmo Instant Transfers running smoothly is a proactive effort. By understanding potential pitfalls and implementing preventative measures, you can minimize disruptions and ensure your transactions process seamlessly. This involves maintaining a stable network, safeguarding your account, and practicing mindful financial habits.

    Proactive steps are crucial for a smooth Venmo experience. Ignoring these precautions can lead to frustrating transfer delays or outright failures, making prompt and efficient financial transactions difficult. Understanding and implementing these preventative strategies will make your Venmo transactions more reliable.

    Maintaining Stable Network Connections

    A consistent and reliable internet connection is fundamental to Venmo’s instant transfer functionality. Interruptions or slowdowns in your network can hinder the transfer process.

    • Regularly check your internet connection. Verify your Wi-Fi or cellular data signal strength. A weak signal can lead to timeouts and connection drops, impacting transfer completion.
    • Use a stable Wi-Fi network whenever possible. Avoid using public Wi-Fi networks for sensitive financial transactions. Public Wi-Fi networks are often less secure and can be vulnerable to unauthorized access, posing security risks for your Venmo account.
    • Consider alternative network options if your current connection is unreliable. If Wi-Fi is unstable, try using cellular data. Conversely, if cellular data is weak, connect to a reliable Wi-Fi network.

    Managing Venmo Account Security

    Robust account security measures are essential for preventing unauthorized access and fraudulent activity. Compromised accounts can lead to failed transfers and financial losses.

    Ugh, Venmo Instant Transfer not working again? It’s frustrating, like being stuck in a digital black hole. Sometimes, when I’m feeling particularly down about it, I find solace in listening to some mellow tunes, like the calming soundscapes of nights in the dark. Hopefully, the Venmo issue will resolve itself soon, and I can get back to smoothly sending and receiving money.

    • Employ strong passwords for your Venmo account. Use a combination of uppercase and lowercase letters, numbers, and symbols. Consider using a password manager to securely store complex passwords.
    • Enable two-factor authentication (2FA) for added security. This extra layer of protection requires a code from a separate device to verify your identity, making unauthorized access significantly harder.
    • Regularly review your Venmo activity. Monitor your transaction history for any suspicious activity. Promptly report any unauthorized transactions to Venmo support.

    Avoiding Common Pitfalls

    Understanding potential pitfalls can help prevent transfer failures. Common causes include insufficient funds, incorrect recipient details, and technical issues.

    • Verify recipient information. Double-check the recipient’s Venmo username and account details to avoid sending funds to the wrong person.
    • Ensure sufficient funds in your account before initiating a transfer. Confirm your account balance to avoid insufficient funds errors.
    • Check for network connectivity problems before initiating a transfer. Verify a strong internet connection to prevent transfer delays or failures due to poor network performance.

    Regular Account Monitoring

    Keeping tabs on your account balance and transaction history is critical. This allows you to catch any unusual activity or errors early on.

    Ugh, Venmo Instant Transfer not working again? It’s frustrating, especially when you’re trying to pay for lunch. Sometimes, these tech hiccups feel like a microcosm of the bigger problems in our modern world. This reminds me of the article I read about office culture, a surprisingly dark and competitive space. It’s a bit like “office culture a life of crime” – office culture a life of crime , where petty jealousies and hidden agendas can hold up progress, much like Venmo failing to process my payment.

    Hopefully, the problem gets fixed soon, because lunch is waiting!

    • Regularly check your account balance. This will help you prevent sending funds when you don’t have enough available.
    • Review your transaction history for any discrepancies or errors. This will enable you to identify and rectify any issues promptly.

    Maintaining Updated Software

    Keeping your Venmo app updated to the latest version is crucial for ensuring compatibility and stability. Outdated software can be vulnerable to security risks and glitches.

    • Ensure your Venmo app is updated to the latest version. Software updates often include bug fixes and security improvements that enhance app functionality and reliability.

    Monitoring Network Connectivity

    Understanding your network’s performance is essential for preventing transfer issues. Regular monitoring helps you proactively address any problems.

    • Use a network monitoring tool to assess the stability of your internet connection. Tools provide real-time data on bandwidth and latency.

    Related Issues

    Payment app glitches are unfortunately common. Users frequently encounter issues with various digital payment platforms, often experiencing similar problems across different systems. Understanding these parallels can provide valuable insight into the underlying causes and effective troubleshooting strategies.

    Similar Issues in Other Payment Apps

    Numerous payment apps, including popular options like PayPal, Google Pay, and Apple Pay, can face similar challenges to Venmo’s instant transfer problems. These issues can manifest as transaction delays, account lockouts, or payment failures. These problems aren’t isolated to Venmo; they’re a broader concern within the digital payment ecosystem.

    Common Causes and Solutions

    A range of factors can contribute to payment app malfunctions. Network connectivity problems are frequently cited as a culprit. Poor internet connections or unstable Wi-Fi can hinder transactions, leading to delays or failures. Software glitches within the apps themselves can also disrupt operations. Outdated app versions or device operating systems may be incompatible with the current platform functionality.

    In addition, security measures, such as two-factor authentication, can sometimes unintentionally impede transactions if not properly configured or understood.

    Troubleshooting Effectiveness Across Systems

    The effectiveness of troubleshooting steps can vary across different payment platforms. While checking network connectivity might resolve transaction delays on PayPal, it might be ineffective for issues stemming from app glitches. In cases of account lockouts, contacting support is often the recommended approach, regardless of the platform. Similarly, updating app and device software can often resolve payment failures on Apple Pay, but this won’t necessarily resolve problems with network connectivity.

    Table of Similar Problems and Potential Solutions

    Problem App Potential Solution
    Transaction Delays PayPal Check network connectivity, ensure sufficient data allowance, and try again later.
    Account Lockouts Google Pay Contact support for assistance, verify account information, and review security settings.
    Payment Failures Apple Pay Update app and device software to the latest versions, ensure sufficient balance, and try a different payment method.
    Transaction Delays Venmo Verify network connectivity, ensure sufficient data allowance, and try the transaction again later.
    Account Lockouts Venmo Contact support for assistance, review security settings, and verify account information.
    Payment Failures Venmo Update app and device software, verify sufficient balance, and try the transaction again with a different payment method.

    Outcome Summary

    In conclusion, Venmo Instant Transfer Not Working can stem from a variety of issues, ranging from network connectivity problems to account-specific errors. By following the troubleshooting steps and understanding the potential causes, you can often resolve the issue yourself. Remember to always check your network, Venmo account information, and app updates. If the problem persists, contacting Venmo support is always an option.