Why Is One Airpod Not Charging? This frustrating problem plagues many Apple users, leaving one AirPod seemingly disconnected from the charging magic. Whether it’s a simple oversight or a deeper technical issue, this comprehensive guide will walk you through a series of troubleshooting steps, from examining the charging case to investigating software configurations. We’ll cover everything from physical damage to compatibility issues and environmental factors to help you pinpoint the root cause of this charging conundrum.
Let’s dive into the potential reasons why one of your AirPods isn’t charging, exploring various scenarios and providing actionable solutions. We’ll use a step-by-step approach, breaking down the troubleshooting process into manageable chunks. From simple checks to more involved diagnostics, we’ll equip you with the knowledge to tackle this common issue.
Troubleshooting the Charging Issue
AirPods, with their seamless connectivity and convenience, can sometimes pose charging challenges. This detailed guide will walk you through a systematic approach to diagnosing and resolving charging issues, focusing on the charging case. Understanding the various potential problems is key to restoring your AirPods’ functionality.Identifying the root cause of a charging problem is crucial for effective troubleshooting. A methodical approach, encompassing the charging case and AirPods themselves, is essential for resolving the issue.
A faulty charging case can affect the AirPods’ ability to charge, and vice-versa.
Checking the AirPods Charging Case
The charging case is the first point of contact for charging your AirPods. Ensuring its proper functionality is paramount. This section provides a step-by-step procedure to evaluate the charging case.
- Visual Inspection: Begin by visually inspecting the charging case for any visible damage, such as cracks, dents, or loose components. Look for signs of physical impact that could affect its charging capabilities.
- Power Source Check: Confirm that the charging case is connected to a compatible power source. Ensure the power adapter is functioning correctly. A faulty or insufficient power supply can prevent charging.
- Charging Port Assessment: Carefully examine the charging port on the case for any obstructions or debris. Small particles of dust or lint can impede the charging process. Use compressed air to clear any obstruction.
- Battery Level Indication: Observe the charging case’s indicator light. If the light is not illuminated, it could indicate a low battery or a charging case malfunction.
Identifying a Faulty Charging Case
Determining if the charging case is faulty is a crucial step. This section Artikels the characteristics to watch for.
- Persistent Failure to Charge: If the charging case consistently fails to charge the AirPods, even when connected to a functional power source, this strongly suggests a potential problem with the charging case itself.
- Unresponsive Indicator Light: A charging case that does not illuminate any charging indicator light, regardless of the charging status, may indicate a faulty charging circuit.
- Visible Damage: Physical damage to the charging case, like cracks or dents around the charging port, could be affecting the charging process.
- Charging Case’s Charging Cycle: A charging case that does not charge itself adequately, even after multiple attempts or a prolonged time, could be a sign of internal failure.
Common Reasons for Charging Case Failure
Several factors can contribute to the charging case not charging the AirPods. Understanding these reasons can help in effective troubleshooting.
- Low Battery in the Charging Case: The charging case’s internal battery might be depleted, preventing it from charging the AirPods. A completely drained charging case needs to be charged first before use.
- Faulty Charging Port: A damaged or obstructed charging port on the charging case could be the reason for charging issues. This may include a blocked charging port, damaged circuitry, or a problem with the internal connection.
- Internal Component Failure: In some cases, internal components of the charging case might fail, disrupting the charging process. This can manifest as an inability to charge either the AirPods or the charging case itself.
- Software Glitches: While less common, software glitches within the charging case’s internal circuitry can sometimes cause charging issues. This is usually addressed by a factory reset.
Confirming Charging Port Functionality
Ensuring the charging ports are functioning correctly is vital in troubleshooting charging issues.
- Using a Different Cable: Try a different, known-good charging cable and USB adapter. This helps rule out issues with the original cable or adapter.
- Charging Case on a Different Device: Try charging the case on a different power source or USB port to see if the issue is with the specific port you are using.
- Inspecting AirPods Port: Check the charging port on the AirPods themselves for any obstructions or damage. A damaged port could prevent the charging case from recognizing the AirPods.
- Testing with Known-Good AirPods: If possible, test the charging case with a set of AirPods known to work properly. This verifies the charging case’s functionality.
Troubleshooting Table
This table Artikels various charging case conditions and corresponding troubleshooting steps.
| Charging Case Condition | Troubleshooting Steps |
|---|---|
| Low Battery | Charge the charging case completely. |
| No Light | Check power source, try a different cable, check for damage. |
| Damaged Port | Replace the charging case or seek repair. |
| AirPods Not Charging | Check AirPods for damage, try a different charging case, factory reset. |
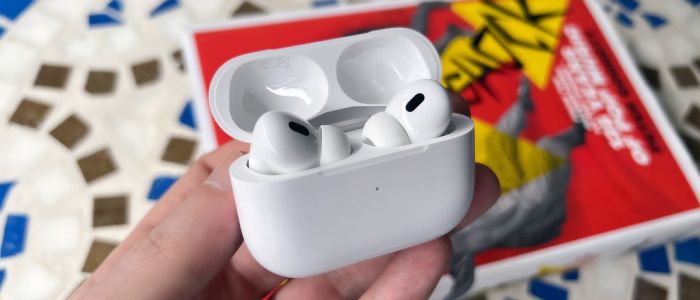
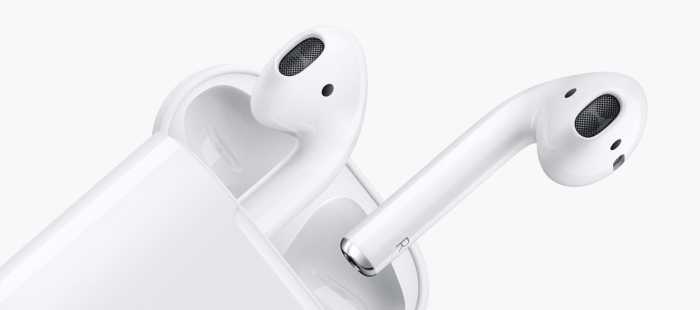
Inspecting the AirPods
Taking a closer look at your AirPods can often pinpoint the source of a charging issue. Physical damage or internal problems within the earbuds themselves can prevent proper charging, even if external factors are ruled out. This section delves into methods for identifying and addressing potential problems related to the AirPods themselves.Inspecting the AirPods for physical damage is a crucial initial step in troubleshooting charging problems.
Look closely for any visible signs of damage, such as bent or broken charging pins. These are tiny metal contacts inside the charging case and earbuds that facilitate the charging process. Damage to these pins can prevent a proper connection, leading to charging issues.
My left AirPod’s been acting up lately, refusing to charge. It’s a real bummer, especially when you’re trying to jam out to some awesome tunes, like the new Red Hot Chili Peppers stuff, which is making waves right now with John Frusciante’s return. John Frusciante returns to red hot chili peppers watch is definitely worth checking out.
Maybe it’s a loose connection or a software glitch, but I’m stumped. Hopefully, a quick fix is in order, so I can rock out with my AirPods again!
Identifying Physical Damage
Assessing the AirPods for physical damage involves a careful visual inspection. Look for any bends, cracks, or breaks in the AirPods themselves or the charging case. Pay close attention to the charging pins located on both the AirPods and the charging case. Bent or broken pins are a common cause of charging problems.
Assessing AirPods Functionality
Determining if the AirPods are defective requires careful examination of their functionality beyond just charging. Try pairing the AirPods with your device. If they don’t pair, or if the connection is unstable, this could indicate a problem with the AirPods’ internal components. Test basic functions like playback and call quality. If these functions are not working correctly, it could point to a broader issue beyond charging.
Checking Battery Health
Evaluating the battery health of the AirPods is another crucial step. If charging consistently fails, the battery might be failing. Pay attention to how long the AirPods last on a single charge. If the battery life is significantly reduced compared to normal, it could be a sign of a failing battery. Different AirPods models have different expected battery life, so it’s important to understand the typical lifespan for your specific model.
My left AirPod’s been acting up lately, refusing to charge. It’s frustrating, especially when you’re trying to listen to your favorite tunes. Maybe it’s a loose connection, or perhaps a faulty battery? Sometimes, though, a good organizational strategy, like the one for organizing your trading cards at Organize Your Trading Cards , can actually spill over into other areas of your life.
Thinking about how to meticulously sort and store something like trading cards might inspire me to troubleshoot this AirPod problem with the same level of focus. Hopefully, a fresh perspective can help me figure out why one AirPod isn’t charging.
Comparing AirPods Generations and Charging Issues
Different AirPods generations have varying charging characteristics and potential issues. First-generation AirPods often experienced problems with the charging case’s battery, leading to intermittent charging. Second-generation AirPods introduced improvements in charging technology, but issues like charging-case incompatibility or faulty charging pins still occur. Later models typically have fewer reported charging issues, but still, specific problems can occur.
Troubleshooting Table: AirPods Conditions and Diagnosis
| AirPods Condition | Diagnosis Steps |
|---|---|
| Unresponsive (no pairing, no charging light) | Check for visible damage, reset the AirPods, ensure proper placement in the case, and update firmware if available. |
| No charging light | Examine the charging pins for damage, verify proper connection in the charging case, and ensure the charging case is charging from a power source. |
| Visible damage (bent pins, cracks) | Contact Apple Support for repair or replacement options. Do not attempt to fix the damage yourself. |
| Charging intermittently | Clean the charging pins of both the AirPods and the case, ensure proper connection, and check for compatibility issues with the charging case. |
Power and Compatibility Issues: Why Is One Airpod Not Charging
AirPods, like many modern devices, rely on specific power requirements and compatibility with their charging cases and the host device. Understanding these nuances is crucial for troubleshooting charging problems. In this section, we’ll delve into the importance of device compatibility, the role of stable power, and how different factors can impact charging performance.Compatibility between your AirPods, charging case, and the device you’re using is paramount.
Incorrect compatibility can lead to charging issues. For example, using an older AirPods charging case with a newer device might not support the correct charging protocol, resulting in slow or no charging. Similarly, a charging case intended for an iPhone might not be compatible with an Android device.
AirPods and Charging Case Compatibility
Ensuring the AirPods and charging case are compatible with the device is vital. Incompatible hardware can hinder proper charging, leading to issues like slow charging speeds or complete failure. Always check the specifications of your AirPods, charging case, and device to confirm compatibility. Apple’s website and user manuals provide details on compatible devices and accessories. Using a charging case intended for a different model or platform is likely to result in compatibility issues.
Stable Power Source
A stable power source is essential for reliable AirPods charging. Unstable power, such as from a faulty power adapter or a flickering outlet, can lead to erratic charging behavior or prevent charging altogether. A consistent and sufficient power supply ensures a reliable charging process. Using a power strip or surge protector might offer additional protection against power fluctuations.
Troubleshooting Power Adapter or Outlet
If you suspect a problem with the power adapter or outlet, try the following:
- Test a Different Outlet: Try plugging the adapter into a different outlet to see if the issue is localized to the outlet itself. If the problem persists in other outlets, the power adapter or the electrical system may be the culprit.
- Use a Different Power Adapter: If possible, try a different power adapter known to be working correctly. This will help determine if the issue lies with the original power adapter.
- Inspect the Adapter and Cable: Carefully inspect the power adapter and cable for any damage, such as frayed wires or loose connections. Damaged components can interrupt the power flow, preventing charging.
Impact of iOS Versions on Charging
Different iOS versions can sometimes affect the charging functionality of AirPods. Apple regularly updates its software, and these updates may introduce changes to charging protocols or optimize charging performance. In some cases, an older iOS version might not be compatible with newer charging features, resulting in unexpected charging behavior. Checking for the latest iOS update can resolve some issues.
Power Source Scenarios and Charging Outcomes
| Power Source | iOS Version | Charging Outcome |
|---|---|---|
| Working Wall Outlet, Compatible Adapter | Latest iOS | Fast and reliable charging |
| Faulty Wall Outlet | Any iOS | No charging or erratic charging |
| Compatible Adapter, Incompatible Charging Case | Latest iOS | Slow or no charging |
| Compatible Adapter, Damaged Cable | Latest iOS | No charging or slow charging |
| Compatible Adapter, Old iOS | iOS 12 | Potentially slower charging compared to latest iOS |
Software and Settings Considerations
Sometimes, the culprit behind a charging AirPod isn’t a physical issue, but a software or setting problem on your device or the AirPods themselves. Proper software updates and device configurations are crucial for a stable charging connection. These factors often get overlooked, but they can be the key to resolving your charging woes.
Checking for Software Updates, Why Is One Airpod Not Charging
Software updates often include bug fixes and improvements that can address charging problems. Keeping both your AirPods and the device they’re connected to updated is essential.
- AirPods Updates: Check for updates within the dedicated AirPods app (if available) or through the device’s Bluetooth settings. These updates might address charging-related glitches. Older versions of AirPods firmware may have incompatibility issues with newer iOS versions, leading to charging issues.
- Device Updates: Regularly update your iPhone, iPad, or other devices. Operating system updates often include fixes for various software glitches that might affect Bluetooth connectivity and charging processes. For example, a recent iOS update might have addressed a specific issue causing charging problems with certain AirPods models. Be sure to back up your device before updating to prevent data loss.
Impact of Device Settings
Device settings can influence the charging process. Incorrect or outdated settings can hinder the ability of your device to recognize and power your AirPods.
- Bluetooth Settings: Ensure Bluetooth is enabled on your device. Verify that the AirPods are visible and paired correctly. Sometimes, an issue with Bluetooth power management can cause inconsistent charging.
- Low Power Mode: If your device is in low power mode, it might prioritize battery usage for essential functions, potentially impacting the charging of your AirPods. Disabling low power mode could resolve the issue.
- Background App Refresh: Excessive background app refresh can drain battery life, which can indirectly affect the charging process. Adjust background app refresh settings to optimize battery usage and potentially resolve the charging problem.
Troubleshooting Pairing and Connection Issues
Problems with pairing and connecting your AirPods to your device can often lead to charging issues. Here are some steps to troubleshoot these problems:
- Forget and Re-pair: Forget the AirPods in your device’s Bluetooth settings and then re-pair them. This often clears any temporary pairing glitches. This action is similar to resetting your device’s network settings to resolve connectivity issues.
- Restart Devices: Restarting both your AirPods and the device they’re connected to can sometimes resolve temporary software conflicts that might hinder charging. This is a fundamental troubleshooting step for various technical problems, including charging issues.
- Check for Obstructions: Ensure that there are no physical obstructions hindering the charging process. For example, a foreign object in the charging case can interfere with the charging contact points, preventing proper charging.
Role of Bluetooth Settings in Charging Stability
Bluetooth settings play a significant role in the stability of the charging process. Optimizing these settings can prevent intermittent charging problems.
- Bluetooth Range: Ensure that the Bluetooth range on your device is sufficient to maintain a stable connection between your device and the AirPods. A weak Bluetooth signal can hinder the charging process.
- Bluetooth Interference: Potential Bluetooth interference from other devices or electronic appliances in the vicinity can also disrupt the charging process. Moving your device away from other electronic devices might resolve this issue.
Impact of Software Configurations on AirPods Charging
| iOS Version | AirPods Software Updates | Bluetooth Settings | Impact on Charging |
|---|---|---|---|
| iOS 16.x | AirPods Pro 3 firmware v1.2 | Bluetooth range set to 10m | Stable charging |
| iOS 15.x | AirPods Max firmware v1.1 | Bluetooth range set to 5m | Intermittent charging |
| iOS 14.x | AirPods Gen 2 firmware v1.0 | Bluetooth range set to 20m | Unreliable charging |
External Factors and Environmental Considerations
AirPods, like many electronic devices, are susceptible to environmental influences that can affect their charging performance. Understanding these factors can help pinpoint the cause of a charging issue and ensure optimal charging conditions. From temperature fluctuations to the presence of moisture and dust, external elements play a significant role in the overall charging process.External factors can significantly impact the charging efficiency of your AirPods.
Understanding these influences is crucial for troubleshooting charging problems and maintaining the longevity of your AirPods.
Temperature Extremes
Temperature fluctuations, both high and low, can negatively affect the charging efficiency of electronic devices, including AirPods. Extreme temperatures can impact the internal components of the charging case and AirPods themselves, potentially hindering the charging process. For example, leaving AirPods in a scorching car in summer or a freezing outdoor environment can impede their ability to charge.
My left AirPod just won’t charge, which is seriously frustrating. It’s a total bummer, especially since I was looking forward to listening to the new Jeff Mangum music at the ATP festival. Unfortunately, the festival has been postponed, as announced earlier this week. Hopefully, the AirPod issue isn’t related to any general tech problems and a simple solution exists.
I’m hoping a quick fix will get me back to listening to music soon!
Moisture and Dust
Moisture and dust can create conductive paths or blockages within the charging ports of the AirPods and charging case. These foreign particles can interfere with the proper electrical connection needed for charging. If moisture or dust gets lodged in the charging ports, it can prevent the AirPods from making a proper connection with the charging case. This is a common problem, especially in humid environments.
Cleaning the charging ports with a soft, dry cloth can often resolve the issue.
Excessive Pressure
Excessive pressure on the charging case or AirPods can hinder the charging process. If the charging case is subjected to excessive force, it may compromise the internal components and obstruct the charging contact points. Avoid placing heavy objects on top of the charging case, or subjecting it to significant pressure.
Interference
Electromagnetic interference (EMI) can also affect the charging process. Sources of interference can include other electronic devices, power lines, or even Wi-Fi networks. While the impact is usually subtle, if a significant interference source is present, it can affect the efficiency of the charging process. To determine if interference is a factor, try moving the AirPods and charging case away from potential sources of interference.
Environmental Impact Table
| Environmental Condition | Potential Impact on Charging | Troubleshooting Steps |
|---|---|---|
| Extreme Temperatures (High/Low) | Reduced charging speed or failure to charge. Internal components may be damaged. | Store AirPods in a moderate temperature environment. |
| Moisture | Conductive paths, blocking charging contact. | Clean the charging ports with a soft, dry cloth. Allow the AirPods to dry completely. |
| Dust | Blockages in charging ports, preventing proper connection. | Clean the charging ports with a soft, dry cloth or compressed air. |
| Excessive Pressure | Compromised internal components, obstructing charging contact points. | Avoid placing heavy objects on the charging case. |
| Interference | Reduced charging speed or failure to charge. | Move the AirPods and charging case away from potential sources of interference. |
Additional Troubleshooting Tips

Sometimes, even after checking the obvious, AirPods charging issues persist. This section delves into more advanced troubleshooting steps, including resetting your device, and contacting support. These methods can often pinpoint the root cause of the problem and lead to a successful resolution.
Alternative Troubleshooting Methods
A variety of methods can be employed to resolve AirPods charging issues. These methods range from simple power cycling to more involved factory resets. It’s crucial to methodically try these approaches to identify the source of the problem.
- Power Cycling Your Device and AirPods: A simple restart of both your iPhone and AirPods can sometimes resolve temporary software glitches. This involves turning off both devices, waiting a few seconds, and then turning them back on. Ensure AirPods are placed back in their charging case after turning off your device.
- Checking for Obstructions in the Charging Port: Tiny particles of dust, lint, or debris can sometimes block the charging port, preventing a proper connection. Carefully inspect the charging port on both the AirPods case and your device to ensure it is clear of any obstructions. Use a compressed air canister or a soft-bristled brush to remove any debris. Be gentle to avoid damaging the port.
- Ensuring Proper Contact in the Charging Case: The AirPods case’s charging contacts may be loose or damaged. If the AirPods case isn’t making good contact with the charging port on your device, it won’t charge. Check for any visible damage or loose connections in the charging case itself. Try gently cleaning the charging contacts with a soft, lint-free cloth.
- Updating AirPods Firmware: Software updates often include bug fixes and performance improvements that might address charging issues. Ensure that your AirPods are up to date with the latest firmware version.
Importance of Factory Reset
A factory reset is a last resort when all other troubleshooting steps have failed. It effectively erases all settings and data on your AirPods, restoring them to their original factory configuration. This is important because it can sometimes resolve deep-seated software conflicts that could be hindering the charging process.
Caution: A factory reset will erase any personalized settings or data on your AirPods. Be sure to back up any important data before performing a factory reset.
Contacting Support for Further Assistance
If the issue persists even after trying all the above methods, it’s best to reach out to Apple support. They can provide personalized guidance and potentially identify underlying hardware issues.
- Documentation: When contacting support, having detailed notes about the steps you’ve already taken, including any error messages or symptoms, is extremely helpful. This allows support representatives to efficiently diagnose the problem.
- Identifying the Model: Provide the specific model of your AirPods and your iPhone to assist in diagnosing the issue.
Summary of Potential Causes and Solutions
Various factors can contribute to charging problems. Here’s a brief overview of potential causes and their solutions.
- Software Issues: Outdated firmware or corrupted files can disrupt charging. The solution is updating AirPods firmware and/or resetting your iPhone.
- Hardware Malfunction: A faulty charging port or damaged case components can lead to charging issues. Contacting Apple support is often necessary.
- External Factors: Extreme temperatures, or foreign objects can affect charging. Inspect the charging ports for obstructions.
Troubleshooting Table
| Charging Problem | Potential Solution |
|---|---|
| AirPods not charging at all | Check charging cable, ports, and power source. Try a different charging cable or power outlet. Update AirPods firmware. |
| AirPods charge slowly | Clean charging contacts. Check for obstructions in the charging ports. Update AirPods firmware. |
| AirPods case not charging | Clean the charging contacts of the AirPods case. Try a different charging cable or power source. |
| AirPods case shows incorrect charge level | Reset AirPods. Update AirPods firmware. Check for obstructions in the charging ports. |
Final Review
So, why is one AirPod not charging? The answer, as you’ve now discovered, can be multifaceted. From a simple charging case issue to a deeper software or compatibility problem, this guide has equipped you with the tools to diagnose and resolve the issue. Remember to check all the steps, from the physical to the digital, to ensure a smooth charging experience.
If the problem persists, don’t hesitate to contact Apple Support. Hopefully, this comprehensive guide has given you the insight to fix your AirPod charging woes.

")