Category: Minecraft Guides

  • Find Your Coordinates in Minecraft A Guide

    Find Your Coordinates in Minecraft A Guide

    Find Your Coordinates in Minecraft sets the stage for a deep dive into the essential navigational tools within the game. Understanding Minecraft coordinates is crucial for everything from simple navigation to complex construction and resource gathering. This guide will equip you with the knowledge to master these coordinates, unlocking a whole new level of Minecraft gameplay.

    We’ll explore various methods for locating coordinates, from in-game tools to third-party resources. The different coordinate systems used in Minecraft will be explained, allowing you to interpret coordinate values effectively. We’ll also delve into the practical applications of coordinates, including navigation, building, and resource discovery. Finally, we’ll cover advanced techniques and visual representations to optimize your Minecraft experience.

    Introduction to Finding Coordinates in Minecraft

    Find Your Coordinates in Minecraft

    Minecraft, a game of boundless exploration, relies heavily on coordinates to navigate its vast and intricate world. Understanding these coordinates is crucial for efficiently completing tasks, building elaborate structures, and engaging in various in-game activities. Knowing how to find and use coordinates unlocks a new level of control and efficiency in this pixelated universe.Coordinates in Minecraft are essentially a set of three numbers (x, y, z) that pinpoint a specific location within the game world.

    These numbers represent the position of a block in relation to a central origin point. They are fundamental to the game’s functionality, enabling players to precisely locate resources, travel between distant points, and establish accurate building plans.

    Understanding Minecraft Coordinates

    Minecraft coordinates are a three-dimensional system that precisely locate blocks in the game. The x and z coordinates determine the horizontal position, while the y coordinate specifies the vertical position. The origin (0, 0, 0) is typically the starting point for a new world, but this can vary based on the world generation. Positive values in x and z indicate movement east and north, respectively, while negative values represent west and south.

    Positive y values indicate upward movement, and negative values indicate downward movement. The system allows for precise placement of blocks, allowing for elaborate designs and efficient travel.

    Methods for Obtaining Coordinates

    Several methods exist for determining coordinates in Minecraft. The most straightforward approach is using the in-game compass. The compass displays the coordinates of the player’s current position. Alternatively, a variety of in-game tools and utilities can be used. For instance, many mods and third-party applications provide advanced coordinate displays and other features.

    Some tools also allow for exporting or sharing coordinates, enabling collaboration among players.

    Uses of Coordinates in Minecraft

    Coordinates play a vital role in numerous aspects of the Minecraft experience. They are indispensable for navigating vast distances, locating specific resources, and precisely positioning structures.

    Finding your coordinates in Minecraft is crucial for navigating vast landscapes. It’s all about those numbers, right? Speaking of navigating, did you hear Amy Schumer’s take on the Star Barbie movie? amy schumer talks star barbie movie She seems to think it’s pretty awesome, which, in my opinion, just makes finding those coordinates in the game that much more important! Seriously, knowing your coordinates is key to finding that perfect diamond mine.

    • Efficient Exploration: Coordinates aid in precise navigation, allowing players to easily return to previously visited locations. For example, finding the coordinates of a valuable resource allows players to return to that location without getting lost.
    • Accurate Building: Precise placement of structures, from simple houses to elaborate castles, relies on understanding and utilizing coordinates. The ability to reproduce structures in exact locations, based on coordinates, is a significant advantage for players.
    • Resource Management: Discovering the coordinates of valuable resources like diamonds, ores, or rare items allows for efficient resource collection and management. The accurate location of resources allows players to return to the spot repeatedly and gather more materials.
    • Multiplayer Collaboration: Coordinates facilitate communication and collaboration among players in multiplayer environments. Sharing coordinates enables players to meet at specific locations, build together, or coordinate complex tasks.

    Examples of Coordinate Usage

    The significance of coordinates is evident in various Minecraft activities. For instance, locating a specific dungeon or treasure chest using coordinates saves valuable time and effort. Planning a large-scale project, such as a complex building or a network of tunnels, becomes significantly more manageable with the aid of precise coordinates.

    Activity Coordinate Application
    Finding a rare resource Using coordinates to precisely locate the resource’s position and quickly return to it.
    Building a large structure Precisely placing blocks based on coordinates to ensure the structure is aligned and matches the intended design.
    Traveling to a distant location Using coordinates to quickly navigate to the destination without getting lost, especially when the location is unfamiliar or in a vast world.

    Methods for Locating Coordinates

    Finding your precise location within the vast world of Minecraft is crucial for various tasks, from building intricate structures to navigating complex dungeons. Understanding different coordinate systems and utilizing in-game tools are essential skills for any Minecraft adventurer. This section details the methods available for locating your coordinates.

    In-Game Compass

    The in-game compass is a fundamental tool for orienting yourself within the Minecraft world. While it doesn’t directly display coordinates, it provides crucial directional information. By noting the compass’s orientation relative to cardinal directions (north, south, east, west), you can estimate your position in relation to known landmarks. This method is helpful for quickly determining your general location. For instance, if you know a specific landmark is due east, the compass can aid in confirming that direction and help to understand your relative position.

    Using the /locate Command

    The `/locate` command is a powerful tool for finding the coordinates of specific structures. It requires knowing the name of the structure you want to find. For example, `/locate stronghold` will reveal the coordinates of the nearest stronghold. This method is highly efficient for locating specific points of interest, like villages, strongholds, or ancient ruins. You can then use these coordinates to travel directly to the desired location.

    Utilizing Maps

    Minecraft maps can be used to determine coordinates. Minecraft maps, whether generated in-game or from third-party tools, often display a grid system. By observing the grid lines and their corresponding coordinates, you can ascertain your location. Maps are especially helpful for large-scale exploration and planning, providing a visual representation of your surroundings and allowing you to pinpoint locations accurately.

    Third-Party Tools, Find Your Coordinates in Minecraft

    Several third-party tools provide a comprehensive view of your Minecraft coordinates, including location overlays and visual representations. These tools often integrate with the game client to display coordinates directly on the screen. These tools are especially beneficial for those seeking an alternative way to access and manage coordinates.

    Comparative Analysis of Methods

    Method Advantages Disadvantages
    In-Game Compass Simple, readily available, good for general direction. Only provides relative direction, not precise coordinates.
    `/locate` Command Efficient for locating specific structures, direct travel. Requires knowing the structure’s name, can be slow for very large worlds.
    Maps Visual representation, useful for planning, good for large-scale exploration. Accuracy depends on map quality, can be cumbersome to use for real-time navigation.
    Third-Party Tools Often provide precise coordinates, overlay on game view, convenient. Requires installing and using external software, potential compatibility issues.

    Understanding Coordinate Systems

    Find Your Coordinates in Minecraft

    Minecraft’s world is a vast 3D space, and understanding its coordinate system is crucial for navigating and interacting with it effectively. Knowing how coordinates work allows you to precisely pinpoint locations, teleport to specific points, and even design complex structures. This section delves into the intricacies of the Minecraft coordinate system, explaining the X, Y, and Z axes and their roles in defining positions within the game.The Minecraft coordinate system is a fundamental aspect of the game’s functionality.

    It provides a structured way to represent locations within the game world, allowing for precise positioning and interaction. It’s essential for tasks like building, exploring, and using commands.

    The Minecraft Coordinate System

    The Minecraft coordinate system is a 3-dimensional system, using three axes: X, Y, and Z. Each axis represents a direction of movement within the game world. These axes are crucial for accurately locating any point within the game.

    X, Y, and Z Axes

    The X-axis in Minecraft runs horizontally from west to east. Positive X values move you further east, while negative X values move you further west. The Y-axis runs vertically, from the bottom of the world to the top. Positive Y values move you upwards, and negative Y values move you downwards. The Z-axis also runs horizontally, from south to north.

    Positive Z values move you further north, and negative Z values move you further south. These axes, when combined, define any location in the Minecraft world.

    Coordinates and Locations

    Coordinates in Minecraft directly correspond to specific locations in the game world. A set of coordinates (X, Y, Z) uniquely identifies a point in space. For example, the coordinates (10, 64, 20) represent a location 10 units east, 64 units above the ground level, and 20 units north of a chosen origin point.

    Figuring out your coordinates in Minecraft can be tricky, but knowing them is essential for navigating the vast world. It’s like having a map, and it’s super useful! Speaking of maps, did you hear about the reunited replacements lineup confirmed? reunited replacements lineup confirmed That’s awesome news for fans, and it makes me think about the various dimensions you can explore in the game – knowing your coordinates in Minecraft really does open up the possibilities.

    Hopefully, you’ll be able to find your way around those newly discovered regions with your coordinates.

    Interpreting Coordinate Values

    Interpreting coordinate values is straightforward. Positive X values are east, negative X values are west; positive Y values are up, negative Y values are down; positive Z values are north, negative Z values are south. The Y-value usually represents the height above ground level.

    Examples of Coordinate Sets

    Here are some examples illustrating different coordinate sets and their corresponding locations:

    • (0, 64, 0): This coordinate represents the ground level at the origin point. It’s the starting position for many players.
    • (10, 70, 20): This coordinate is 10 blocks east, 70 blocks above ground level, and 20 blocks north of the origin.
    • (-5, 32, -15): This coordinate is 5 blocks west, 32 blocks above ground level, and 15 blocks south of the origin.

    Coordinate Systems Across Minecraft Versions

    The core coordinate system has remained consistent across various Minecraft versions. However, some minor changes might exist in the way the game handles the world’s dimensions or specific features.

    Minecraft Version Coordinate System Key Differences
    Early Versions Standard 3D coordinate system Potentially different rendering or chunk loading techniques, but the fundamental principle of the coordinate system remained the same.
    Current Versions Standard 3D coordinate system Continued consistent use of the coordinate system, with enhancements in game mechanics and features that don’t affect the underlying coordinate structure.

    Practical Applications of Coordinates

    Understanding Minecraft coordinates empowers players to navigate the game world with precision and efficiency. Beyond simply knowing where you are, coordinates unlock a vast array of capabilities, from simple navigation to complex construction and resource gathering. This section dives deep into the practical applications of coordinates in Minecraft.

    Navigation in Minecraft

    Coordinates are fundamental for precise navigation. Instead of wandering aimlessly, players can use coordinates to teleport to specific locations, saving significant time and effort. Knowing the coordinates of a desired location allows for instant travel, whether it’s to a friend’s base, a prominent landmark, or a vital resource point. For instance, a player can note the coordinates of a stronghold and return quickly, avoiding the risk of getting lost.

    Building and Construction in Minecraft

    Coordinates facilitate precise building and construction. When constructing elaborate structures, knowing the precise coordinates of each block is essential for aligning elements and maintaining symmetry. Players can precisely place blocks, create complex designs, and arrange items according to a blueprint, relying on coordinates as a reference system. This is particularly helpful for intricate structures like castles or elaborate redstone contraptions.

    Finding Resources in Minecraft

    Coordinates are invaluable for locating and collecting resources. Knowing the coordinates of a specific resource location, such as a vein of diamonds or a rare ore, allows for rapid retrieval. Players can mark the coordinates of resource-rich areas for future reference, ensuring they can return to those locations swiftly and efficiently. This is particularly useful for repetitive resource gathering tasks.

    Complex Tasks Requiring Coordinate Knowledge

    Many complex tasks in Minecraft rely heavily on coordinates. These tasks can range from meticulously designing and building intricate redstone contraptions, requiring precise block placement and circuit activation based on coordinate-based timing, to creating complex automated systems for farming or crafting. For example, designing a precise system for automated ore processing in a large-scale mining operation requires accurate coordinates for each component.

    Strategies for Efficient Use of Coordinates

    Several strategies can enhance the efficient use of coordinates. One key strategy involves meticulously documenting the coordinates of significant locations and resources in a notebook or digital document. Using a dedicated coordinate system, for example, a grid system for the entire map, can facilitate more complex designs and layouts. Another strategy is utilizing in-game tools like the command block, allowing for automated coordinate retrieval and placement.

    Using a coordinate system for inventory management, marking coordinates for specific crafting recipes, can also improve efficiency.

    Frequently Asked Questions About Using Coordinates

    • What is the format of coordinates in Minecraft? Minecraft coordinates are represented as X, Y, Z values, specifying the position of a block in the 3D world. X represents the horizontal position, Y the vertical position, and Z the other horizontal position.
    • How do I find my current coordinates in Minecraft? The in-game user interface typically displays the current coordinates, usually accessible through the chat or a designated menu.
    • Can I share coordinates with other players? Yes, players can share coordinates with each other through chat or other communication methods.
    • How do I use coordinates in redstone circuits? Coordinates are used in redstone circuits to control the activation and deactivation of various components based on time or specific trigger locations.

    Advanced Techniques

    Mastering coordinates in Minecraft unlocks a world of possibilities beyond simple exploration. Advanced techniques leverage coordinates for intricate redstone contraptions, automated tasks, and large-scale project management. This section dives into these applications, showcasing how coordinates empower players to create truly sophisticated and dynamic structures.Understanding precise coordinate locations becomes crucial when designing complex mechanisms and structures. Precise measurements allow for accurate placement of blocks and circuits, ensuring smooth operation of intricate redstone contraptions and automated tasks.

    Advanced Crafting and Redstone Engineering

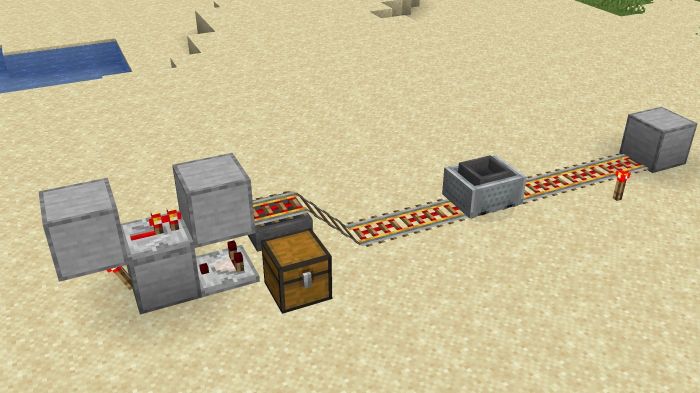
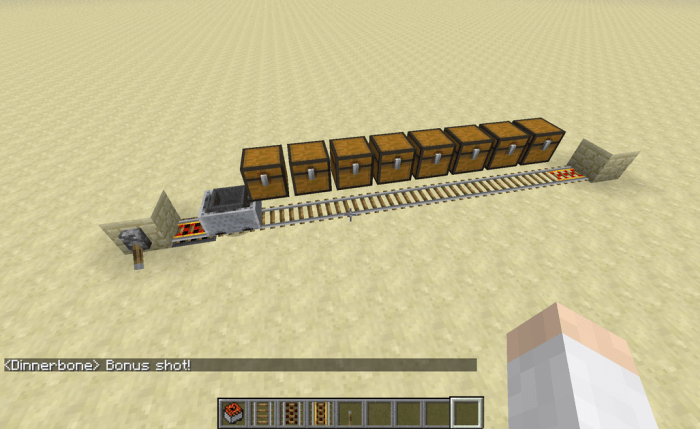
    Precise coordinate placement is paramount for intricate redstone mechanisms. Knowing the coordinates of components allows for precise routing of signals, ensuring that complex contraptions function as intended. For instance, a complex redstone clock requires careful placement of repeaters, comparators, and other components, all facilitated by knowing their precise coordinates. This precision translates to more complex and sophisticated redstone designs, allowing for automated tasks and intricate systems.

    Large-Scale Projects

    Managing large-scale projects in Minecraft requires a sophisticated understanding of coordinates. Dividing a project into sections with defined coordinate boundaries enables teams to work collaboratively, ensuring seamless integration of different parts. This approach is essential for mega-structures, intricate redstone networks, or elaborate farms. For example, a sprawling farm can be sectioned off using coordinates to automate harvesting and resource management across different areas.

    Automated Tasks

    Coordinates are the backbone of automated tasks in Minecraft. Precisely defined coordinates allow for automated delivery of resources, farming, or even intricate combat scenarios. Using command blocks and scripting, players can leverage coordinates to control the actions of various entities and objects. For example, a farm can be automated to automatically harvest crops and deliver them to a designated storage location.

    Figuring out your coordinates in Minecraft can be tricky, but it’s essential for navigating vast landscapes. Speaking of navigating, I just had to check out this amazing performance by Donald Glover (Childish Gambino) with Reggie Watts and James Corden on the Late Late Show. This show was hilarious and totally blew me away. Getting those coordinates in Minecraft is just as crucial as knowing your latitude and longitude when exploring the digital world, right?

    Examples of Automated Tasks

    • Automated Farming: Define a specific area for crops using coordinates. Command blocks trigger harvesting and transport to storage locations based on these coordinates. This automated system can significantly reduce the time spent on manual farming.
    • Automated Resource Gathering: Designate specific areas for mining using coordinates. Command blocks can automatically gather resources from these areas and transport them to designated locations. This is ideal for large-scale resource gathering.
    • Automated Entity Movement: Using coordinates, command blocks can control the movement of entities like villagers, mobs, or even players. This allows for automated delivery of items or for controlling the behavior of mobs in a specific area.

    Advanced Minecraft Coordinate Techniques

    Technique Description Use Case
    Coordinate-based Farming Dividing a farm into sections using coordinates for efficient resource management and automation. Large-scale farms, automated harvesting and delivery.
    Precise Redstone Circuits Utilizing coordinates to accurately place redstone components, enabling intricate and complex mechanisms. Automated crafting systems, elaborate clockwork mechanisms.
    Large-Scale Structure Planning Dividing a project into manageable sections using coordinates for better collaboration and construction management. Mega-structures, intricate castles, complex networks.
    Automated Mob Management Using coordinates to control the movement and actions of mobs using command blocks. Controlling mob spawns, managing hostile mobs.

    Visual Representation of Coordinates: Find Your Coordinates In Minecraft

    Understanding coordinates in Minecraft is crucial for planning and executing complex projects. Whether it’s building intricate structures or mapping out vast territories, visualizing these numerical values in a spatial context significantly simplifies the process. This section delves into various methods for visualizing coordinates, emphasizing their practical applications and importance in complex Minecraft projects.Visualizing coordinates transforms abstract numerical data into tangible representations, facilitating a more intuitive understanding of the Minecraft world.

    This allows players to effectively plan and execute projects, whether it’s creating elaborate structures or navigating vast terrains. We’ll explore different methods for creating these visualizations, from simple maps to complex schematics.

    Examples of Maps Showing Coordinates in Minecraft

    Minecraft’s in-built compass and the minimap display the coordinates in the top-left corner. These in-game tools are rudimentary but effective for quickly determining a location. Furthermore, many third-party tools and mods provide more detailed map overlays, potentially showing coordinates for every block or significant structure.

    Creating Custom Maps with Marked Coordinates

    Creating custom maps with marked coordinates is a straightforward process. Various map-editing software and digital drawing tools can be used. Players can digitally trace their Minecraft world, labeling key structures or significant points with their corresponding coordinates. The added benefit of custom maps is the ability to annotate and record important information beyond simple location markers.

    Significance of Visualizing Coordinates for Complex Projects

    Visualizing coordinates becomes paramount when working on intricate projects. Complex structures, intricate layouts, and extensive networks necessitate a visual representation of coordinates to maintain clarity and consistency. It helps in troubleshooting issues, ensuring alignment, and facilitating collaborative efforts.

    Using a Coordinate System to Create a Schematic of a Building

    A coordinate system forms the bedrock of a schematic. To create a schematic of a building, map the X, Y, and Z coordinates of every block in the structure. These coordinates can then be used to recreate the building in another location or on a different server. This process ensures accuracy and enables the building’s reproduction in a new environment.

    Table Comparing Different Ways to Visually Represent Coordinates

    Method Description Pros Cons
    In-game minimap Built-in Minecraft tool Simple, readily available Limited detail, not customizable
    Custom Maps (digital) Using software to create a map High detail, customizable, annotations possible Requires software, time to create
    Schematic (text-based) Listing coordinates of blocks Precise, easily transferred Less intuitive than a visual representation

    Detailed Description of a Hypothetical Minecraft World Using Coordinates

    Consider a hypothetical Minecraft world, “The Crystal Caverns.” The central hub, a large obsidian fortress (X: 1000, Z: 500), is surrounded by various structures. A network of interconnected tunnels (X: 900-1100, Z: 450-550) leads to several treasure chambers. A sprawling farm (X: 1200, Z: 600) provides food for the inhabitants, with a distinct layout and easily identifiable plots.

    The visualization of these coordinates would aid in efficiently navigating and utilizing this complex world.

    Conclusive Thoughts

    Mastering coordinates in Minecraft opens up a world of possibilities. By understanding the various methods, coordinate systems, and practical applications, you can navigate the game with ease, build impressive structures, and discover resources efficiently. This guide provides a comprehensive overview, empowering you to become a more skilled and strategic Minecraft player. From simple navigation to complex automation, this guide provides the tools and techniques needed to unlock the full potential of Minecraft.

  • Craft a Hopper in Minecraft A Complete Guide

    Craft a Hopper in Minecraft A Complete Guide

    Craft a Hopper in Minecraft sets the stage for an in-depth exploration of this versatile block. We’ll delve into its fundamental mechanics, crafting process, and various applications, from simple redstone circuits to complex automated systems. Prepare to unlock the true potential of hoppers in your Minecraft adventures.

    This comprehensive guide will walk you through crafting a standard hopper, understanding its functionality in transporting items, and its interactions with other blocks and redstone. We’ll cover common issues, advanced applications, and even comparisons with alternative item transport methods.

    Introduction to Minecraft Hoppers

    Minecraft hoppers are essential redstone components for managing item flow. They act as conduits, allowing items to move between containers, chests, and other hoppers. Understanding their functionality and different types is crucial for creating efficient and complex redstone circuits. Their basic mechanics involve transferring items in a specific direction, triggered by various conditions.Hoppers are fundamental to automated item collection and distribution in Minecraft.

    They can be integrated into complex systems, automating tasks such as sorting, transporting, and storing items. This opens up a wide range of creative possibilities for building sophisticated structures and gameplay experiences.

    Types of Hoppers

    Hoppers come in two primary variations: standard and powered. Standard hoppers function based on gravity and proximity to other containers. Items fall from a higher to a lower location. Powered hoppers, on the other hand, operate based on a redstone signal. This allows for precise control over item flow and can bypass the limitations of standard gravity-based movement.

    Basic Hopper Mechanics

    Hoppers transfer items in a specific direction. An item will only move from one hopper to another if the destination hopper is lower or closer to the source. If a hopper has an item and there’s an empty space in front of it, the item will be moved. This simple principle underlies many intricate redstone systems.

    Hopper Redstone Circuits

    Hoppers can be incorporated into various redstone circuits. For example, they can trigger actions based on the presence or absence of items, creating automated systems. This opens up many opportunities for designing intricate and automated tasks, such as automated farms, mining automation, or complex sorting systems.

    Item Collection System

    This system demonstrates a basic method of collecting items.

    Component Description
    Hopper Collects items from a chest.
    Chest Stores the collected items.
    Powered Repeater Provides a consistent redstone signal to the hopper.

    The system works by using a powered hopper to continuously collect items from a chest. The powered repeater ensures a stable redstone signal to the hopper.

    A simple diagram illustrating this system is as follows:[Imagine a diagram with a chest positioned above a hopper. A powered repeater is connected to the hopper. The chest and hopper are connected by an arrow showing the item flow from the chest into the hopper.]The chest is positioned above the hopper to ensure items naturally fall into the hopper.

    The powered repeater maintains the redstone signal needed for the hopper to function. This simple example showcases a foundational application of hoppers.

    Crafting a Hopper

    Hoppers are essential for efficient resource management in Minecraft. They act as conduits for transferring items between containers, chests, and other hoppers. Understanding how to craft them is crucial for optimizing storage and logistics in your Minecraft world. Crafting a hopper requires specific materials and a crafting table, but the process is straightforward once you know the recipe.

    Crafting a hopper in Minecraft is surprisingly straightforward, especially once you get the hang of it. It’s a useful block for automating storage and transport, a bit like the intricate, rhythmic interplay of a band like Lambchop, whose former bassist, Marc Trovillion , recently passed. You’ll need some iron ingots and a few other components, and then you’re set to create a sophisticated storage system in your world.

    It’s a great way to organize your resources and make your Minecraft experience more efficient.

    Materials Required

    Crafting a hopper necessitates gathering the required resources. Iron ingots and iron nuggets are the primary components. Iron is obtained through smelting iron ore. A crafting table is also needed for the crafting process.

    Crafting Recipe

    The recipe for a hopper is relatively simple. The following diagram displays the precise arrangement of materials within the crafting grid:

    [ ] [Iron Ingot] [ ]
    [Iron Ingot] [ ] [Iron Ingot]
    [ ] [Iron Ingot] [ ]
    

    Three iron ingots are required, arranged in a horizontal line with one in the center row. This precise configuration is vital for the crafting process.

    Crafting Steps

    To craft a hopper, follow these steps using a crafting table:

    • Open your crafting table.
    • Place the three iron ingots in the crafting grid as shown in the recipe diagram. Ensure the arrangement aligns with the recipe specifications.
    • The crafted hopper will appear in the output slot of the crafting table.
    • Click on the hopper in the output slot to collect it.

    Efficient Material Gathering

    Gathering the required materials for crafting a hopper efficiently is key to maximizing your crafting time. Explore the following strategies:

    • Mining for Iron Ore: Iron ore is found underground. Look for caves and mineshafts. Using a pickaxe to mine the ore efficiently is crucial. For greater efficiency, consider using a mining helmet to gain better visibility in dark areas.
    • Smelting Iron Ore: Smelt the mined iron ore in a furnace to obtain iron ingots. Furnaces can be placed in a strategic location for easy access to smelted materials.
    • Automated Mining: If you have advanced structures, consider automated systems like redstone circuits or hoppers themselves to gather and transfer iron ore and smelted iron ingots.

    Hopper Functionality and Uses

    Hoppers, a fundamental building block in Minecraft, are crucial for efficient item transport. They are more than just conduits; their functionality expands to interact with various elements of the game world, including chests, other hoppers, and redstone circuits. Understanding their nuances allows for complex automation and resource management systems.

    Hoppers operate by transferring items between containers. Their efficiency and adaptability make them essential for large-scale crafting, farming, and redstone projects. This section delves into how hoppers function, highlighting their behavior with different blocks and how redstone significantly alters their performance.

    Hopper Item Transfer Mechanism

    Hoppers act as intermediaries, transferring items from one container to another. They work on a first-in, first-out (FIFO) basis. If a hopper receives an item from a source, it attempts to place it into a destination. This transfer is often instant, but delays can occur if the destination is full or unavailable. Items are transferred one at a time unless the source and destination are very close to each other, allowing for faster and more efficient transport.

    Hopper Interactions with Other Blocks

    Hoppers exhibit unique behavior when encountering various blocks. For example, when a hopper is connected to a chest, the hopper will attempt to pull items from the chest if the hopper’s inventory is empty. Conversely, if the chest is full and the hopper has space, the hopper will place items into the chest. This interaction is crucial for automating item storage and retrieval.

    Similarly, connecting a hopper to another hopper creates a chain, allowing for extended item transport networks. The process of transferring items between hoppers is generally seamless, though slight delays might occur based on the item type and inventory space available.

    Crafting a hopper in Minecraft is surprisingly satisfying, especially when you consider the intricate mechanics involved. It’s like a miniature, automated logistics system, and the way it interacts with other blocks is fascinating. This reminds me of the concept of “wire change becomes us,” wire change becomes us , where seemingly simple changes can dramatically alter the way we approach things.

    Ultimately, mastering the hopper’s use in Minecraft can be a powerful tool for efficiently managing resources in the game.

    Hopper Interactions with Redstone

    Redstone significantly alters the behavior of hoppers. A powered hopper functions as a unidirectional conduit, pushing items from a source into a destination. This unidirectional movement means that the hopper only transfers items in one direction. Unpowered hoppers, on the other hand, act as bidirectional conduits, transferring items in both directions. This ability to control the direction of item flow is essential in redstone contraptions.

    Redstone Control of Hopper Behavior

    Redstone signals directly influence a hopper’s function. A powered hopper will always attempt to transfer items to the destination. If the destination is full or inaccessible, the powered hopper will continue to try to place the item. In contrast, an unpowered hopper will only transfer items if there is both a source and a destination. This control mechanism allows for intricate automation systems, enabling players to create customized item-transport systems tailored to their needs.

    Powered vs. Unpowered Hopper Performance Comparison

    Scenario Unpowered Hopper Powered Hopper
    Item Transfer from Chest to Hopper Transfers if the hopper has space Transfers regardless of hopper inventory
    Item Transfer from Hopper to Chest Transfers if the chest has space Transfers regardless of chest inventory
    Item Transfer between two Hoppers Transfers in both directions Transfers in one direction
    Redstone Signal Presence No effect on transfer Significantly influences transfer direction
    Inventory Space Limited by inventory space Not limited by inventory space, but potentially limited by redstone circuit’s signal timing

    This table highlights the key differences in the performance of powered and unpowered hoppers across various scenarios. Powered hoppers, while not necessarily faster, offer greater control and can bypass inventory limitations in the destination. Unpowered hoppers, in contrast, offer flexibility in both directions but are subject to the limitations of inventory space.

    Advanced Hopper Applications

    Craft a Hopper in Minecraft

    Hoppers, seemingly simple containers, unlock a vast array of possibilities in Minecraft’s redstone systems. Beyond basic item transfer, they become crucial components for complex automated tasks, enabling efficient resource management and intricate logistical networks. This section dives into sophisticated applications, showcasing how hoppers can be integrated into automated farms, sorting systems, and intricate delivery networks.

    Hoppers excel at managing items beyond simple storage. Their ability to transfer items between containers, even those not directly adjacent, opens doors to intricate automated systems. The combination of hoppers with other redstone components empowers players to create self-sufficient and highly organized worlds.

    Automated Item Sorting Systems

    Automated item sorting systems leverage hoppers’ ability to discriminate based on item type and stack size. Sophisticated designs can sort items into different chests or containers based on specific criteria. This automation is vital for managing large inventories, enabling players to separate resources or crafting components with speed and accuracy. Consider a system that automatically sorts ores based on their type into different storage areas.

    Automated Item Delivery Systems

    Automated item delivery systems are a cornerstone of advanced redstone construction. These systems utilize hoppers, powered rails, and command blocks to ensure precise and efficient movement of items across vast distances. A common example is a system that automatically delivers resources to a crafting station, freeing up player time for other tasks.

    Automated Farms

    Hoppers significantly enhance the efficiency of automated farms. They can be integrated into complex systems that automate the entire process, from planting to harvesting and storing the yield. The use of hoppers in these systems eliminates the need for constant manual intervention, making farms highly self-sufficient.

    Table of Automated Farming Systems

    Farming System Components Description
    Automatic Wheat Farm Hoppers, dispensers, farmland, water source Wheat plants are automatically watered and harvested, with hoppers collecting the wheat and moving it to storage.
    Automated Potato Farm Hoppers, dispensers, farmland, water source, chests Potatoes are automatically planted, grown, and harvested, with hoppers delivering the harvested potatoes to storage.
    Automated Carrot Farm Hoppers, dispensers, farmland, water source, chests Carrots are automatically planted, grown, and harvested, with hoppers delivering the harvested carrots to storage.
    Automated Sugar Cane Farm Hoppers, dispensers, farmland, water source, chests Sugar cane is automatically harvested, with hoppers delivering the harvested sugar cane to storage.

    Troubleshooting Hopper Issues

    Craft a Hopper in Minecraft

    Hoppers, while a crucial component in Minecraft automation, can sometimes malfunction. Understanding the common problems and their solutions is essential for smoothly running automated systems. This section delves into the troubleshooting process for hopper-related issues, providing clear explanations and actionable steps to diagnose and resolve them.

    Troubleshooting hoppers effectively involves a methodical approach. It’s crucial to identify the specific problem before attempting a solution. Sometimes, the issue might be a simple oversight, while others could stem from complex interactions within the automation network. This guide aims to equip players with the knowledge to pinpoint and resolve common hopper malfunctions.

    Common Hopper Malfunction Causes

    Various factors can contribute to hoppers not functioning as expected. These include incorrect placement, insufficient space, conflicting interactions with other blocks, and issues with the automation network design.

    Incorrect Hopper Placement and Orientation

    Hoppers are directional. They only transfer items in a specific direction. If a hopper is not positioned correctly to receive or dispense items from the source or destination, it will fail to function as intended. Ensure the hopper’s output is pointed towards the intended recipient, and the input is aligned with the source of the items. Incorrect placement often leads to items being “stuck” or failing to move through the system.

    Consider the direction of item flow in your entire automation setup.

    Insufficient Space and Item Stacking Issues

    Hoppers require sufficient space to transfer items efficiently. If the hopper’s input or output area is blocked or overcrowded, items can get jammed, causing the hopper to stop working. Make sure there’s enough room for items to move freely between the source and destination. Consider the capacity of the hopper and the rate of item flow in your automated system.

    If items are being stacked in an unconventional manner, this can disrupt the smooth flow of items through the system.

    Conflicting Block Interactions

    Other blocks in your automation system can cause conflicts with hoppers. For example, chests, furnaces, and other machines can interact with hoppers in unpredictable ways, leading to unexpected behavior. Ensure that no blocks are obstructing the hopper’s input or output pathways. For example, a wall between a hopper and a chest can prevent the hopper from functioning. If hoppers are directly connected to each other, ensure there are no blocks impeding the flow of items between them.

    Automation Network Design Issues

    Complex hopper systems are prone to errors in design. Incorrect connections, loops, or conflicting signals can cause hoppers to malfunction. Review your entire automation network, checking for any logical errors in the placement or sequence of the hoppers and other components. Carefully consider the directionality of each hopper and the order in which items should flow through the system.

    For instance, a closed loop of hoppers may result in items endlessly cycling without ever reaching their intended destination.

    Troubleshooting Guide

    Problem Possible Cause Solution
    Hoppers not transferring items Incorrect placement, blocked pathways, insufficient space, conflicting block interactions, automation network issues Verify correct orientation and placement. Clear any blockages. Ensure sufficient space. Check for conflicting blocks. Review the automation network design for logical errors.
    Items getting stuck Insufficient space, conflicting block interactions, automation network issues Increase the space around the hopper. Check for obstructions. Review the automation network design.
    Items not reaching destination Incorrect placement, blocked pathways, automation network issues Verify correct orientation. Remove any blockages. Check for loops or conflicting connections.
    Items cycling endlessly Closed loop in the automation network Identify and correct the closed loop in the automation network. Break the loop to allow items to reach their destination.

    Creative Hopper Designs

    Hoppers in Minecraft, while simple in their design, unlock a wealth of possibilities for automation. Beyond basic storage and transport, they can form the backbone of complex and efficient systems. This section explores a sophisticated automated smelting system, demonstrating how creativity can transform these simple mechanisms into powerful tools for resource management.

    Crafting an automated smelting system using hoppers offers several advantages over manual smelting. It significantly increases efficiency, freeing up player time and resources for other tasks. It also allows for continuous processing of resources, reducing downtime and maximizing output. This is particularly beneficial in large-scale operations or for players who want to significantly accelerate the rate at which they collect resources.

    Automated Smelting System

    This design focuses on automating the smelting process, ensuring a constant flow of resources. The system consists of three key components: input, smelting, and output. Efficient movement of resources between these stages is crucial for maximum output.

    Input Station

    A dedicated input area collects raw materials. This area uses a combination of hoppers, chests, and a dispenser to ensure consistent input. The dispenser, triggered by a redstone signal, automatically pushes items into the hopper system. The chest serves as a buffer to prevent overloading the system and maintain a steady supply of raw materials. The hopper system connects the chest to the smelting area, ensuring materials are transferred without interruption.

    Smelting Area

    This section utilizes a furnace connected to a hopper. The hopper collects smelted items from the furnace and sends them to the output area. This setup ensures a continuous flow of processed resources.

    Output Station

    The output station employs a second hopper system to transfer processed items to a designated output chest. This area is crucial for storing the finished products. A separate chest is used for the storage of processed items, ensuring that the output area does not get overloaded. This separation maintains order and ensures uninterrupted processing.

    Redstone Circuitry

    A simple redstone circuit controls the dispenser, ensuring that items are moved to the smelting area at a regular rate. A comparator compares the items in the input chest to a predetermined threshold, and activates the dispenser only when the chest has enough items to keep the furnace busy. The signal from the comparator is sent to a redstone torch which powers the dispenser.

    This setup prevents the system from overworking the furnace, preventing block damage and maintaining stability.

    Component Description
    Input Chest Stores raw materials.
    Dispenser Automated transfer of raw materials.
    Furnace Processes raw materials into finished products.
    Output Chest Stores finished products.
    Hoppers Transfer items between components.

    Diagram

    (Imagine a diagram here. It would show the input chest, dispenser, hoppers connecting to the furnace, and the output chest. Arrows would indicate the flow of items.)

    Crafting a hopper in Minecraft is surprisingly straightforward, but mastering the intricacies of the game’s inventory system can be tricky. Just like learning to efficiently position your hands on a keyboard Position Hands on a Keyboard for typing, understanding the correct placement of items is key to crafting a functional hopper. Once you get the hang of it, crafting a hopper becomes a breeze!

    Description of the diagram: The diagram visually represents the automated smelting system. The flow begins with raw materials in the input chest. The dispenser automatically pushes the items into the system, then the hoppers carry them to the furnace. The furnace processes the items, and the hoppers carry the finished products to the output chest.

    Construction Guide

    1. Establish the Input Area: Position the input chest and place a dispenser above it. Connect the chest to a hopper, and the hopper to the dispenser. Connect a comparator to the hopper and a redstone torch to the comparator.
    2. Create the Smelting Area: Place the furnace and connect a hopper to its output. Ensure that the hopper is positioned to catch the smelted items.
    3. Construct the Output Area: Position the output chest and connect it to a hopper. The hopper should be placed to collect items from the furnace hopper.
    4. Wire the Redstone Circuitry: Connect the comparator to the redstone torch, which will power the dispenser. Adjust the comparator settings to ensure a consistent item flow to the furnace.
    5. Test and Refine: Test the system to ensure that items are being transferred smoothly between stages. Adjust the redstone circuit and placement of hoppers as needed to optimize the process.

    This detailed system provides a significant increase in efficiency and output compared to manual smelting, especially in large-scale operations.

    Comparison with Other Item Transport Mechanisms

    Hoppers, while powerful in Minecraft, aren’t the only way to move items. Understanding their strengths and weaknesses compared to other methods like chests and conveyors is crucial for efficient and strategic world building. This comparison highlights when hoppers excel and when other options are more suitable.

    Chests, conveyors, and hoppers each offer unique advantages and disadvantages for transporting items. Understanding these distinctions is vital for optimizing item flow in your Minecraft world.

    Hoppers vs. Chests

    Chests are simple storage containers. Their primary function is to hold items. Hoppers, in contrast, are designed for automated item transfer. Chests excel in straightforward storage, but their passive nature limits their efficiency for complex setups. Hoppers, on the other hand, facilitate automatic item movement, making them superior for intricate logistical systems.

    • Chests are excellent for simple, static storage. They’re ideal for areas where items are placed and retrieved manually. However, they lack the automated transfer capabilities required for larger-scale, automated systems.
    • Hoppers are far more efficient for transferring items between different containers or locations. Their automated functionality allows for sophisticated item flow setups, but they are less effective for static storage.

    Hoppers vs. Conveyors

    Conveyors are linear item transporters. They move items in a single direction along a predetermined path. Hoppers, however, can transfer items in various directions and between multiple destinations. Conveyors are excellent for straightforward linear pathways, but they lack the flexibility of hoppers for more intricate networks.

    • Conveyors are suitable for simple, linear item transport. They’re efficient for moving items along a single path but lack the versatility of hoppers for complex setups.
    • Hoppers excel in complex item distribution systems. Their ability to transfer items between multiple containers and locations makes them more versatile, allowing for more intricate logistics in your Minecraft world. They can even facilitate a circular item movement pattern.

    Comparative Analysis Table

    Transport Method Advantages Disadvantages Best Use Cases
    Chests Simple storage, easy to use Manual retrieval, no automated transfer Temporary storage, small-scale inventories
    Conveyors Linear item movement, efficient for straight paths Limited to a single direction, inflexible Moving items in a straight line, conveyor belts
    Hoppers Automated item transfer, flexible directions, multiple destinations Can be complex to set up, less efficient for simple transfers Automated item sorting, intricate logistical networks, item distribution across multiple locations

    Hopper Integration with Other Mods: Craft A Hopper In Minecraft

    Hoppers, the essential item transport conduits in Minecraft, often benefit from enhancements offered by various mods. These add-ons can drastically alter how hoppers function, improving efficiency, adding new capabilities, or even introducing unforeseen conflicts. Understanding these interactions is crucial for maximizing the potential of your hopper systems in a modded Minecraft environment.

    Popular mods frequently introduce new items, blocks, and behaviors that affect item handling. This can lead to intricate interactions with hoppers, either boosting their efficiency or creating unexpected consequences. Knowing how these interactions work can significantly improve your modded Minecraft experience, preventing frustrating bugs and unlocking powerful new strategies.

    Impact of Resourceful mods

    Resourceful mods often introduce new ore types and crafting recipes, which can significantly impact hopper functionality. For example, a mod adding a new type of enchanted iron ore might cause hoppers to prioritize those ores over standard iron, affecting the efficiency of your mining and smelting operations. These mods can also introduce new blocks with unique interaction mechanics, potentially creating unexpected pathways for items to flow through.

    Advanced Mod Interactions with Hoppers

    Many mods extend the functionality of hoppers, enabling more sophisticated item handling systems. For instance, a mod specializing in automation might provide a hopper-compatible sorting mechanism. This mechanism allows hoppers to categorize items based on properties like damage value or custom tags, enabling the creation of highly complex and specialized automated factories. These integrations can improve efficiency, enabling specialized production chains and intricate inventory management.

    Example: The “Automated Assembly” Mod, Craft a Hopper in Minecraft

    Consider the “Automated Assembly” mod, which introduces specialized assembly blocks. This mod allows items to be processed and combined in a structured manner. The hoppers in this mod integrate with the assembly blocks, allowing them to receive raw materials, collect intermediate products, and output finished goods. This integration allows the hoppers to precisely track and deliver items needed at each stage of the assembly process.

    This detailed process allows for a more efficient and controlled flow of materials, making it possible to achieve intricate assembly tasks in a controlled environment. Hoppers now become integral parts of the assembly line, facilitating precise and efficient material handling.

    Potential Conflicts and Troubleshooting

    While mods can enhance hopper functionality, they can also introduce conflicts. Incompatibilities between mods can lead to unexpected behavior, where items might get stuck, disappear, or not flow as intended. This can be especially problematic when trying to integrate complex automation systems. Careful testing and understanding of mod interactions are essential to avoid these issues. If conflicts arise, consulting mod documentation or online forums can provide valuable solutions and workarounds.

    Mod Impact on Efficiency and Effectiveness

    The impact of mods on hopper efficiency and effectiveness is significant and varies greatly depending on the specific mod. Some mods may marginally improve efficiency by adding new item handling features, while others can significantly boost efficiency by enabling complex automated systems. The addition of advanced features like sorting, processing, or custom tags can result in substantial improvements in the overall throughput and organization of your modded Minecraft inventory management.

    However, unexpected conflicts can hinder efficiency if not properly addressed.

    Summary

    From basic crafting to sophisticated automated farms, this guide provides a thorough understanding of Minecraft hoppers. You’ll master their function, learn how to troubleshoot issues, and discover creative applications for these essential blocks. So, gear up, and get ready to build some amazing automated systems in Minecraft!