Clean Acrylic Paint Brushes is your essential guide to maintaining pristine brushes for optimal painting results. From understanding why your brushes get dirty to exploring diverse cleaning techniques, this comprehensive guide covers every aspect of keeping your acrylic brushes in top condition. Discover the importance of regular cleaning and the different methods for various brush types, from round to flat, and learn how to tackle stubborn paint and common cleaning issues.
This article will delve into the intricacies of cleaning acrylic paint brushes, guiding you through the process step-by-step. We’ll cover everything from basic water and soap methods to more advanced techniques for specific brush types and paint types. A detailed table comparing different cleaning methods will be provided, along with tips on storing and maintaining your brushes for maximum lifespan.
We’ll also tackle common problems and offer solutions to keep your brushes in excellent condition.
Introduction to Clean Acrylic Paint Brushes
Clean acrylic paint brushes are essential tools for achieving professional-looking artwork. They are the vehicles for applying acrylic paint, and their condition directly impacts the quality of the final product. Maintaining clean brushes ensures that paint is applied smoothly and evenly, minimizing streaking and imperfections. This is crucial for both beginners and experienced artists alike.Proper brush care is paramount to longevity.
Dirty brushes can harbor dried paint, which can damage the bristles and reduce the brush’s effectiveness. This is especially true with acrylics, as they dry quickly and can become embedded in the brush fibers. Understanding the reasons why brushes get dirty and the best methods for cleaning them are key to achieving optimal painting results.
Reasons for Dirty Paint Brushes
Several factors contribute to paint brush grime. Over time, pigment particles from the paint accumulate on the brush hairs. Additionally, solvents and additives in the acrylic paint can leave residues. These residues, combined with the paint itself, can create a buildup on the bristles, which can affect the brush’s flexibility and performance. The amount of paint used and the duration of application are also factors, as thicker applications and longer use times contribute to a faster buildup of grime.
For example, a brush used for an entire painting session will likely be more heavily coated with paint than one used for a small touch-up.
Methods for Cleaning Acrylic Paint Brushes
There are several ways to effectively clean acrylic paint brushes, each with its own advantages and disadvantages. Choosing the right method depends on the amount of paint on the brush and the type of residue.
| Method | Procedure | Pros | Cons |
|---|---|---|---|
| Water Rinse | Immediately after use, rinse the brush thoroughly under lukewarm running water. Gently work out the excess paint. | Quick and easy, especially for light applications. Preserves brush bristles and reduces the need for harsh chemicals. | Not effective for heavy paint buildup. May not fully remove solvents or additives. |
| Soap and Water | Mix a small amount of mild dish soap with lukewarm water. Submerge the brush in the mixture, gently working out the paint. Rinse thoroughly until the water runs clear. | Effective at removing paint and residues. | Can be time-consuming, and requires careful handling to avoid damaging the bristles. |
| Brush Cleaner | Use a dedicated brush cleaner, either liquid or gel form, as directed by the product instructions. Follow up with thorough rinsing. | Quickly removes even heavy paint buildup. | Can be expensive and may contain harsh chemicals. May require additional rinsing steps to remove the cleaner itself. |
| Solvent Cleaning | Use a solvent-based cleaner, such as mineral spirits, turpentine, or a specific acrylic paint remover. Soak the brush in the solvent and gently work out the paint. Rinse thoroughly with water afterwards. | Highly effective at removing dried paint. | Requires extreme caution as solvents can damage the brush’s bristles if left in the solution too long. |
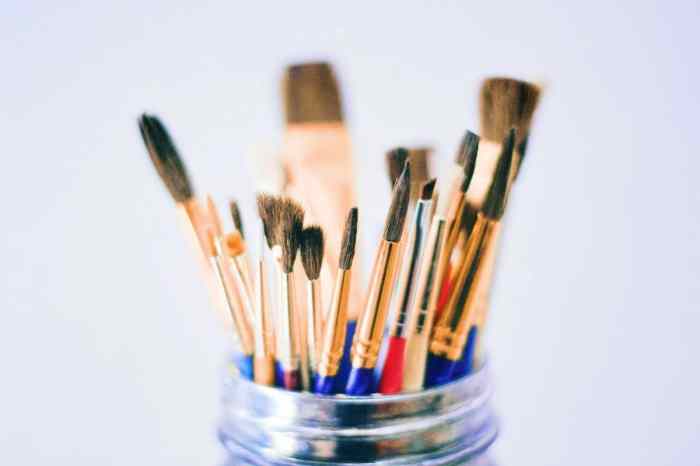
Different Types of Acrylic Paint Brushes: Clean Acrylic Paint Brushes

Acrylic paint brushes come in a wide array of shapes and sizes, each designed for specific tasks. Understanding the characteristics of different brush types allows artists to select the ideal tool for their project, maximizing control and achieving desired effects. Choosing the right brush is crucial for achieving a professional finish and preventing frustration.Different brush shapes cater to various painting styles and techniques.
A skilled artist leverages the unique properties of each brush to create diverse textures and effects. From delicate details to bold strokes, the right brush can make all the difference in the final piece.
Round Brushes
Round brushes are versatile tools for a variety of applications. Their pointed tips allow for precise detail work, while their varied sizes accommodate different stroke widths. These are excellent for creating fine lines, dots, and other intricate details. Round brushes are particularly well-suited for adding highlights and shadows, enhancing the overall visual impact of a painting. They are also great for creating smooth transitions between colors.
Flat Brushes
Flat brushes are renowned for their broad surface area, which facilitates the application of large amounts of paint. This characteristic makes them ideal for covering large surfaces quickly and evenly. Their shape and the control they provide are useful for creating smooth, even washes and blending colors effectively. Flat brushes are frequently used for landscapes, murals, and large-scale artwork where a broad stroke is necessary.
Fan Brushes, Clean Acrylic Paint Brushes
Fan brushes are characterized by their wide, tapered shape. Their unique design allows for the creation of soft, blended edges and gradients. They excel at creating smooth transitions between colors and achieving a diffused effect. This type of brush is perfect for creating soft highlights, delicate washes, and subtle transitions, ideal for landscapes, portraits, and other types of art.
Filbert Brushes
Filbert brushes combine the rounded tip of a round brush with the flat surface of a flat brush. This unique shape provides a broad, yet controlled application of paint, ideal for blending colors and creating smooth transitions. The subtle curve helps to create soft edges and detailed textures. These brushes are commonly used for portraits, still lifes, and other detailed artwork where both control and a broad stroke are needed.
Cleaning Methods for Different Brush Types
Proper cleaning is essential for maintaining the quality and longevity of acrylic paint brushes. Different brush types require specific cleaning techniques to prevent damage and ensure optimal performance. The use of appropriate solvents and techniques can greatly influence the overall quality and efficiency of the cleaning process.
- Round Brushes: Due to their pointed tips, gentle cleaning is crucial. Start by rinsing the brush thoroughly under warm water, and then gently swirl the bristles in a container of appropriate cleaning solution (water-based or solvent-based). Work the paint out by swirling the brush in the solution.
- Flat Brushes: Flat brushes can handle more aggressive cleaning due to their broader surface area. Rinse the brush thoroughly under warm water, then use a brush cleaner to remove the paint from the bristles. Gently swirl the brush in the cleaning solution.
- Fan Brushes: Fan brushes require a similar approach to flat brushes. Rinse under warm water and use a brush cleaner to loosen the paint. Carefully work the bristles in the cleaning solution, avoiding harsh scrubbing.
- Filbert Brushes: Filbert brushes require a balance of gentleness and thoroughness. Rinse the brush under warm water, then use a brush cleaner to loosen the paint from the bristles. Work the bristles in the cleaning solution, avoiding harsh scrubbing or twisting that could damage the brush shape.
Factors to Consider When Selecting Brushes for Cleaning
Selecting the right cleaning materials is crucial for maintaining the brush’s shape and functionality. The choice of cleaning solution should depend on the type of paint used. This consideration ensures that the bristles are not damaged or the paint is not left behind.
- Brush Material: Natural bristles (like sable or hog hair) require more delicate handling during cleaning. Synthetic bristles (like nylon or polyester) are generally more durable and can withstand more aggressive cleaning techniques.
- Paint Type: The type of acrylic paint used significantly influences the cleaning process. Water-based acrylics are usually easier to remove than oil-based paints, and specialized cleaners are available for different paint types.
- Brush Size and Shape: The size and shape of the brush affect the cleaning process. Smaller brushes require a more delicate approach, while larger brushes can tolerate more vigorous cleaning.
Brush Types, Features, and Applications
| Brush Type | Features | Applications | Cleaning Notes |
|---|---|---|---|
| Round | Pointed tip, various sizes | Fine lines, details, highlights, shadows | Gentle rinsing, swirling in cleaner |
| Flat | Broad surface area | Large areas, washes, murals | Thorough rinsing, swirling in cleaner |
| Fan | Wide, tapered shape | Soft edges, gradients, diffused effects | Gentle rinsing, swirling in cleaner |
| Filbert | Rounded tip, flat surface | Blending, smooth transitions, detailed textures | Gentle rinsing, swirling in cleaner |
Cleaning Techniques for Acrylic Paint Brushes
Maintaining your acrylic paint brushes is crucial for longevity and optimal performance. Proper cleaning ensures that the bristles remain in good condition, preventing paint from hardening and clogging the brush, enabling you to achieve a clean and precise application in future painting sessions. Clean brushes are essential for creating high-quality artwork.Cleaning techniques are vital for extending the life of your brushes and maintaining their usability.
Different cleaning methods work better for different types of paint and levels of soiling. Understanding these methods will help you maintain your brushes effectively.
Water and Soap Cleaning Method
This method is generally the first line of defense for cleaning acrylic paint brushes. It’s effective for light to moderate soiling. It’s a gentler approach, preserving the brush’s integrity.
- Prepare your workspace. Gather a clean container, lukewarm water, mild dish soap, and a brush cleaner or old toothbrush. A clean, well-lit workspace is essential for effective cleaning.
- Submerge the brush. Gently place the brush into the container of lukewarm water. This softens the paint and loosens any adhering particles.
- Apply soap. Add a small amount of mild dish soap to the water and gently swirl the brush to mix. Avoid using harsh chemicals, as these can damage the brush’s bristles.
- Clean the brush. Use your fingers or a brush cleaner to work the soap through the bristles, removing any loose paint particles. For stubborn paint, gently massage the bristles against the container’s side.
- Rinse thoroughly. Rinse the brush under running lukewarm water until all soap residue is removed. Ensure the water runs clear. Avoid using hot water, as this can damage the brush’s bristles.
- Shape the brush. Gently shape the brush back into its original form. This step helps maintain the brush’s structure and ensures that the bristles are not deformed.
- Air dry. Allow the brush to air dry completely. Avoid placing the brush in direct sunlight or near a heat source, as this can damage the bristles. Place it on a clean towel or paper towel.
Solvent Cleaning Method
Solvent cleaning is more effective for removing stubborn acrylic paint, especially when the paint has dried. However, it is important to be cautious with solvents as they can damage the brush bristles over time.
- Prepare your workspace. Gather a clean container, solvent (e.g., odorless mineral spirits, paint thinner), and a brush cleaner or old toothbrush. Ensure proper ventilation when using solvents.
- Submerge the brush. Submerge the brush in the solvent. The solvent helps dissolve the dried paint. Avoid submerging the brush entirely if possible.
- Apply solvent. Add a small amount of solvent to the container, ensuring that the brush is fully immersed. Avoid using excessive amounts of solvent, as this can damage the brush’s bristles.
- Clean the brush. Use your fingers or a brush cleaner to gently work the solvent through the bristles, dislodging dried paint particles. If the paint is extremely stubborn, leave the brush submerged in the solvent for a few minutes.
- Rinse thoroughly. Rinse the brush with copious amounts of water until all traces of solvent are removed. The water should run clear.
- Shape the brush. Gently shape the brush back into its original form to maintain its structure.
- Air dry. Allow the brush to air dry completely. Place it on a clean towel or paper towel. Ensure that the brush is completely dry before storing it.
Stubborn Paint Removal Techniques
Stubborn paint can be a challenge, requiring more aggressive techniques.
- Using a soft brush or toothbrush. Gently scrubbing the brush bristles with a soft brush or toothbrush can dislodge stubborn paint particles.
- Soaking the brush. Soaking the brush in a solution of water and dish soap for an extended period can help soften the paint and make it easier to remove.
- Using a gentle scrubbing motion. Avoid harsh scrubbing, as this can damage the bristles. Instead, use a gentle scrubbing motion to loosen and remove the paint.
- Using a brush cleaner. Applying a brush cleaner to the brush and gently scrubbing can help to dislodge and remove stubborn paint.
Comparison of Cleaning Solutions
Water and soap is generally a safe and effective method for most acrylic paint. Solvents are more aggressive and should be used cautiously, especially for dried paint. Experimenting with different methods can help you determine the most effective approach for your needs.
Supplies Needed for Cleaning Acrylic Paint Brushes
- Clean container
- Lukewarm water
- Mild dish soap
- Solvent (e.g., odorless mineral spirits, paint thinner)
- Brush cleaner or old toothbrush
- Paper towels or clean cloth
Cleaning Methods Table
| Cleaning Method | Step 1 | Step 2 | Step 3 |
|---|---|---|---|
| Water and Soap | Prepare workspace with container, water, soap, and brush cleaner. | Submerge brush in lukewarm water. | Apply soap, gently clean bristles, rinse thoroughly, shape, air dry. |
| Solvent | Prepare workspace with container, solvent, and brush cleaner. | Submerge brush in solvent. | Apply solvent, gently clean bristles, rinse thoroughly, shape, air dry. |
Maintaining Clean Acrylic Paint Brushes

Keeping your acrylic paint brushes clean and well-maintained is crucial for longevity and optimal performance. Proper storage and care prevent paint build-up, ensuring your brushes remain usable for future projects. A well-maintained brush is a happy artist’s tool.Maintaining clean acrylic paint brushes is about more than just a quick clean. It’s a proactive approach to preserving the quality and usability of your brushes, ultimately saving you money and time in the long run.
Proper storage and preventative measures are key to extending the life of your valuable artistic tools.
Keeping my acrylic paint brushes clean is crucial for vibrant colors and preventing smudges. But, sometimes, I find myself wondering about the nuances of digital communication – like what exactly does the blushing emoji mean? To explore that, I highly recommend checking out this insightful article What Does the Blushing Emoji Mean. It’s fascinating how subtle digital cues can add layers of meaning to our interactions.
Regardless, meticulous brush cleaning is key for a satisfying painting experience!
Optimal Storage Practices
Proper storage is essential to prevent paint build-up and maintain the integrity of the brush bristles. A well-organized storage system keeps brushes protected and ready for use.Storing clean brushes in a vertical position, using a brush holder or similar vertical arrangement, allows the bristles to dry naturally and prevents them from becoming misshapen. This method also minimizes the risk of paint buildup in the brush’s ferrule.
Choose a storage area that is free from moisture and direct sunlight to maintain optimal conditions for the brush’s longevity.
Preventing Future Paint Build-Up
Preventing future paint build-up on your brushes is critical for preserving their shape and functionality. Taking immediate action after each use minimizes the buildup and keeps your brushes in peak condition.Immediate cleaning after each use is the best practice to prevent paint build-up. This will significantly reduce the amount of time spent on extensive cleaning sessions later. This minimizes the risk of paint drying into the brush and making it difficult to remove.
Optimal Conditions for Brush Preservation
Ideal conditions for brush preservation include a dry, cool, and dust-free environment. These conditions prevent the deterioration of the brush bristles and the potential for mold or mildew growth.Store brushes in a dry location away from direct sunlight. Avoid places with high humidity or temperature fluctuations. Storing brushes in a clean, dry place, like a dedicated art studio or cabinet, will help them last longer and maintain their original form.
Tips to Extend Brush Lifespan
Taking proactive steps can significantly extend the lifespan of your acrylic paint brushes. Consistency and attention to detail can extend the usable life of your tools by years.Regular cleaning and storage, as Artikeld in the previous sections, are crucial. Using the appropriate cleaning solutions and techniques, as described earlier, will maintain the integrity of the bristles and the brush structure.
Keeping my acrylic paint brushes clean is crucial for vibrant colors and preventing brush-strokes from looking muddy. It’s like, imagine Hulk’s massive appetite, and how much he has to eat to maintain that physique! Similarly, you need to consider the amount of paint your brushes absorb, and to clean them thoroughly for a successful painting project, you can also check out how much does hulk have to eat.
Proper cleaning is essential to get the most out of your tools and achieve the desired results.
Avoid storing brushes in overly damp or humid environments.
Checklist for Maintaining Clean Acrylic Paint Brushes
A checklist ensures consistency in your brush care routine. Following these steps consistently ensures that your brushes remain in top condition for years to come.
- Clean brushes immediately after use.
- Use the correct cleaning solution for the type of paint.
- Rinse thoroughly until all traces of paint are gone.
- Shape and reshape the brush gently after cleaning.
- Store brushes vertically in a dry and dust-free environment.
Wrapping a Clean Brush
Proper wrapping ensures the brush maintains its shape and prevents damage during storage. This practice preserves the brush’s integrity and readiness for future use.Wrap the brush’s bristles gently around the ferrule with a soft cloth or tissue. Avoid applying excessive pressure, which could damage the brush. Secure the wrap with a rubber band, securing the bristles. Place the wrapped brush in a dedicated brush holder or container.
This procedure is vital for maintaining the shape and condition of the bristles.
Troubleshooting Common Cleaning Issues
Keeping your acrylic paint brushes in pristine condition is crucial for achieving professional-looking results and extending their lifespan. However, sometimes issues arise during the cleaning process, leading to paint build-up, stubborn residue, or dried paint. This section will address these common problems and provide effective solutions.Acrylic paint can be notoriously tricky to remove from brushes, especially when it dries.
Understanding the causes of these issues and employing the correct techniques is essential for maintaining your tools.
Keeping my acrylic paint brushes clean is crucial for vibrant colours and smooth application. I’ve been diligently following the best practices, and recently discovered some amazing new techniques. Speaking of creativity, did you hear about Noel Gallagher announcing two solo albums? Noel Gallagher announces two solo albums is a huge deal, and a great reminder that inspiration can strike anywhere.
Regardless, I’m still finding the best ways to keep my brushes in tip-top shape for my next painting project.
Identifying Paint Build-Up and Stubborn Residue
Paint build-up and stubborn residue often result from insufficient initial cleaning or the use of incompatible cleaning solutions. The key to tackling these issues is a multifaceted approach that considers the nature of the residue.
Addressing Dried Paint on the Brush
Drying paint on a brush can be frustrating, but with the right tools and techniques, it can be resolved. Immediate action is crucial, as dried paint becomes increasingly difficult to remove.
Handling Hardened Paint in the Bristles
Hardened paint in the bristles is a more challenging scenario. The paint has fully cured, making it resistant to typical cleaning methods. Patience and the right approach are key.
Preventing Paint from Drying in the Brush
Preventing paint from drying in the brush is crucial to maintaining its optimal condition. Prompt cleaning is paramount. Employing effective techniques from the initial stages can significantly reduce the chances of encountering dried paint.
Table of Issues and Solutions for Cleaning Acrylic Paint Brushes
| Issue | Solution | Explanation |
|---|---|---|
| Paint build-up/stubborn residue | Use a brush cleaner specifically designed for acrylics. Gently massage the brush in the cleaner, then rinse thoroughly. Repeat if necessary. | Brush cleaners help loosen and remove dried paint particles. Gently working the brush prevents damage to the bristles. |
| Dried paint | Immediately rinse the brush with warm, soapy water. If the paint is still wet, gently work the brush in the water to loosen the paint. If dry, apply a small amount of specialized acrylic brush cleaner and gently massage. | Prompt cleaning with warm water is vital to prevent drying. If dry, use a cleaner to break down the paint’s bonds. |
| Hardened paint | Soak the brush in a mixture of dish soap and warm water for several hours. Use a soft brush or cotton swab to gently work the paint from the bristles. If the paint is still stubborn, consider using a specialized paint remover. | Soaking softens the paint and makes it easier to remove. Gentle agitation and the use of specific removers can help dislodge hardened paint. |
| Preventing drying | Rinse the brush thoroughly after each use. If using a specific cleaner, rinse the brush after each stroke. Store brushes in a vertical position to prevent bristles from becoming entangled. | Regular rinsing keeps the bristles clean and prevents paint from drying in between strokes. Vertical storage maintains the shape and integrity of the brush. |
Advanced Cleaning Techniques for Acrylic Paint Brushes
Mastering the art of cleaning acrylic paint brushes goes beyond the basics. This section dives into specialized techniques for intricate brushes, various bristle types, specific paint types, and even watercolor integration, providing a comprehensive approach to keeping your brushes in top condition. Understanding these advanced methods will significantly enhance your painting experience and longevity of your tools.Intricate designs and unique brush shapes often present cleaning challenges.
Traditional methods might not be sufficient for reaching every nook and cranny of a brush with a complex structure. Careful disassembly and meticulous cleaning are key. A good example is a fan brush; its numerous bristles may require individual attention during the cleaning process.
Specialized Cleaning Methods for Intricate Brushes
Specialized cleaning methods are essential for brushes with intricate designs, ensuring thorough removal of paint without damaging the brush’s structure. Disassembly, if applicable, is often necessary to reach all areas of the brush. Carefully separating the bristles and meticulously cleaning each section is critical. Using a soft brush or a small, pointed tool for cleaning crevices is also beneficial.
The delicate nature of some brushes requires the use of a mild, specialized cleaner.
Cleaning Brushes with Different Bristle Types
Different bristle types respond to cleaning differently. Natural bristle brushes, known for their softness and flexibility, may require gentler handling. Synthetic brushes, with their durability, can tolerate slightly more aggressive cleaning methods. When cleaning natural bristle brushes, avoid harsh scrubbing that could damage the delicate hairs. Synthetic brushes can often be washed with a slightly stronger detergent solution, although always test in an inconspicuous area first.
Cleaning Brushes with Specific Paint Types
Acrylic paints, in their various forms, have varying levels of adhesion and viscosity. Cleaning methods should be tailored to the paint type used. Thicker acrylic mediums or pastes may require a longer soaking time in a cleaning solution, while thinner paints may only need a brief rinse. Understanding the paint’s characteristics allows for more effective cleaning and avoids potentially damaging the brush.
Cleaning Brushes Used in Watercolor Painting
Watercolor brushes, often delicate and fine, require specialized cleaning methods. Watercolor paints are water-soluble, making them relatively easy to remove. Using a separate water container for watercolor cleaning is recommended. Thorough rinsing is crucial to prevent the buildup of paint that can harden and damage the brush over time. The rinsing process should be gentle to avoid damaging the brush’s fine hairs.
Comparing Cleaning Methods for Different Paint Types
A comparison table can help illustrate the differences in cleaning methods based on paint type.
| Paint Type | Cleaning Method | Important Considerations |
|---|---|---|
| Acrylics (thinner) | Gentle rinsing, mild detergent solution | Avoid harsh scrubbing |
| Acrylics (thicker/paste) | Soaking in cleaning solution, followed by rinsing | Soaking time may need to be adjusted |
| Watercolors | Thorough rinsing in clean water | Avoid harsh scrubbing |
Tools for Advanced Cleaning
For advanced cleaning techniques, specific tools can prove invaluable.
- Small, pointed tools (e.g., toothpick, small brush): These are crucial for reaching into crevices and intricate brush designs.
- Gentle cleaning solution: A specialized cleaner or a mild dish soap solution tailored to the specific paint type.
- Separate water containers: Using separate containers for rinsing and cleaning prevents cross-contamination.
- Soft cloths or paper towels: These are essential for blotting excess water from brushes.
- A brush cleaner (optional): A brush cleaner can speed up the cleaning process and make it more efficient.
Final Wrap-Up
In conclusion, maintaining clean acrylic paint brushes is crucial for achieving top-quality results and extending the life of your brushes. By understanding the various cleaning techniques, the characteristics of different brush types, and the best practices for storage and maintenance, you’ll be well-equipped to keep your brushes in pristine condition. From basic cleaning to advanced methods, this guide provides a comprehensive resource for every artist looking to elevate their painting experience.
Leave a Reply